About cookies on this site Our websites require some cookies to function properly (required). In addition, other cookies may be used with your consent to analyze site usage, improve the user experience and for advertising. For more information, please review your options. By visiting our website, you agree to our processing of information as described in IBM’sprivacy statement. To provide a smooth navigation, your cookie preferences will be shared across the IBM web domains listed here.
Tutorial
Get an IBM MQ queue for development running on AWS Cloud
Configure your queue for app connections
On this page
To see how IBM MQ works, you will be guided through creating and configuring a queue manager (server). Then, you will connect an application (client) to it.
After completing the tutorial, you will be able to send messages to and retrieve messages from a queue.
You can download, install, and run IBM MQ queue manager (server) in a variety of ways:
- In a container or Red Hat OpenShift Container Platform.
- In the IBM Cloud, Microsoft Azure, Google Cloud, or AWS (this tutorial) (or AWS using Ansible or AWS using Terraform).
- On various operating systems: Linux/Ubuntu or Windows. For macOS, use IBM MQ on Containers.
Learning objectives
After completing this tutorial, you will understand these concepts:
- IBM MQ queue managers
- IBM MQ queues
- Point-to-point messaging
Prerequisites
AWS provides several cloud technologies into which it is possible to deploy an IBM MQ queue manager: AWS Elastic Compute Cloud (EC2), AWS Elastic Kubernetes Services (EKS) and AWS Elastic Container Services (ECS).
Important: This tutorial demonstrates how IBM MQ can be deployed on Amazon ECS for development or experimentation only. IBM License Service and ILMT cannot run on ECS. As a result, IBM MQ deployments on ECS do not meet IBM’s sub-capacity licensing requirements and are not supported for production use. For fully supported and license-compliant container deployments, use OpenShift or another Kubernetes platform (for example, the IBM MQ Operator on a compliant Kubernetes distribution).
In this tutorial, we will use Docker Compose to interact with Amazon ECS (Elastic Container Service) to deploy an IBM MQ queue manager onto AWS Fargate.
The relevant Docker Compose scripts are in mq-dev-patterns repo.
If you do not want to use Docker Compose to deploy an IBM MQ queue manager, you can instead use Ansible or Terraform, in which case you need to follow the steps in these tutorials:
This tutorial assumes you are using the AWS free tier for hosting, however the queue manager deployment onto Amazon ECS and AWS Fargate requires some AWS resources that are outside the free tier. At the time of this writing, we estimate a minimal configuration will cost approximately $2 per day. The exact cost is dependent on several factors including size of container requested, volume of messages stored and network traffic. To avoid unnecessary cost, users should monitor their utilization carefully and remove resources when they are no longer required. This tutorial provides steps on how to remove the resources that are created.
To protect your AWS account credentials, do not run this tutorial as an account root user, and ensure that you enable multi-factor authentication for all AWS accounts. Your root user has complete unrestricted access, so it should not be used for everyday access. Only grant the permissions needed to each user account for the services that that user needs.
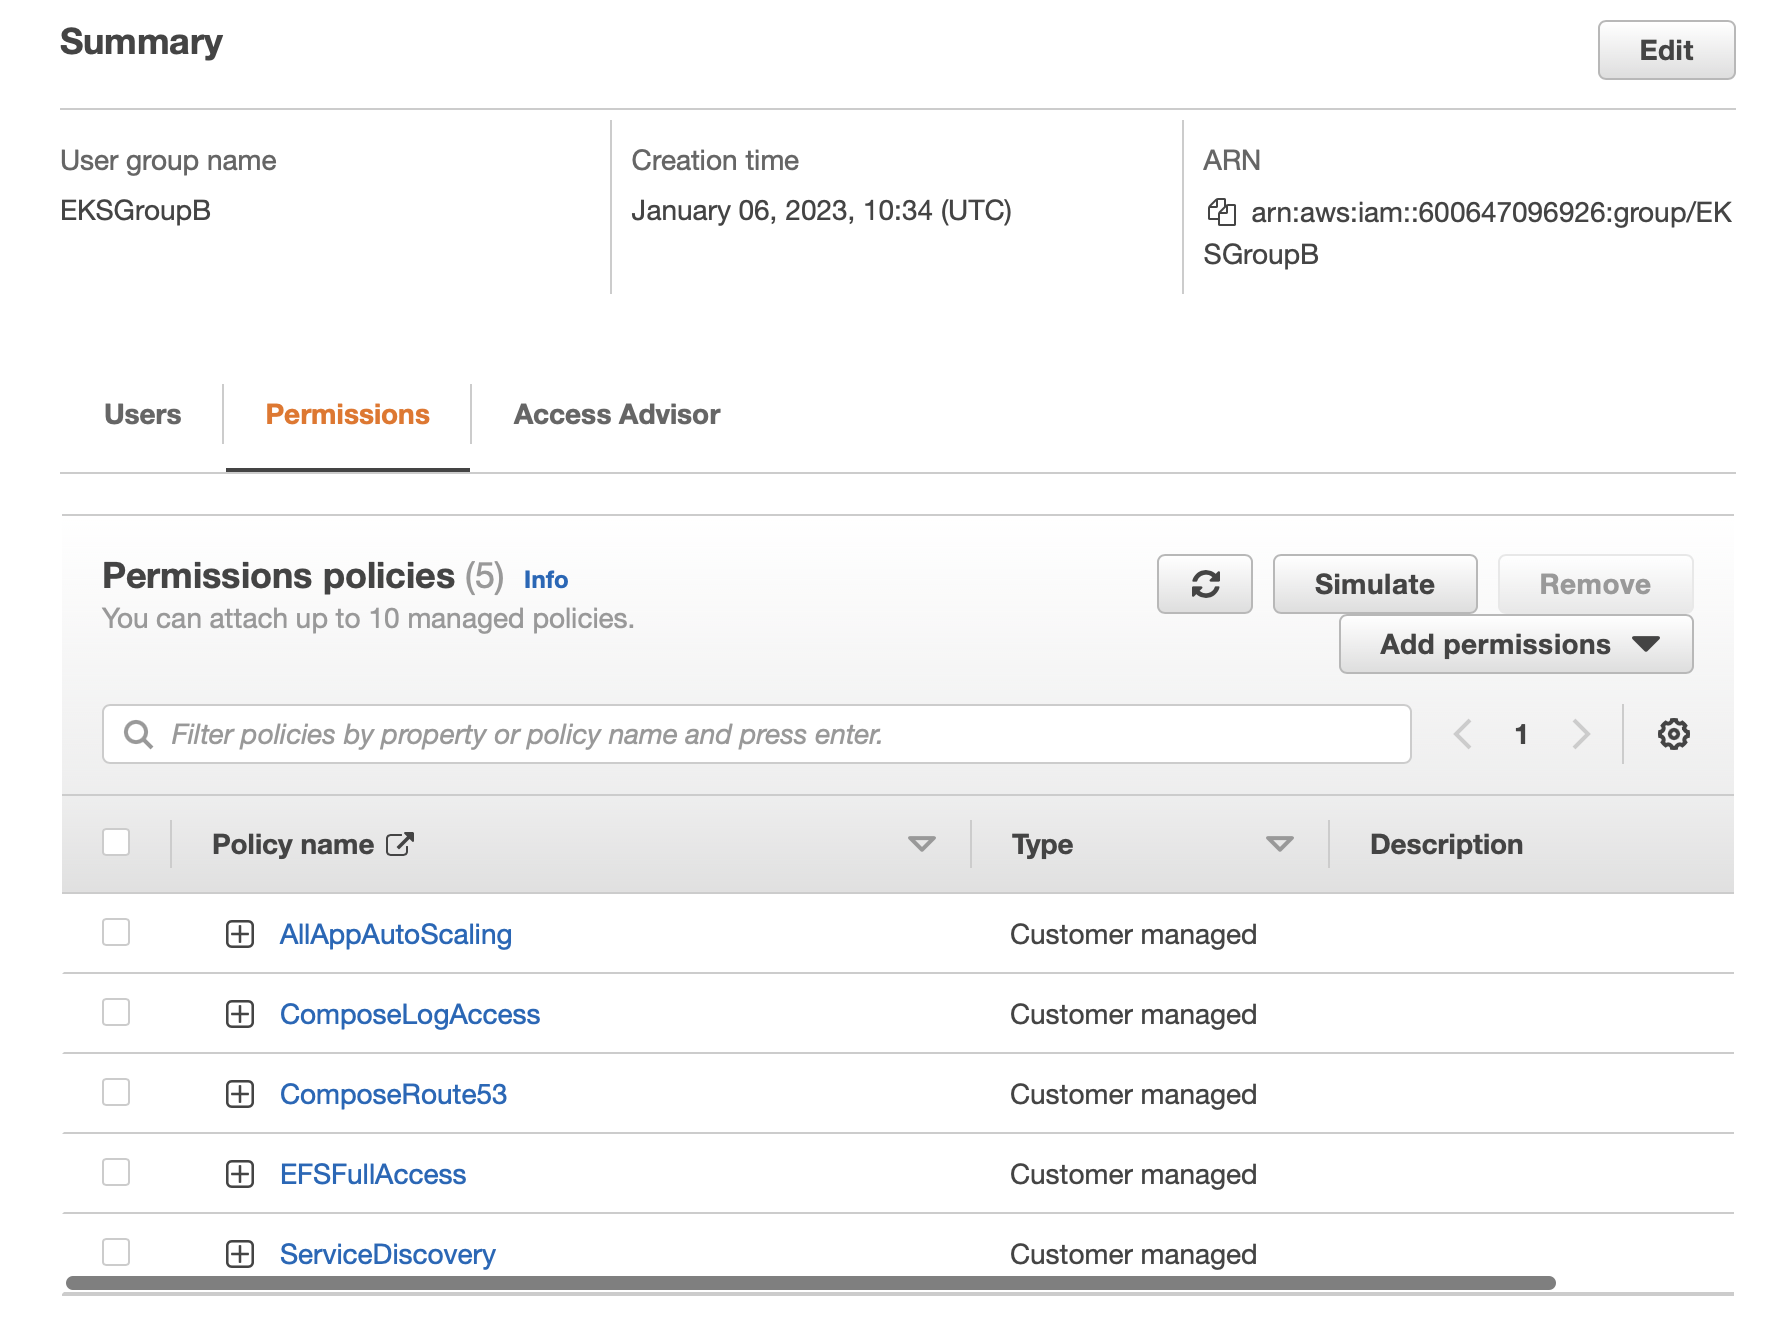
Also, do not grant policy permissions directly to users, but instead grant permissions to groups and associate users with groups. In creating this tutorial, we used the IAM (Identity and Access Management) service to create two users, an admin user and a compose user. The admin user was associated with an admin group for which we granted the inbuilt system policy AdministratorAccess. The admin user was used to create the compose user who was associated with a couple of user groups that were granted the required IAM permissions to complete the lab, as listed in the following prerequisites. Two groups are required as AWS IAM restricts the number of policies that can be attached to each group.
As the compose user you will be using the command line, so you will need an active access key (IAM>USERS>compose user>Security credentials from the AWS Console).
To complete this tutorial, you will need:
- Docker and Docker Compose CLI.
- If you don’t already have it, you will need cURL installed on your computer.
- An AWS Account.
- A default AWS region and VPC. AWS resources are hosted in AWS regions, Each region is a separate geographic area, eg. eu-west-2 is London. Each AWS region has multiple, isolated locations known as Availability Zones, eg. eu-west-2a, eu-west-2b, eu-west-2c. Network traffic between two availability zones in a single region has low latency. Network traffic between geographically distant regions has high latency.
- The AWS CLI. Also, you need to configure the AWS CLI with the AWS Account access key. That is, you must have run
aws configurefrom the command line. You need to define IAM permissions for these AWS services:
- Application Auto Scaling
- AWS CloudFormation
- Amazon Elastic Compute Cloud (Amazon EC2)
- Amazon Elastic Container Service (Amazon ECS)
- Amazon Elastic Load Balancing
- AWS Identity and Access Management (IAM)
- Amazon CloudWatch Logs
- Amazon Route 53
- AWS Service Discovery.
For details, see the requirements section in the Docker docs. The easiest way to create the IAM policies is by using the AWS IAM console visual editor (see the AWS docs for instructions). You can use the coarse-grained policies that we used in our mq-dev-patterns repo.
How you group the IAM policies is completely up to you. We split the policies across two groups. We put the built-in AWS managed system policies into one group.

We put the custom policies into a second group.
Lastly, make sure that you have a default VPC selected in your AWS console, as shown in the following screen capture:

Steps
For this tutorial, we will be using two command line terminals, which you should open both in the same directory. We will create and use two YAML files and a .env file in this directory.
You can downlowd the files from our mq-dev-patterns repo.
Step 1: Create an AWS context
For compose to be able to interact with AWS services, a context needs to be created that will allow Compose to make use of AWS credentials.
From one of the terminals run the command
docker context create ecs mq-server
In the ensuing prompts, select An existing AWS profile.

Then, select default.

You should see the following output: Successfully created ecs context "mq-server"
The context is now able to make use of these credentials to provision the required services to build the infrastructure described in the YAML files. The AWS profile user must have sufficient permissions to make those requests.
Step 2. Create a YAML file for MQ persistent storage
Our MQ instance will be making use of persistent storage. Persistent storage is use by MQ to:
- Preserve persistent messages
- Cache non-persistent messages to reduce memory overheads
- Remember configuration
- Remember transactional state for applications and channels
- Save diagnostic data between server outages.
This storage needs to be prepared with the correct file structure and posix permissions because the IBM MQ queue manager container runs using a non-root user who needs read/write access to the storage.
Create a YAML file named mq-init-compose.yaml with this YAML:
services:
  mq-init:
    image: "icr.io/ibm-messaging/mq:latest"
    entrypoint:
      - runmqserver
      - -i
    environment:
      - LICENSE=accept
      - MQ_QMGR_NAME=QM1
    volumes:
      - qm1data:/mnt/mqm
    deploy:
      resources:
        limits:
          cpus: '0.5'
          memory: 1Gb
volumes:
  qm1data:
    driver_opts:
      uid: 0
      gid: 0
Or, you can download this mq-init-compose.yaml file from the mq-dev-patterns repo using the following curl command:
curl https://raw.githubusercontent.com/ibm-messaging/mq-dev-patterns/master/container/queuemanager/compose/mq-init-compose.yaml -o mq-init-compose.yaml
To provision the storage, run the command:
docker --context=mq-server compose -f mq-init-compose.yaml -p mqonaws up
Wait for the compose process to start in the first terminal. Then, in the second terminal, run the command:
docker --context=mq-server compose -p mqonaws logs -f
Allow Compose to create the required services and start the storage setup. In the first window, you will see the following output:
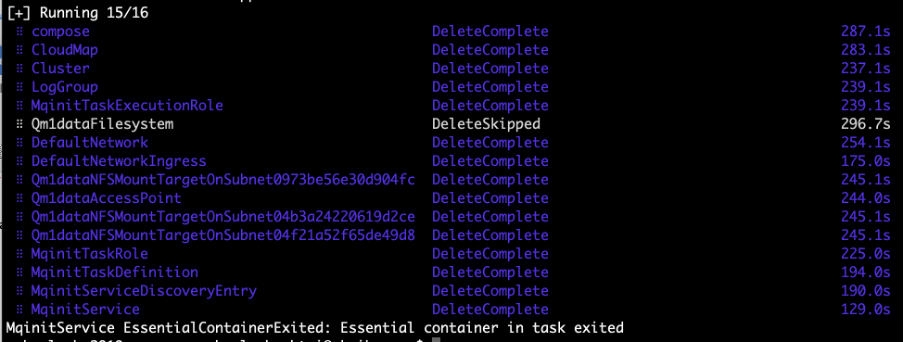
This output indicates that the app started and ran to completion. After completion, Compose detected that the container was not running and so removed the no longer needed infrastructure it.
Note that the FileSystem delete was skipped, leaving it available. Compose attaches a retention period to external file systems so they don’t need to be deleted immediately and can be reused.
The logs in the second terminal will show:
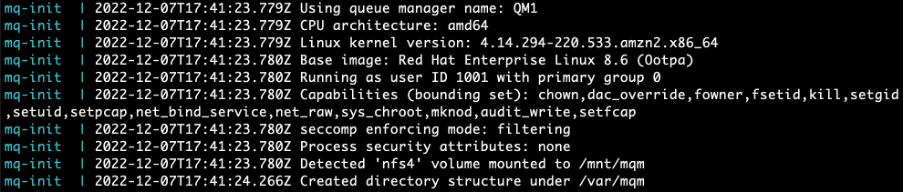
This output indicates that the mounted volume has been prepared.
Step 3. Create and start a queue manager
With the external storage prepared, you are now ready to deploy MQ.
Create a YAML file named docker-compose.yaml with this YAML:
services:
  mq:
    image: "icr.io/ibm-messaging/mq:latest"
    ports:
      - 9443:9443
      - 1414:1414
    environment:
      - LICENSE=accept
      - MQ_QMGR_NAME=QM1
      - MQ_APP_PASSWORD=${APP_PASSWORD}
      - MQ_ADMIN_PASSWORD=${ADMIN_PASSWORD}
    volumes:
      - qm1data:/mnt/mqm
    networks:
      - qm1network
    deploy:
      resources:
        limits:
          cpus: '0.5'
          memory: 2Gb
volumes:
  qm1data:
    driver_opts:
      gid: 0
    labels:
      - com.ibm.mq=qm1
networks:
  qm1network:
    labels:
      - com.ibm.mq=qm1
Or, you can download this docker-compose.yaml file from the mq-dev-patterns repo using the following curl command:
curl https://raw.githubusercontent.com/ibm-messaging/mq-dev-patterns/master/container/queuemanager/compose/docker-compose.yaml -o docker-compose.yaml
You can customize the yaml to suit your queue manager needs. We have set the CPU and memory in the yaml to minimal defaults. The ports used in the .yaml file map ports from the container host to the MQ queue manager container. If you are going to deploy multiple queue managers, then you will need different container host ports for each instance, such as 9444:9443 and 1415:1414.
The next compose up command that we will use will create an ECS cluster. An ECS cluster is a collection of tasks and services. Think of it as a namespace or an isolation boundary. At the cluster level you define the type of containers (Linux, for example) and in which region the containers will run. AWS charges per cluster, so if you want to reuse an existing cluster, then add the following to the top of the YAML files we will be using and enter the name of the existing ECS cluster you want to use.
x-aws-cluster: “existing cluster name”
The next compose up command will also create a load balancer. The ports specification in the yaml file indicate that we need to expose the queue manager ports 9443 and 1414. AWS does this by adding a load balancer through which all incoming public network traffic is routed. The load balancer allows only 9443 and 1414 traffic through to the queue manager. The queue manager and load balancer are placed in different AWS security groups. The security groups act as firewalls and by default deny all ingress traffic, but allow all egress traffic. The queue manager security group has rules which allow ingress traffic from the load balancers security group on ports 9443 and 1414. When the security groups are configured correctly all queue manager ingress network traffic has to route through the load balancer.
A new load balancer address is used on every docker compose up iteration. If you want to reuse an existing load balancer to keep the same load balancer address, then add the Amazon resource name (arn) (which looks something like this: arn:aws:ecs:eu-west-2:600647096926:cluster/MQTest) of the load balancer to the top of the YAML files.
x-aws-loadbalancer: "LoadBalancerName"
This .yaml file makes use of the app (${APP_PASSWORD}) and admin (${ADMIN_PASSWORD}) passwords being defined in an .env file:
APP_PASSWORD=appPasswordGoesHere
ADMIN_PASSWORD=adminPasswordGoesHere
Next, create the .env file.
Then run the command in the first terminal:
docker --context=mq-server compose -f docker-compose.yaml -p mqonaws up
In the second terminal run the command:
docker --context=mq-server compose -p mqonaws logs -f
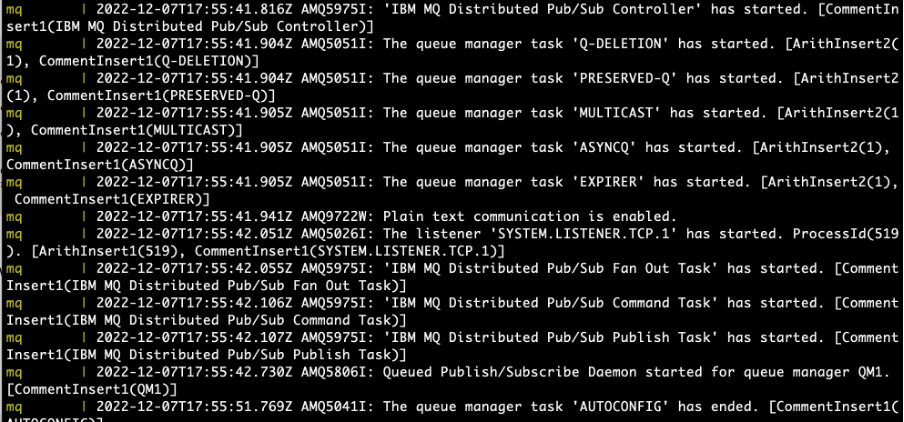
In the first terminal, you should see the required AWS being started before the MQ Server container is started.

You should see MQ logs in the second terminal.
You have now deployed MQ to AWS using Compose to provision all the requisite AWS infrastructure.
Step 4. Use cURL to put and get messages
You can use the load balancer address to post messages onto to a queue. As a quick verification we will use curl to post a persistent message over HTTPS.
From a terminal or command window run the following command to post a persistent message. Remember to use your own app password and host IP address.
curl -i -k -X POST \
 -u app:<put your app password here>  \
--header 'Content-Type: text/plain; charset=utf-8' \
--header 'Accept: application/json' \
--header 'ibm-mq-rest-csrf-token: blank' \
--header 'ibm-mq-md-expiry: unlimited' \
--header 'ibm-mq-md-persistence: persistent' \
-d 'This is a persistent message' \
'https://compo-LoadB-179PV12LV1XEK-e9e32cf54a14891e.elb.eu-west-2.amazonaws.com:9443/ibmmq/rest/v3/messaging/qmgr/QM1/queue/DEV.QUEUE.1/message'
You should see a 201 return code, indicating that the message was successfully posted.
HTTP/2 201
content-type: text/plain; charset=utf-8
ibm-mq-md-messageid: ID:414d5120514d31202020202020202020baf15f6301e50040
Also place a non-persistent message onto the queue by running the command.
curl -i -k -X POST \
 -u app: <put your app password here>  \
--header 'Content-Type: text/plain; charset=utf-8' \
--header 'Accept: application/json' \
--header 'ibm-mq-rest-csrf-token: blank' \
--header 'ibm-mq-md-expiry: unlimited' \
-d 'This is a non-persistent message' \
'https://compo-LoadB-179PV12LV1XEK-e9e32cf54a14891e.elb.eu-west-2.amazonaws.com:9443/ibmmq/rest/v3/messaging/qmgr/QM1/queue/DEV.QUEUE.1/message'
Step 5. Use the MQ console
To construct the URL for the MQ Console, we need to know the ports for the load balancer. To identify these ports, in the first terminal run the following command:
docker --context=mq-server compose ps
You should output similar to the following:

This command shows that a load balancer is running with port forwarding of the ports 1414 and 9443. In our case (see above) the load balancer was: compo-LoadB-179PV12LV1XEK-e9e32cf54a14891e.elb.eu-west-2.amazonaws.com.
Using this load balancer, we can construct the URL which will allow access to the MQ console from a browser at the address.
In our case this was: https://compo-LoadB-179PV12LV1XEK-e9e32cf54a14891e.elb.eu-west-2.amazonaws.com:9443/ibmmq/console
If you are successfully redirected to the login screen of MQ console, congratulations! You should see an output similar to the one below.
You can now use the IBM MQ console to interact with your queue manager deployed on your AKS cluster.
Inside the console, you can view and edit all of your MQ objects, as well as create others. You can also set permissions for different users and objects. A full MQ Console tour is available in this IBM Docs article, but we'll go over some basic actions here.
Select Manage to open a list of queue managers. You can create or manage them from here. Selecting a queue manager, such as QM1, will display the queues and other objects associated with this queue manager, like the image below.

From here, click Create to create your own queues. You can also see the messages on existing queues by selecting an individual queue, as shown in the following screen capture.
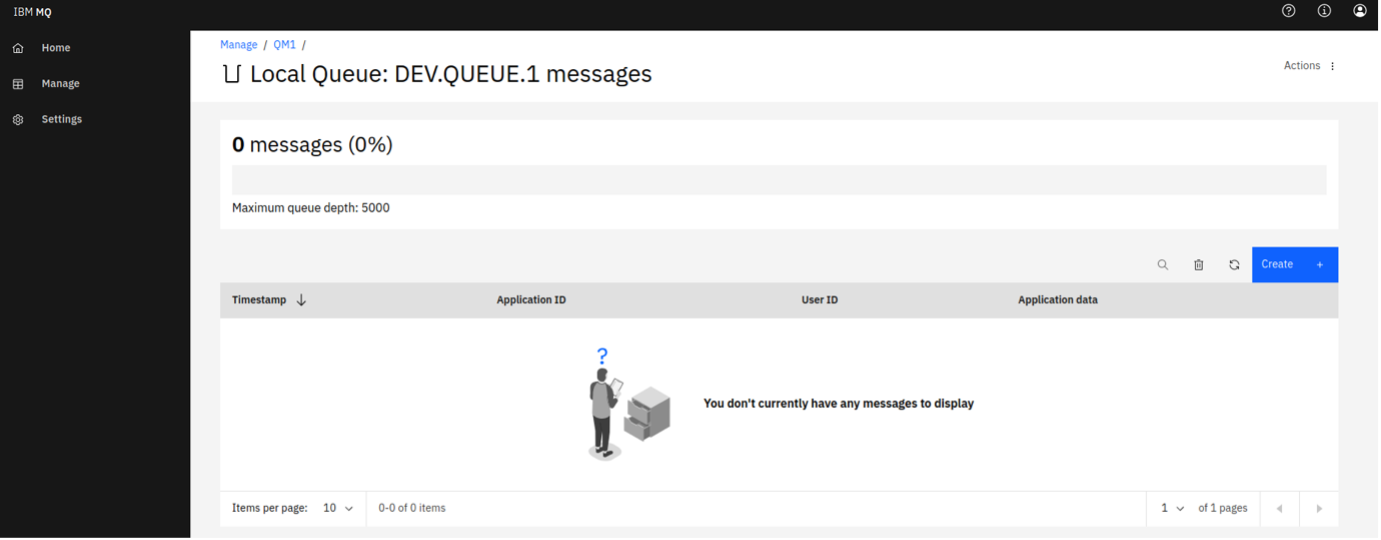
You can put a message onto this queue clicking Create on this page, which here means "create a new message". The Application data field contains the message contents. Clicking Create puts your message onto the queue.

Now, we've set up the MQ Console, which will help us to manage and visualize our messaging system.
Step 6. Optionally, tear down the AWS services
To avoid unnecessary cost, you should shut down all AWS services once you are done with them. Please be aware that on AWS, security and compliance is a shared responsibility between AWS and AWS customers. As a result you are responsible for the security of guest operating systems, software and data.
Remove the MQ container and all AWS infrastructure, except the EFS storage, by running the following command.
docker --context=mq-server compose -p mqonaws down
If you restart the container, within the storage retention period, then the persisted MQ state will be restored.
When you no longer need it, you can remove the EFS Storage. List which volumes you have by running the following command:
docker --context=mq-server volume ls
Using the returned arn identifier remove the volume by running the following command:
docker --context=mq-server volume rm <full_hard_identifier_from_ls>
If you are using an existing Amazon ECS cluster or load balancer, then they will not have been removed by the compose down process.
Summary
Congratulations! In this tutorial you used the Docker compose to run MQ as a container in Amazon Elastic Container Service (Amazon ECS) / Fargate Cluster. You used AWS / EFS storage that was used as a shared volume allowing persistence across container or host interruptions.
You were able to access the MQ console to demonstrate that your queue manager was working.. Finally, you used the MQ REST API to send persistent messages.
You should now understand how you can deploy IBM MQ queue manager on AWS.
When you start developing your own client applications to connect to the queue manager, you'll follow these steps:
- Configure the connection to the queue manager.
- Open a queue.
- Put or Get a message on/from the queue.
- Close the connection to the queue manager.
This process demonstrates the point-to-point style of messaging. Applications that put messages act as producers. Applications that get messages act as consumers.
In IBM MQ, the queue manager is effectively the server part of the system, and applications that connect to it are clients.
Usually it is the administrators that look after the MQ server where all the MQ objects are defined and the routing of messages happens. Client applications are created by developers and IBM MQ provides client libraries that developers must include in their applications. These libraries, also called MQ clients, address and use the MQ objects that admins have set up on the MQ server side. In more complex scenarios, the MQ libraries do most of the heavy messaging work for you, so you just have to learn how to use them.
Configuration is needed on both the server and the client sides for the messaging to work.
When you first start developing MQ client applications, it helps to have access to your own queue manager and a queue, for testing your client application against. Installing IBM MQ in the cloud gives you access to a queue manager and many options for configuring MQ objects as you begin developing your client application.
Now that you can run MQ on AWS you can now create MQ applications that use the queue manager of your MQ on AWS instance.
You will be using the IBM MQ queue manager that you created in this tutorial in the follow on Deploying MQ Applications to AWS tutorial.