About cookies on this site Our websites require some cookies to function properly (required). In addition, other cookies may be used with your consent to analyze site usage, improve the user experience and for advertising. For more information, please review your options. By visiting our website, you agree to our processing of information as described in IBM’sprivacy statement. To provide a smooth navigation, your cookie preferences will be shared across the IBM web domains listed here.
Tutorial
Governing private LLM deployments hosted on IBM Cloud Virtual Servers using watsonx.governance
Learn how to deploy a large language model on a virtual server and monitoring its prompts using watsonx.governance
On this page
Archived content
Archive date: 2025-09-12
This content is no longer being updated or maintained. The content is provided “as is.” Given the rapid evolution of technology, some content, steps, or illustrations may have changed.The need for organizations to maintain privacy and run large language models (LLMs) in controlled environments is increasing. One way to achieve this is by hosting models on cloud servers and managing compute, network, and storage resources independently, rather than relying on Platform as a service (PaaS) services. IBM Cloud offers several GPU profiles that can be used for training and inferencing LLMs. Once these models are hosted privately, effective governance can be achieved through watsonx.governance, allowing organizations to evaluate prompts while maintaining the privacy of their hosted models.
watsonx.governance overview
IBM watsonx.governance is designed to help organizations direct, manage, and monitor their artificial intelligence (AI) activities effectively. With watsonx.governance, you can:
- Govern generative AI and machine learning (ML) models from any vendor.
- Evaluate and monitor model health, accuracy, drift, bias, and generative AI quality.
- Access governance, risk, and compliance capabilities, including workflows with approvals, customizable dashboards, risk scorecards, and reports.
- Use factsheet capabilities to automatically collect and document model metadata across the AI model lifecycle.
watsonx.governance's compliance features enable you to manage AI in alignment with compliance policies. Its risk management capabilities allow you to proactively detect and mitigate risks, such as fairness, bias, and drift. The lifecycle governance features help you manage, monitor, and govern AI models from IBM, open-source communities, and other model providers.
In this tutorial, you'll learn how to monitor private endpoints using watsonx.governance. We will deploy the LLaMA 7B and Mistral 7B models via Hugging Face on a Virtual Server Instance (VSI) on IBM Cloud, and demonstrate how to configure their private endpoints for monitoring with watsonx.governance. Additionally, we'll cover topics within watsonx.governance, focusing on real-time monitoring of privately deployed LLMs.
Prerequisites
To follow this tutorial, you will need an IBM Cloud account.
Estimated time
This tutorial should take approximately 20-30 minutes to complete.
Steps
There are three main steps to governing private LLM deployments:
- Set up services on IBM Cloud to run watsonx.
- Deploy an LLM on a Virtual Server Instance (VSI) on IBM Cloud.
- Monitor detached prompt templates using watsonx.governance.
Set up services on IBM Cloud to run watsonx
Step 1: Set up your IBM Tech Zone environment
To begin, you can reserve an IBM Cloud instance from any collection on TechZone.
If you are enrolled in a bootcamp, you will likely be working in a shared instance. You should have received an email from noreply@techzone.ibm.com with the subject line “[EXTERNAL] A reservation has been shared with you on IBM Technology Zone.”
Accept the invitation to the instance.
Join the instance by clicking the
HERElink in the email where it says, “Please go HERE to accept your invitation” or by clickingJoin nowas shown in the image below.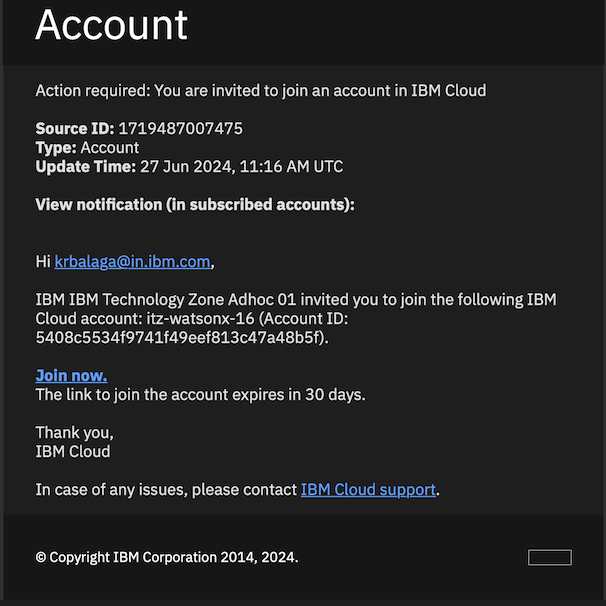
Once the page displays, check the box as indicated in the image, then click
Join Account.
Step 2: Provision a Watson Studio instance
Navigate to the IBM Cloud catalog to provision an instance of IBM Watson Studio.
Enter
Watson Studioin the search bar.
Select the region
Dallasand choose theLiteplan.Specify a unique instance name, add your name to the tags, and click
Create.
Once the service is successfully provisioned, launch the service with
watsonx.
Step 3: Create a new Project
To create a new project:
In the
Projectssection at the bottom of the page, click the+symbol to create a new project.
Enter a unique name for your project, including both your first and last name, along with any other relevant information.

Associate Cloud Object Storage:
If you do not already have a Cloud Object Storage (COS) instance, click on the link and create a new instance.
If a Cloud Object Storage (COS) instance is already selected for you (with a name starting with
itzcos-...), you do not need to make any changes.If prompted to select from multiple instances, please consult with your bootcamp lead to choose the correct COS instance.

Click
Create. It may take a few seconds for the project to be officially created.
Step 4: Associate the correct Watson Machine Learning (WML) instance
After your project is created, you will be directed to the project home page.
Select the
Managetab.In the left sidebar, click on
Services and Integrations, then click onAssociate service.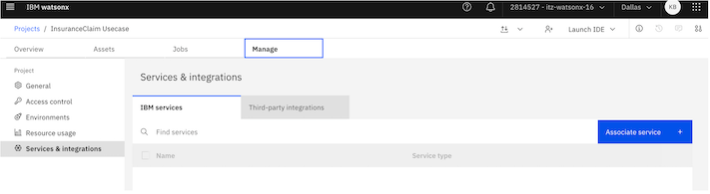
Select the service with
Type=Watson Machine Learningand clickAssociate.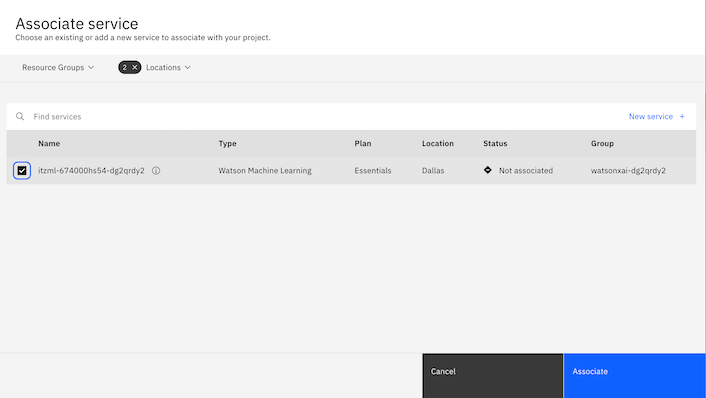
Note: If you cannot find the service, try removing all filters from the
Locationsdropdown list.
Step 5: Create an instance of watsonx.governance
Click on the Navigation menu and select
Services catalogunderAdministration.In the service catalog, select
watsonx.governance.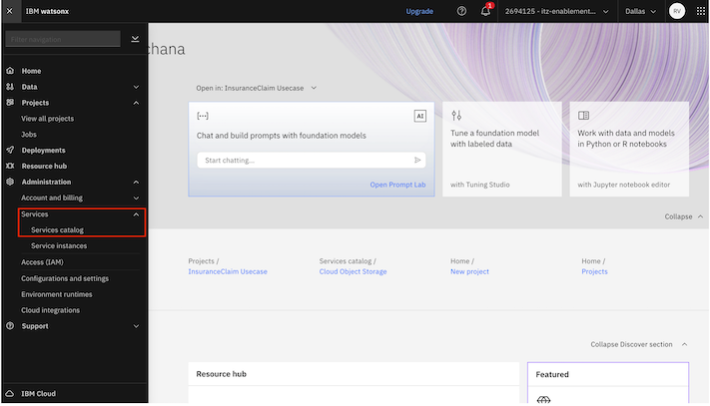
Specify the required details and click
Create.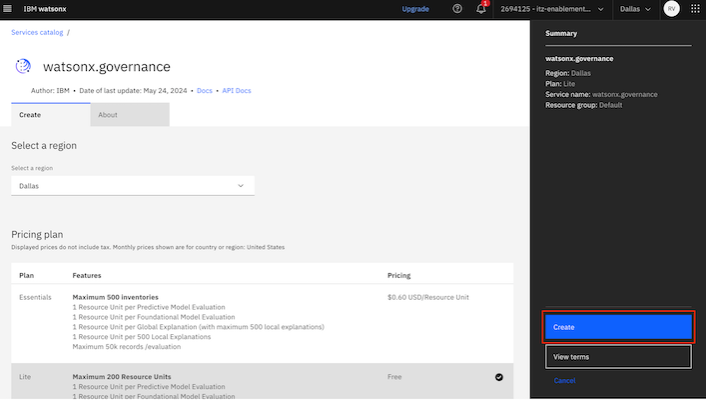
Step 6: Verify that an inventory is created
Now that you have created a project, you’ll need to create an inventory for the next part of the tutorial.
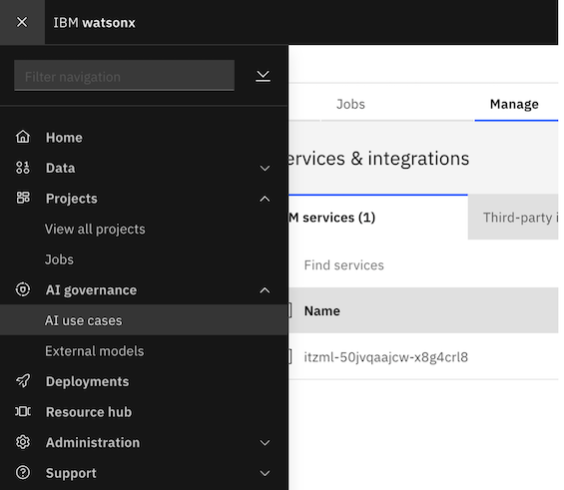
Navigate to the watsonx home page, and in the left sidebar, click on AI Governance dropdown, then select AI use cases.
If you are directed to a page that says
No inventories available yet, clickManage inventoriesand create a new one.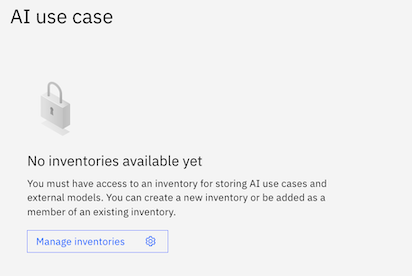
If you see some use cases listed on the page, an inventory has already been created, and you are all set! You can proceed with Lab 1.
Note: If you want to create a fresh inventory for the bootcamp, click the gear icon at the top, navigate to Inventories, and follow the same instructions as above.
When creating your inventory, be sure to give it a unique name and select the correct Cloud Object Storage (COS) instance.
With the project and inventory set up, you are now ready to deploy an LLM on a virtual server instance on IBM Cloud.
Deploy an LLM on a Virtual Server Instance on IBM Cloud
Set up the environment
In this tutorial, you will use IBM Cloud to provision and set up the following components:
- Ubuntu 22.04 - 4 vCPU | 16 GiB | 8 Gbps Virtual Server Instance (VSI)
When provisioning a VSI, the following resources will be automatically created:
- A Virtual Private Cloud (VPC) attached to it
- A security group governing the VPC
- A Floating IP in the same region to expose your application to the internet
Step 1: Provision a Virtual Server Instance for VPC
Go to the IBM Cloud Catalog and search for
Virtual Server for VPC.Choose the following configuration options and click
Create:- Image: Select
ibm-ubuntu-22-04-4-minimal-amd64-1. - Profile: Select a balanced profile with 8 vCPU and 32 GB RAM.
- Image: Select
Specify a name for your instance.
Generate an SSH key specific to the system you will use to log in. Click
Create SSH Key, name the key, and then clickCreate. The key will be automatically generated and downloaded for you.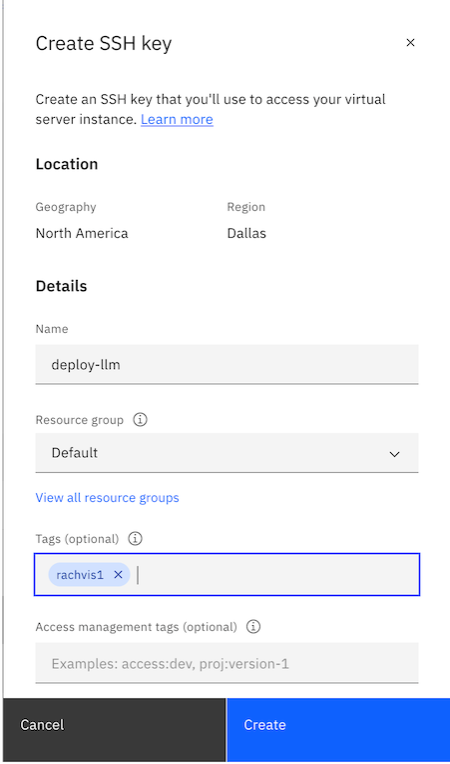
Choose the Virtual Network Interface for Networking and let it create one for you. Click on
Create VPCto create a VPC network.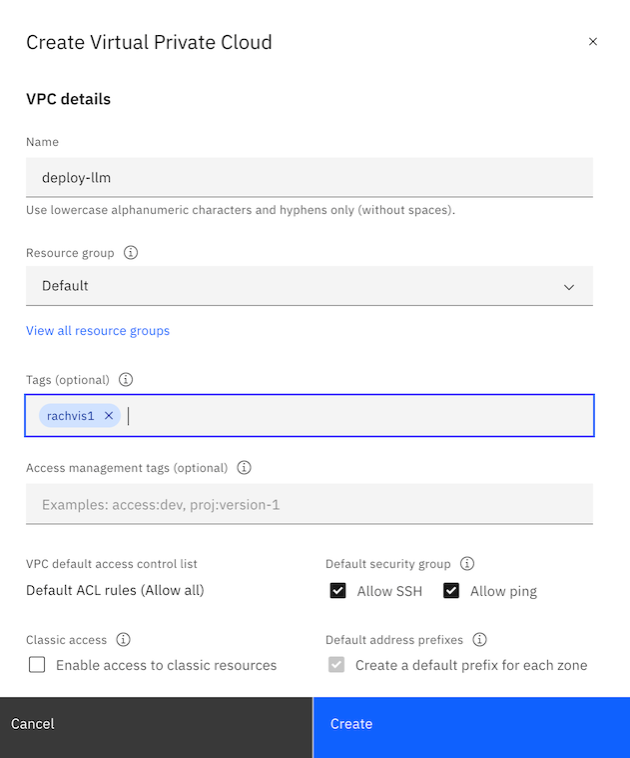
After setting up the configurations, click on
Create. Wait for the provisioning process to complete.
Step 2: Set up the networking
Before you can access the cluster, you need to configure the networking settings.
Step 2a: Obtain a Floating IP
Your instance does not come with a Floating IP by default, you'll need to get one.
From the IBM Cloud navigation menu, select
Floating IP.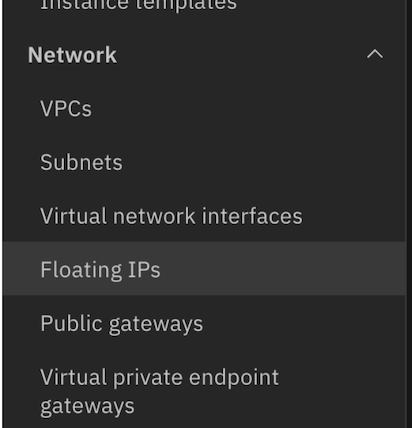
Click on
Reserve. Ensure that you select the same zone as the one you chose for your instance. This will allow the instance to appear in the resource-to-bind drop-down list.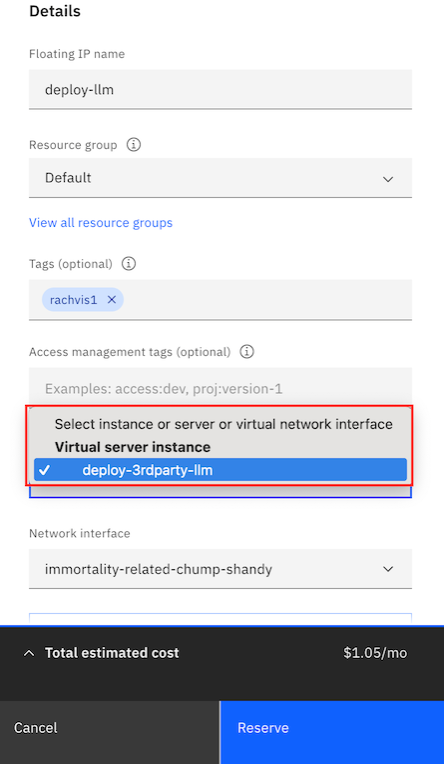
Click
Reserveto assign the Floating IP to your instance.
Step 2b: Allow inbound traffic on Port 80
Your application is deployed on port 80, allowing it to be accessed directly without redirection. Although the firewall settings are largely managed by the deployment script, you will need to manually add an inbound rule to the security group.
Go to the
Security Groupssection for your VPC in the IBM Cloud dashboard.Choose the security group that is linked to your instance. You can identify it by checking the tags in the instance details.
Within the security group, navigate to
Rulesand add a newTCP Inbound Ruleto permit traffic on port 80.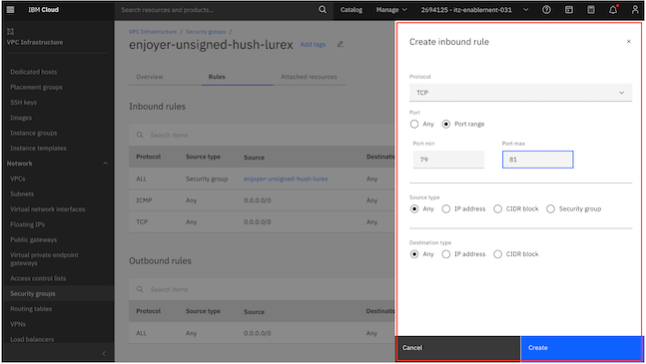
Step 3: Access the cluster
Open the terminal and navigate to the directory where your SSH key was downloaded.
Run the following command to set the appropriate permissions, ensuring that the key can be used for SSH access:
chmod 400 <path to your pem file>Use the command below to connect to your cluster. Replace
<path-to-your-pem-file>with the actual path to your SSH key and<Floating IP>with the IP address of your instance:ssh -i <path to your pem file> root@<Floating IP>When prompted, type
yesto add the server to your list of known hosts.
Step 4: Run the script to install libraries
To streamline the setup process, there's a script that will install all necessary libraries, tools, and a Flask application to provide UI or API access to the model. Follow these steps:
Open a terminal window and run the following command to clone the repository:
git clone https://github.com/rachvis/govern-3rd-party-modelsChange to the appropriate directory by running:
cd govern-3rd-party-modelscd VPC VSI ScriptMake the setup script executable:
chmod +x install.shExecute the script to begin the installation process:
./install.shWait for the setup to complete. This may take a few minutes. Once you see a completion message, the setup is complete.
Note: If prompted for manual input, especially during the
update-initramfsstep, press Enter until you return to the console. The process will then continue automatically.
Step 5: Verify the endpoint
After the script completes, the Flask application should be running on your VM.
Congratulations! You have successfully deployed an LLM on a VSI instance.
Monitoring detached prompt templates using watsonx.governance
Follow these steps to set up governance for the prompts for the model deployed on the Virtual Server Instance.
Begin by downloading the required Git repository to your local computer.
Step 1: Import the Notebook into your Project
Log in to watsonx.
Open the project named ‘InsuranceClaim Summary’ that was created during the
Setting up services on IBM Cloud to run watsonxprocess.Navigate to the
Assetssection and click onNew Asset.Follow the path:
Assets -> New Asset -> Work with data and models in Python or R notebooks.
Select
Local file, upload the filelab.ipynb, and click ‘Create’.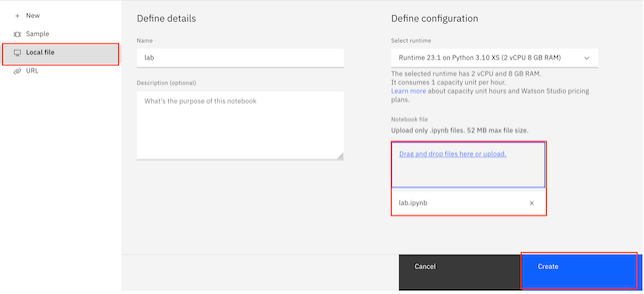
Step 2: Edit the Notebook
Open the notebook and run the cells as instructed.
Edit the Following Segments:
- IBM Cloud API Key: Input your IBM Cloud API Key.
- Project ID: Enter the Project ID from your watsonx project.
- Floating IP: Provide the Floating IP of the Virtual Server Instance where the Flask app is running.
Once you have made the necessary edits, run all the cells.
Return to the project dashboard, where you will see a detached prompt created in the
Assetssection.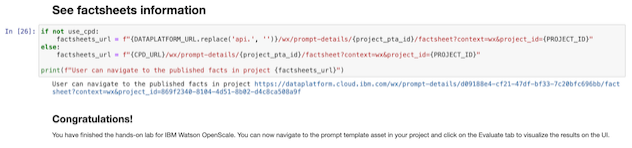
Step 3: Explore the metrics on the UI
- Return to the Project Dashboard. You will see a new asset added:
External Prompt Template (model flan-t5 on VM).
Click on the newly added prompt template to explore it.
Review the metrics and insights provided in the monitoring dashboards.

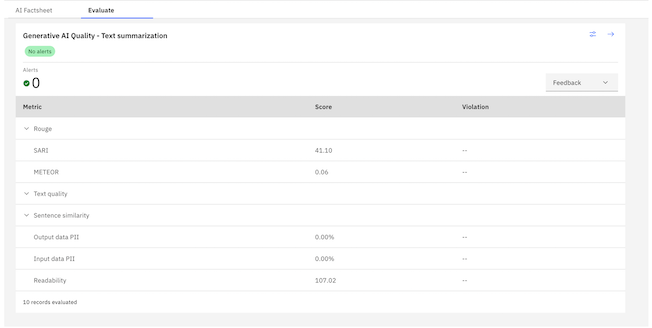
Congratulations! You have successfully set up monitoring with watsonx for the external prompt template.
Summary
In this tutorial, you deployed a large language model on a virtual server and used watsonx.governance to evaluate the detached prompts.