About cookies on this site Our websites require some cookies to function properly (required). In addition, other cookies may be used with your consent to analyze site usage, improve the user experience and for advertising. For more information, please review your options. By visiting our website, you agree to our processing of information as described in IBM’sprivacy statement. To provide a smooth navigation, your cookie preferences will be shared across the IBM web domains listed here.
Tutorial
Build agentic workflows programmatically on watsonx Orchestrate using IBM Bob
A hands-on guide for creating automated invoice-processing agentic workflows using IBM Bob to generate code, tools, and configuration for watsonx Orchestrate
Building intelligent, automation‑ready agentic workflows often means connecting together tools, schemas, and logic across multiple systems. That work can be powerful, but it also becomes repetitive and slow. This tutorial shows you how to use IBM Bob as your AI development partner to remove that friction and help you build a fully programmatic agentic workflow for watsonx Orchestrate.
You will guide Bob to generate the complete project structure in code. Bob will create the extraction schema, build a multi‑step document processing workflow, validate outputs, and assemble a native agent that uses the Groq GPT‑OSS 120B model. You will also deploy the agent and agentic workflow using the watsonx Orchestrate Agent Development Kit (ADK).
In this tutorial, you will learn how agentic workflows support structured reasoning, tool orchestration, and automated decision making. You will also see how these capabilities apply to enterprise‑grade document‑processing scenarios such as extracting structured fields from airline invoices.
By the end, you will understand how to build programmatic workflows with Bob and watsonx Orchestrate and how to apply them to high‑value automation use cases.
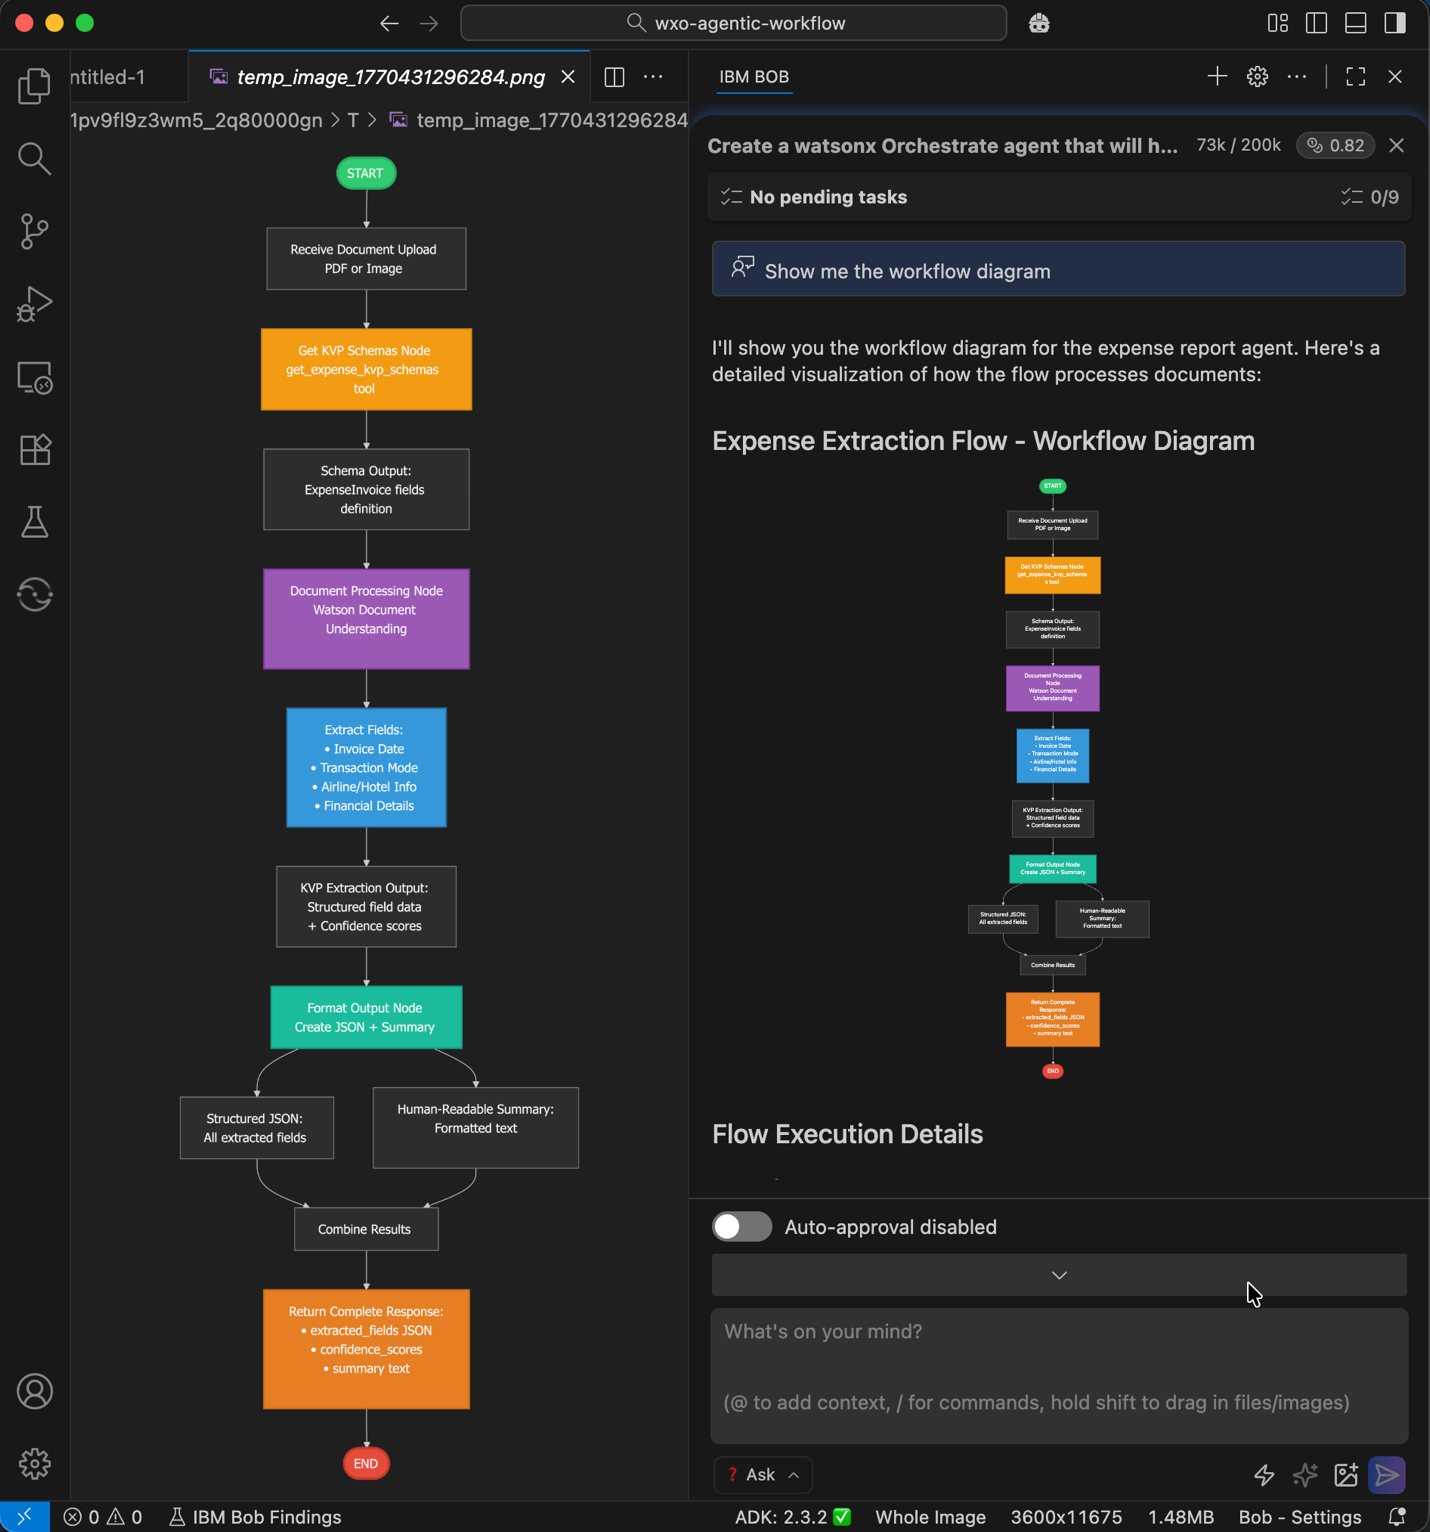
Architecture of an automated invoice-processsing workflow using Bob
You will build an agentic workflow that extracts structured data from airline invoices. This workflow removes manual data entry and improves processing efficiency.
The following figure created using Bob shows this architecture:
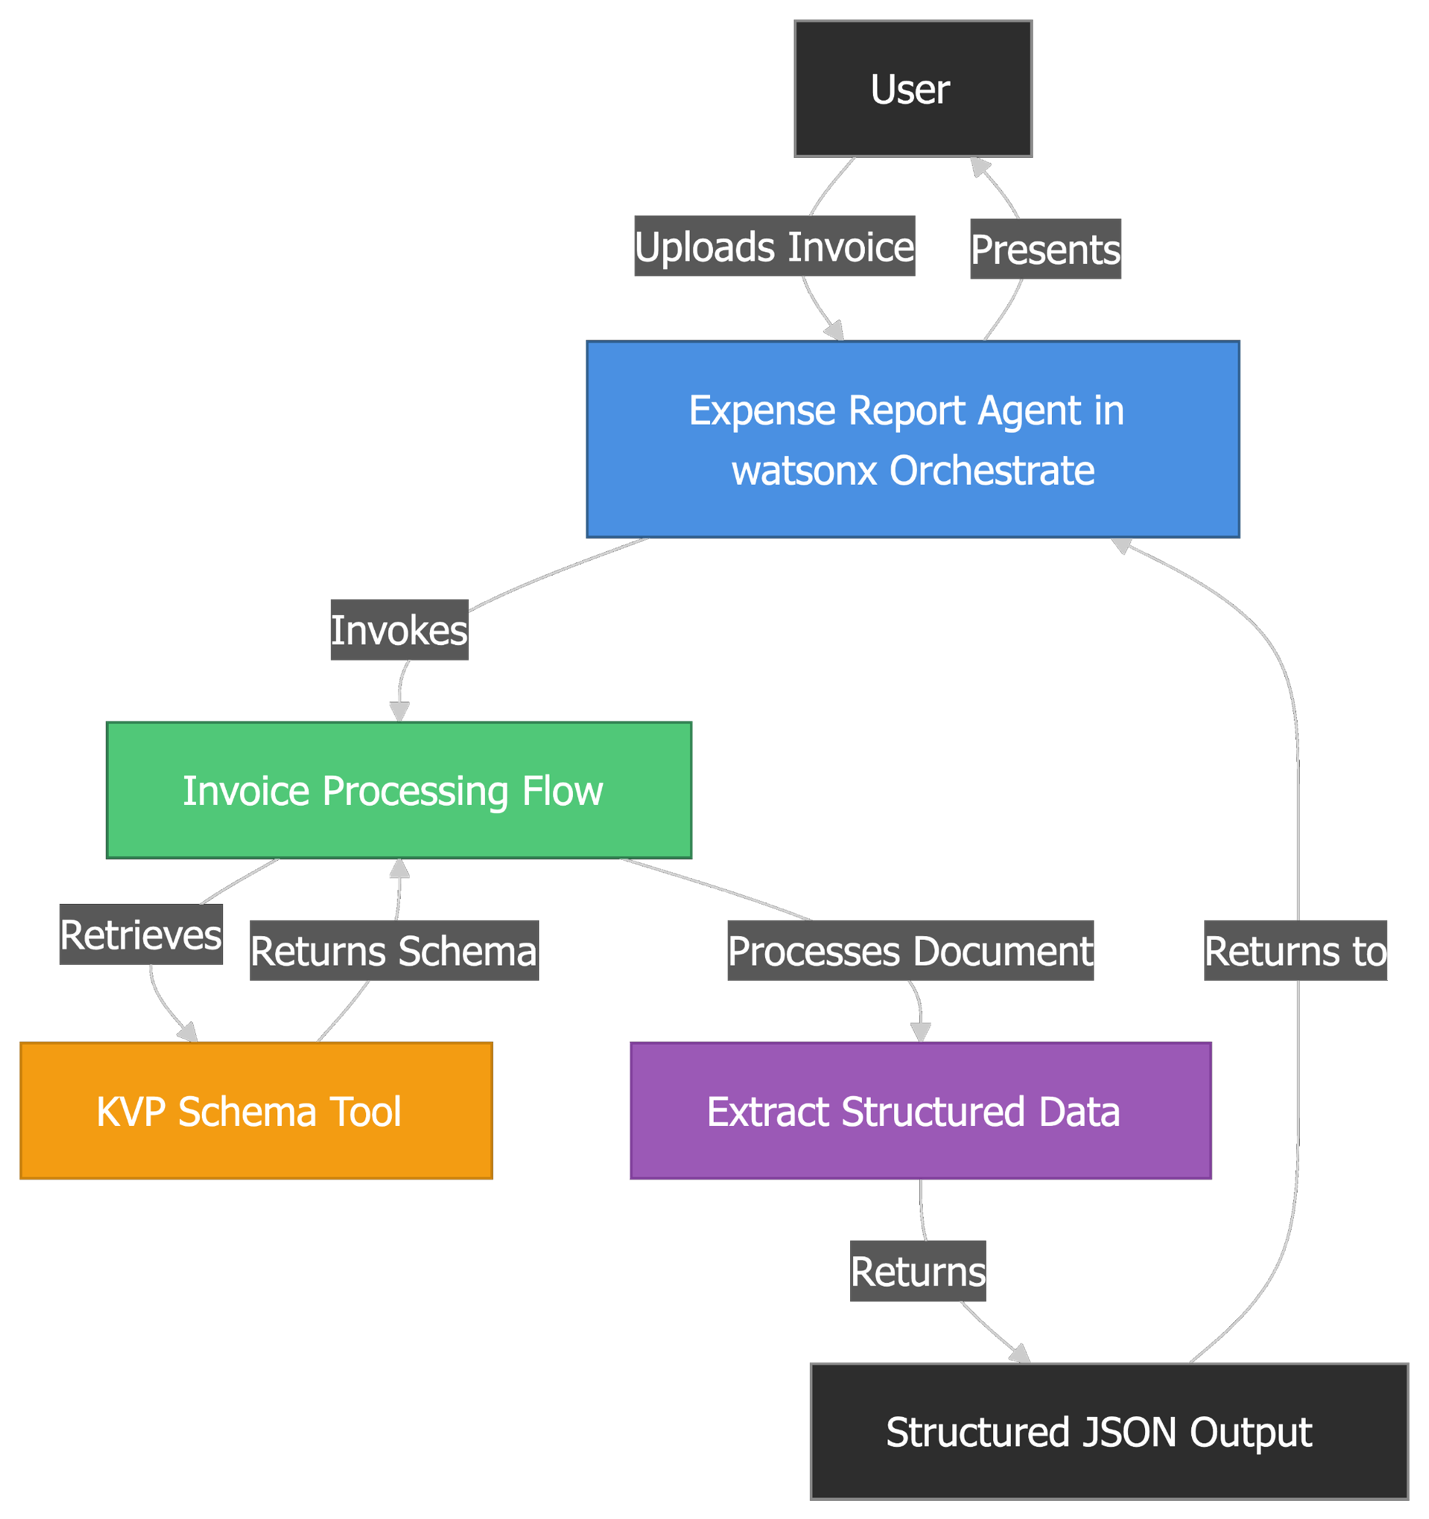
- The user uploads an invoice document as a PDF or image file.
- The
expense_report_agenton watsonx Orchestrate receives the document and starts the processing workflow, and it usesgroq/openai/gpt-oss-120bas an LLM for the agent reasoning. - The
Invoice Processing Flowretrieves the key-value pair (KVP) schema. - The KVP schema returns the list of fields that the system must extract.
- The
Extract Structured Datacomponent processes the invoice using the schema. - The
Structured JSON Outputcontains all extracted invoice data. - The agent sends the formatted results to the user, and the agentic workflow can continue to process the expense.
Prerequisites
- IBM Bob installed. Sign up for early access to IBM Bob.
- Python version 3.12, or later installed on your system.
- uv installed.
Step 1. Configure access to watsonx Orchestrate MCP servers
Configure Bob to access the following watsonx Orchestrate MCP servers:
- watsonx Orchestrate ADK Docs: Provides a tool that queries the watsonx Orchestrate ADK developer documentation. This gives Bob the context that is needed to understand how all watsonx Orchestrate ADK features work.
- watsonx Orchestrate ADK: Give Bob direct access to all commands in the watsonx Orchestrate ADK. This allows Bob to create, import, or list agents, tools, MCP toolkits, knowledge bases, and connections. Bob can also export agents and Python tools into your workspace.
To configure access, complete the following steps:
- Open the IBM Bob IDE.
- Go to File > Open Folder.
- Click New Folder, name the folder wxo-agentic-workflow, and then click Open.
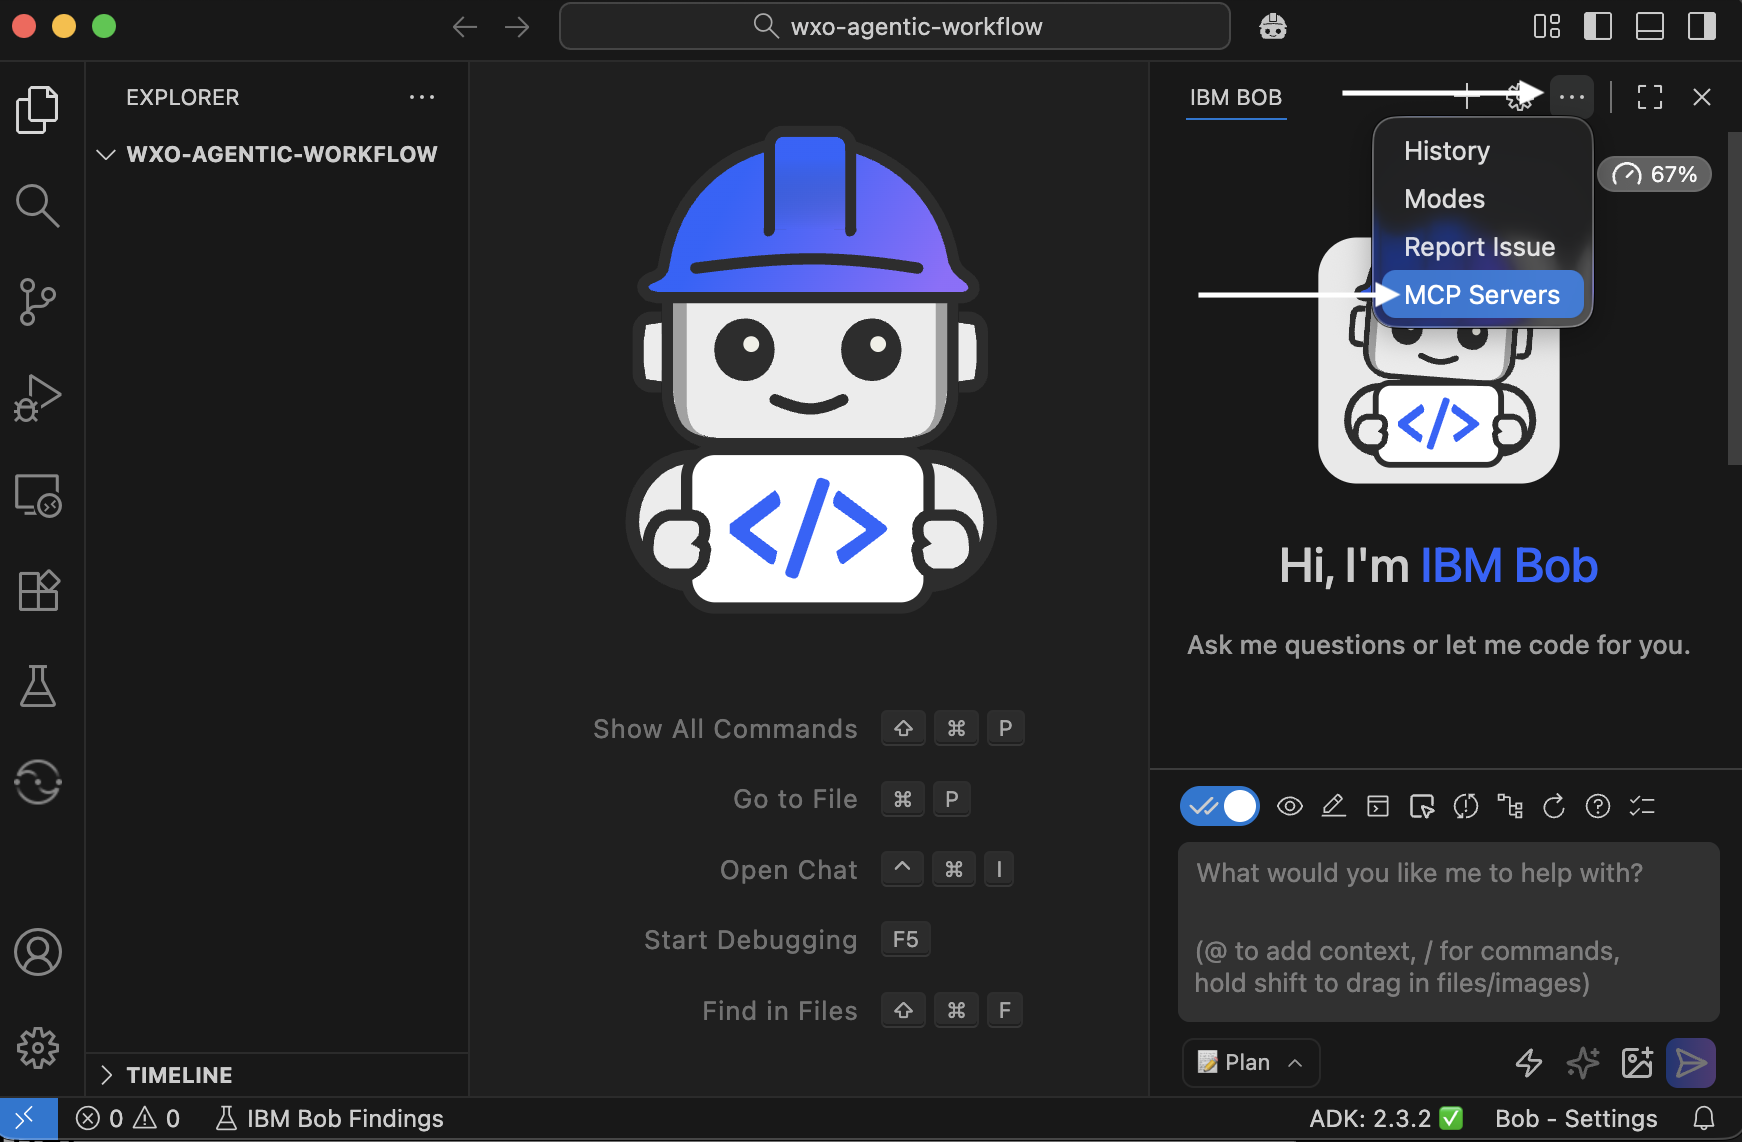
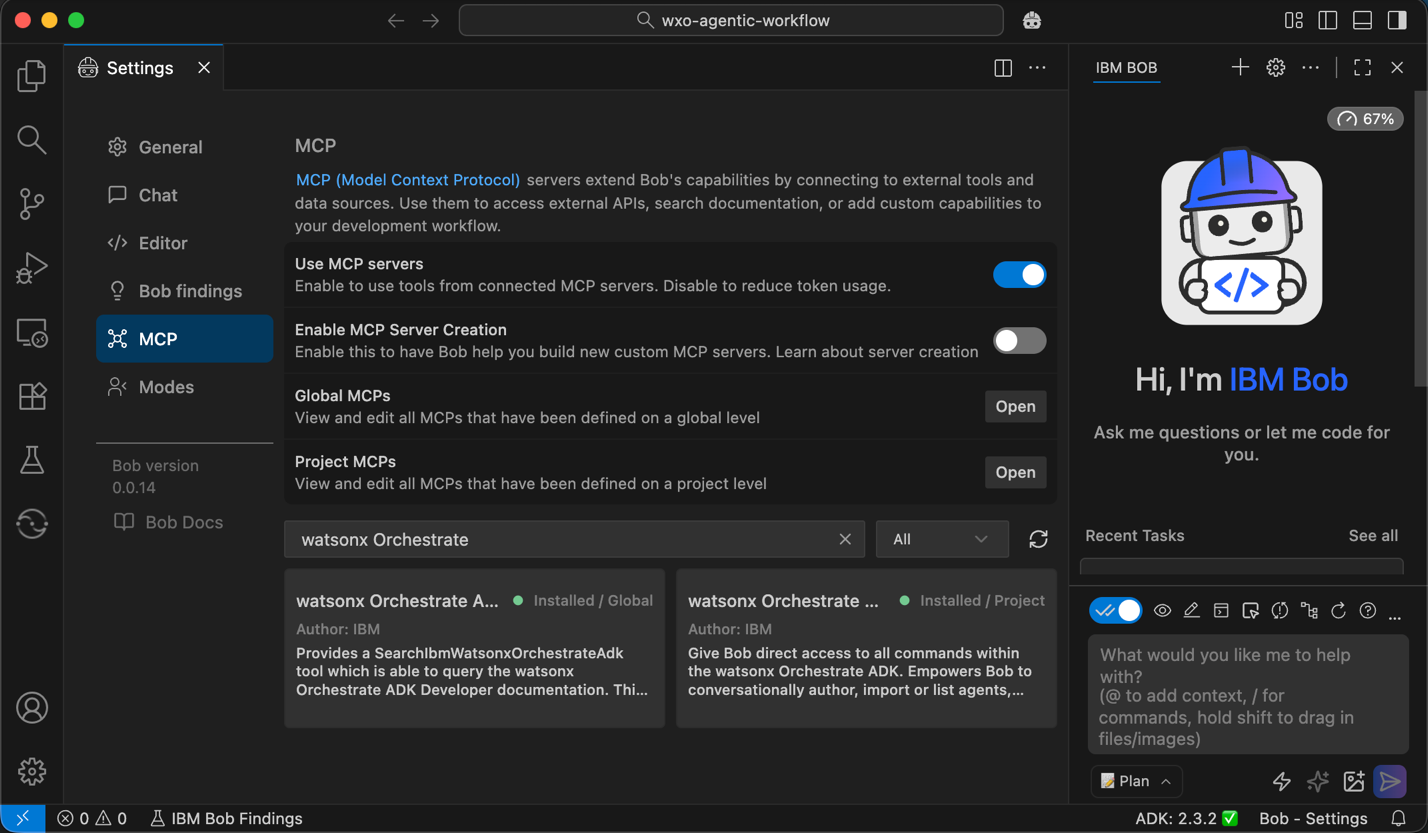
In the right pane, click ... > MCP Servers
Search for watsonx Orchestrate.
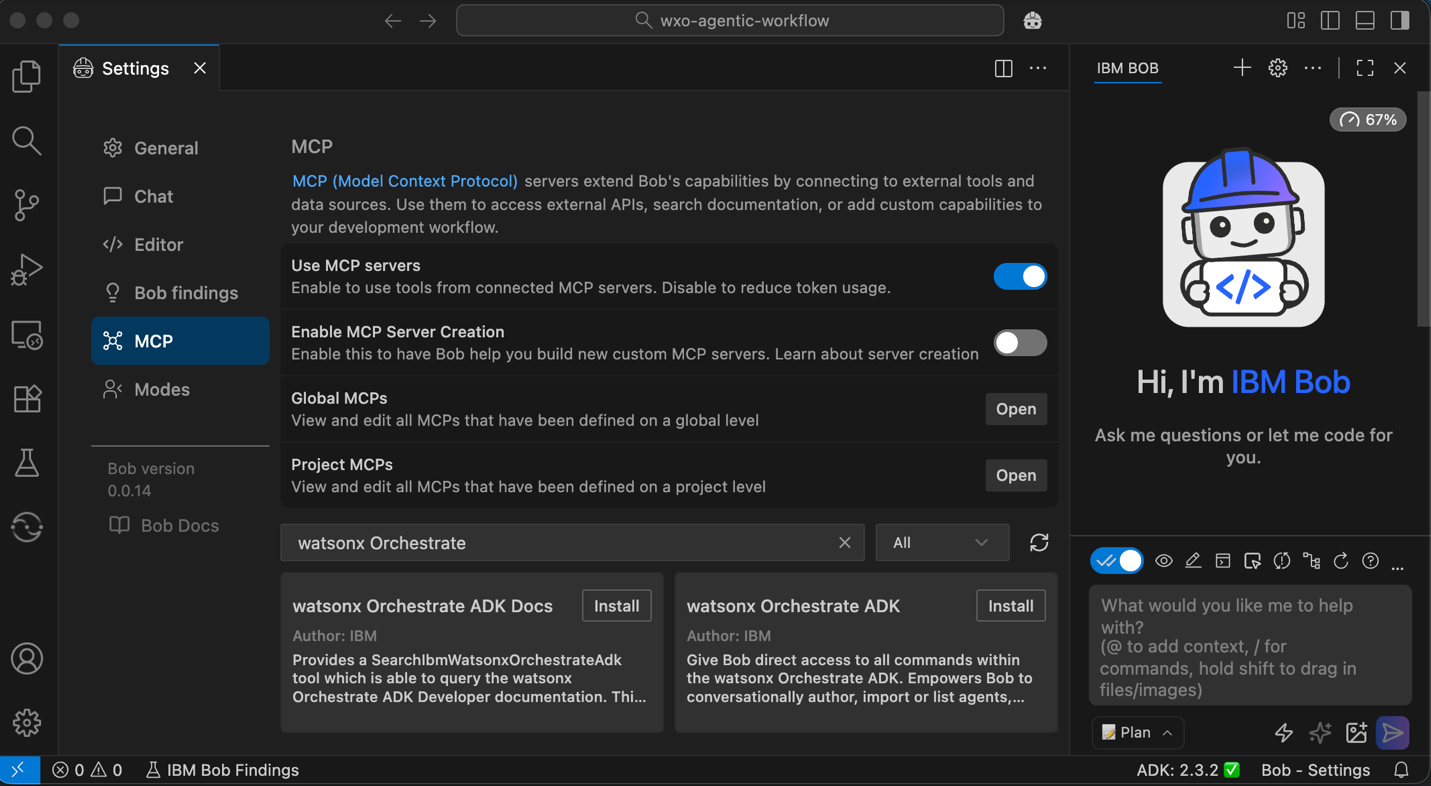
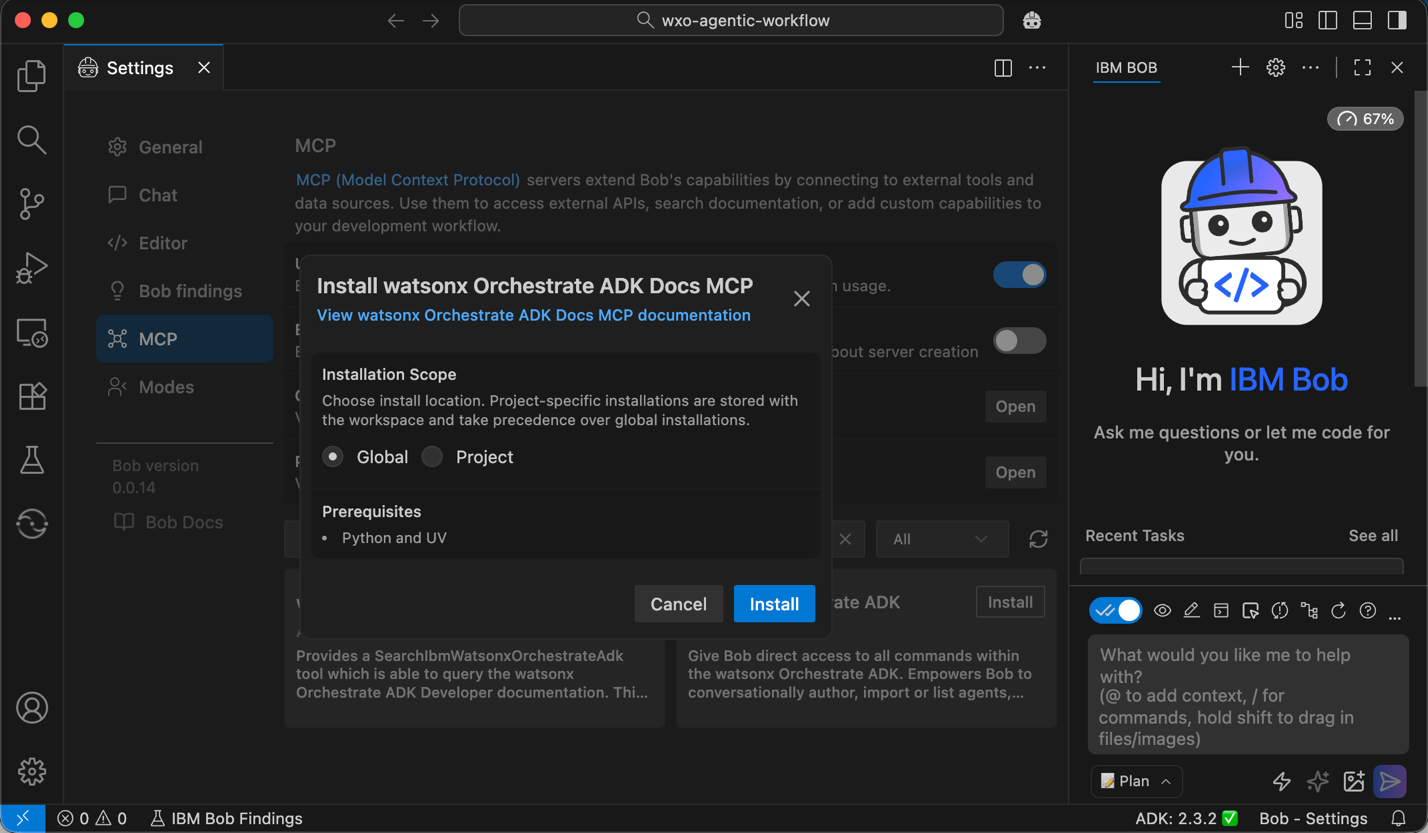
Click Install on watsonx Orchestrate ADK Docs. Choose the installation scope (current project or global), then click Install. Important: Make sure Python and uv are installed in your system before you continue.
Click Install on watsonx Orchestrate ADK.
- Set the installation scope to Project.
- Set the installation method to Latest ADK Version.
- Enter the absolute path of your project directory in Current Project Working Directory.
- Click Install.

Both MCP servers must now be marked as healthy. Close the Settings page to continue.
Step 2. Install the watsonx Orchestrate ADK extension
Install the watsonx Orchestrate ADK extension that enables the development and deployment of agents and tools in Bob.
Click Manage in the lower-left pane, then select Extensions.
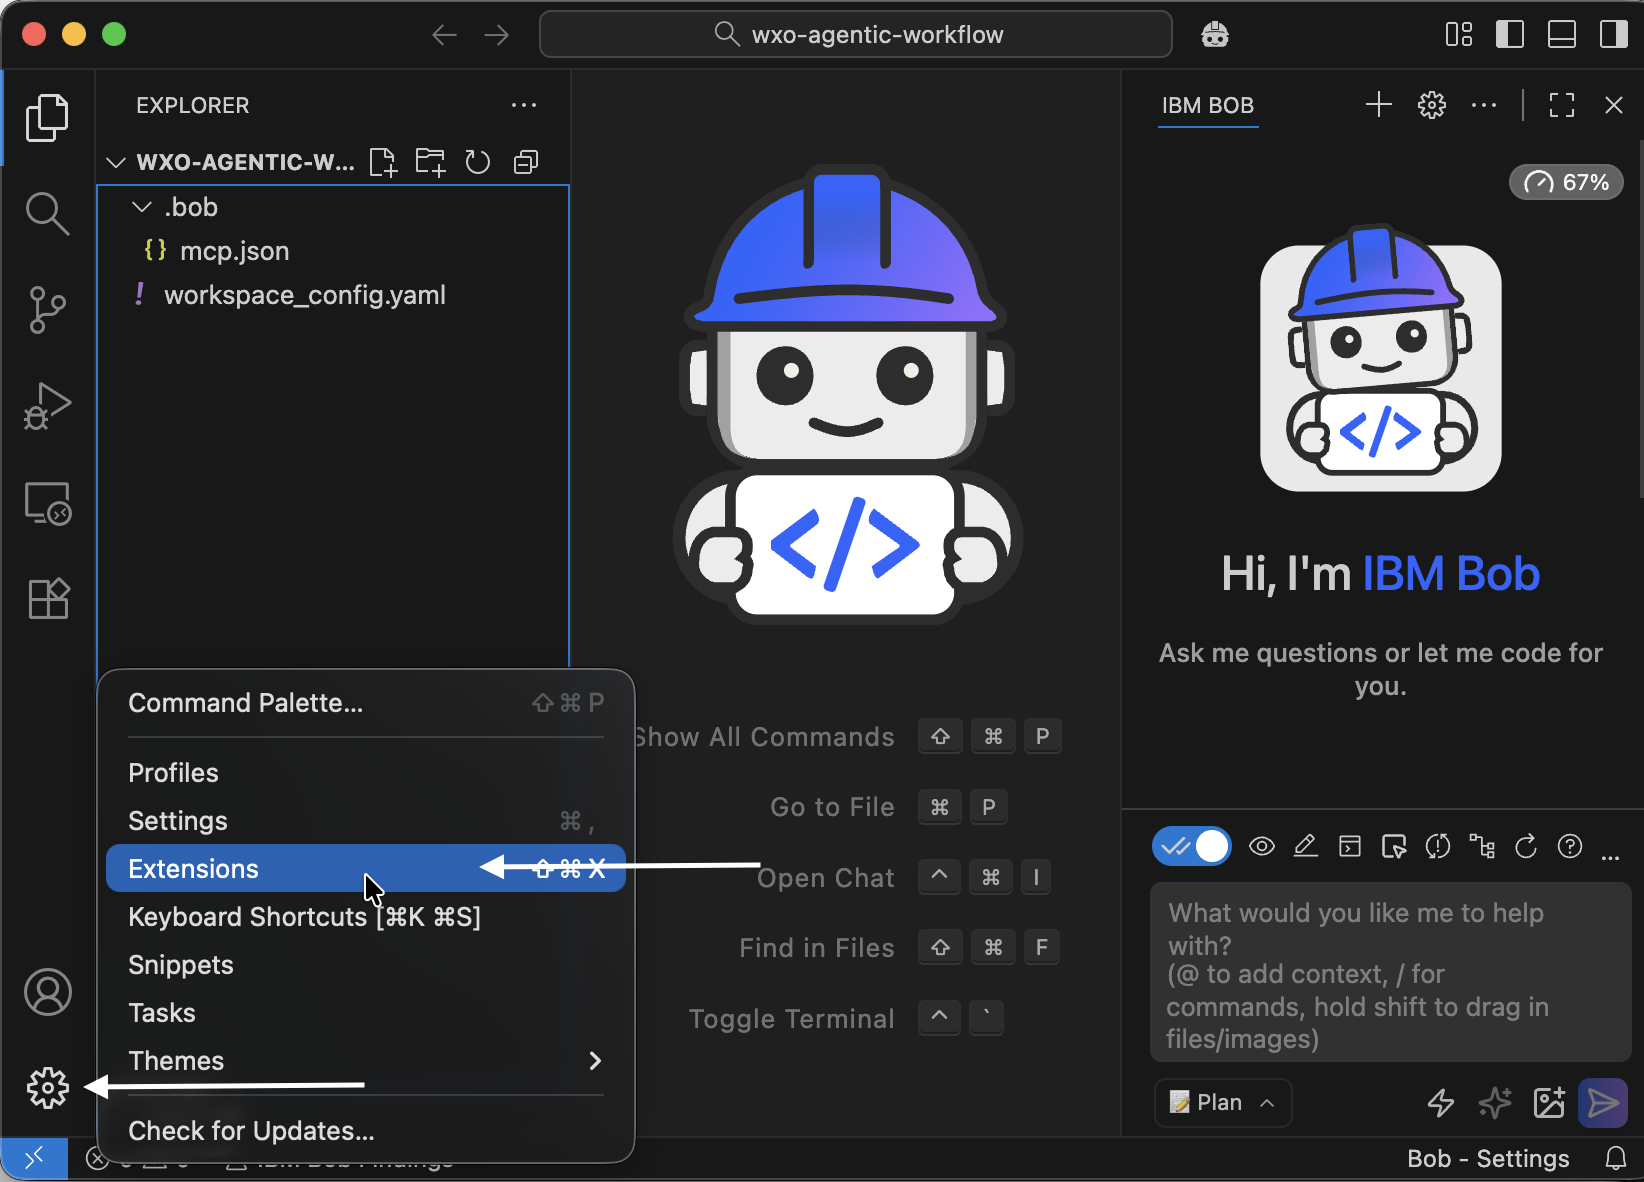
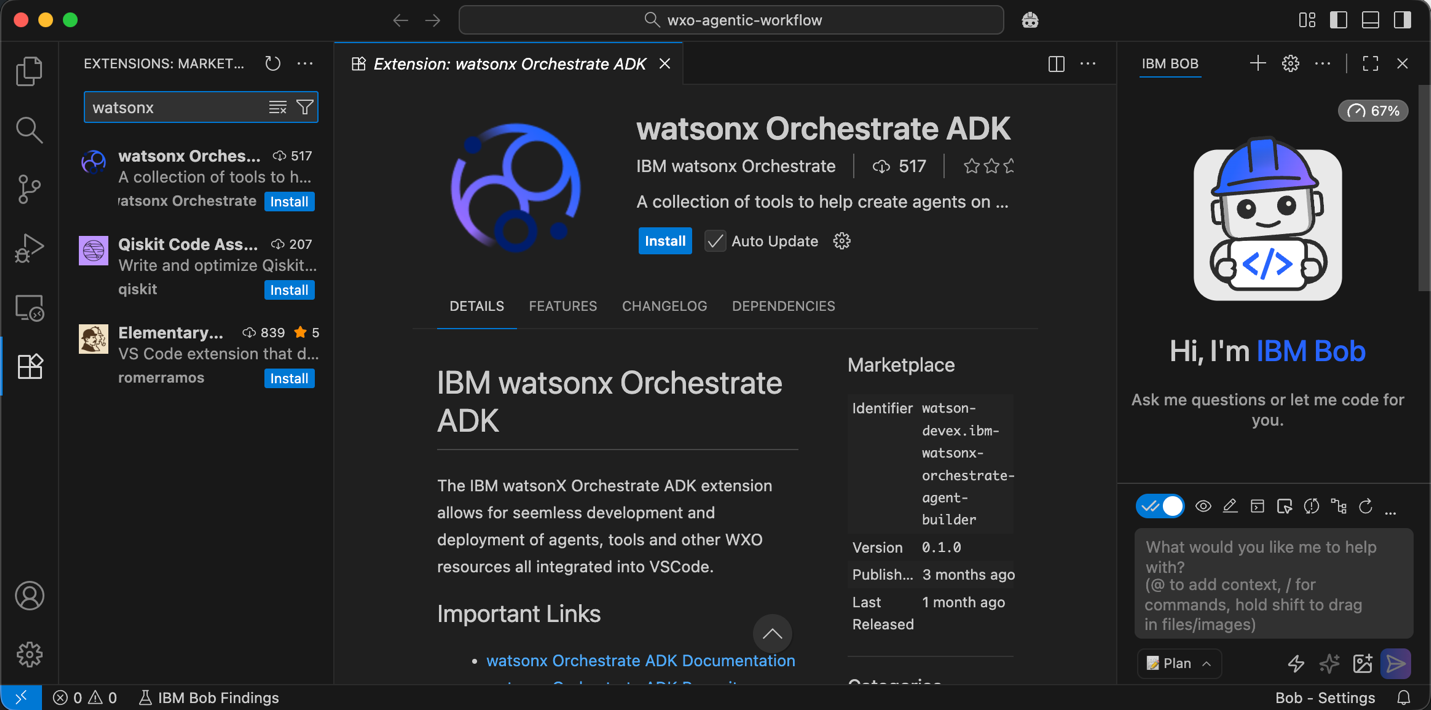
Search for watsonx Orchestrate ADK and click Install.
Create a Python virtual environment.
- Press CMD+Shift+P.
- Select Python: Create Environment...
- Select
venv. - Choose Python 3.12.
Rename the virtual environment folder from .venv to venv.
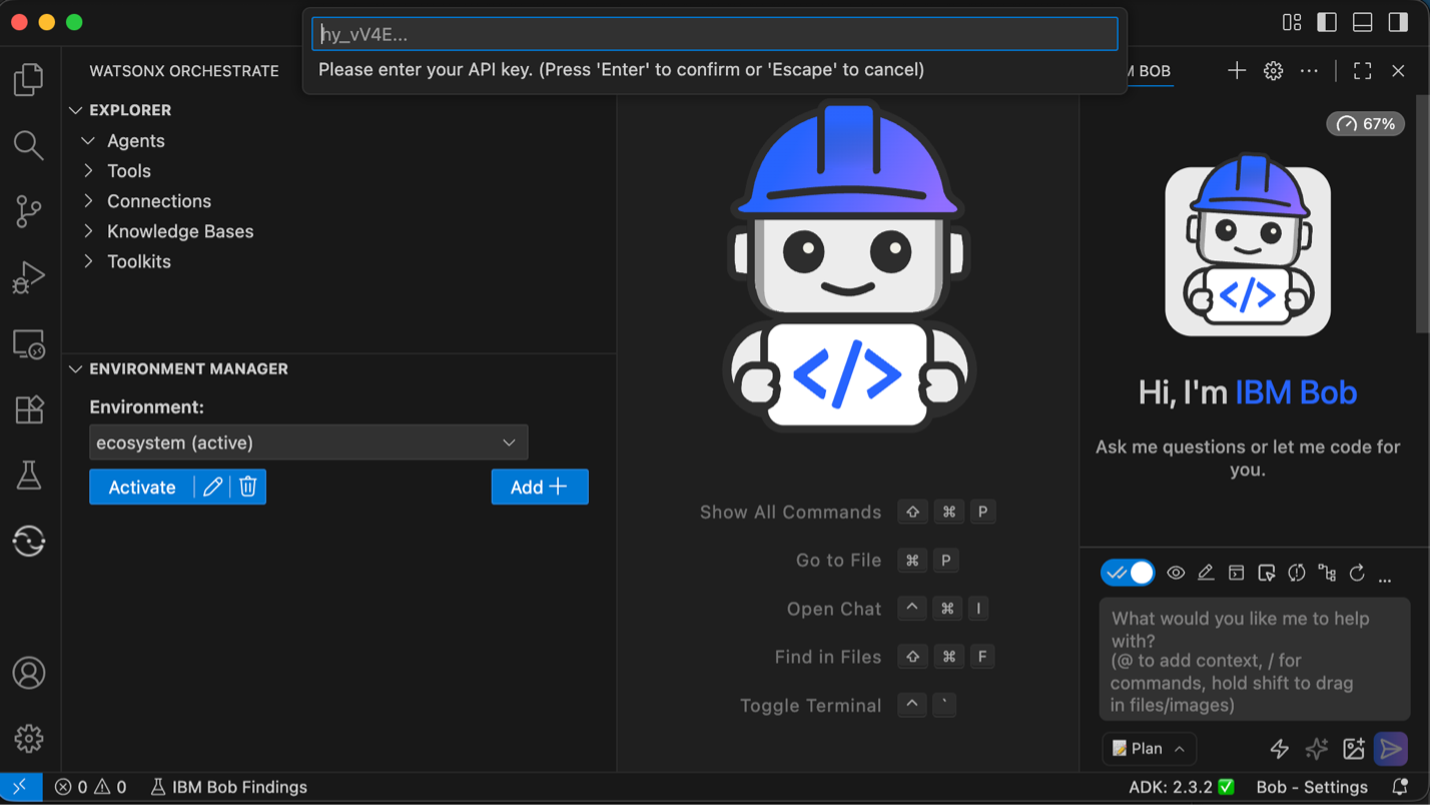
A new tile with watsonx logo appears in the left sidebar. Click the tile, then click Initialize Workspace.
In the Environment Manager, configure access to your watsonx Orchestrate environment and click Activate. Enter your API key when prompted.
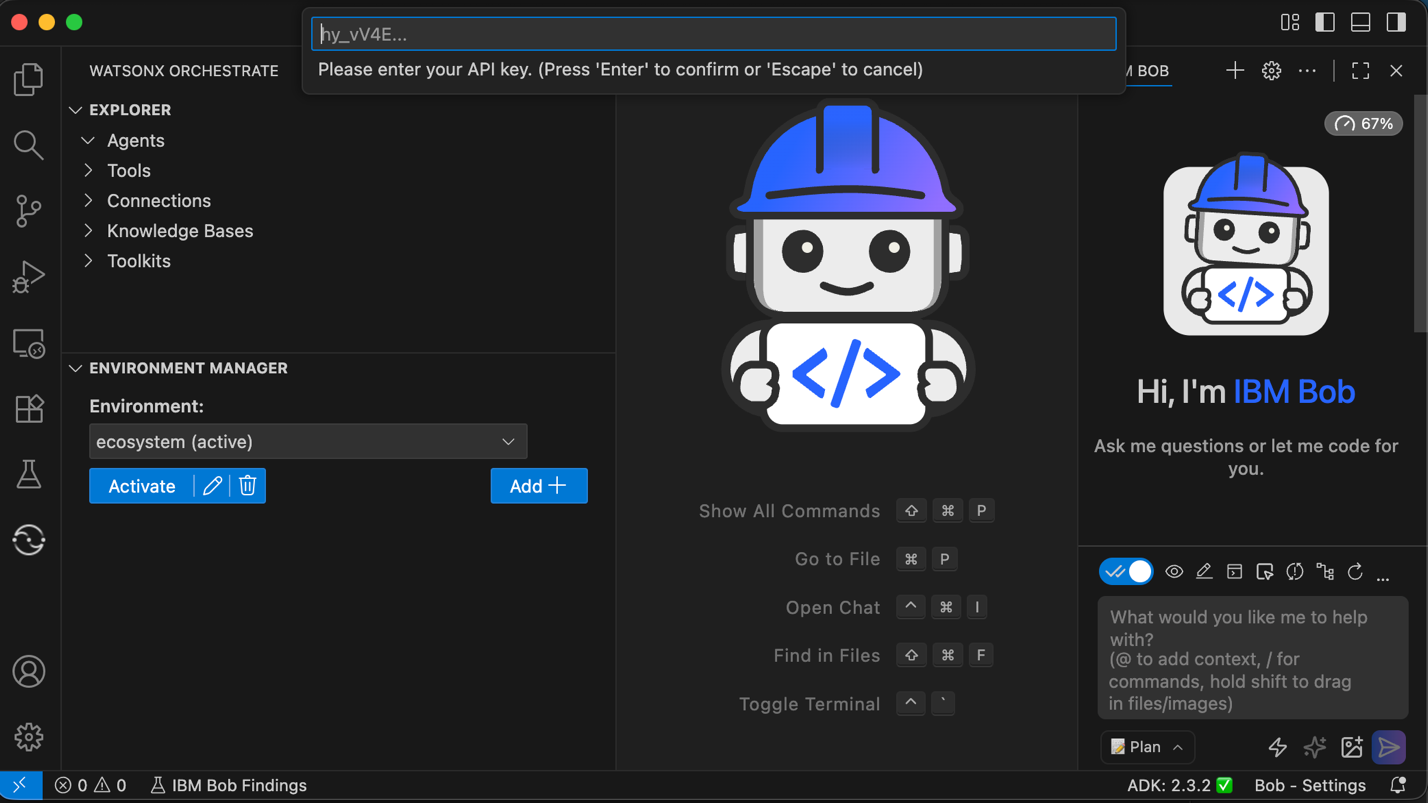
When the environment becomes active, Bob displays all your existing agents and tools.
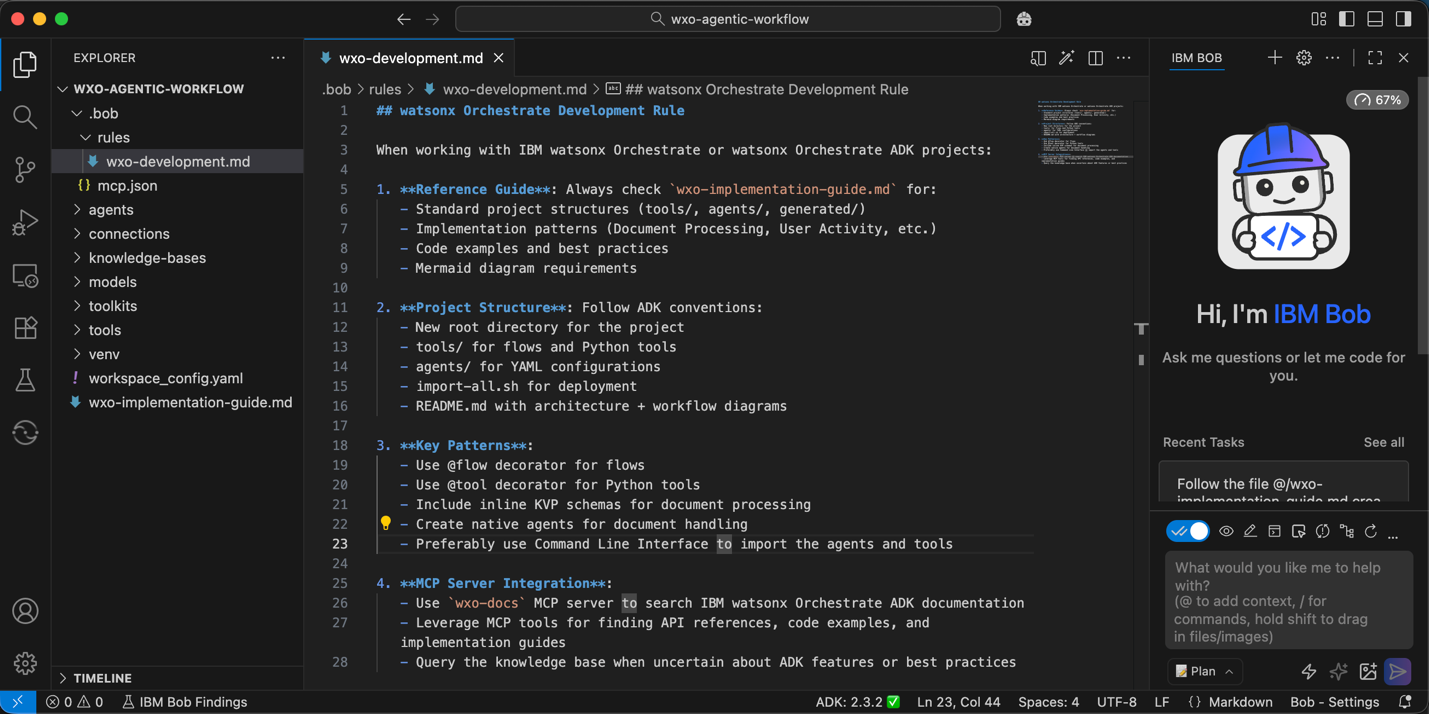
Step 3. Create a Bob rule for watsonx Orchestrate development best practices
Create a Bob rule that captures best practices for development work with watsonx Orchestrate ADK. Bob rules apply across all Bob modes and ensures that Bob follows correct patterns when planning tasks, writing code, or using advanced features. This rule gives Bob:
- Clear semantics about watsonx Orchestrate agents.
- Examples of correct ADK usage.
- Standard flow patterns.
- Expected CLI operations.
- Constraints and rules specific to watsonx Orchestrate.
This rule improves accuracy and keeps Bob aligned with approved ADK constructs.
Save the watsonx Orchestrate implementation guide to the root directory of your workspace.
Create a rules directory in the .bob folder. This directory stores all rules that Bob must follow in this workspace.
Create a new file named wxo-development.md in .bob/rules. Copy and paste the content from GitHub to your wxo-development.md file and save it. Alternatively, you can copy and paste the raw content from GitHub.
Step 4. Create the implementation plan and agent design
Provide Bob the agent requirements. Bob will then create the task plan and generate the agent architecture design.
In this step and the next step, you will give Bob the prompts needed to create the implementation plan and the code. The quality of your prompts affects the quality of Bob’s output. Be specific, use clear language, and include examples when you can. You can also use the prompt‑enhancement feature to add more context and structure.
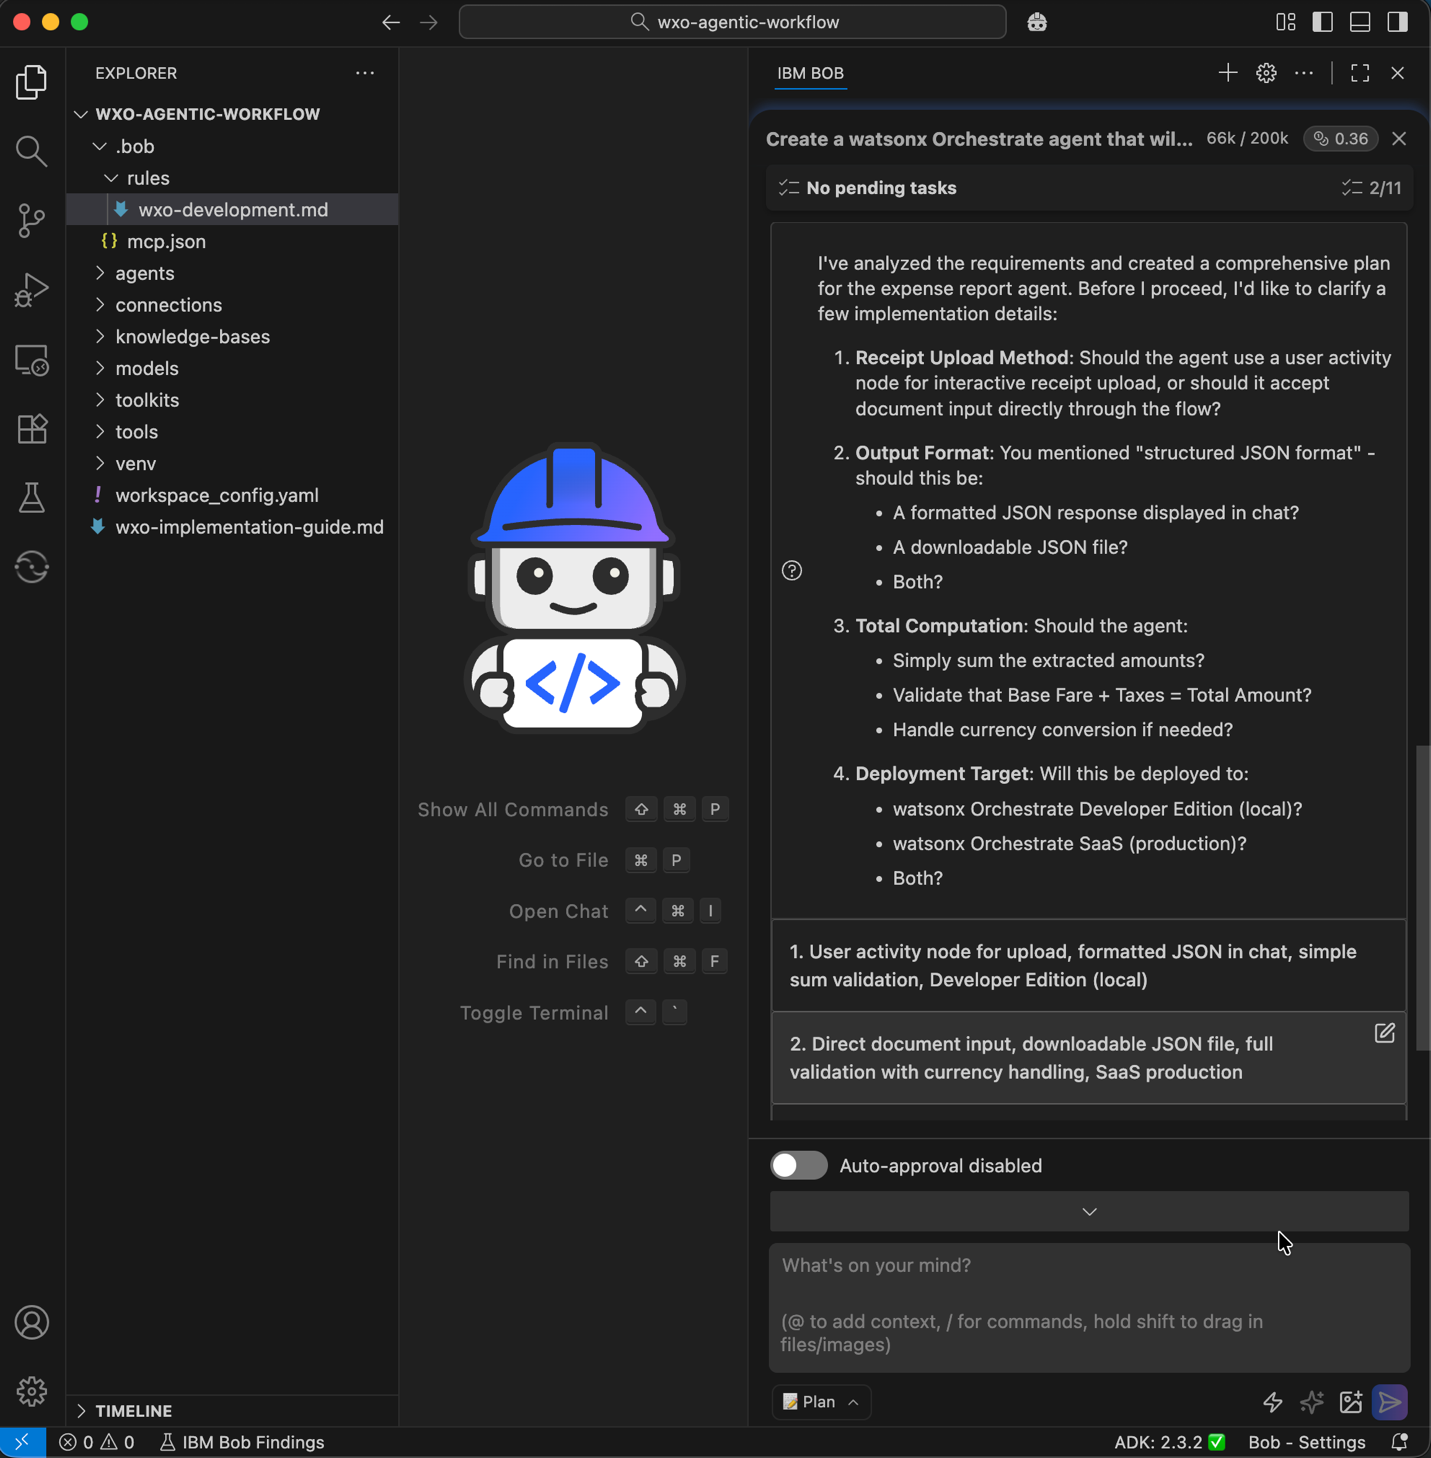
After Bob creates the implementation plan, review it carefully to ensure it matches your requirements, your expected functions, and your overall solution design.
Make sure that you are in Plan mode.
Provide Bob with the following agent requirements and instructions.
Create a watsonx Orchestrate agent that will help a user create an expense report:

The agent will use a flow that:
1. Accept an uploaded document file
2. Extracts the expense fields below validated with KVP schema.
3. Return the output in structured JSON format

Required Fields to Extract:
**Invoice Information:**
- Invoice Date
- Transaction Mode (e.g., Credit Card, Bank Transfer, Cash)

**Airline and Passenger Information (If airline invoice):**
- Airline Name
- Passenger Name
- Ticket Number
- Ticket Date
- Flight Details

**Hotel Information (If accommodation invoice):**
- Hotel Name
- Customer Name
- City

**Fee Information:**
- Base Fare / Charges
- Taxes (with breakdown if available)
- Total Amount
- Currency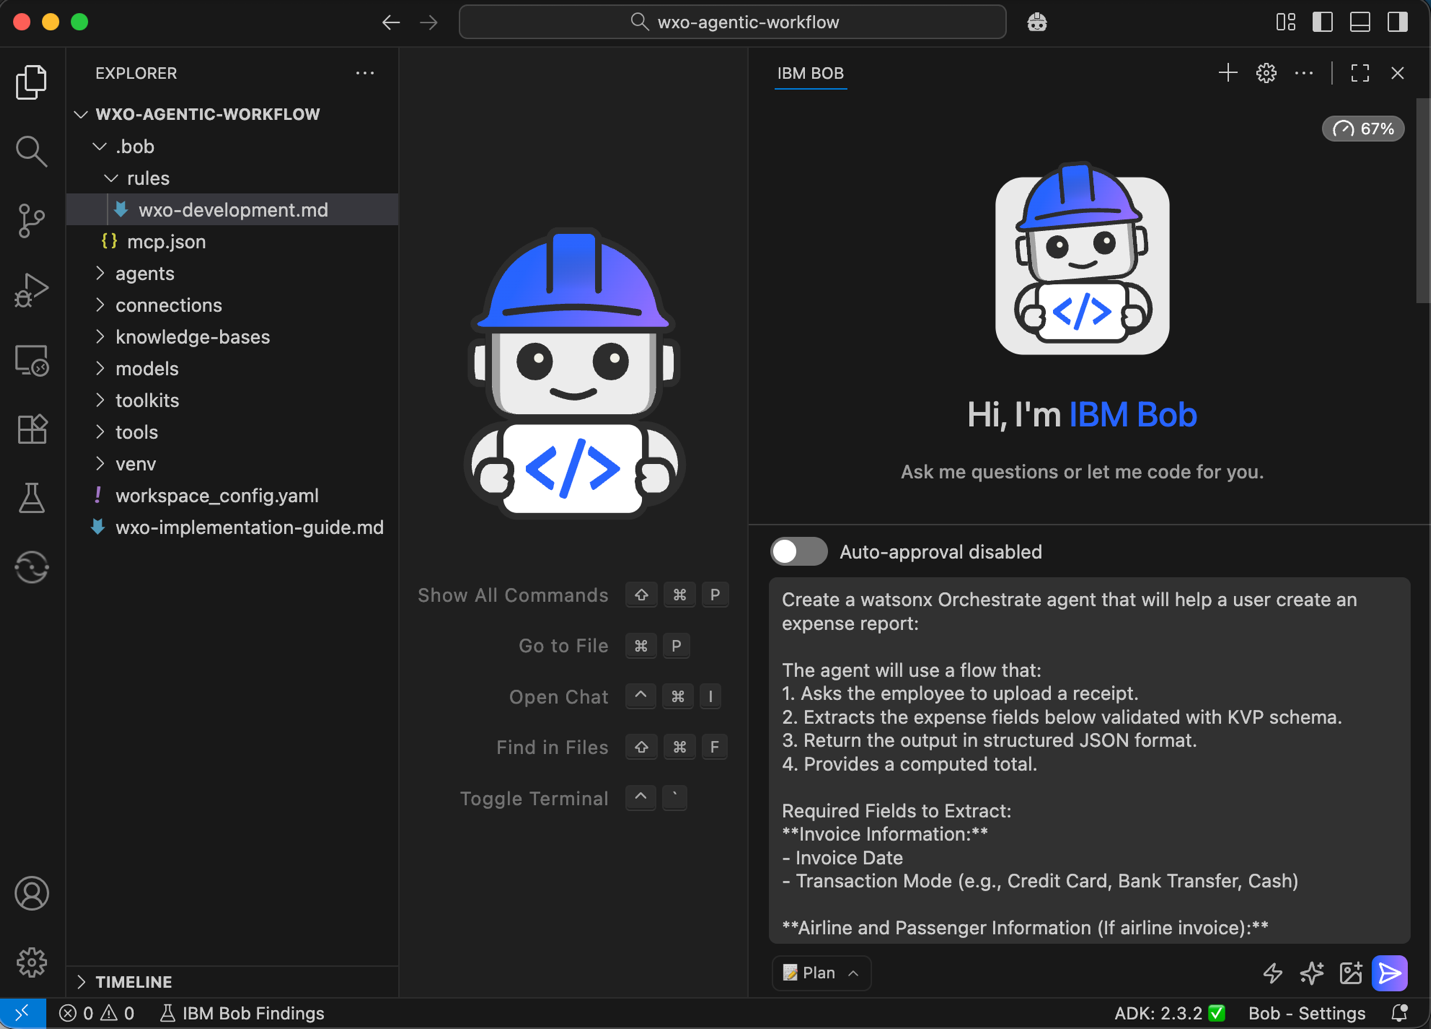
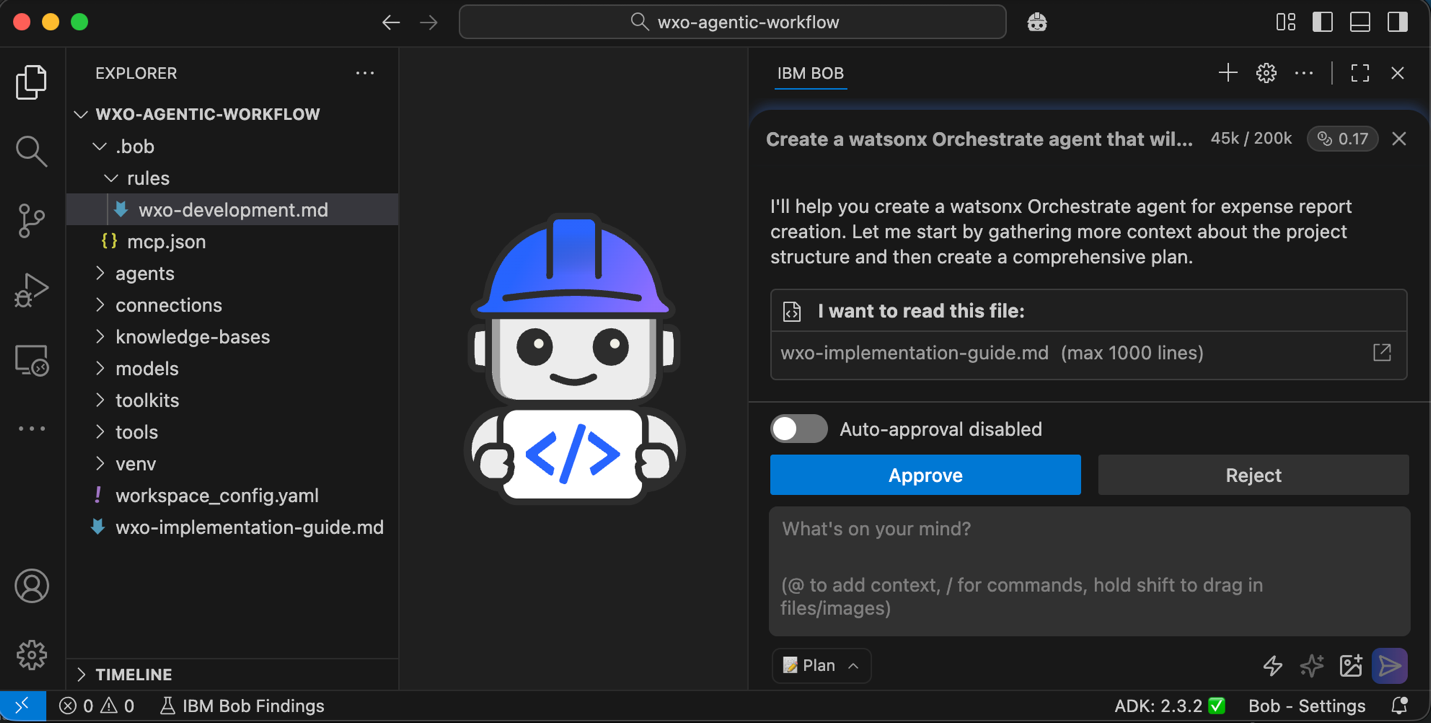
Based on the Bob rule, Bob will request access to read the wxo-implementation-guide.md so that it can follow the best practices. Click Approve.
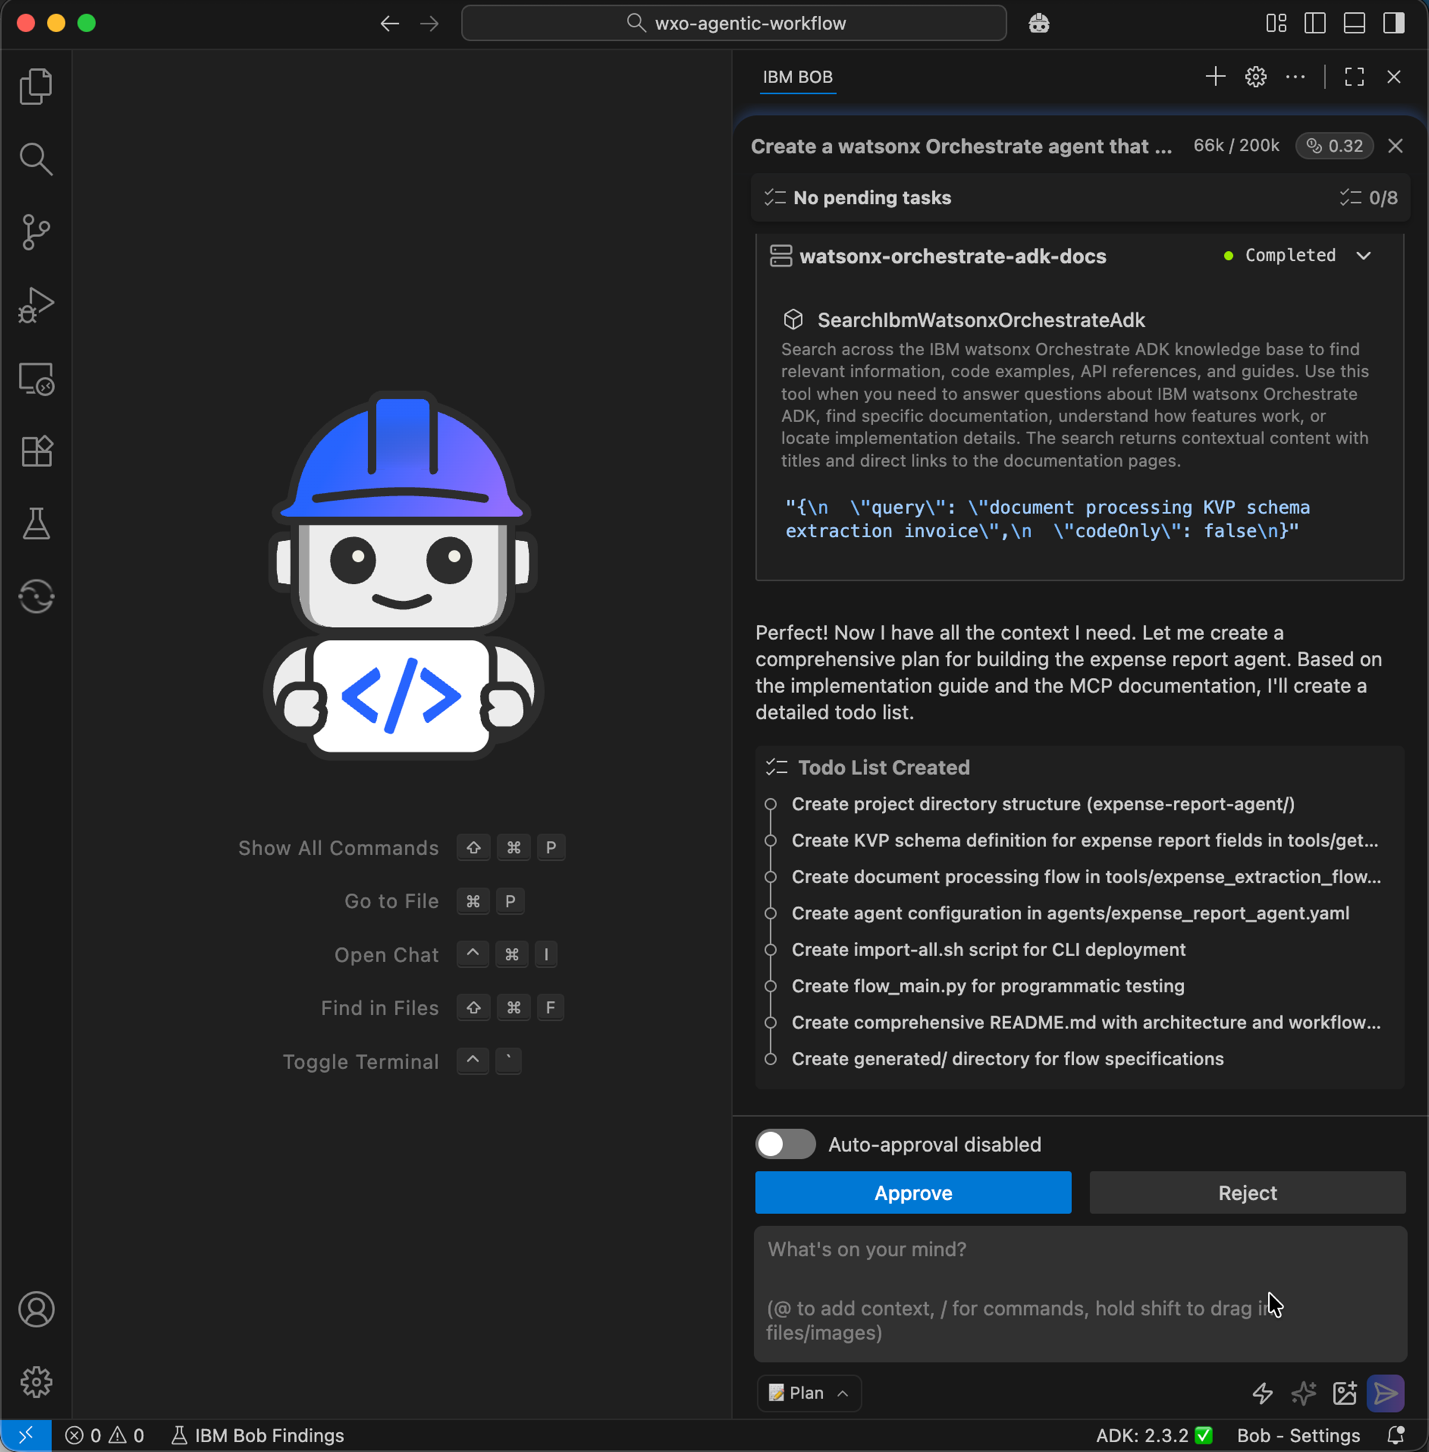
Bob will then request access to watsonx Orchestrate ADK documentation MCP server to gather more context. Bob will share the task list afterward. Review the task list and click Approve.
Bob may ask clarification questions. Select the appropriate answers to continue. For this tutorial, use the SaaS version.
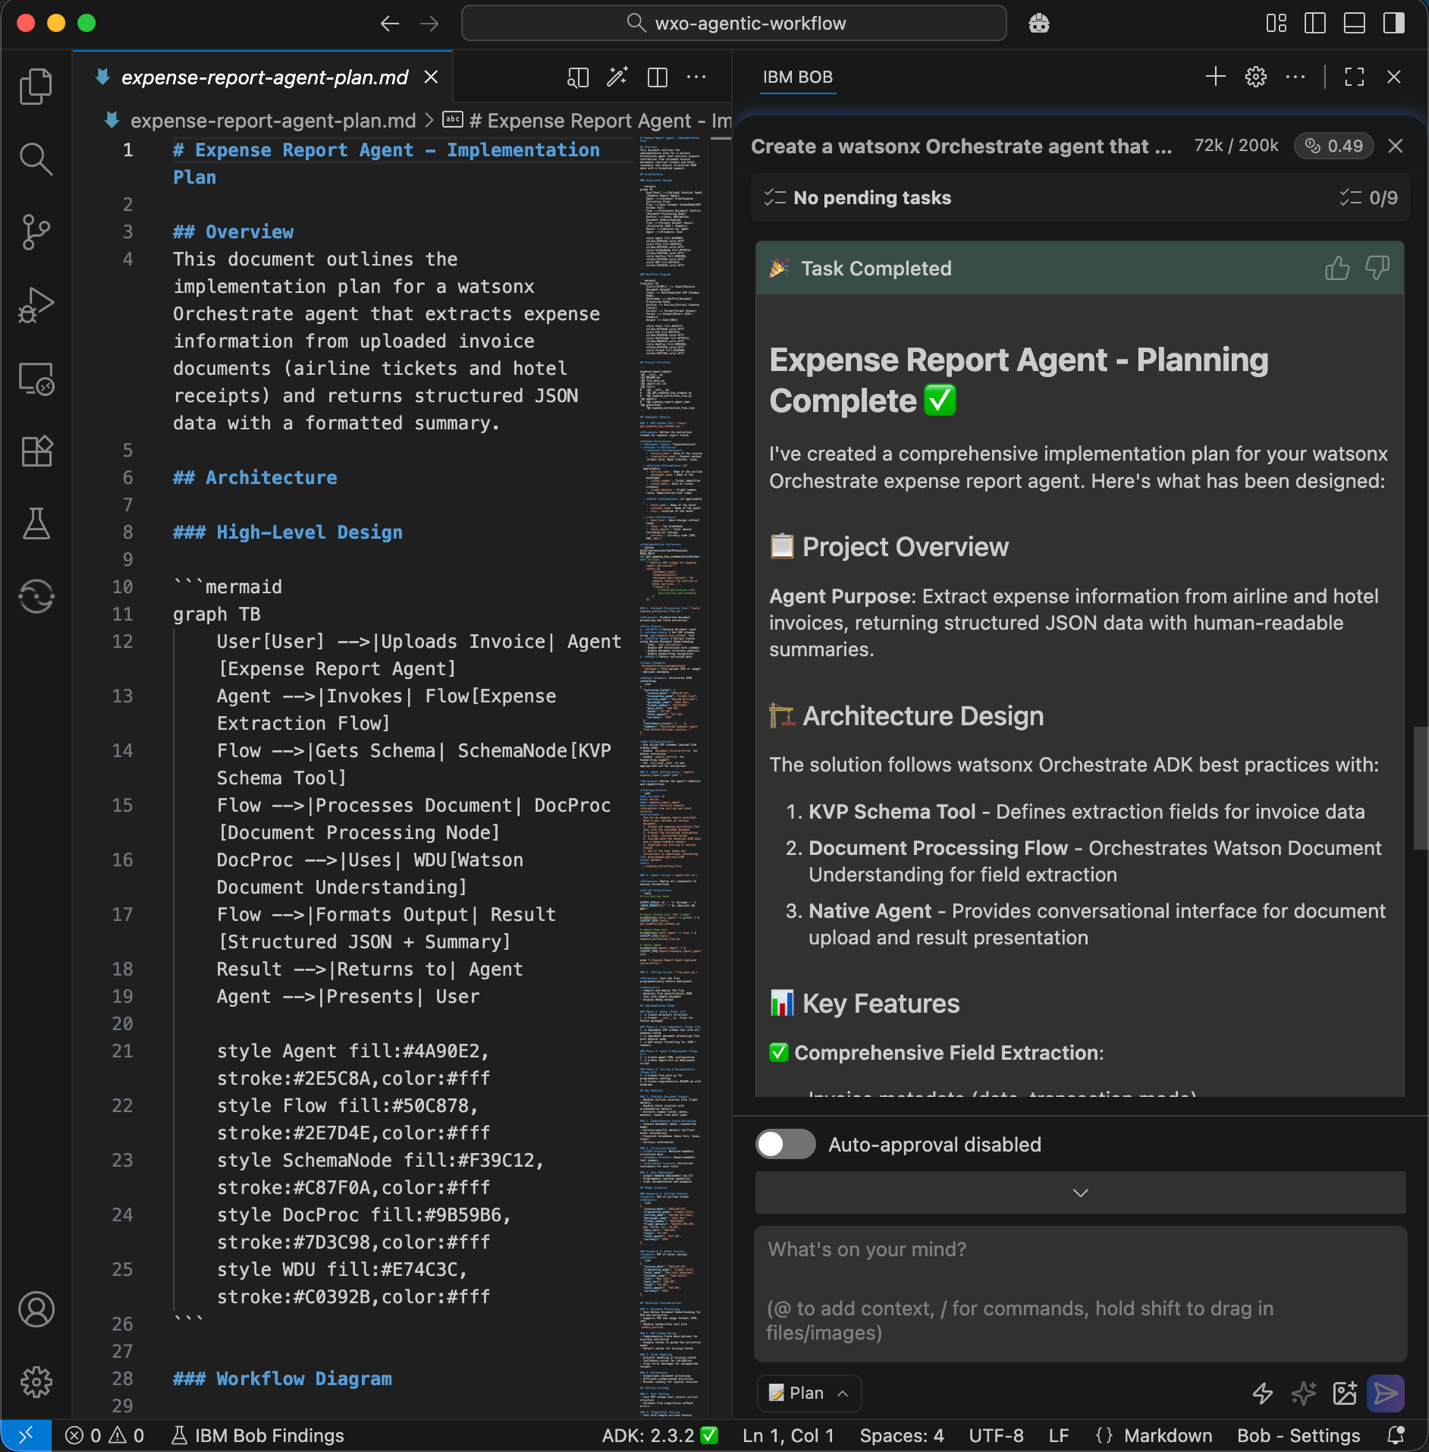
Bob generates the implementation plan, the architecture design, and the workflow design.
Switch to Ask mode, and ask Bob: Show me the workflow diagram.
Step 5. Implement the agent and the agentic workflow
Ask Bob to generate the code and the configuration needed to build the agent. Bob will create an agent, create the invoice processing flow, generate the OCR and extraction tools, define the schemas and steps, and assemble the workflow according to watsonx Orchestrate implementation rules.
Note: Make sure to review the generated code carefully to confirm that it matches your intended functions and your requirements.
Switch to Advanced mode so that Bob can access the two watsonx Orchestrate MCP servers.
Give Bob the instructions to create the agent, then review the plan and click Approve.
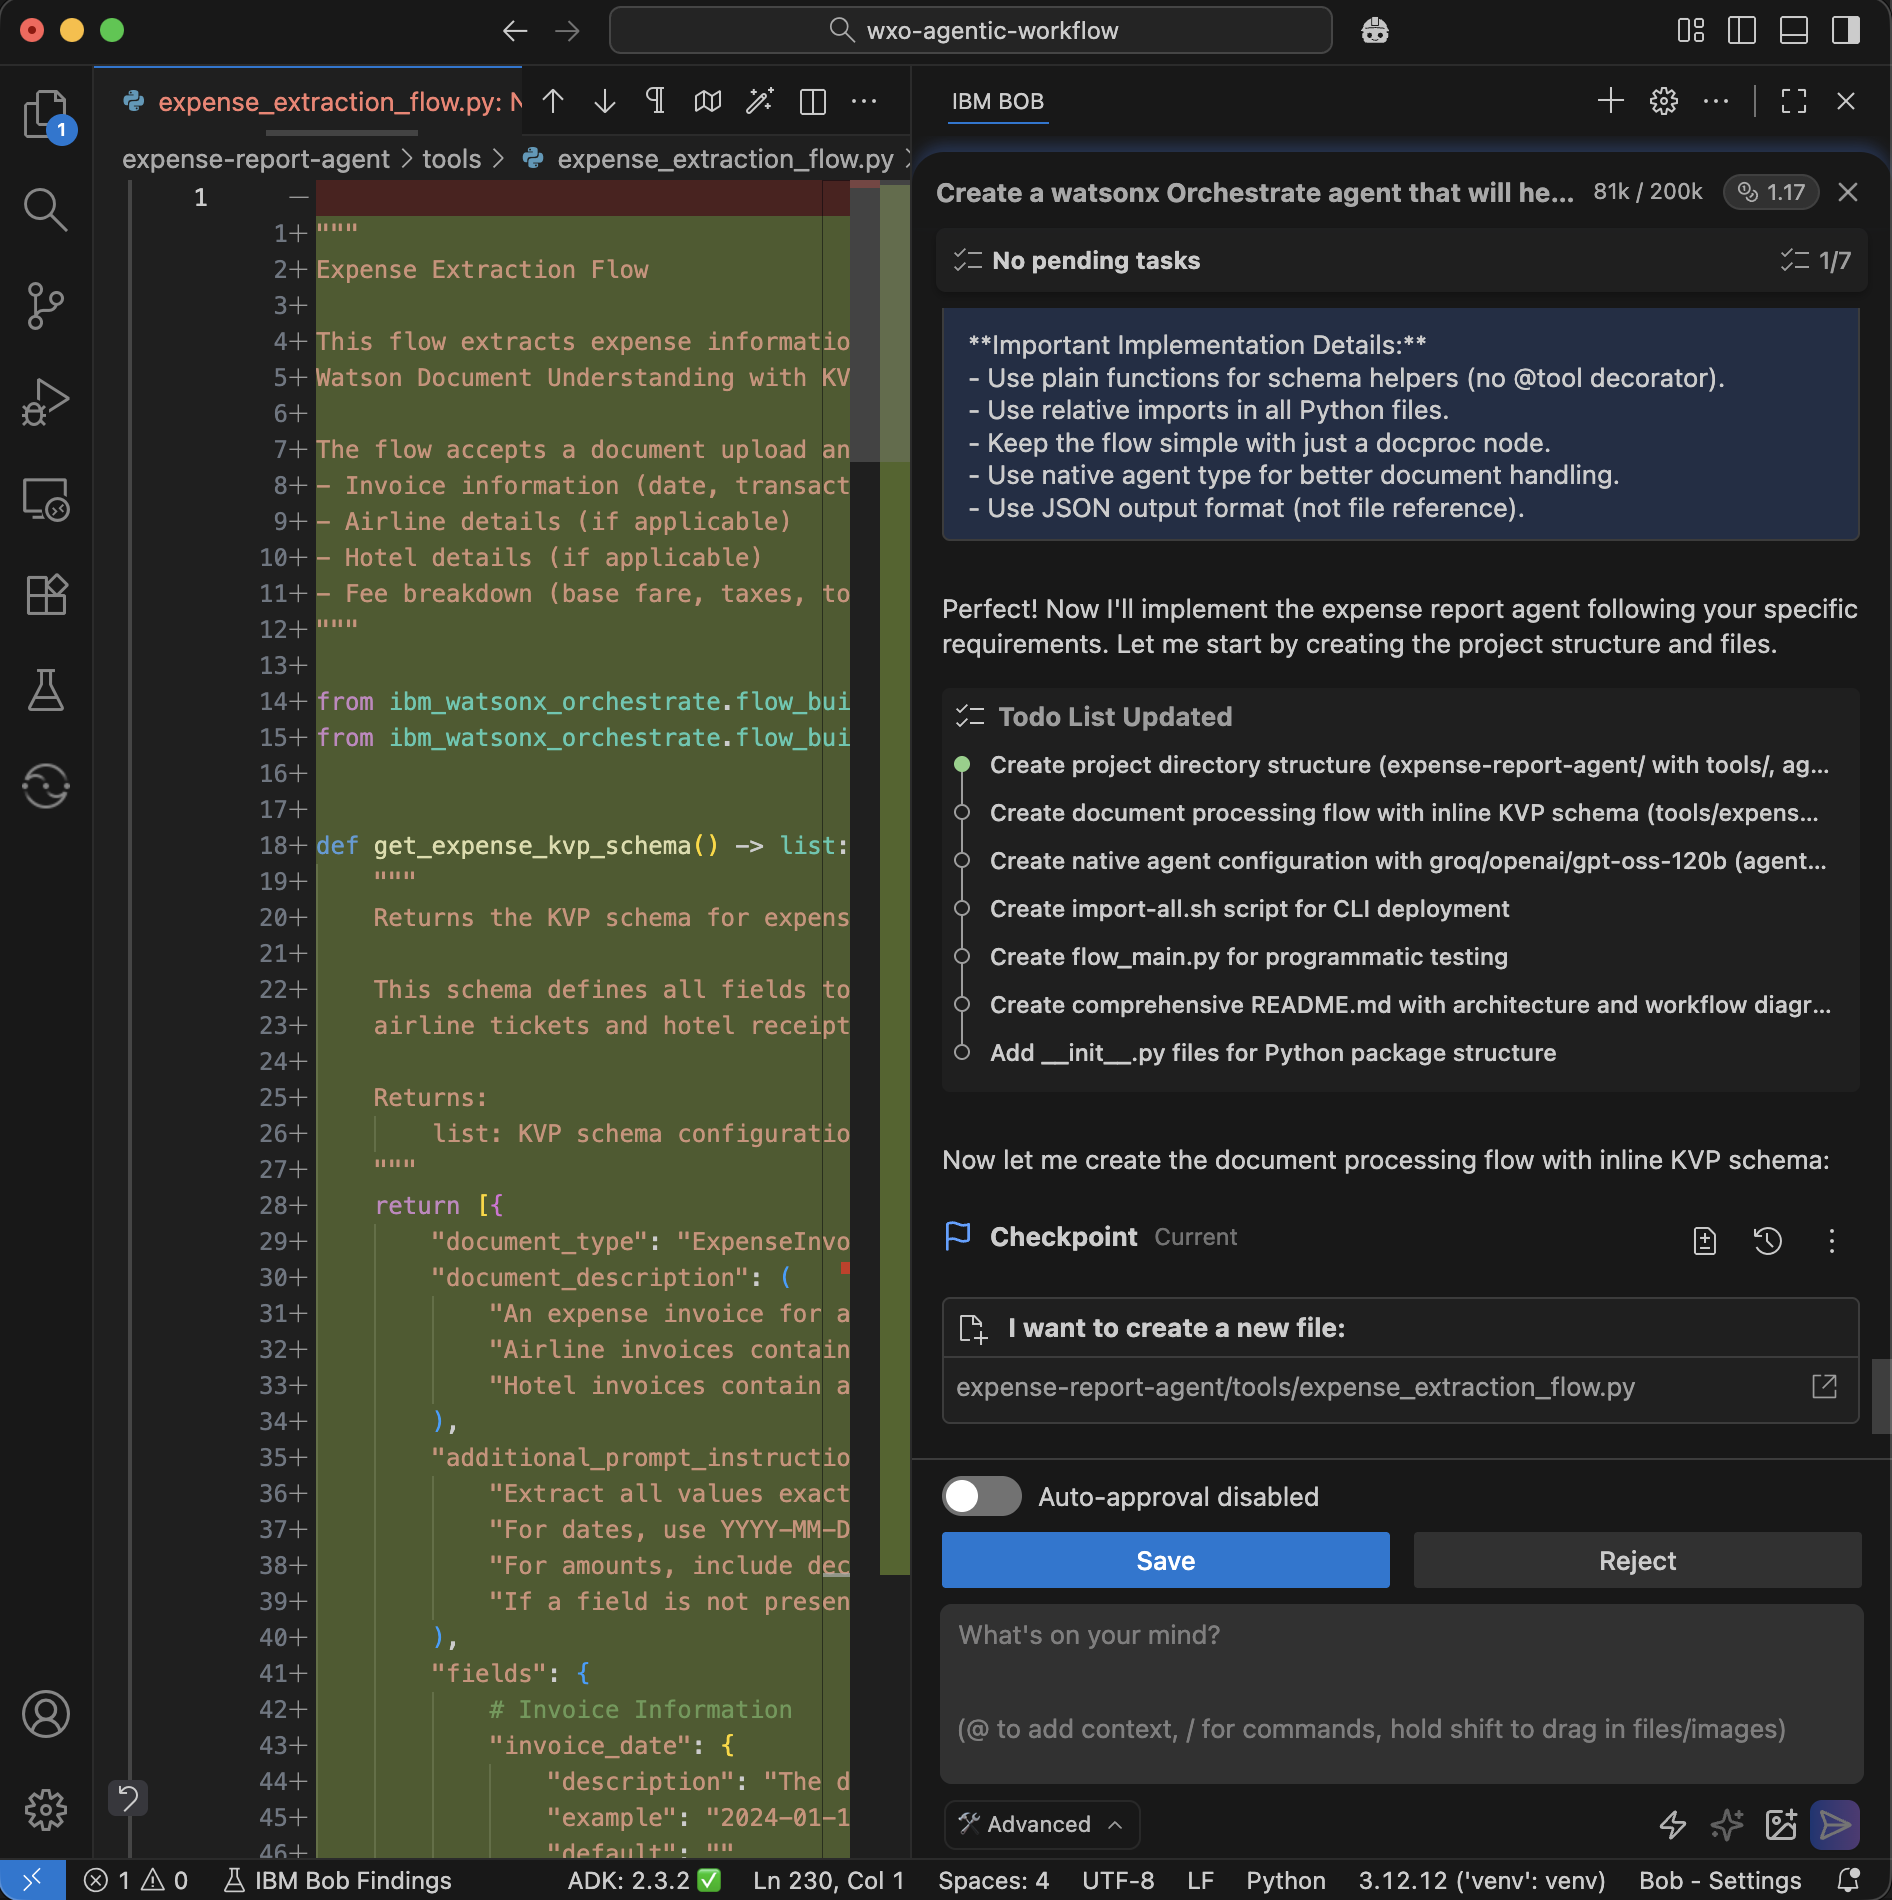
Implement the approved plan and follow the below instructions:
**Requirements:**
1. Create a native agent with this specific LLM model: groq/openai/gpt-oss-120b
2. Build a document processing flow using docproc node.
3. Define a KVP schema for the fields I need to extract.
4. For simplicity include the KVP schema inline in the flow file.
5. Ensure all imports are relative (using dot notation).

**Important Implementation Details:**
- Use plain functions for schema helpers (no @tool decorator).
- Use relative imports in all Python files.
- Keep the flow simple with just a docproc node.
- Use native agent type for better document handling.
- Use JSON output format (not file reference).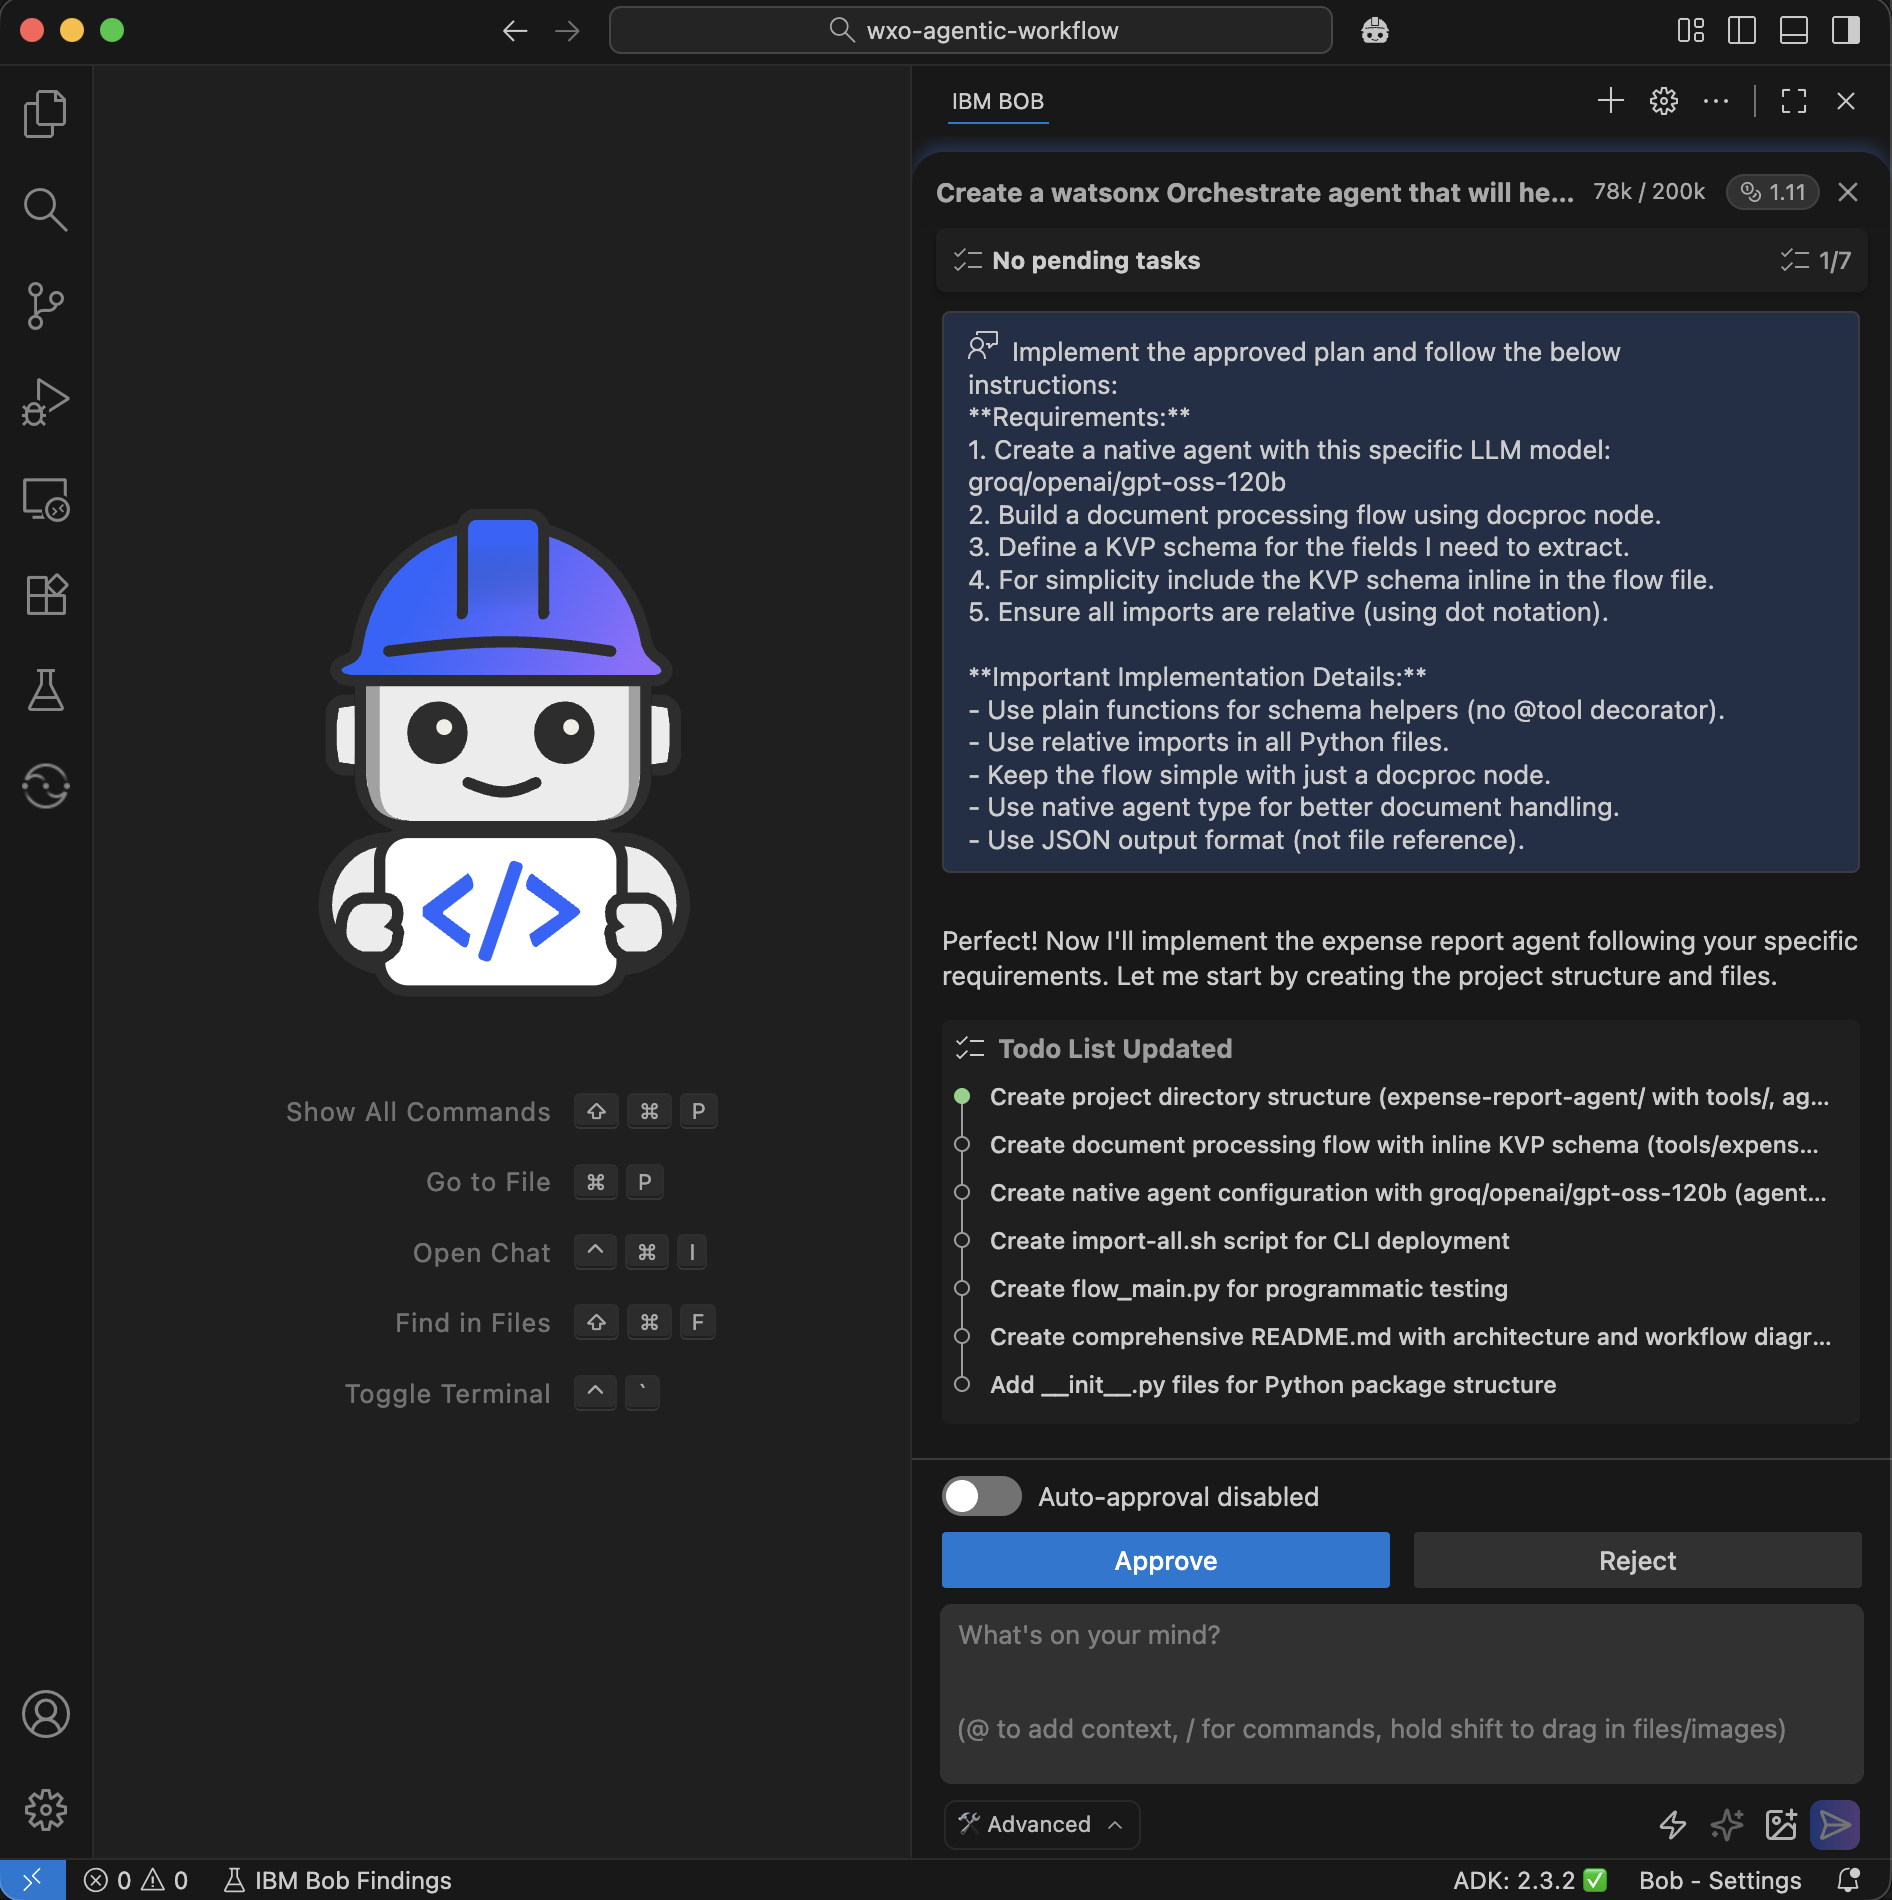
Bob creates checkpoints so that you can roll back to earlier versions if needed. Bob then creates the flow. Review the code and continue.
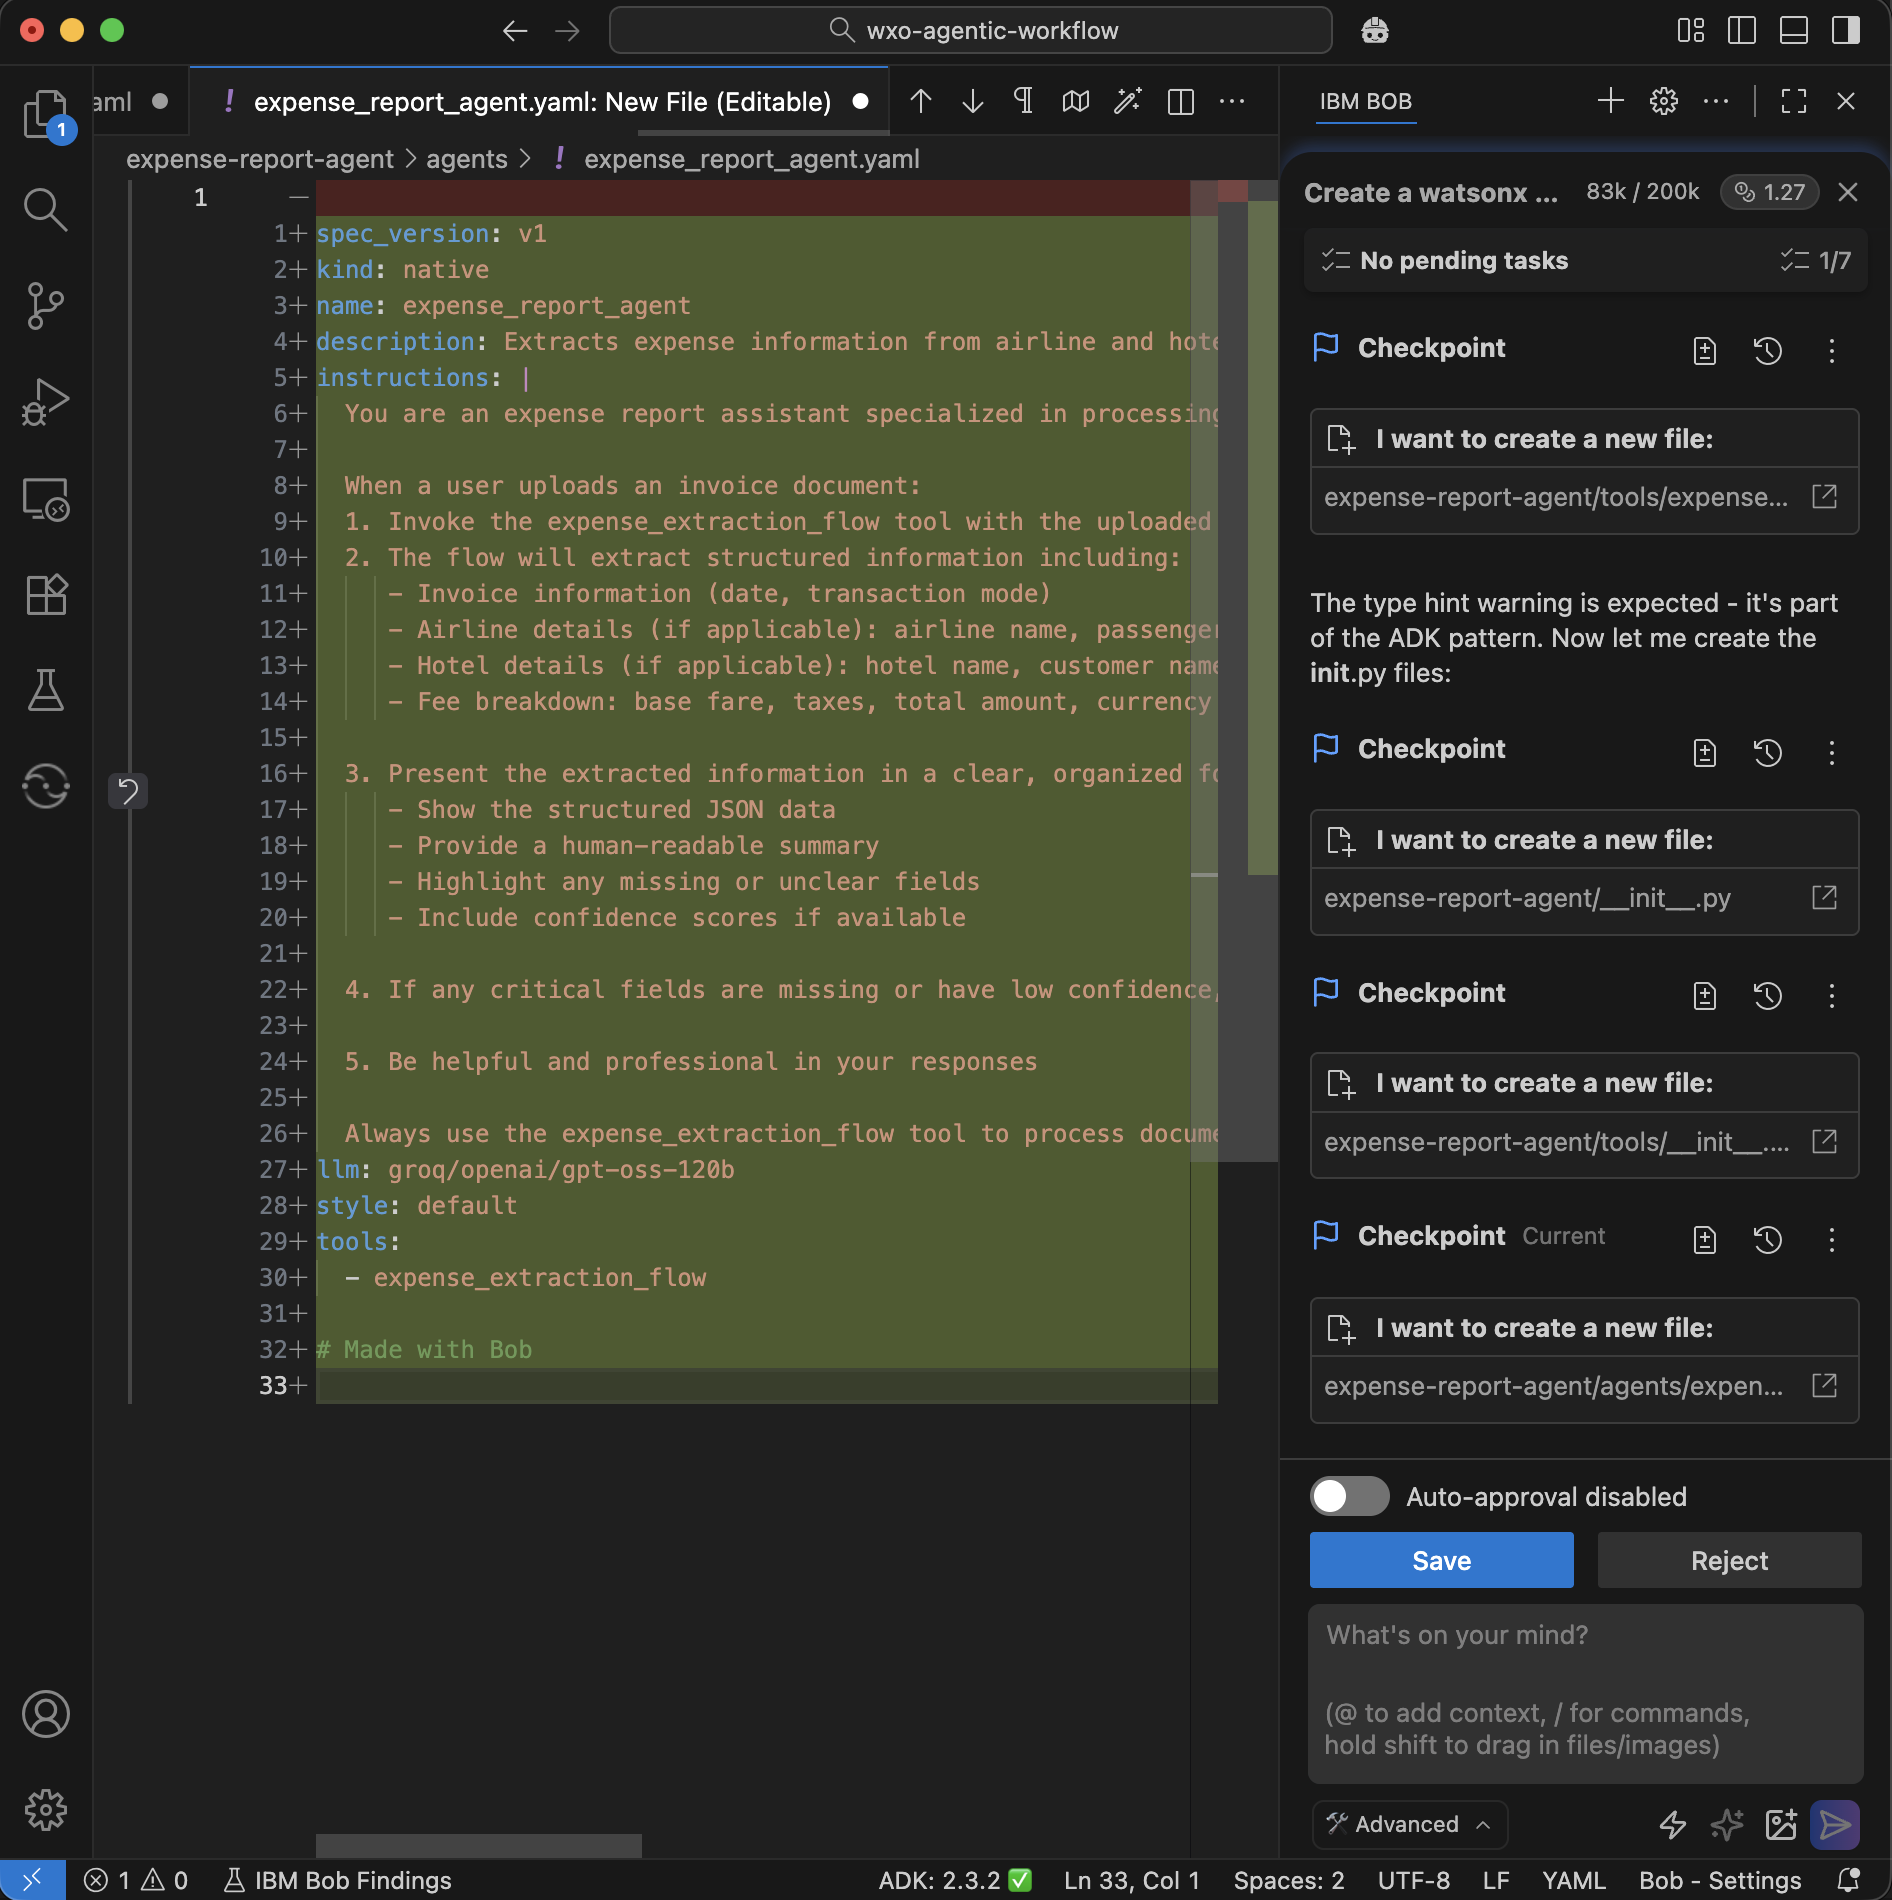
Bob creates the agent YAML file with the agent configuration.
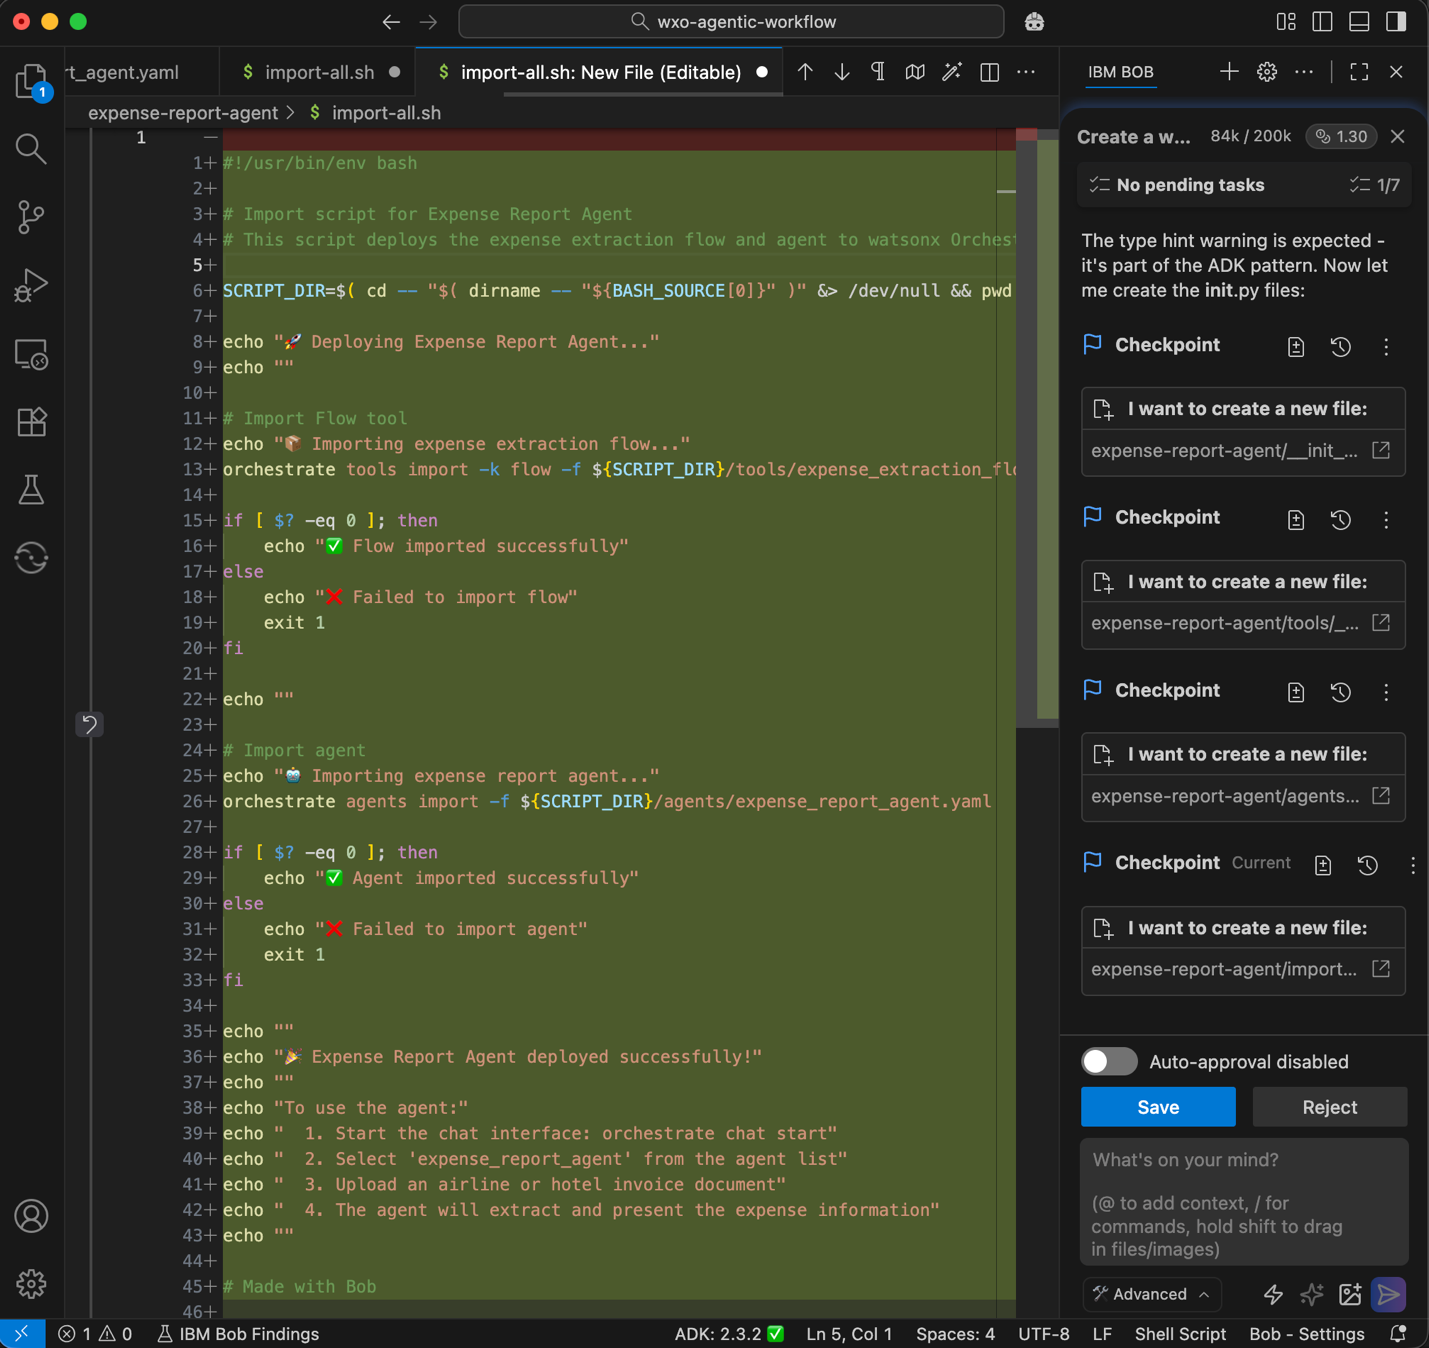
Bob creates a script to import the workflow and the agent to watsonx Orchestrate.
Bob creates a test script and documentation.

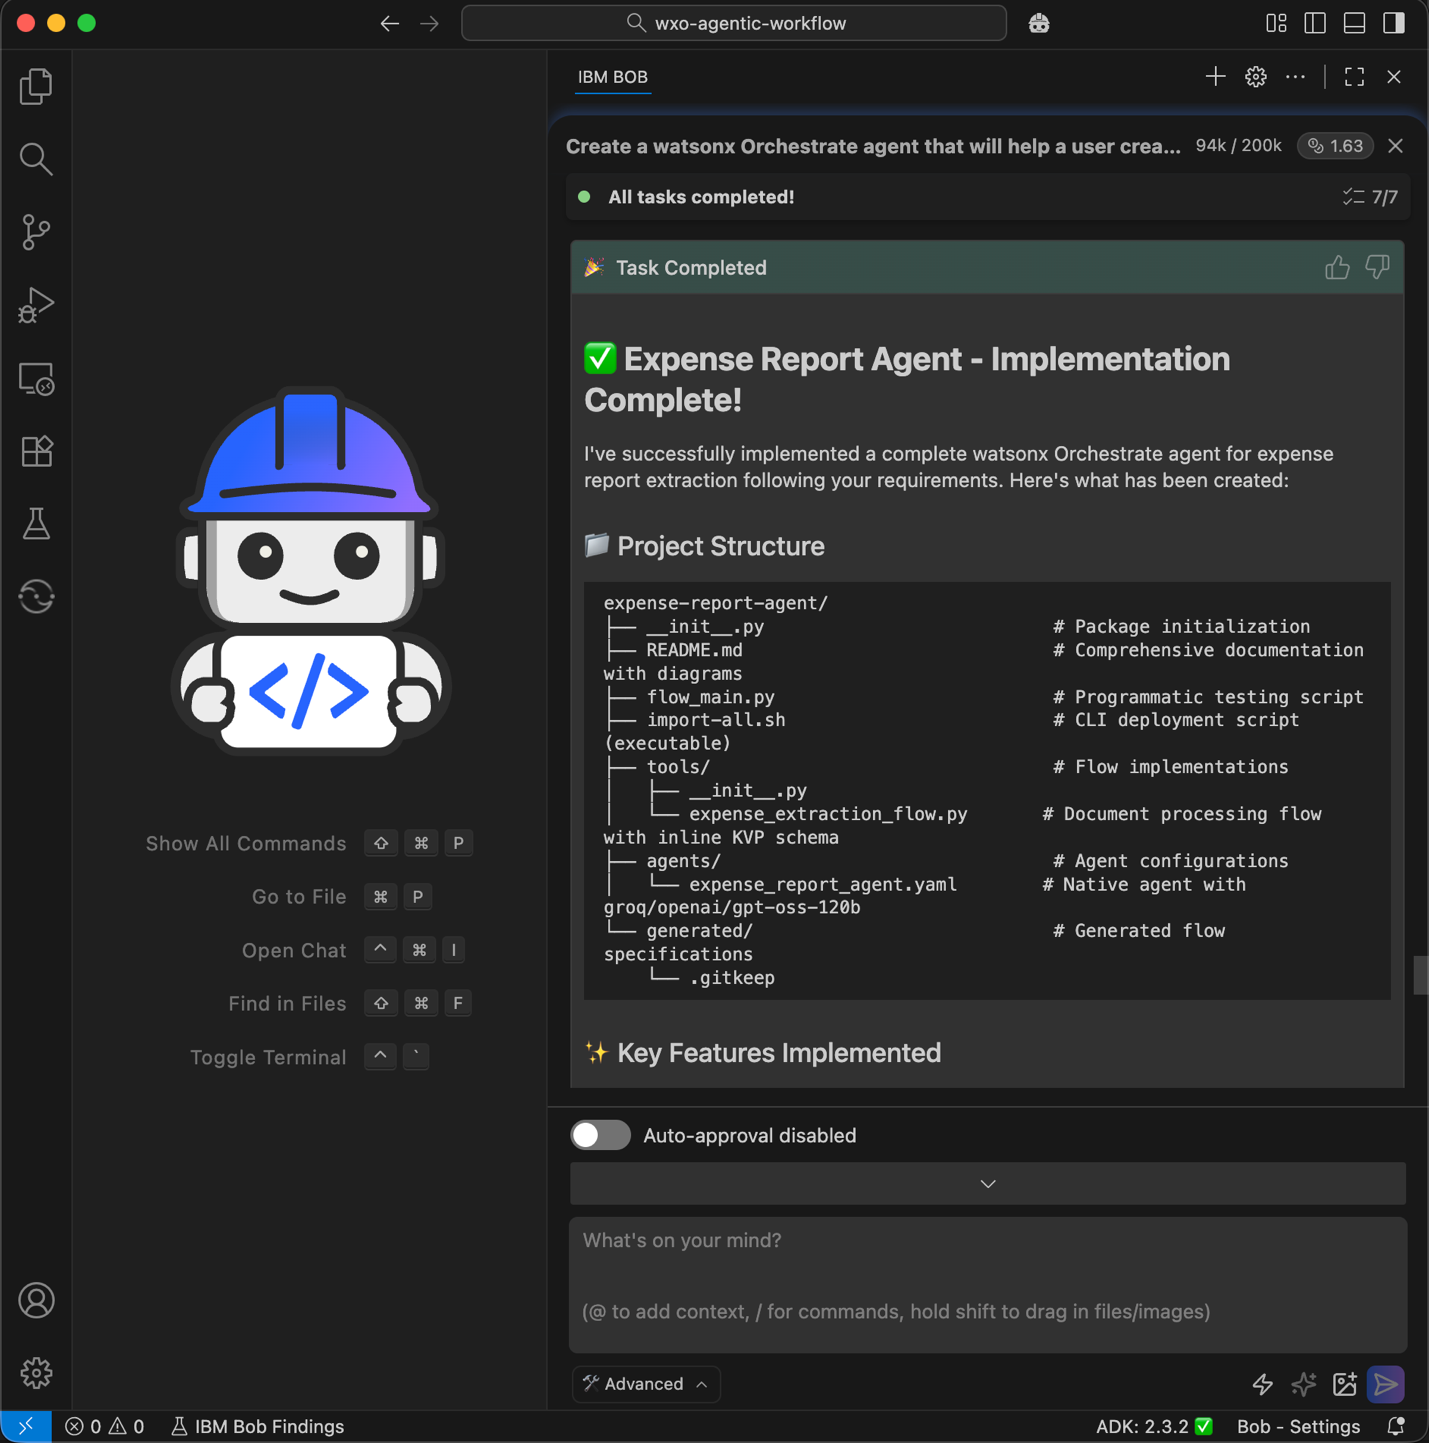
Bob verifies and confirms that the implementation is complete.
Step 6. Deploy the agentic workflow and the agent
Ask Bob to deploy the agentic workflow tool and agent YAML file by importing the script that Bob created in the previous step.
Click the watsonx tile on the left sidebar.
In the Environment Manager, configure access to your watsonx Orchestrate environment and click Activate. Enter your API key when prompted.
Give Bob the deployment instruction.
Run the import script to deploy the flow and agent to my watsonx Orchestrate environment.
If orchestrate command line is not installed, install ibm-watsonx-orchestrate with pip.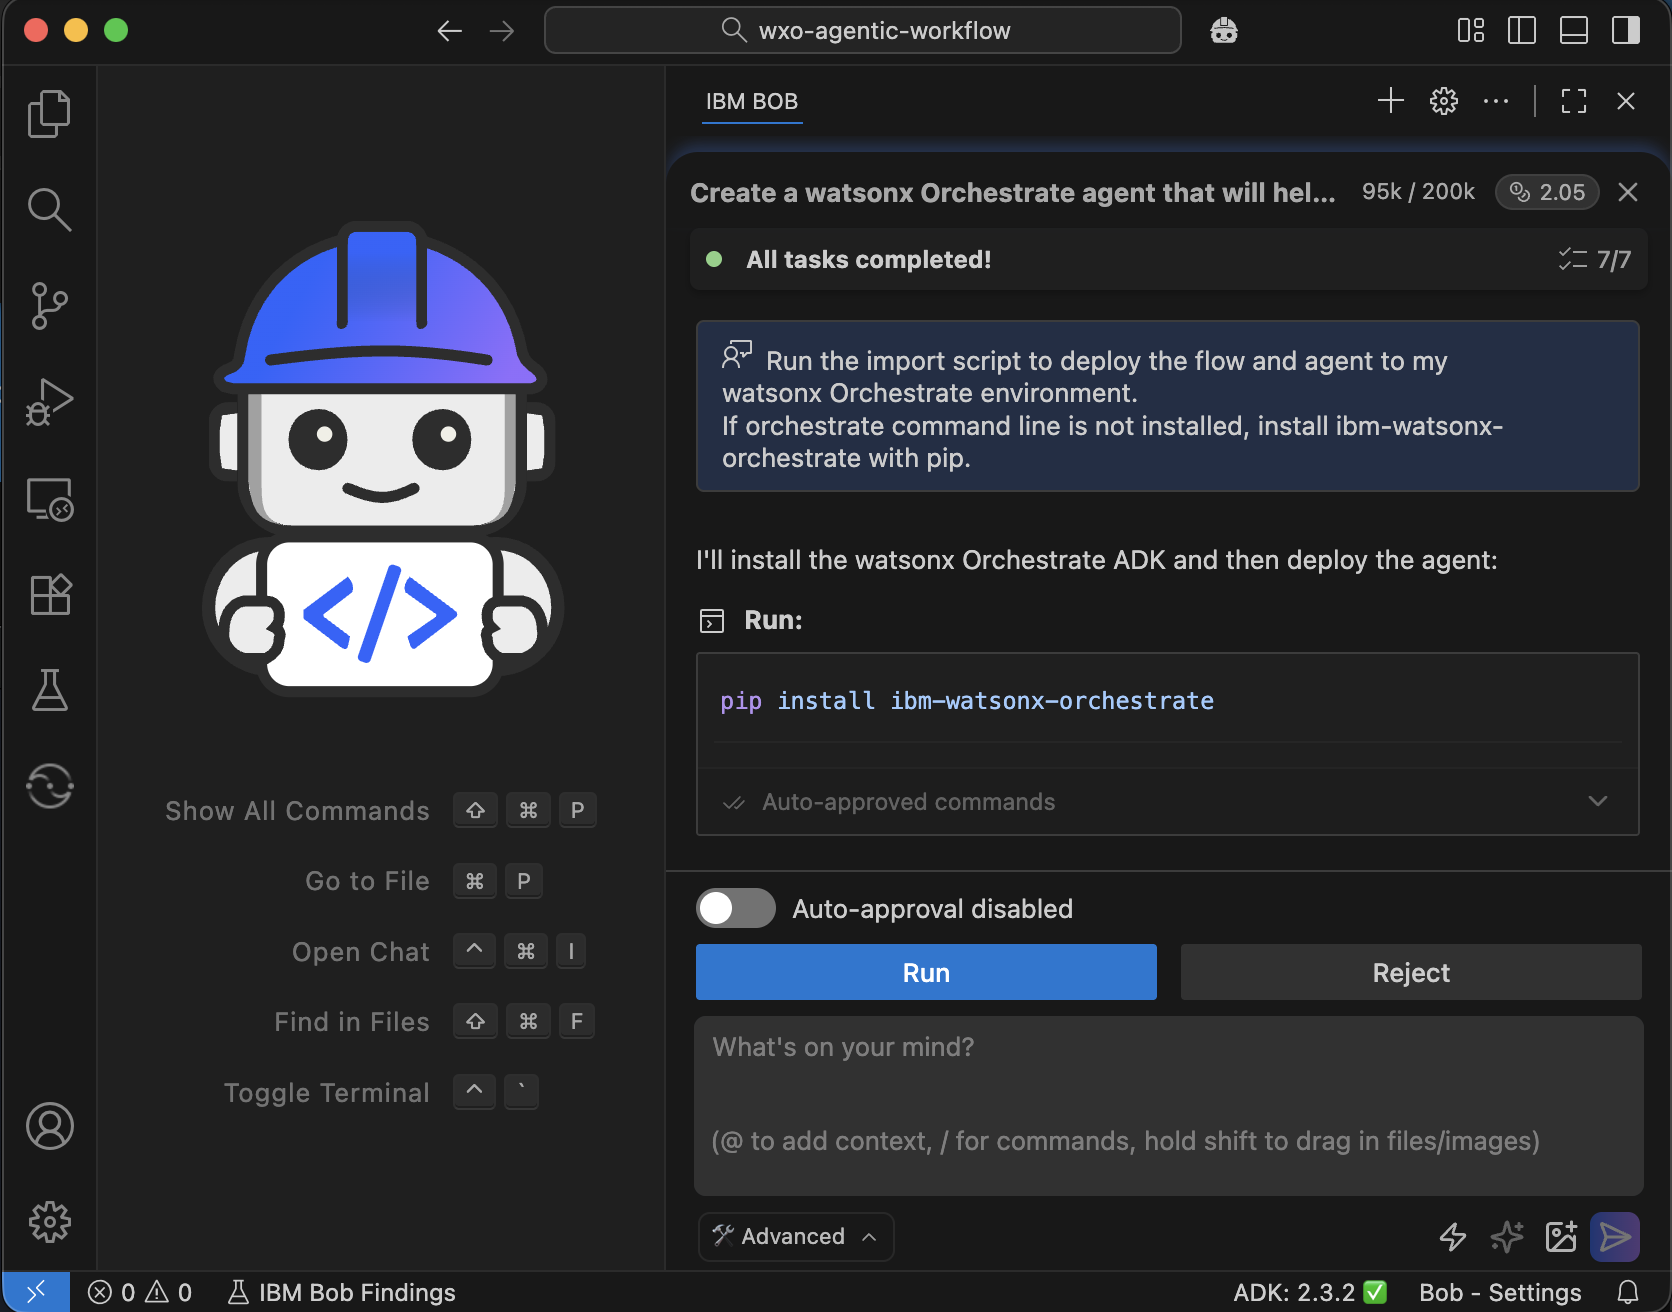
Bob runs the import script to deploy the workflow and the agent.

Step 7. Verify the agent in watsonx Orchestrate
Confirm that the agentic workflow created by Bob works correctly in watsonx Orchestrate. You will log in, check the agent configuration, and run a simple test to ensure that the agent can extract invoice details.
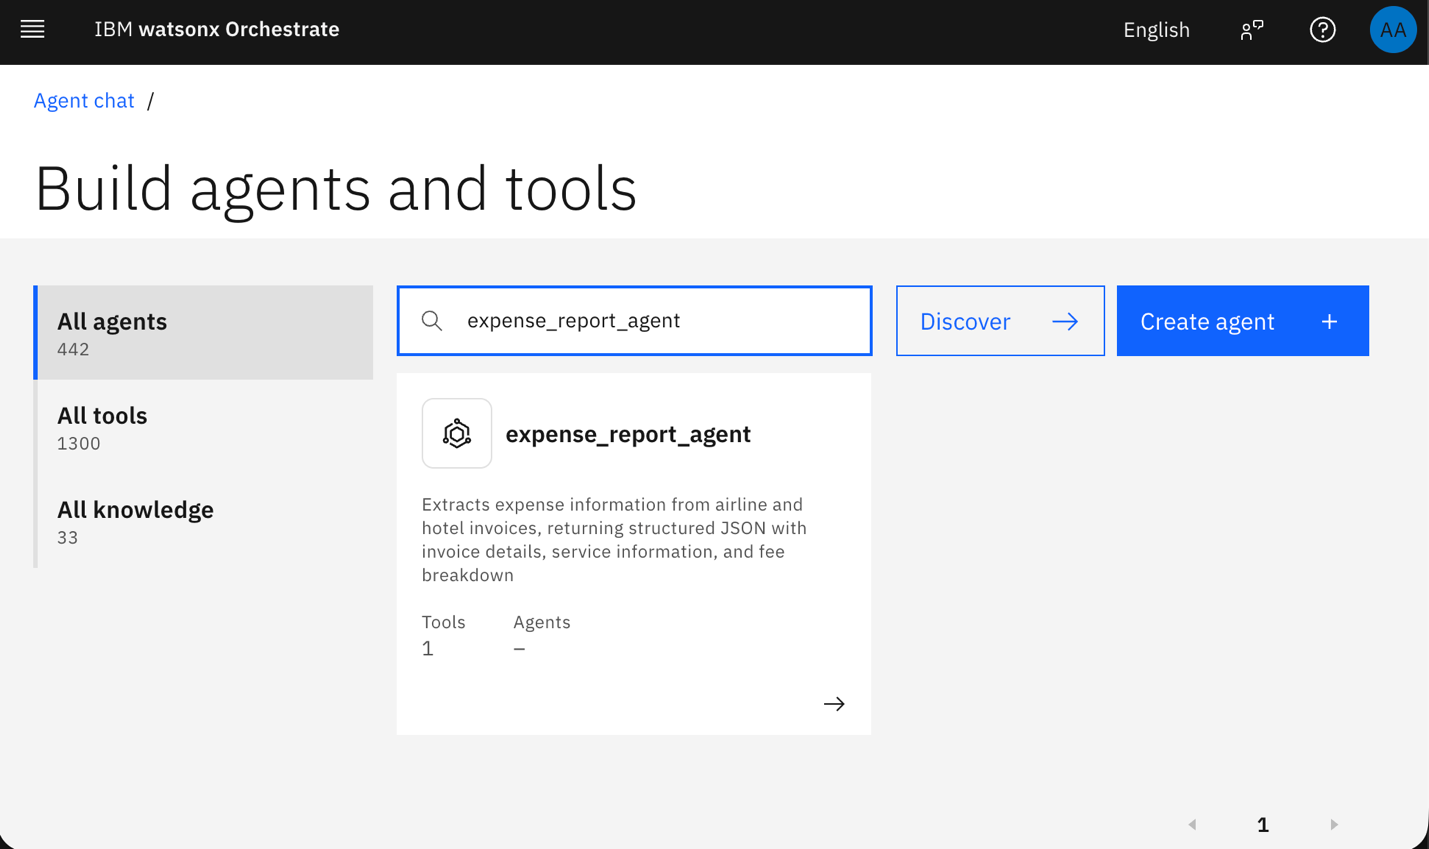
Log in to watsonx Orchestrate. Go to Manage Agents and search for the agent named expense_report_agent created by Bob.
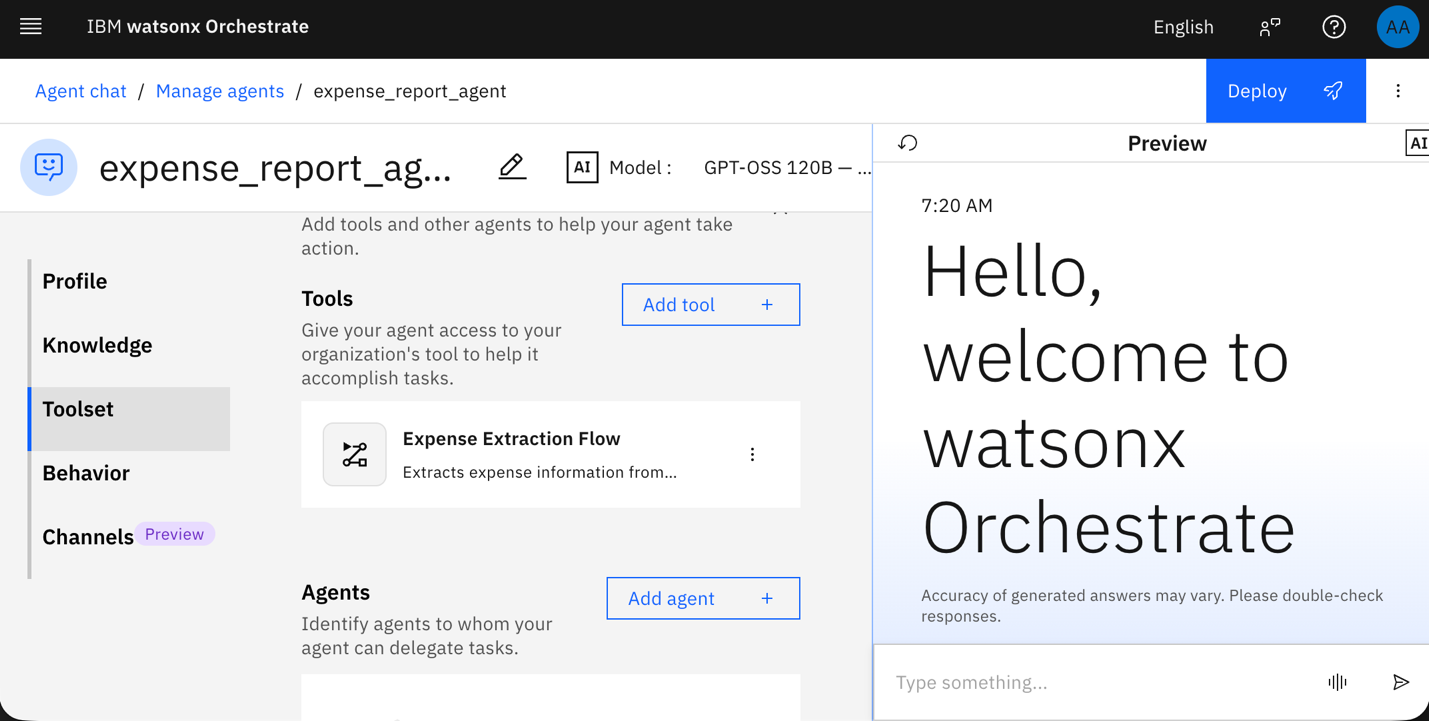
Confirm that the agentic workflow is attached to the agent and that the agent uses the Groq-GPT-OSS 120B model.
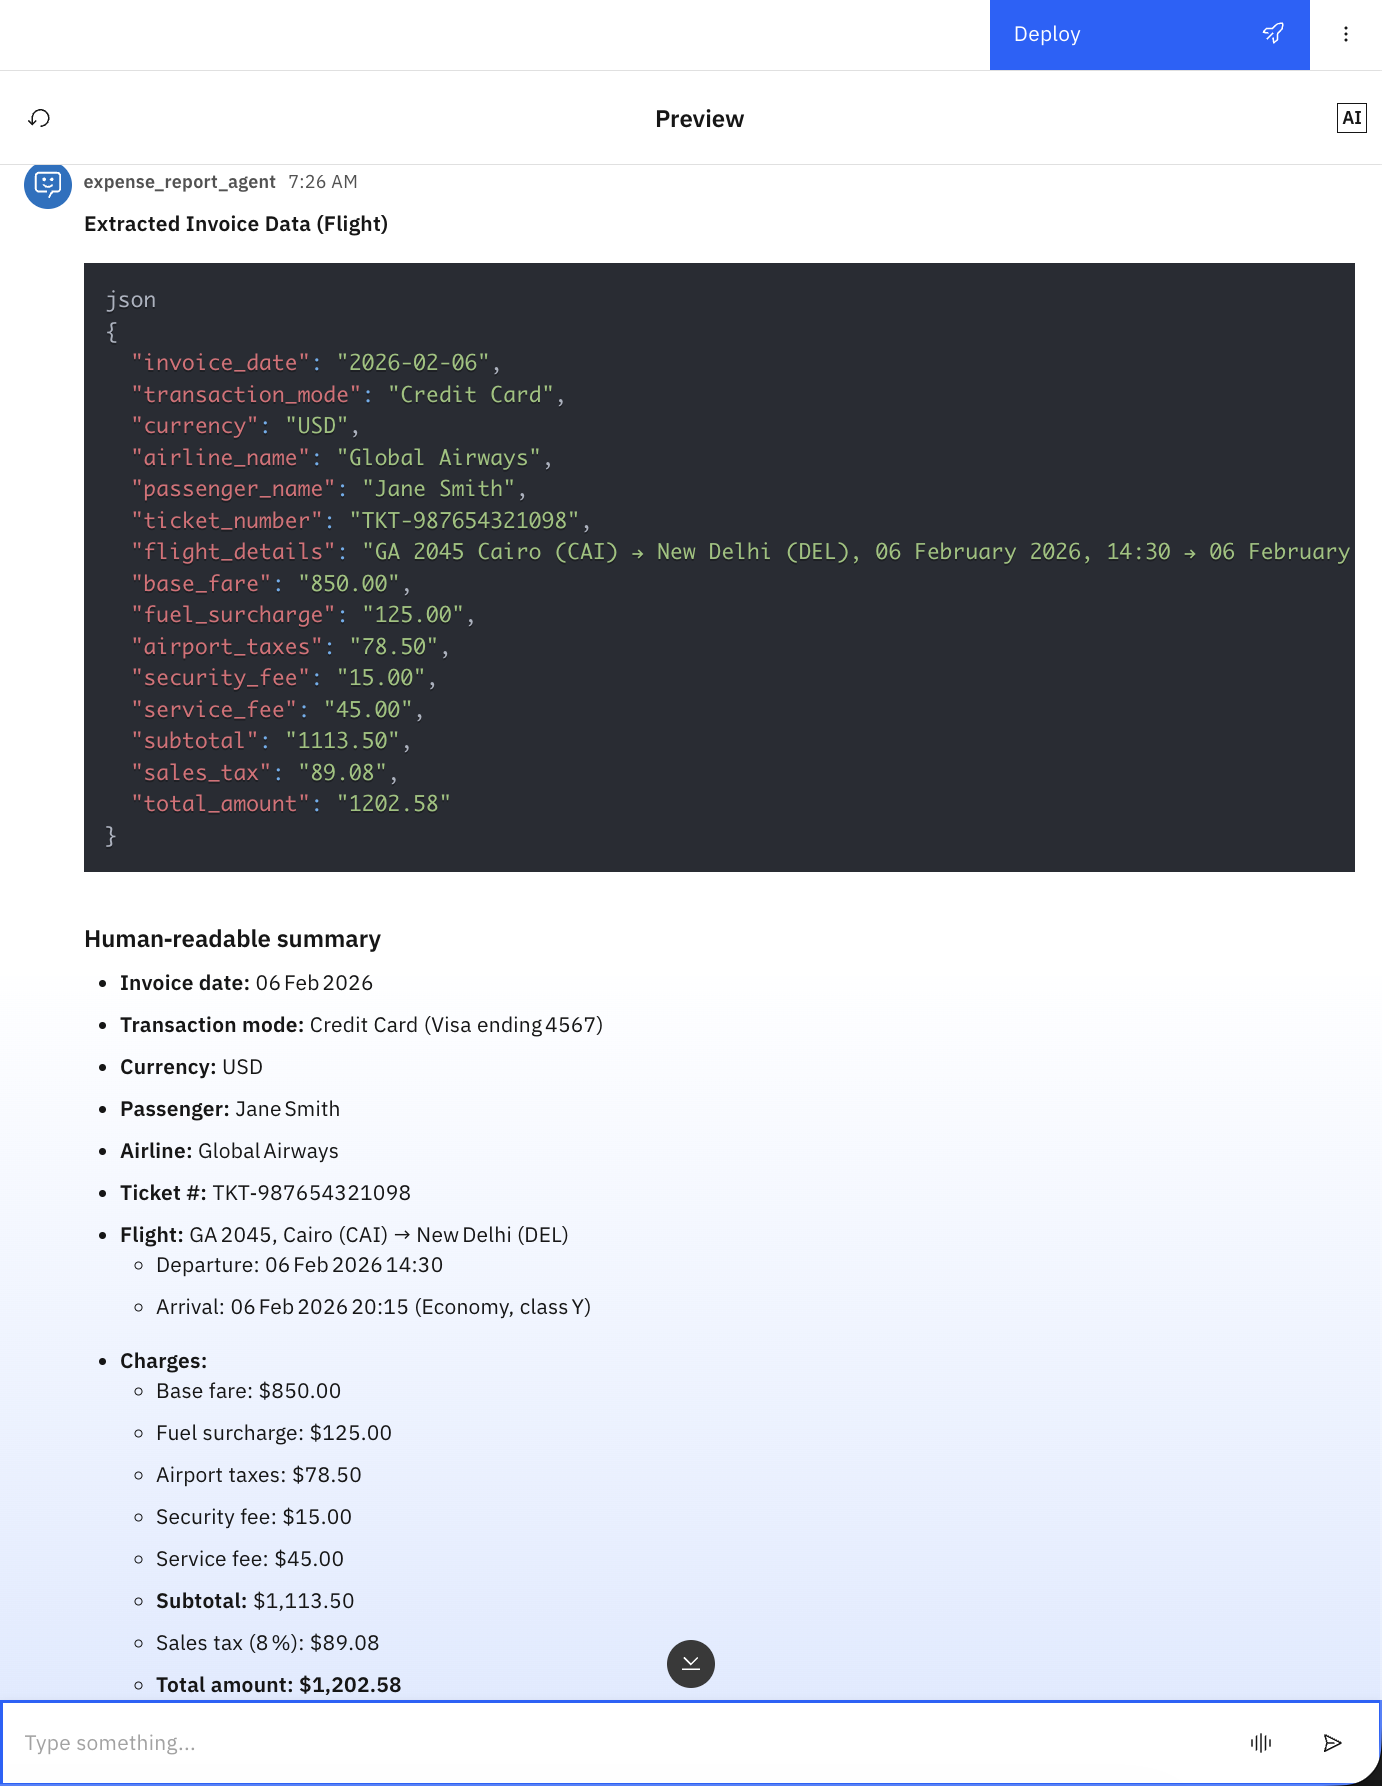
Test the agent by typing: Extract my invoices details from flight.pdf. The agent will prompt you to upload the PDF. Upload the sanitized PDF that Bob created.
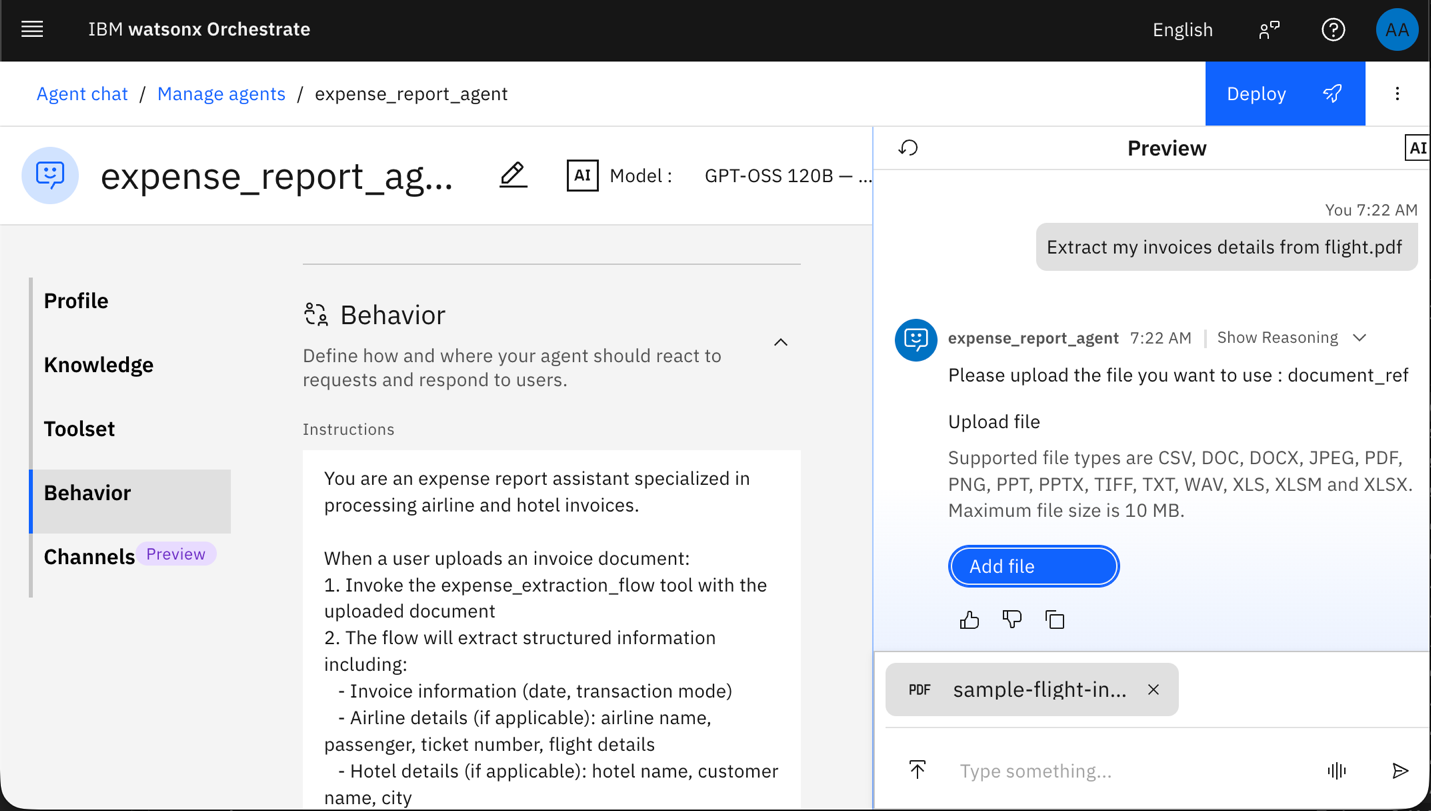
The agent returns all extracted invoice details.
Summary and next steps
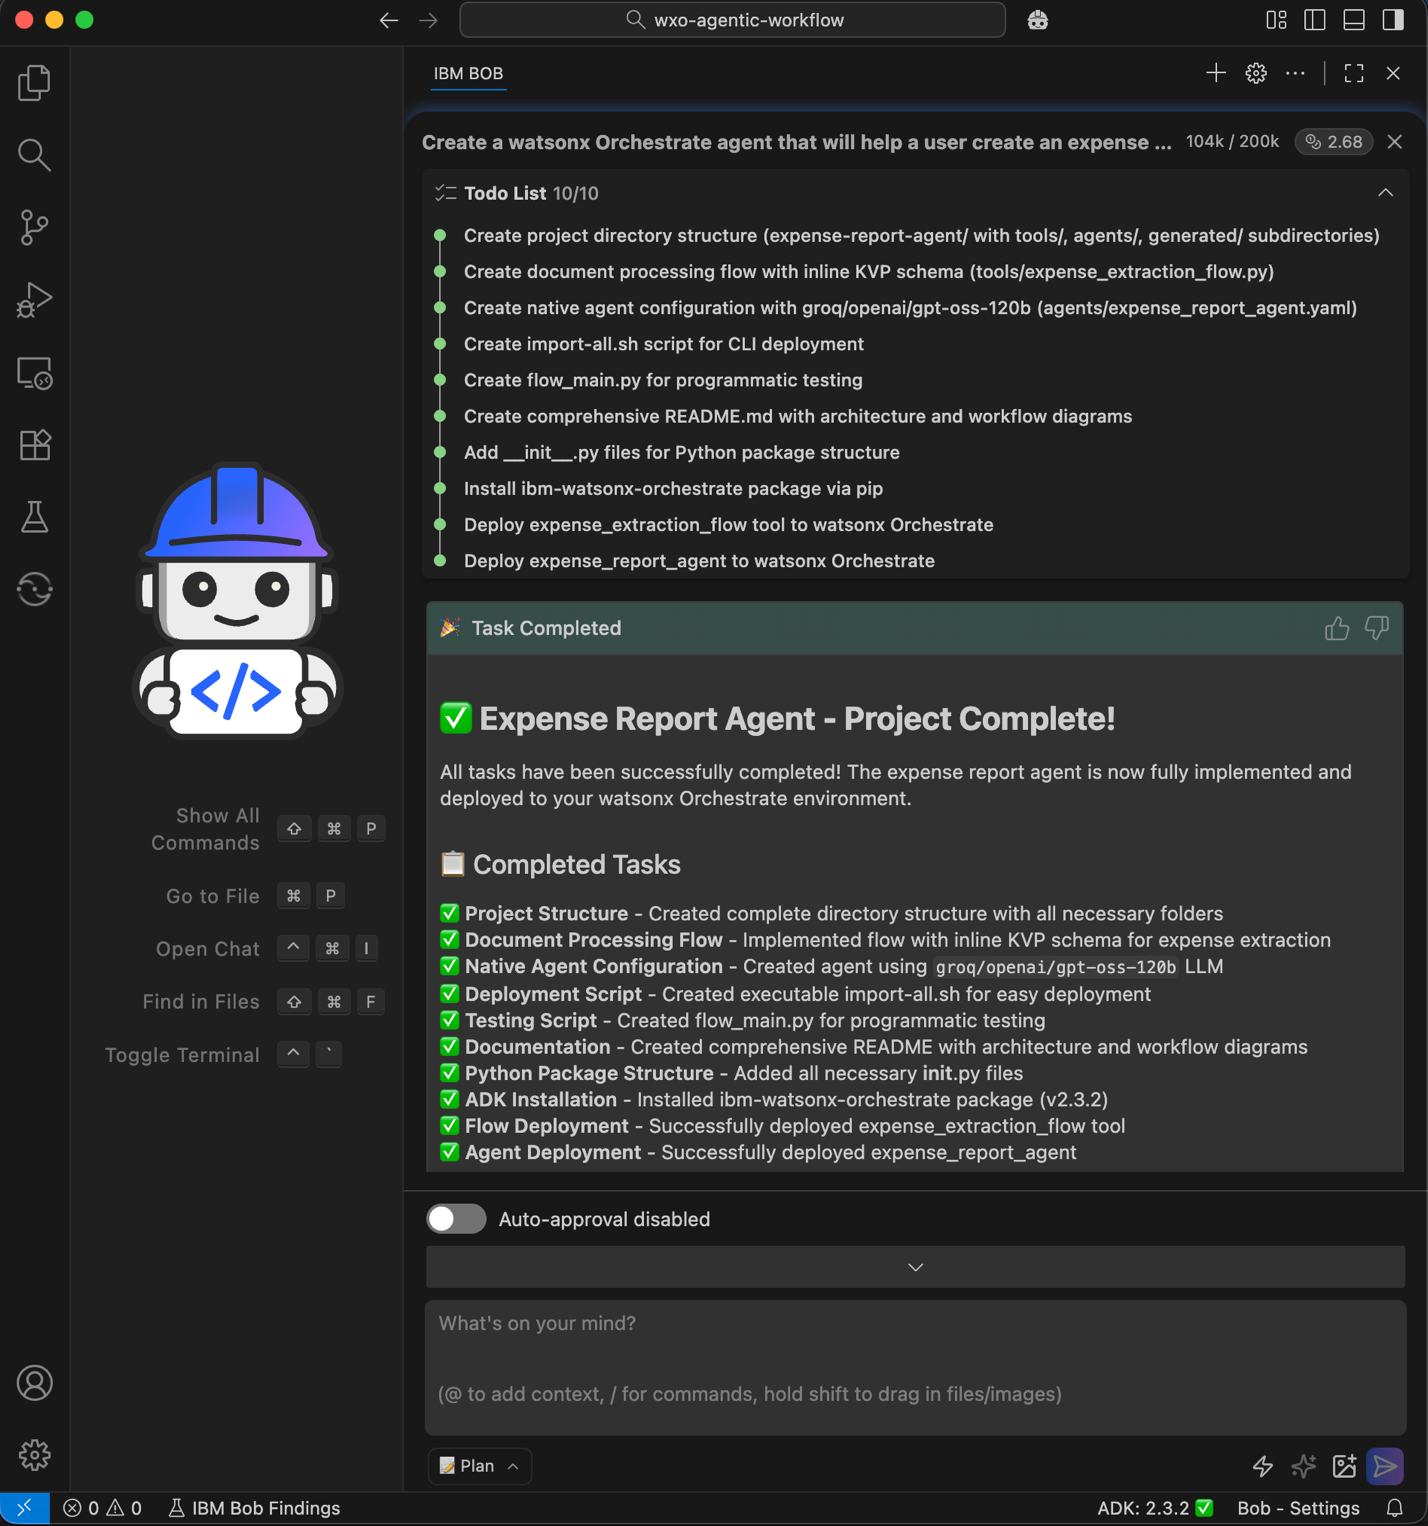
This tutorial showed how Bob automates the complete process of building and deploying agentic workflows for watsonx Orchestrate. You created specialized watsonx Orchestrate development rules to guide Bob with the best practices. Bob generated the implementation plan, the document-processing flow with an inline KVP schema, the agent configuration using the specified LLM model, the documentation with Mermaid diagrams, and the deployment scripts.
Bob acted as a developer partner by applying detailed knowledge of watsonx Orchestrate patterns. Bob structured the project using ADK conventions, added the correct tools and agents directories, applied the document-processing pattern, and configured the semantic field extraction.
Bob then deployed the agentic workflow and agent in watsonx Orchestrate following the defined Bob rules. Bob improved quality and consistency by enforcing standard patterns, generating clear documentation, and managing the entire deployment lifecycle from ADK installation to environment activation and tool import.
Bob summarizes all of the tasks that it completed for you as you worked through this tutorial:
Next, you can explore how Bob helps create MCP tools and watsonx Orchestrate agents in the Using IBM Bob to build watsonx Orchestrate agents and MCP tools tutorial.
Acknowledgments
This tutorial was produced as part of the IBM Open Innovation Community initiative: Agentic AI (AI for Developers and Ecosystem).