About cookies on this site Our websites require some cookies to function properly (required). In addition, other cookies may be used with your consent to analyze site usage, improve the user experience and for advertising. For more information, please review your options. By visiting our website, you agree to our processing of information as described in IBM’sprivacy statement. To provide a smooth navigation, your cookie preferences will be shared across the IBM web domains listed here.
Tutorial
Generate machine learning model pipelines to choose the best model for your problem
AutoAI automates machine learning tasks like preparing data for modeling, choosing the best algorithm for your problem, and more
On this page
It was inevitable to expect artificial intelligence, which facilitates every aspect of our lives, to facilitate its own development process. Building better models requires more complex time-intensive and costly AI procedures, which require expertise from cleansing the data to feature engineering, designing the architectures to parameter optimization. To ease this process and make it efficient in terms of time and effort, you need to automate these workloads. With the aim of creating AI for AI, IBM introduced a service on Watson™ Studio called AutoAI.
AutoAI is a service that automates machine learning tasks to ease the tasks of data scientists. It automatically prepares your data for modeling, chooses the best algorithm for your problem, and creates pipelines for the trained models.
Learning objectives
This tutorial explains the benefits of the AutoAI service on a use case so you can have a better understanding of how regression and classification problems can be handled without any code and how the tasks (such as feature engineering, model selection, and hyperparameter tuning) are done with this service. The tutorial also includes details for choosing the best model among the pipelines and how to deploy and use these models.
Prerequisites
To follow along, you must:
- Sign up for an IBM Cloud account.
- Create a Cloud Object Storage Service instance.
- Create a Watson Studio Service instance.
- Create a Watson Machine Learning Service instance.
- Have basic knowledge of machine learning algorithms.
Estimated time
This tutorial takes approximately 20 minutes to complete, including the training in AutoAI.
Steps
After creating an IBM Cloud account and signing in, you can follow these steps.
Step 1. Create required service instances
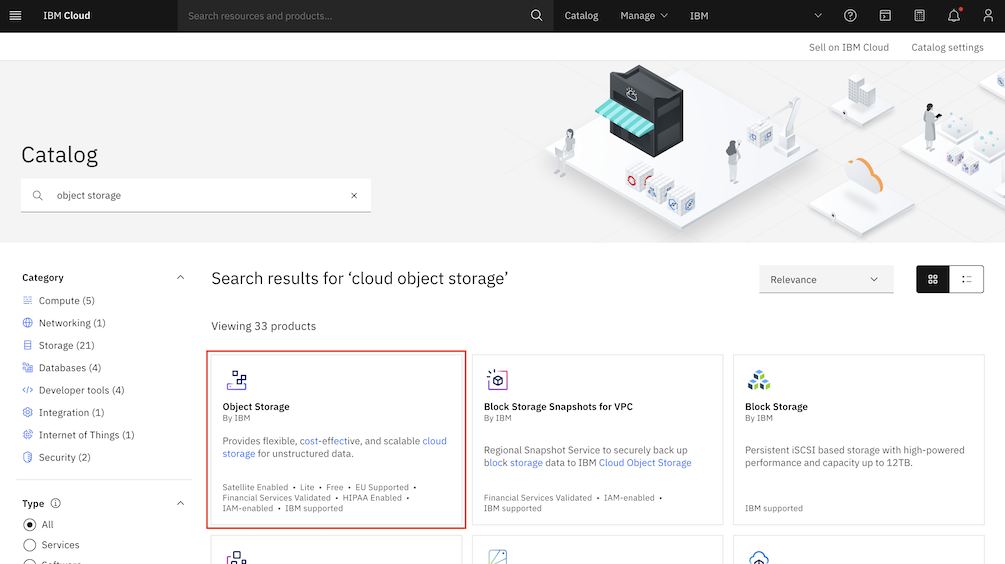
Object Storage
To store the data, you need a storage service to be linked with your project later. To do that, search for Storage in the IBM Cloud Catalog, or go to the Storage tab from the left menu on the same page and click the Object Storage service.
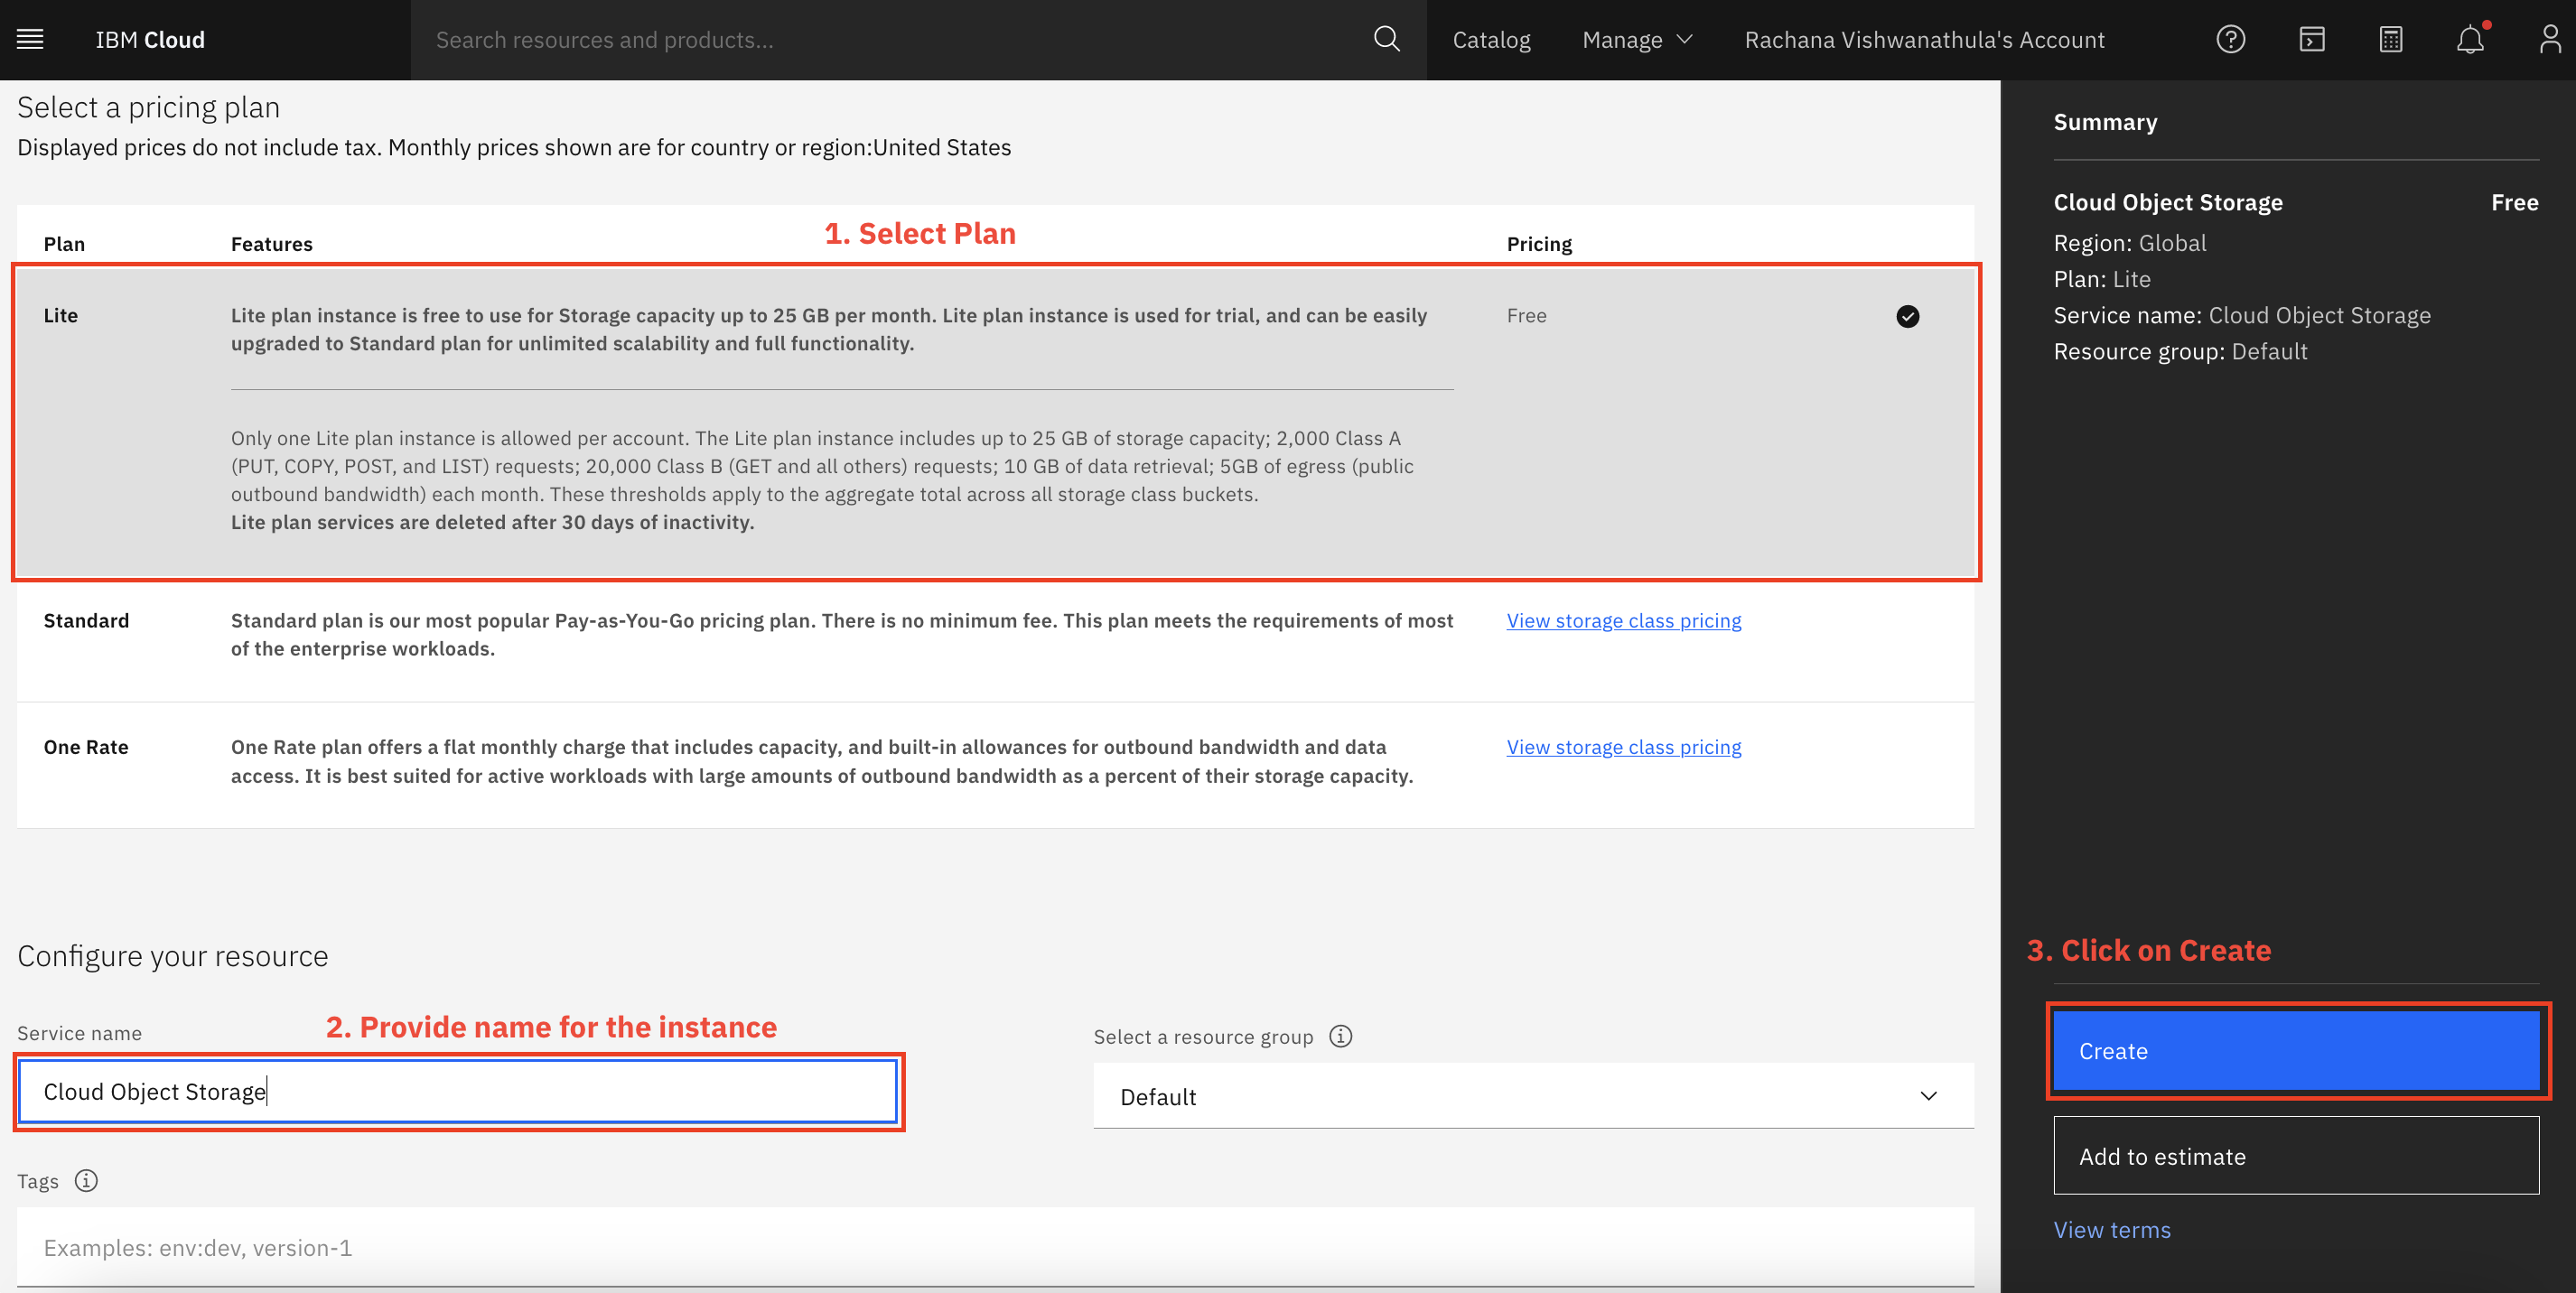
Select IBM Cloud.
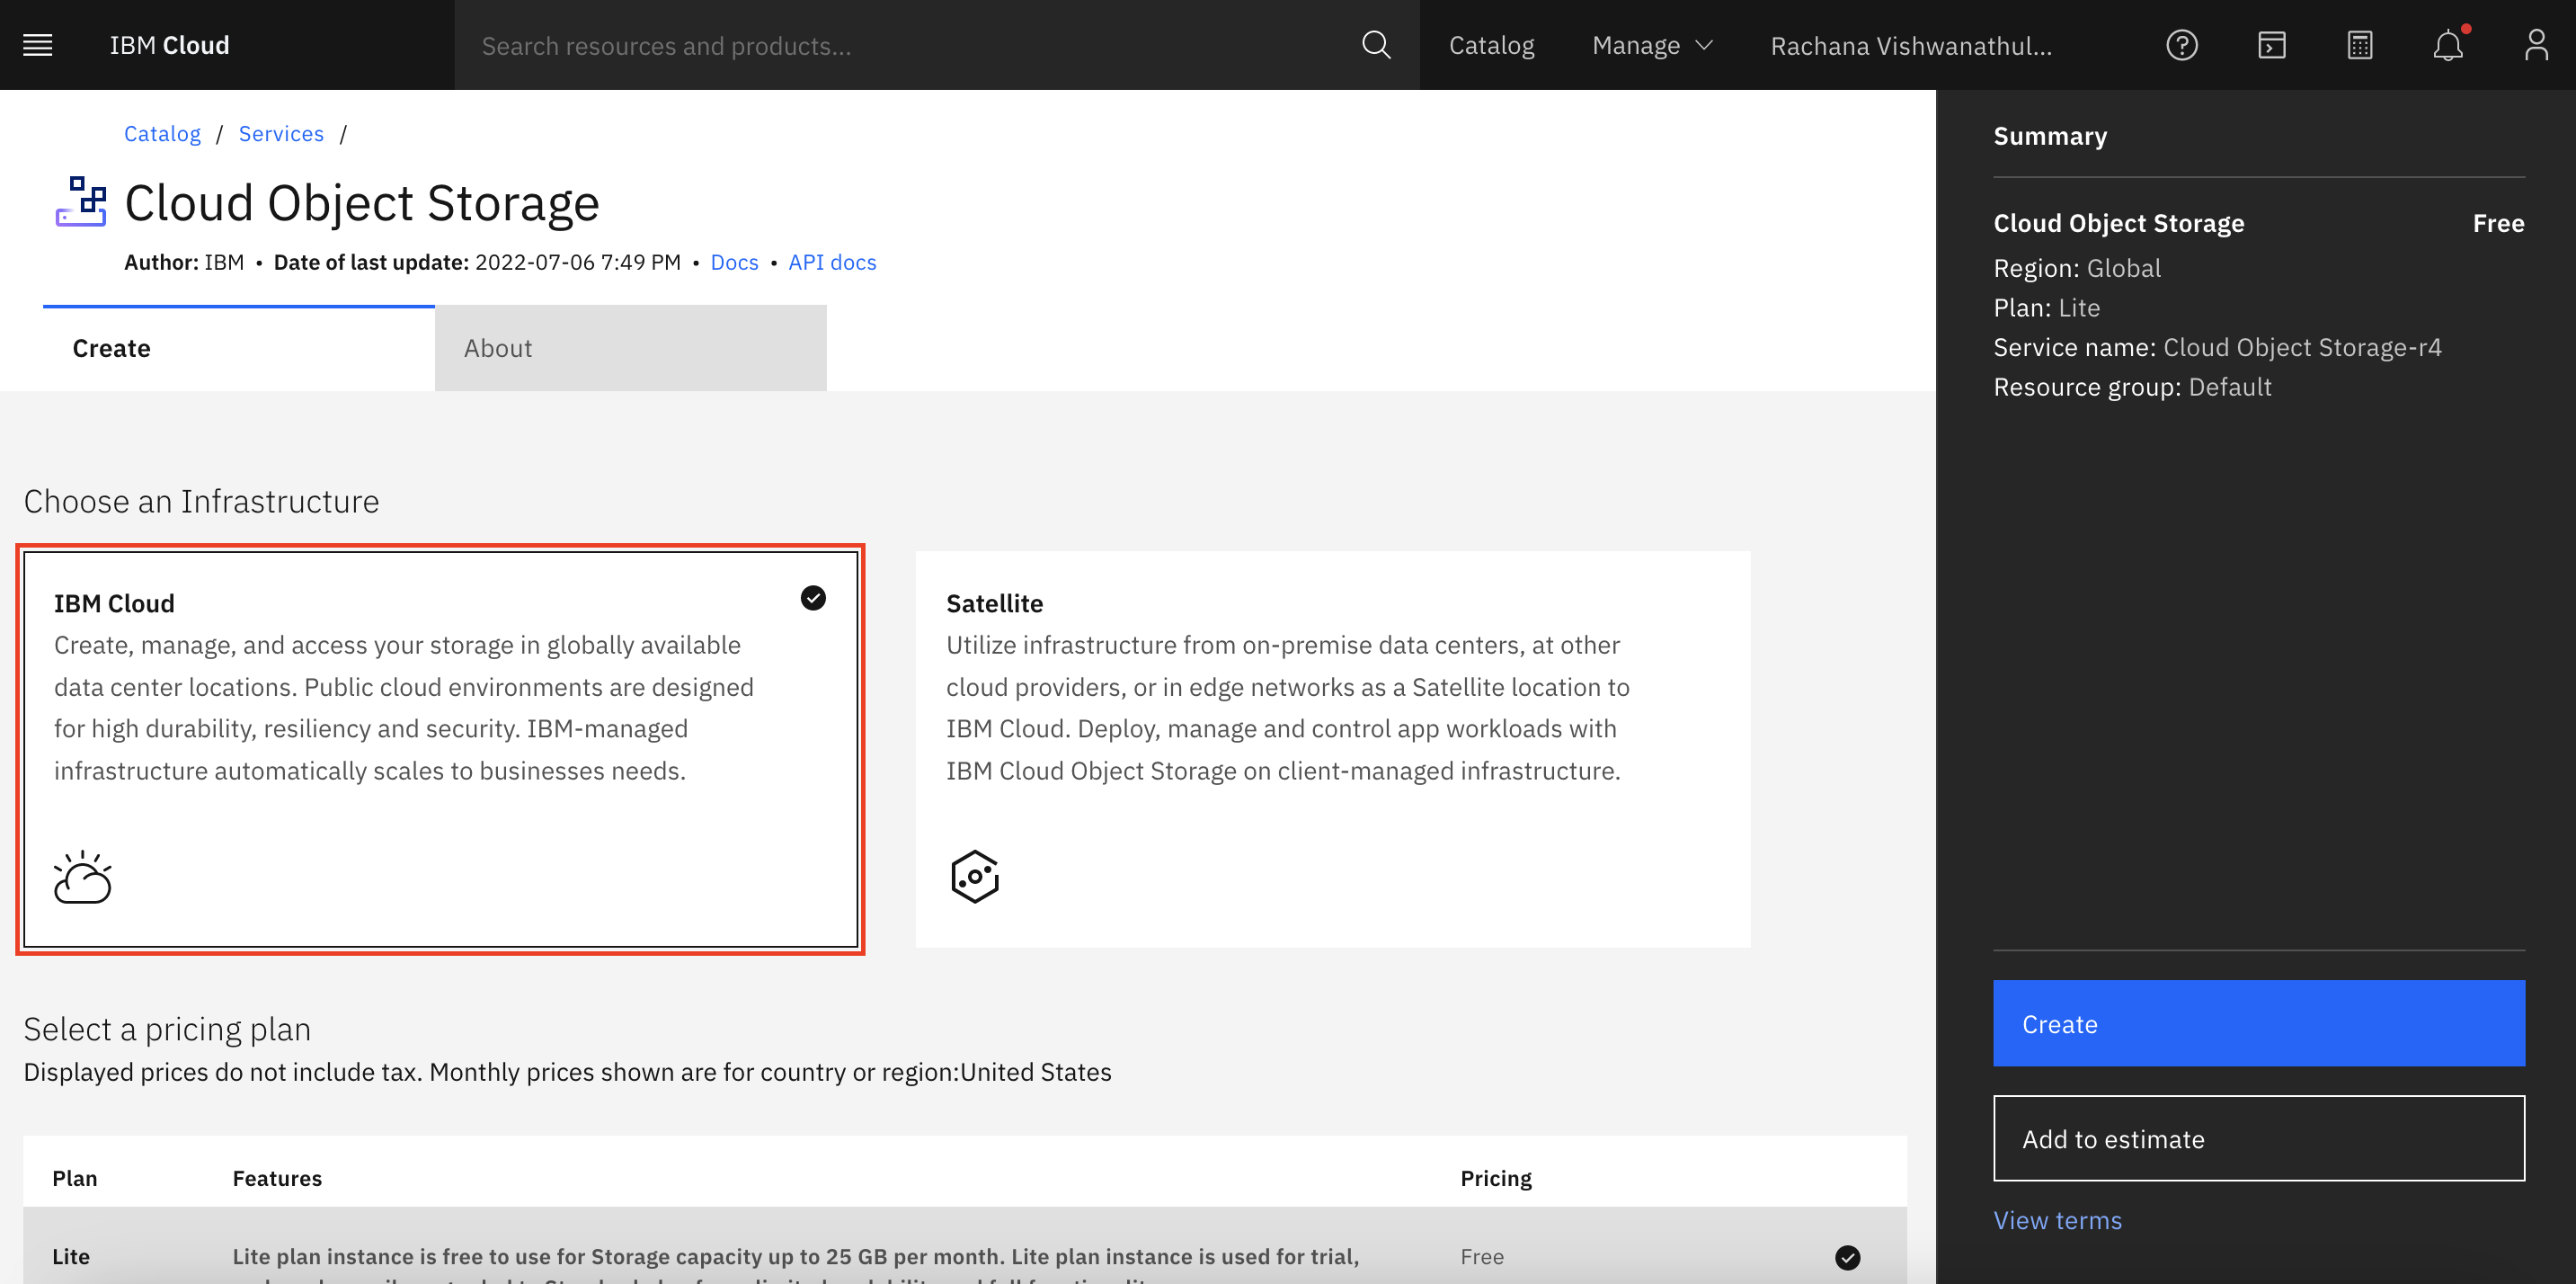
Optionally, you can name this service instance, and click Create.
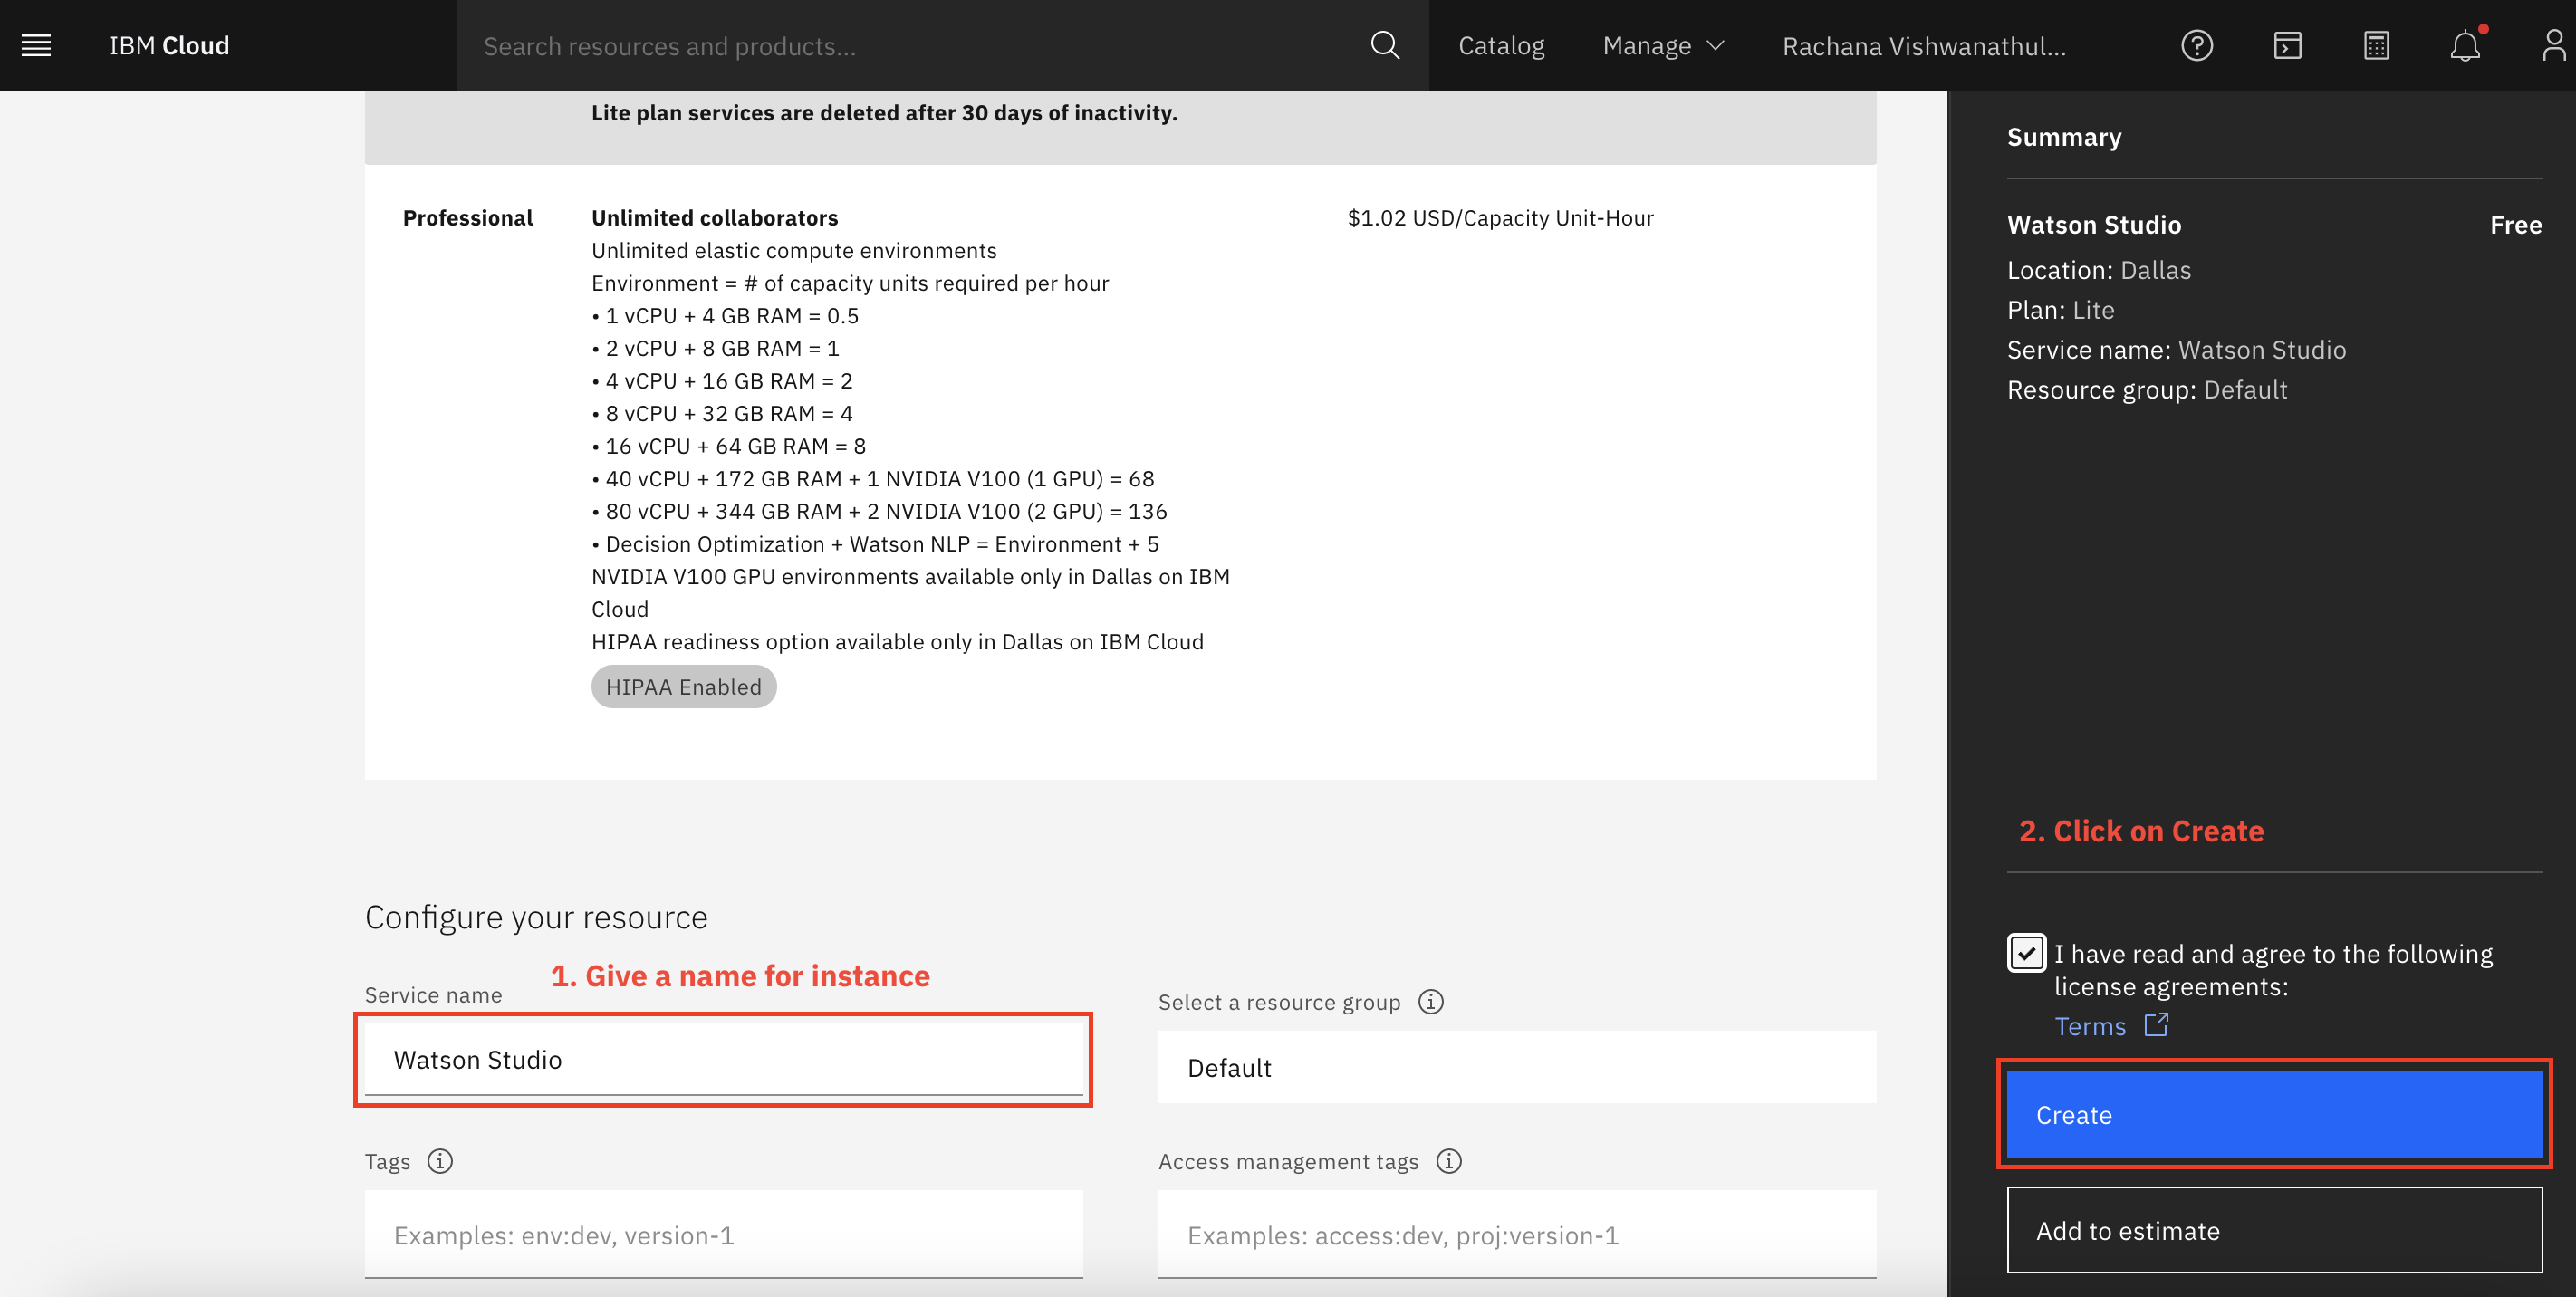
Watson Studio
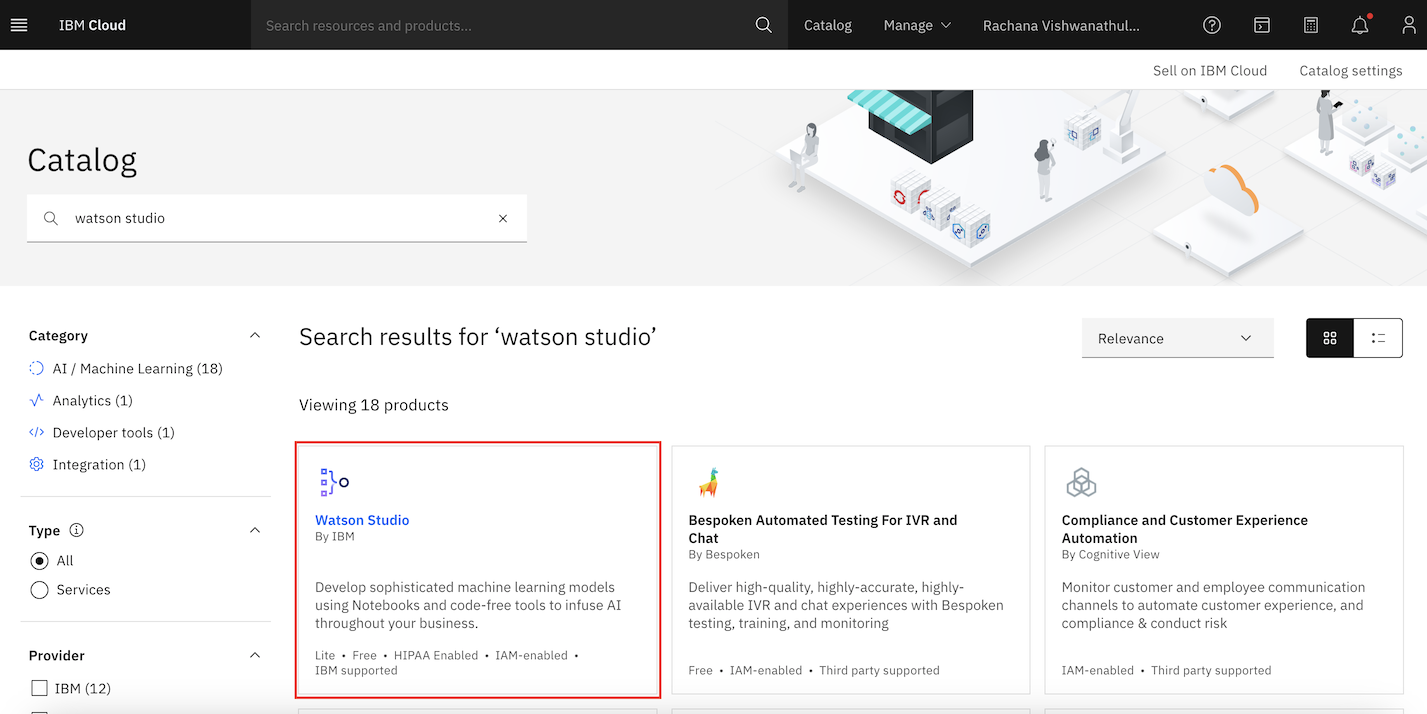
Search for Watson Studio in the IBM Cloud Catalog, and click the Watson Studio tile.
Select the location and plan, and scroll down.
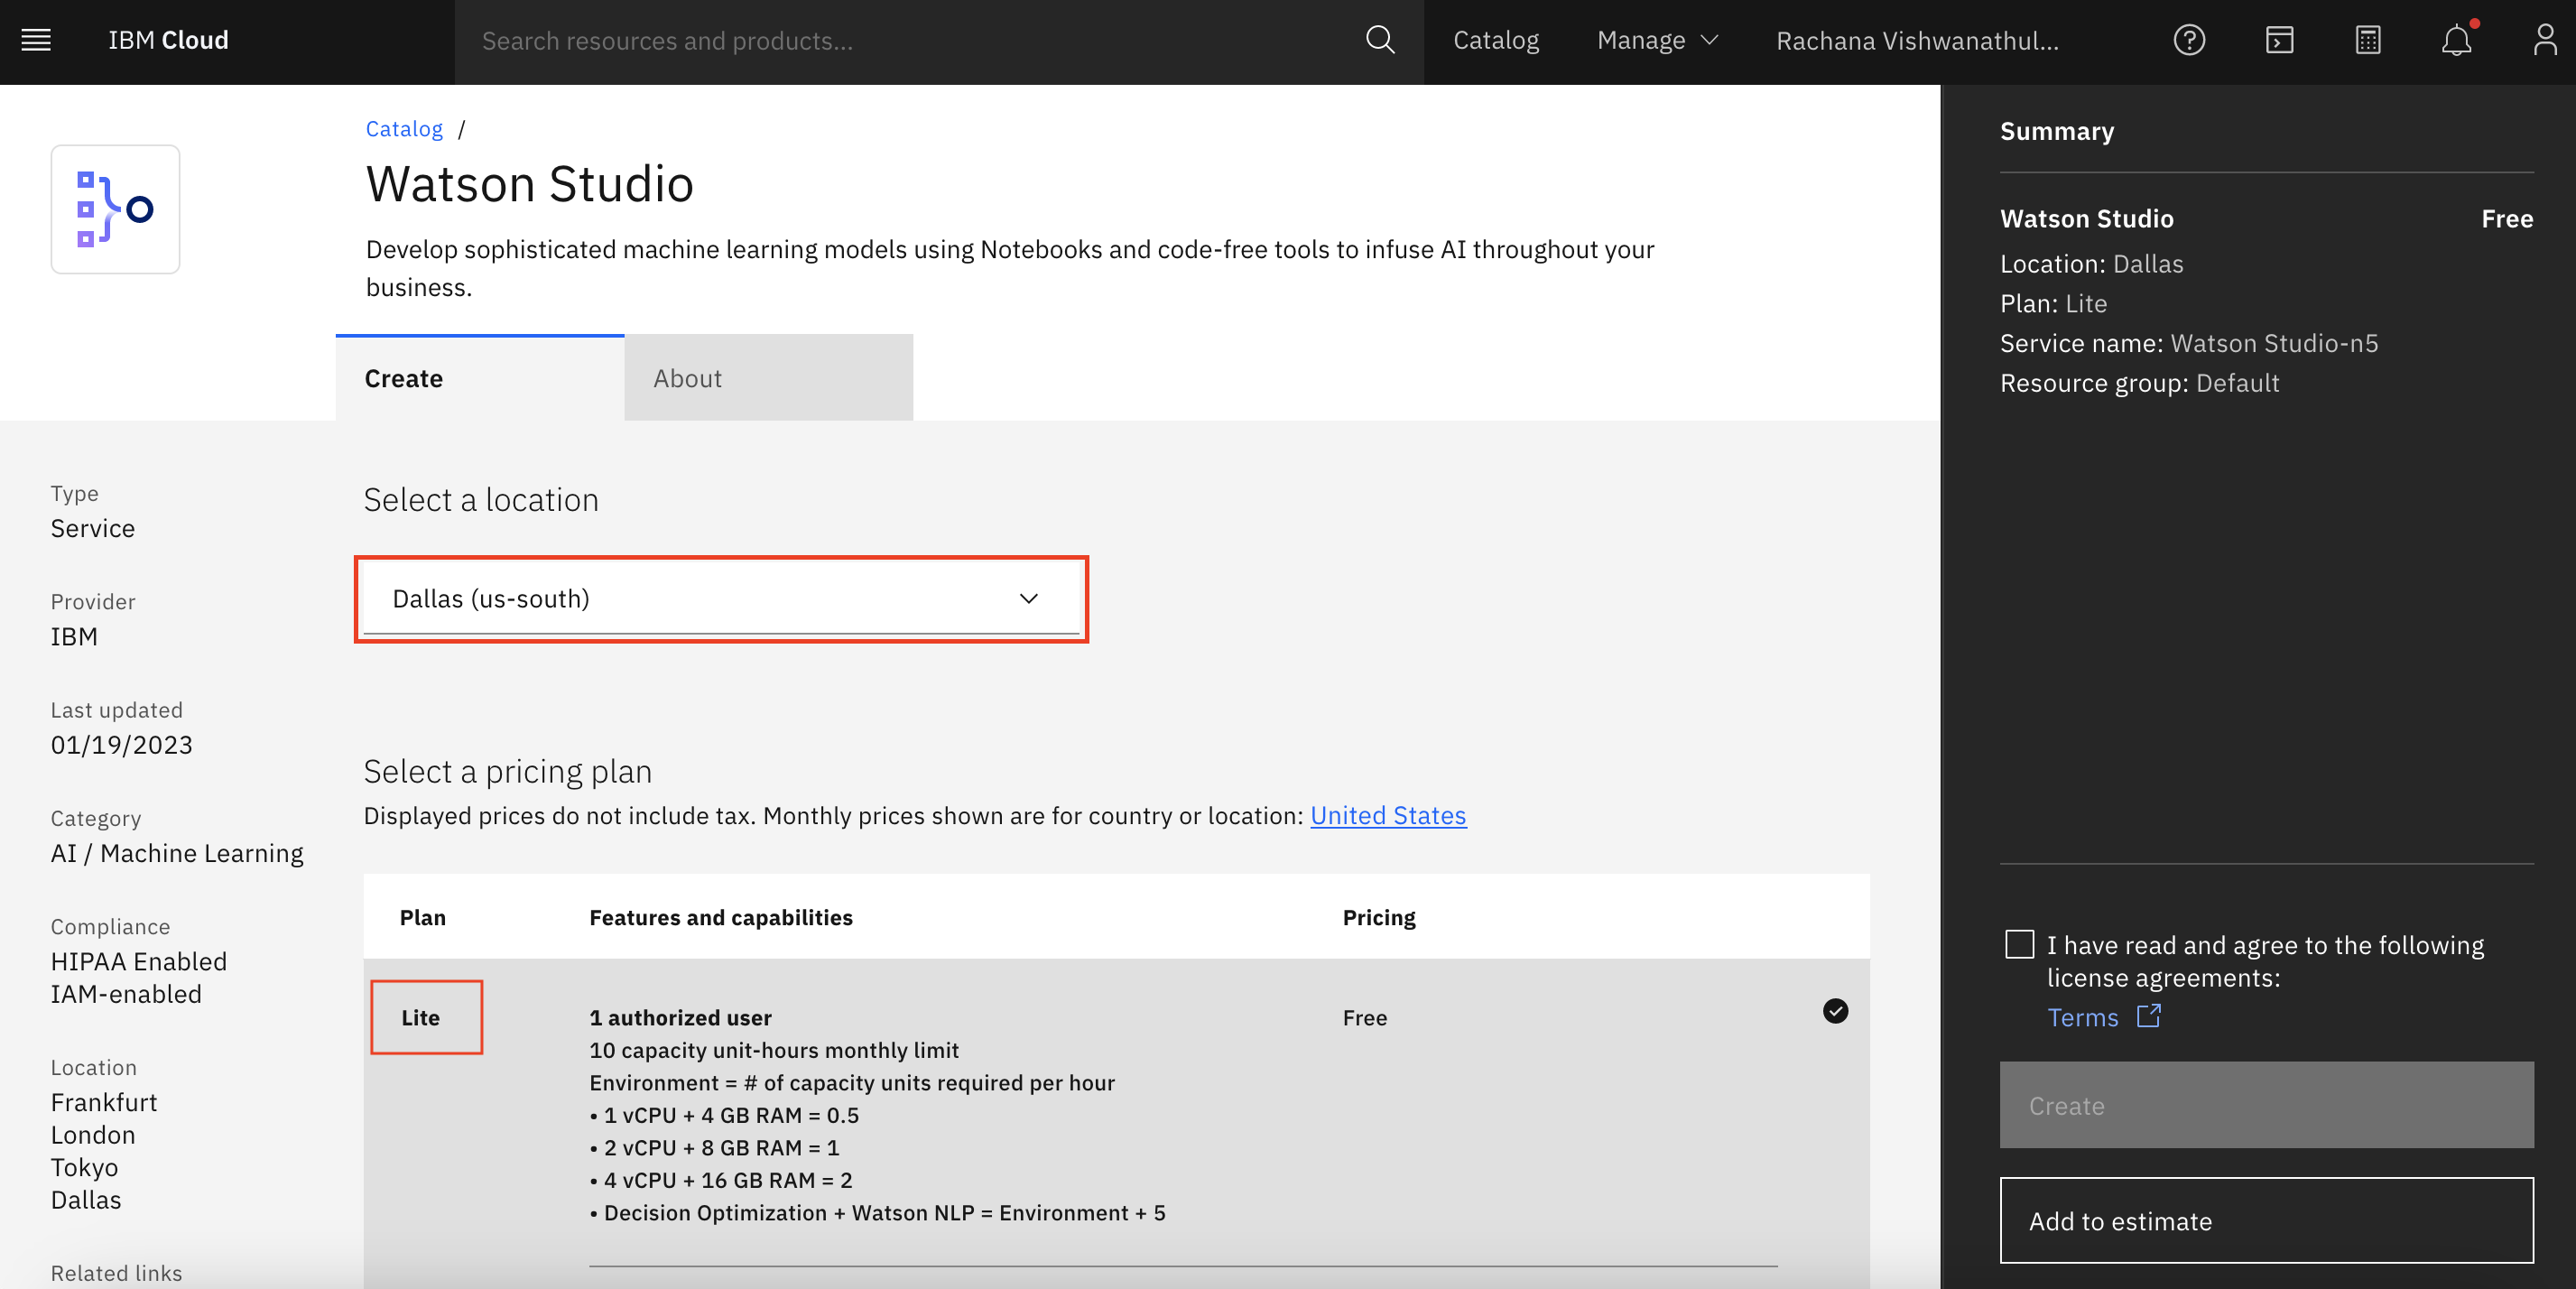
As you did with the Object Storage service, you can name your service, and click Create.
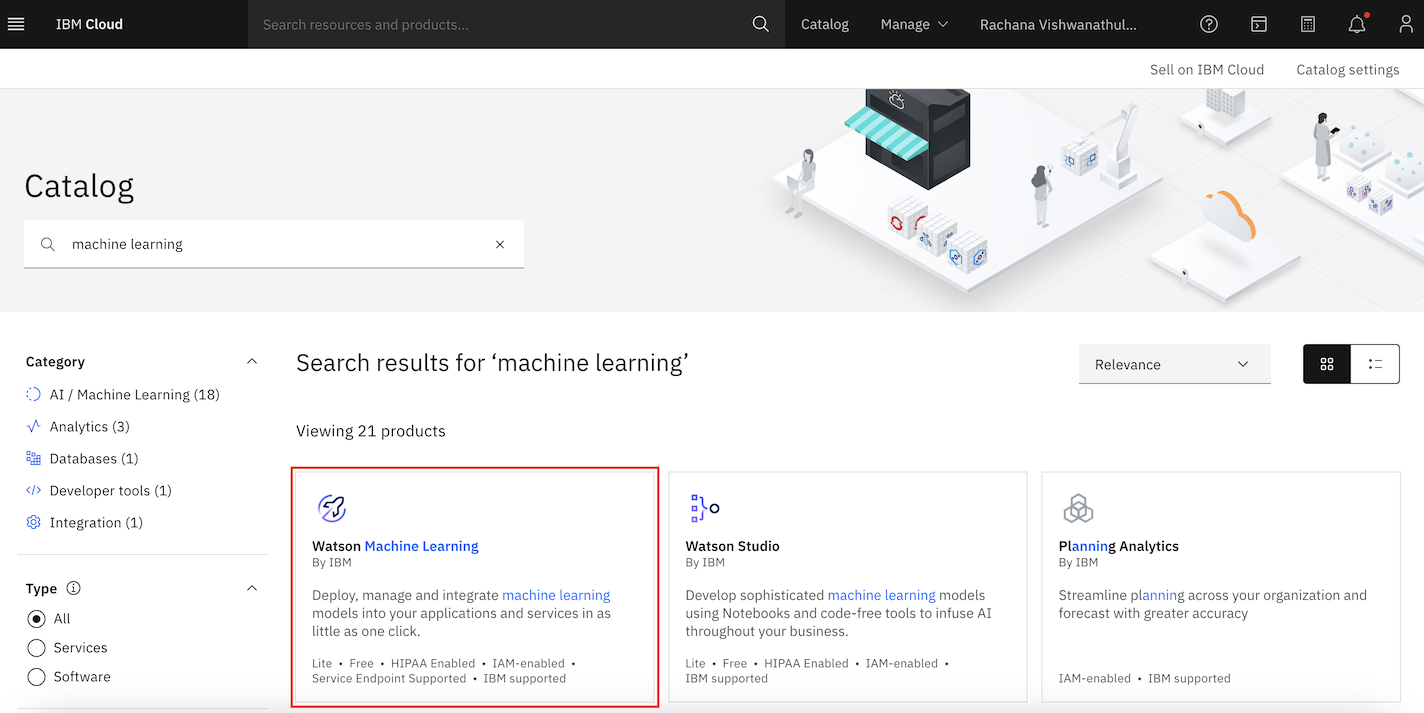
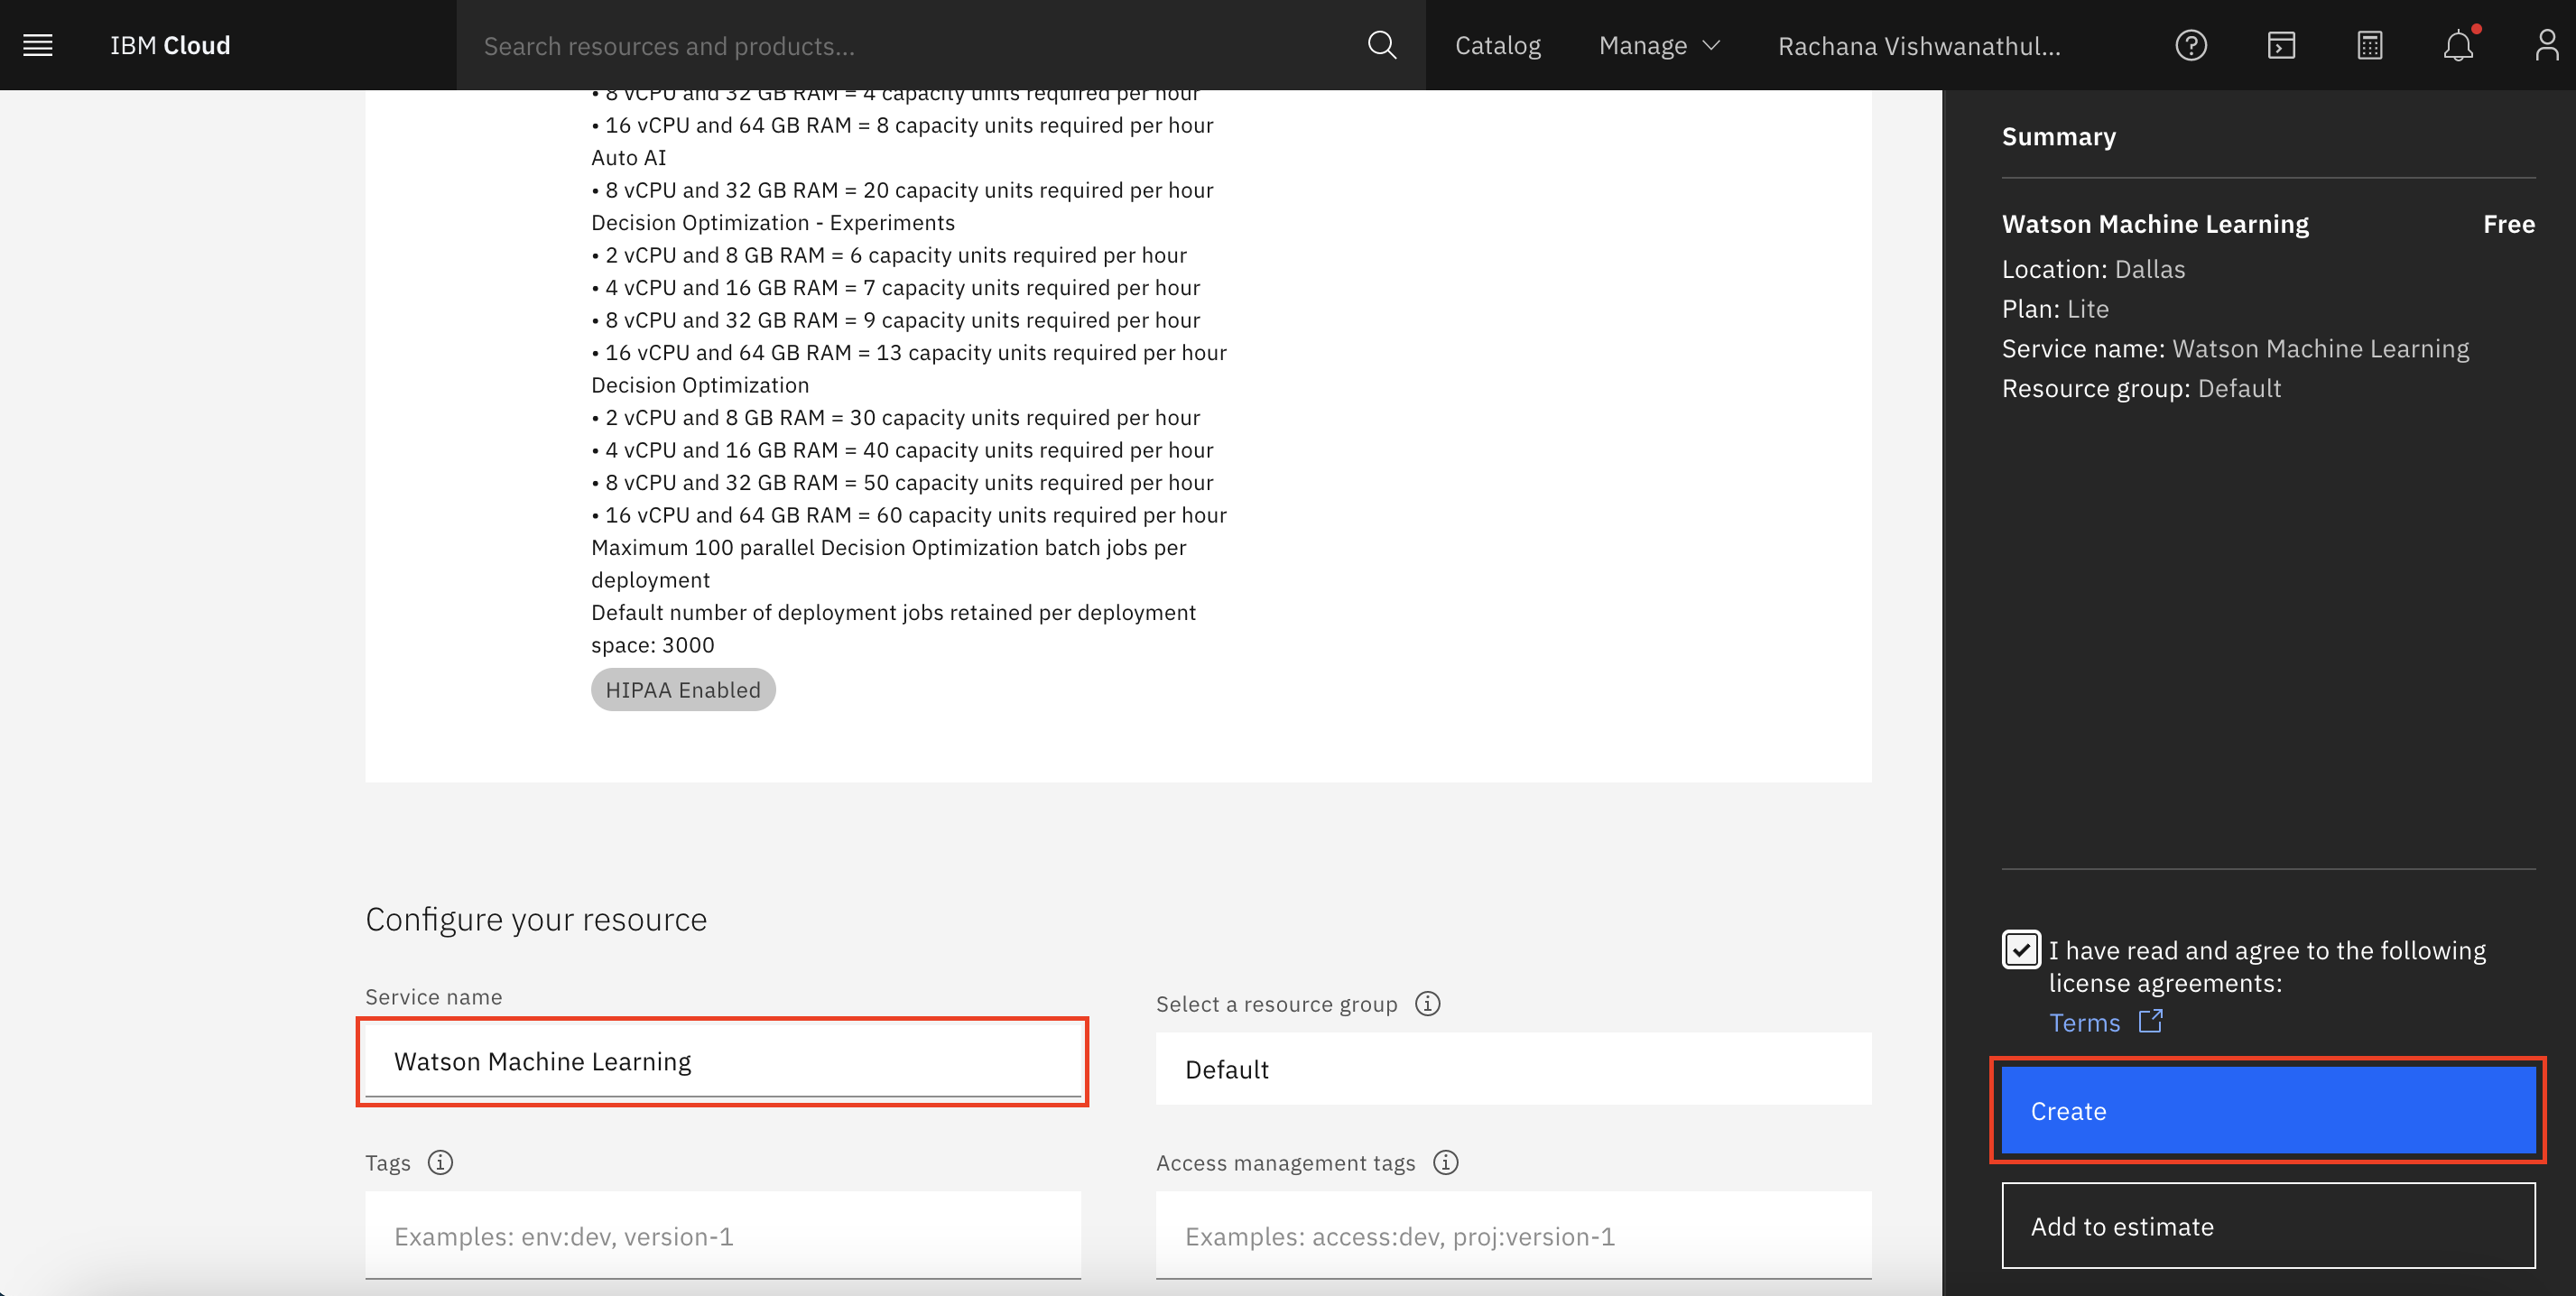
Watson Machine Learning
Search for Watson Machine Learning in the IBM Cloud Catalog, and click the Watson Machine Learning service tile.
Select the location for the instance and the plan.
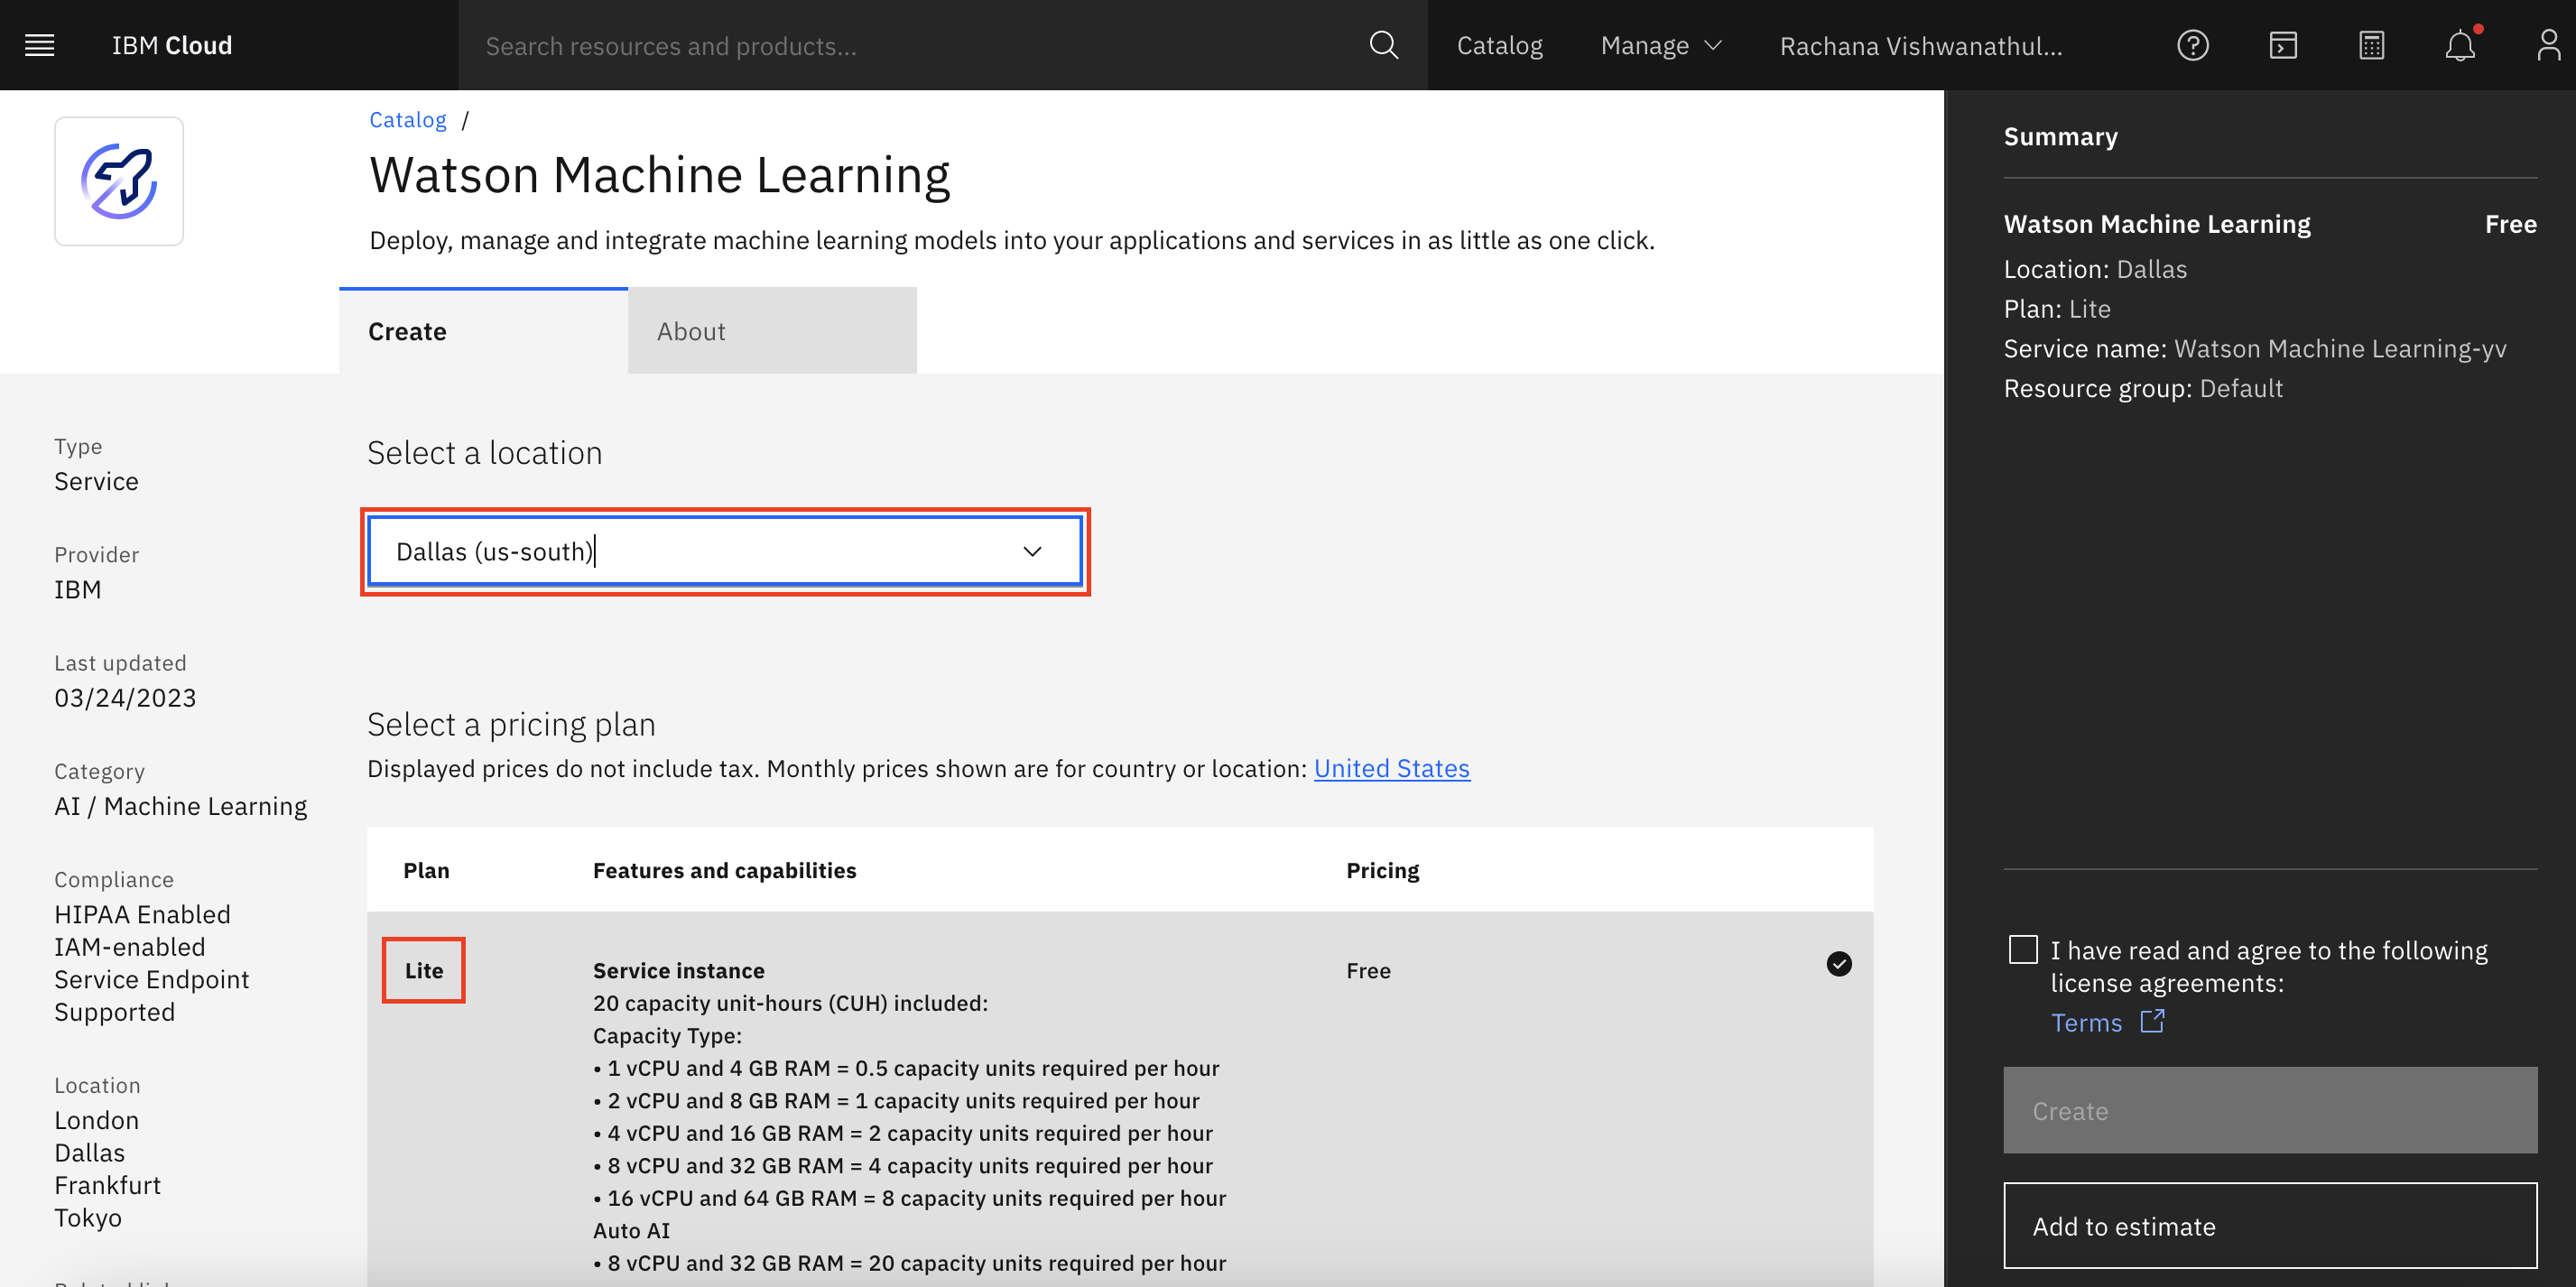
Provide a name for the instance, and click Create.
Launch service
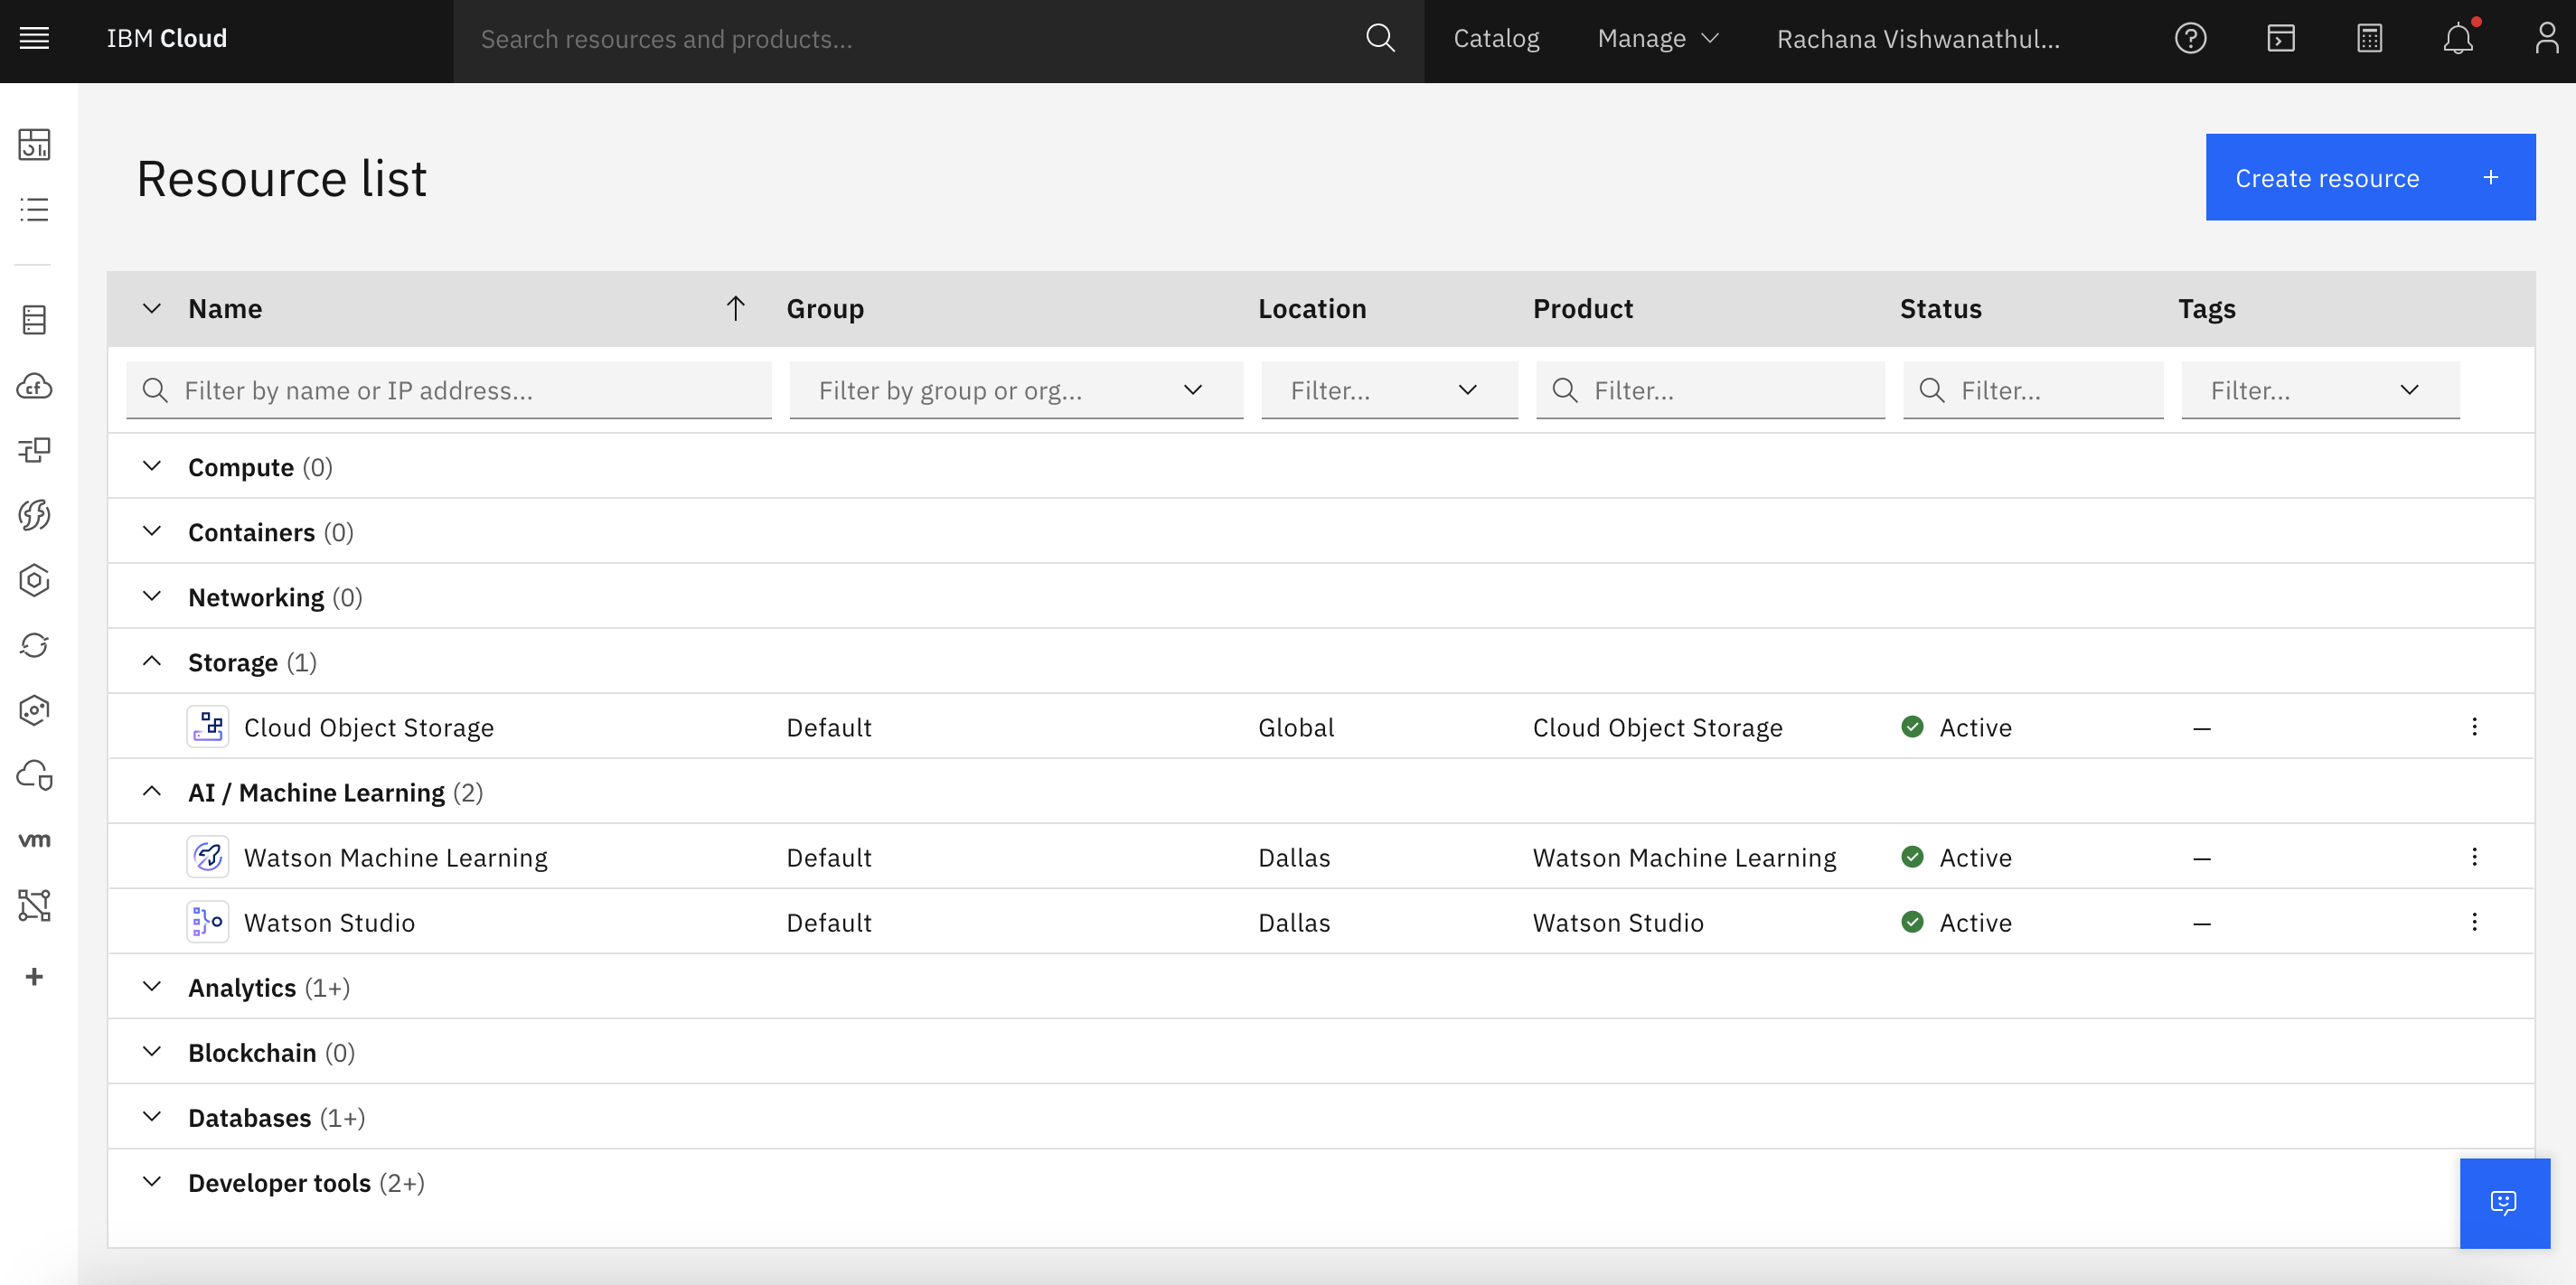
After all of the services are created, go to Resource list, and ensure that all of the services are created.
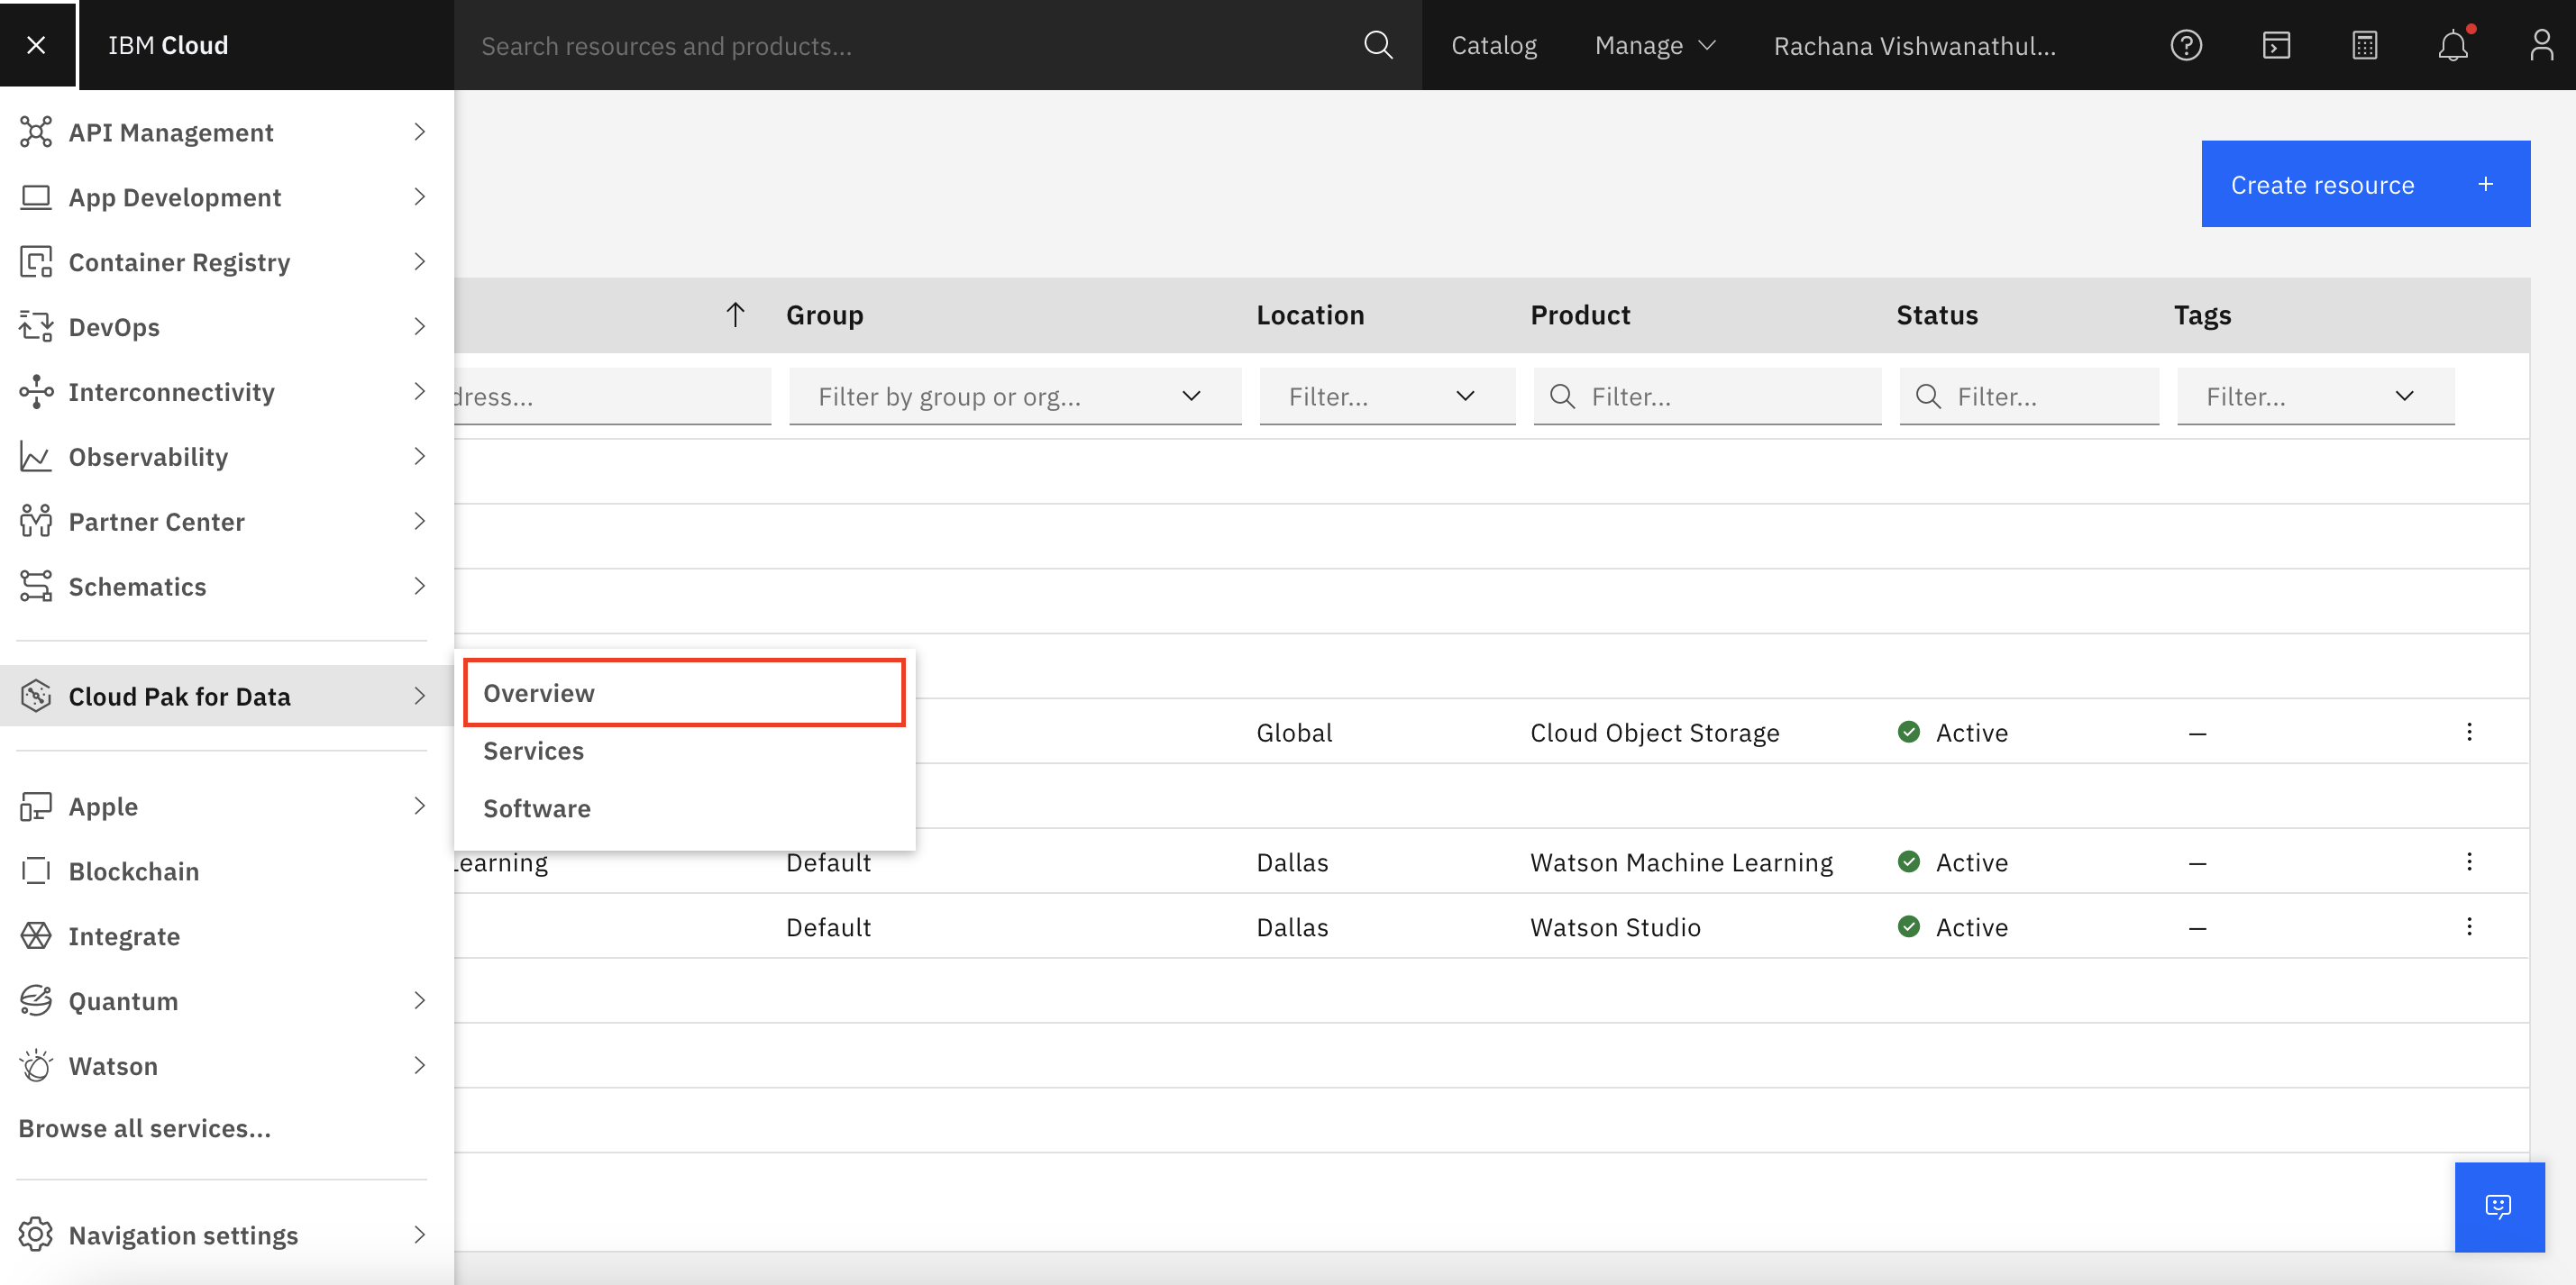
From the Navigation menu, scroll down to Cloud Pak for Data, and select Overview.
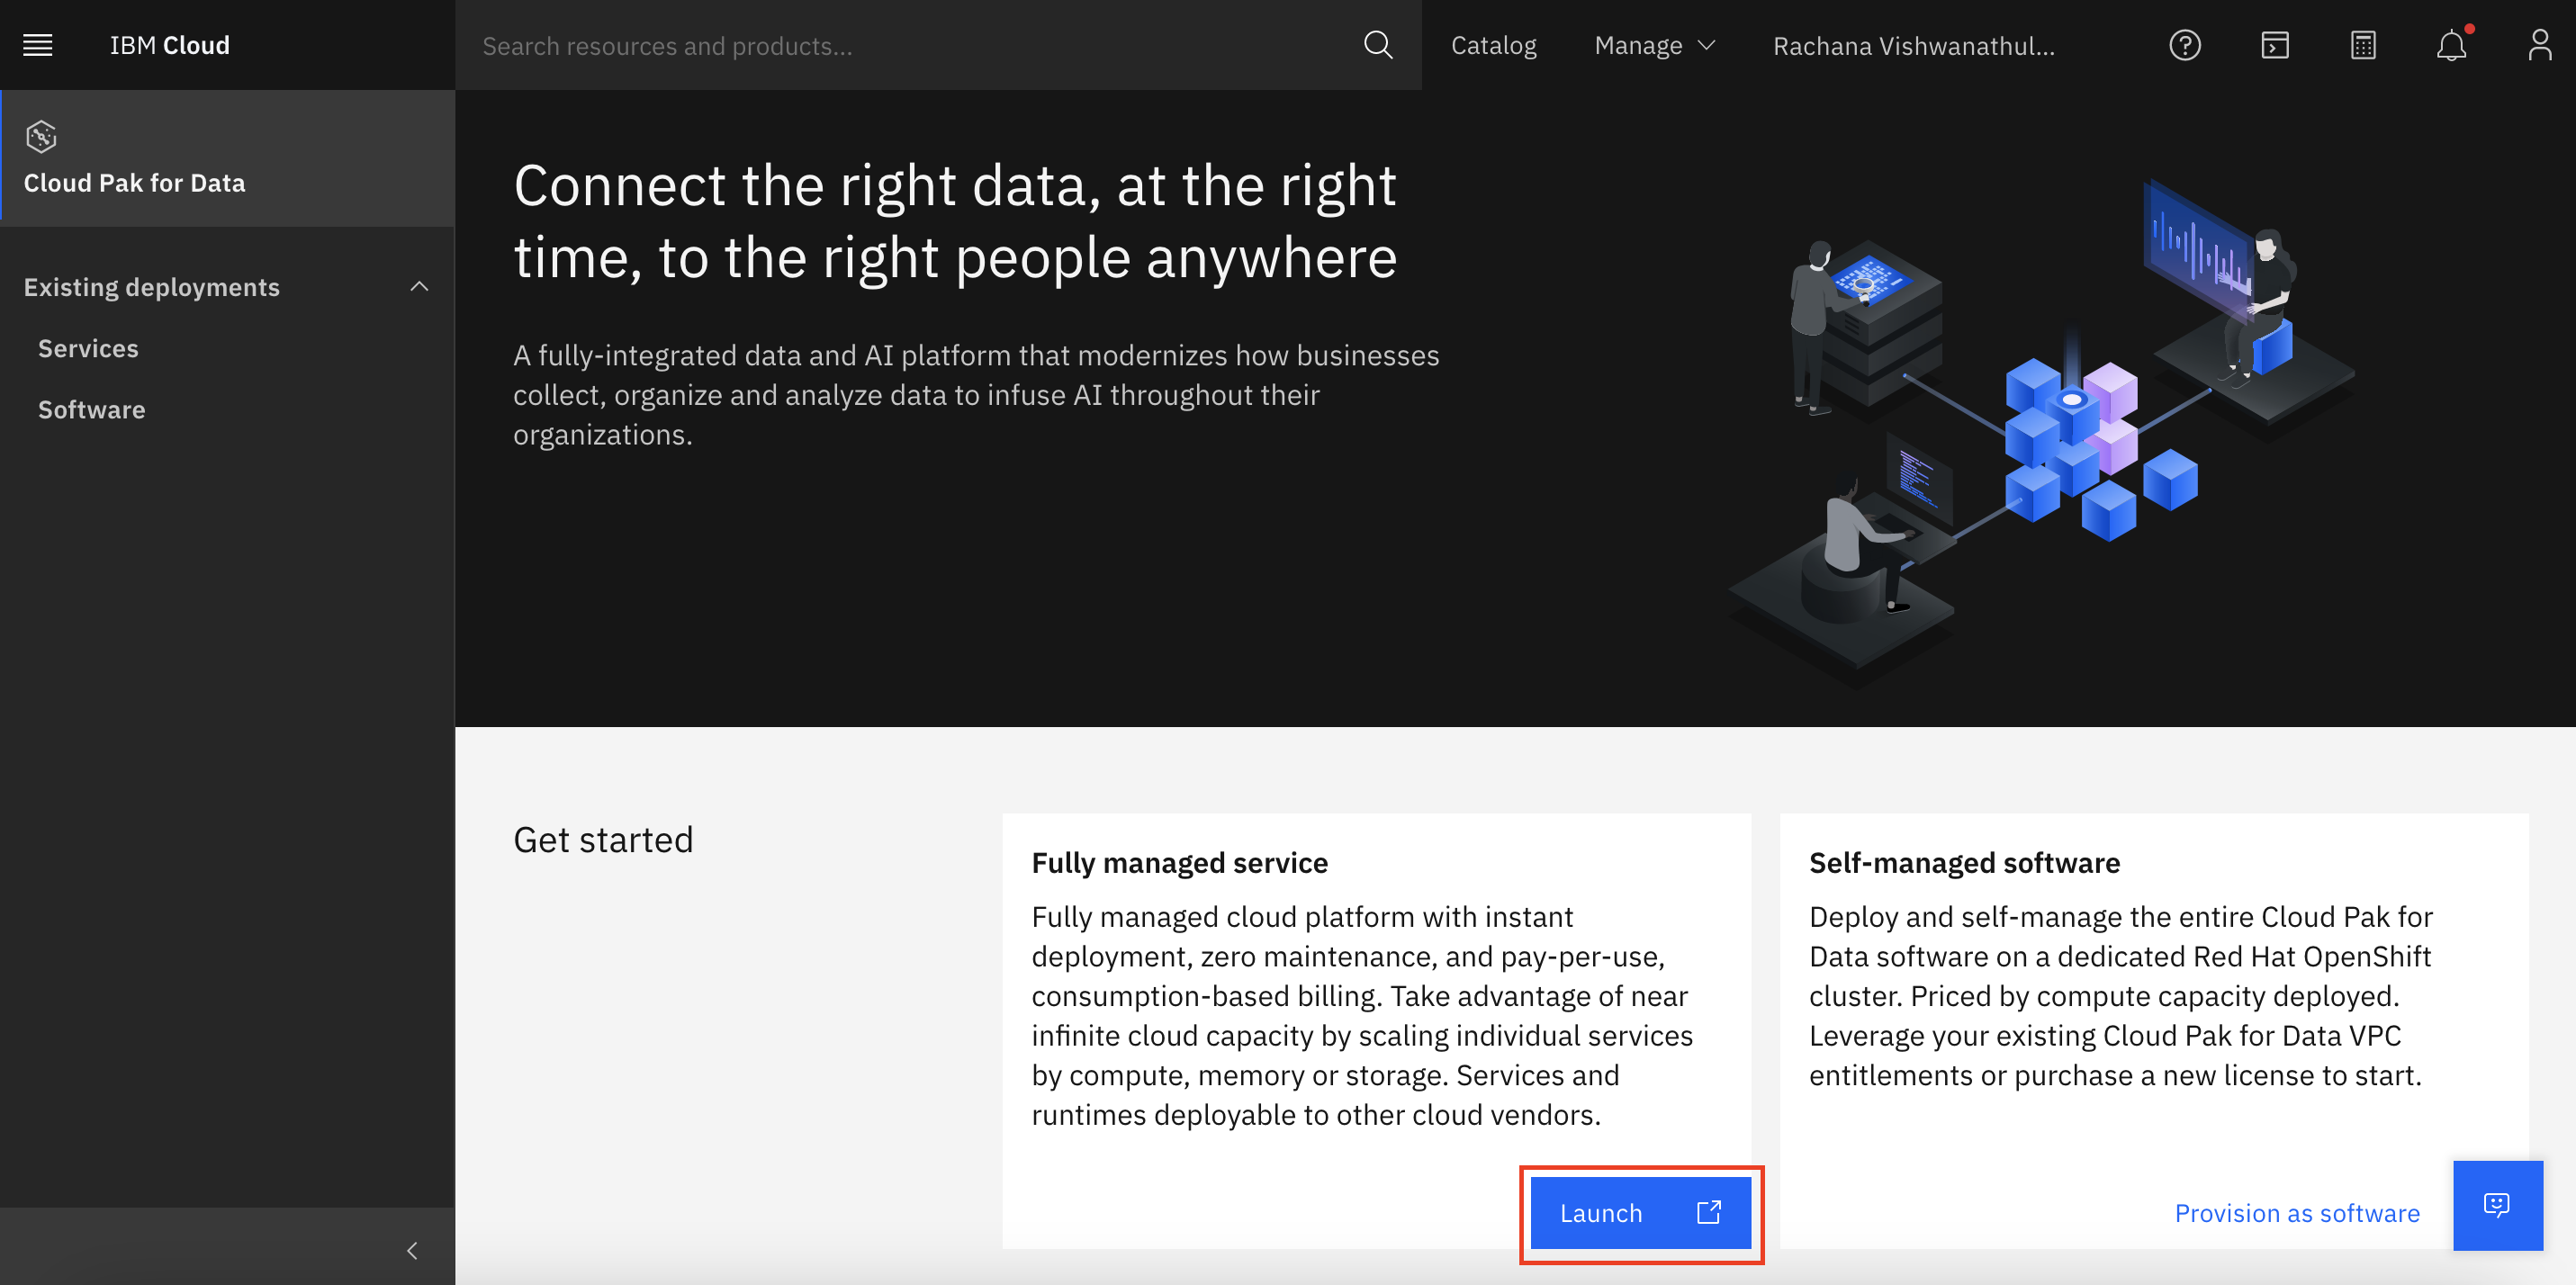
Click Launch under Fully managed service.
Step 2. Train a model with AutoAI
Watson Studio is an integrated platform that is designed to organize your project assets, such as data sets, collaborators, models, and notebooks. In this tutorial, you use Watson Studio to create a project in which you train a model with AutoAI and deploy this trained model.
Create a Watson Studio project
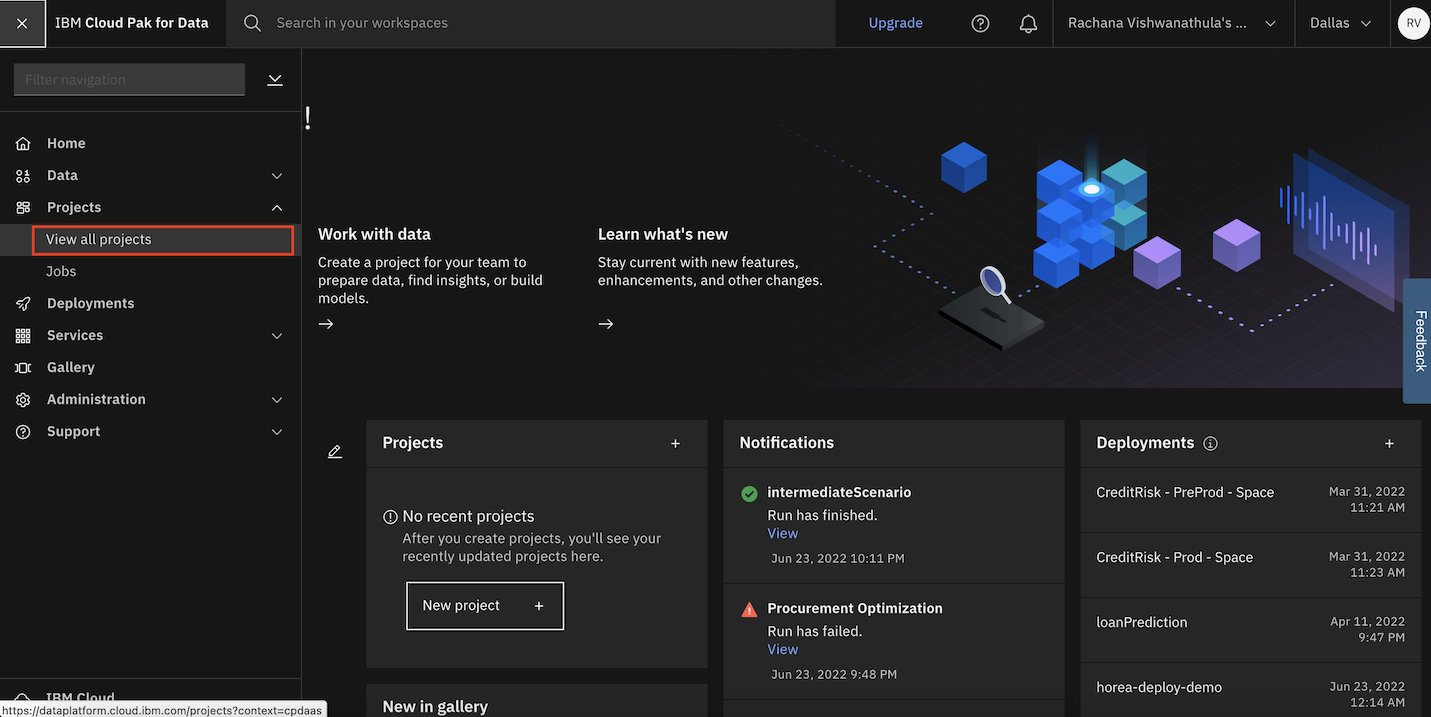
Go to Navigation menu, and click View all projects.
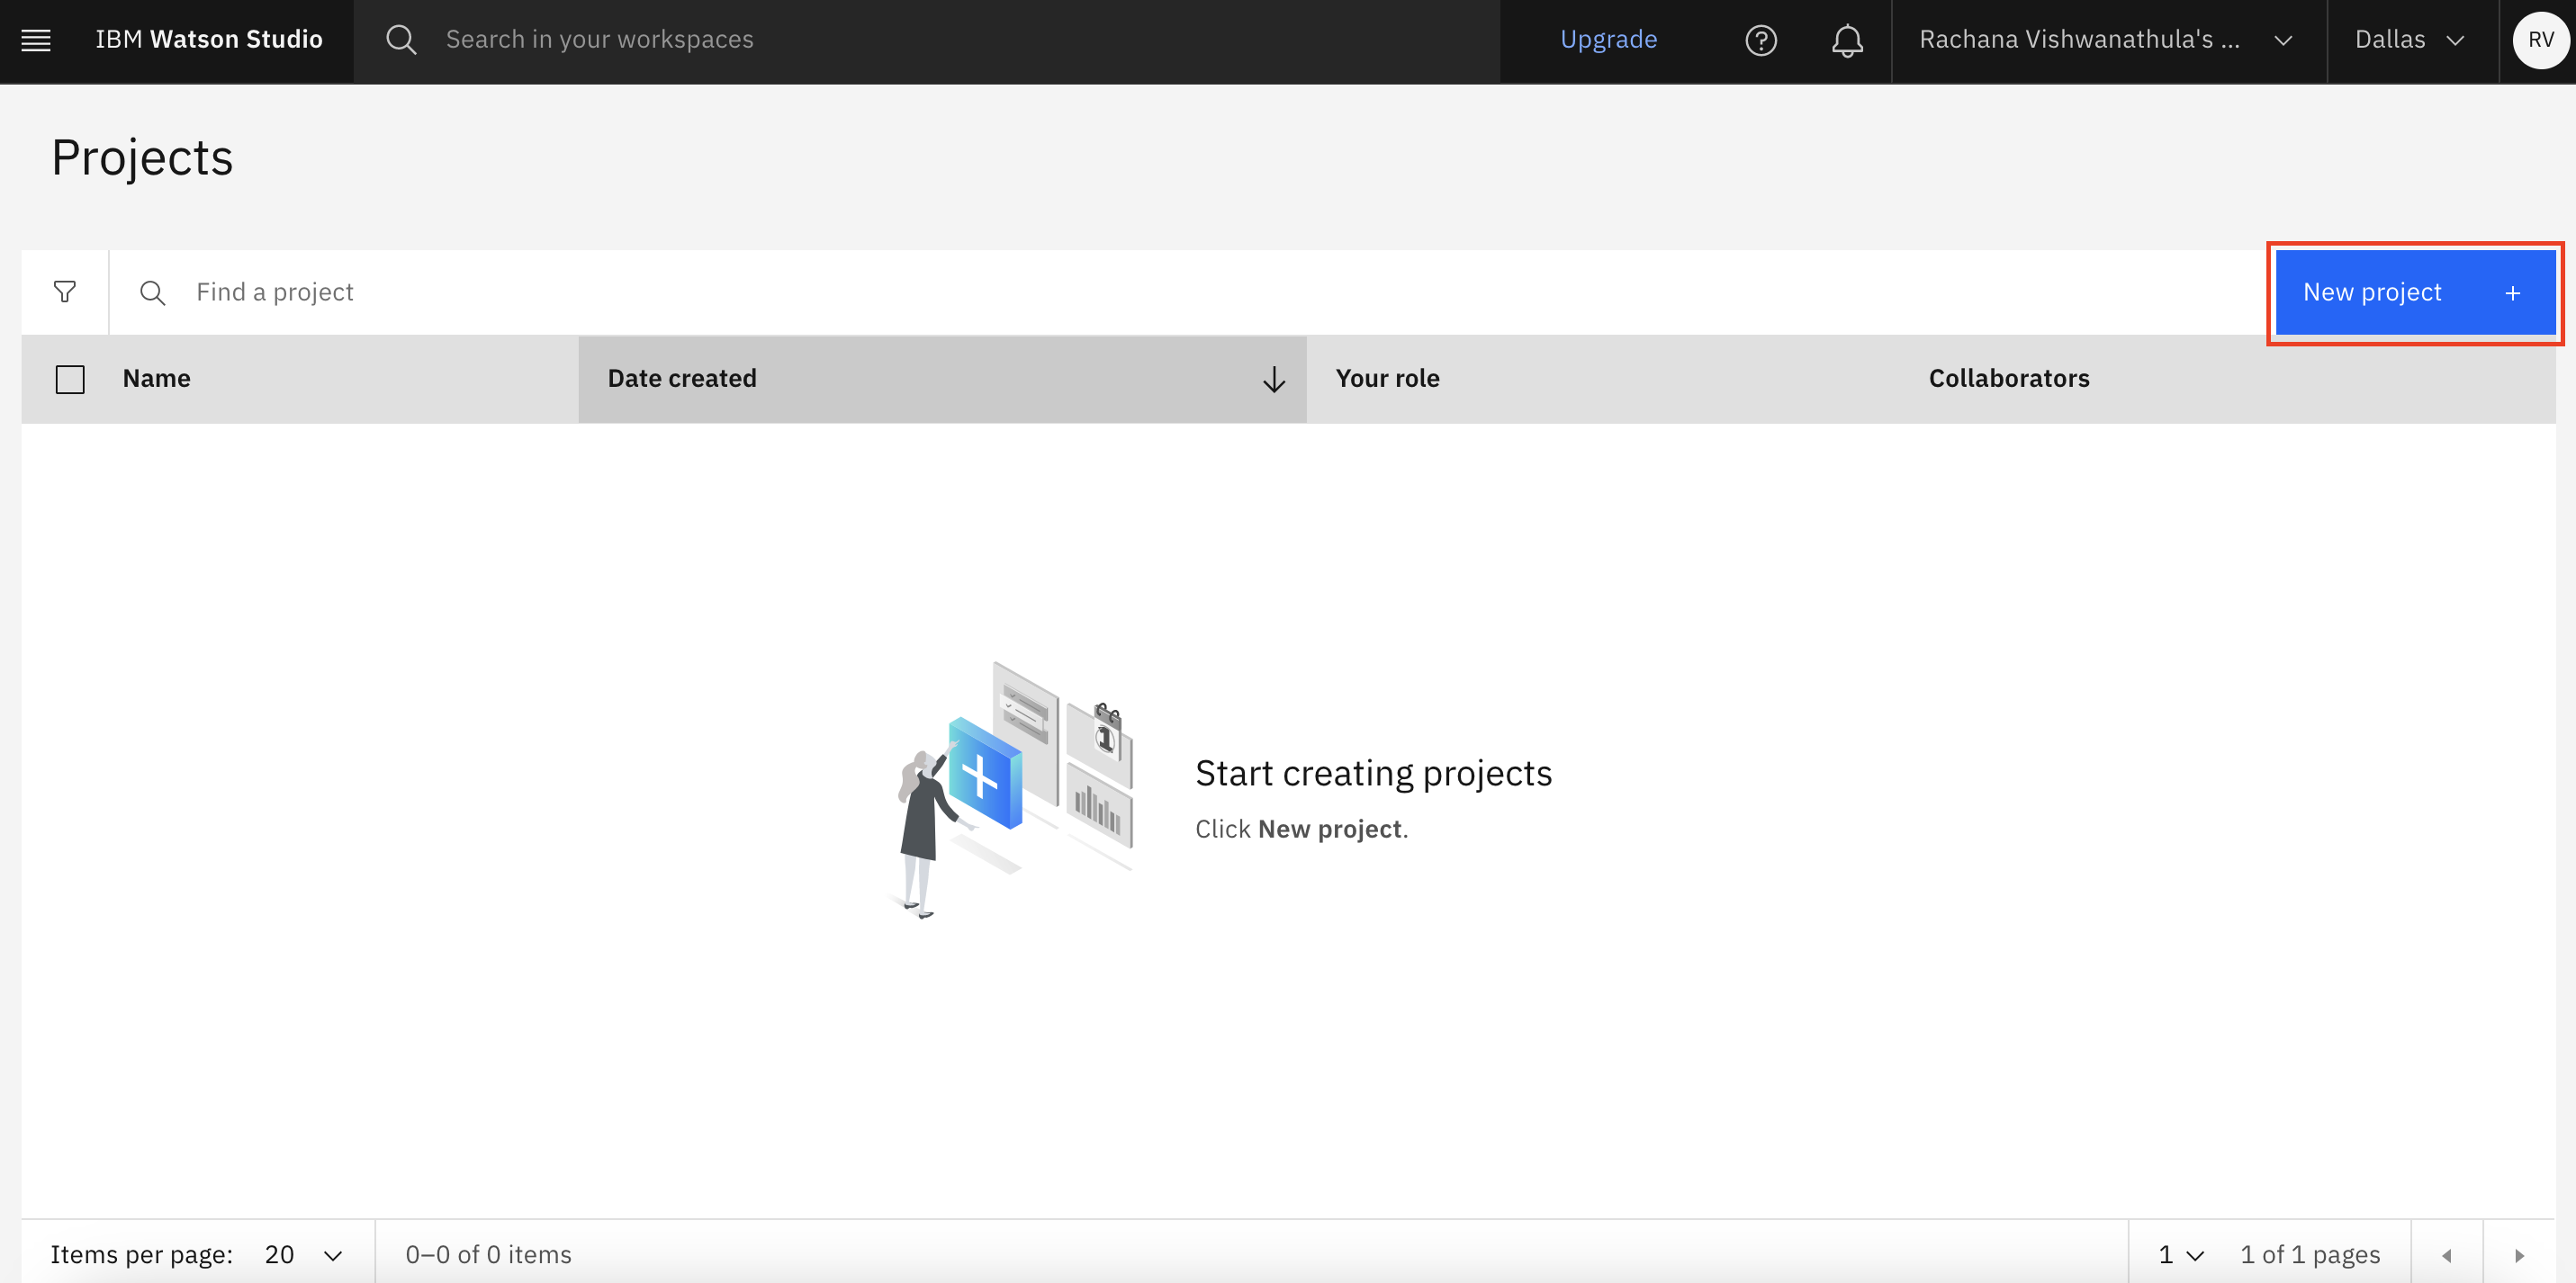
Click New Project.
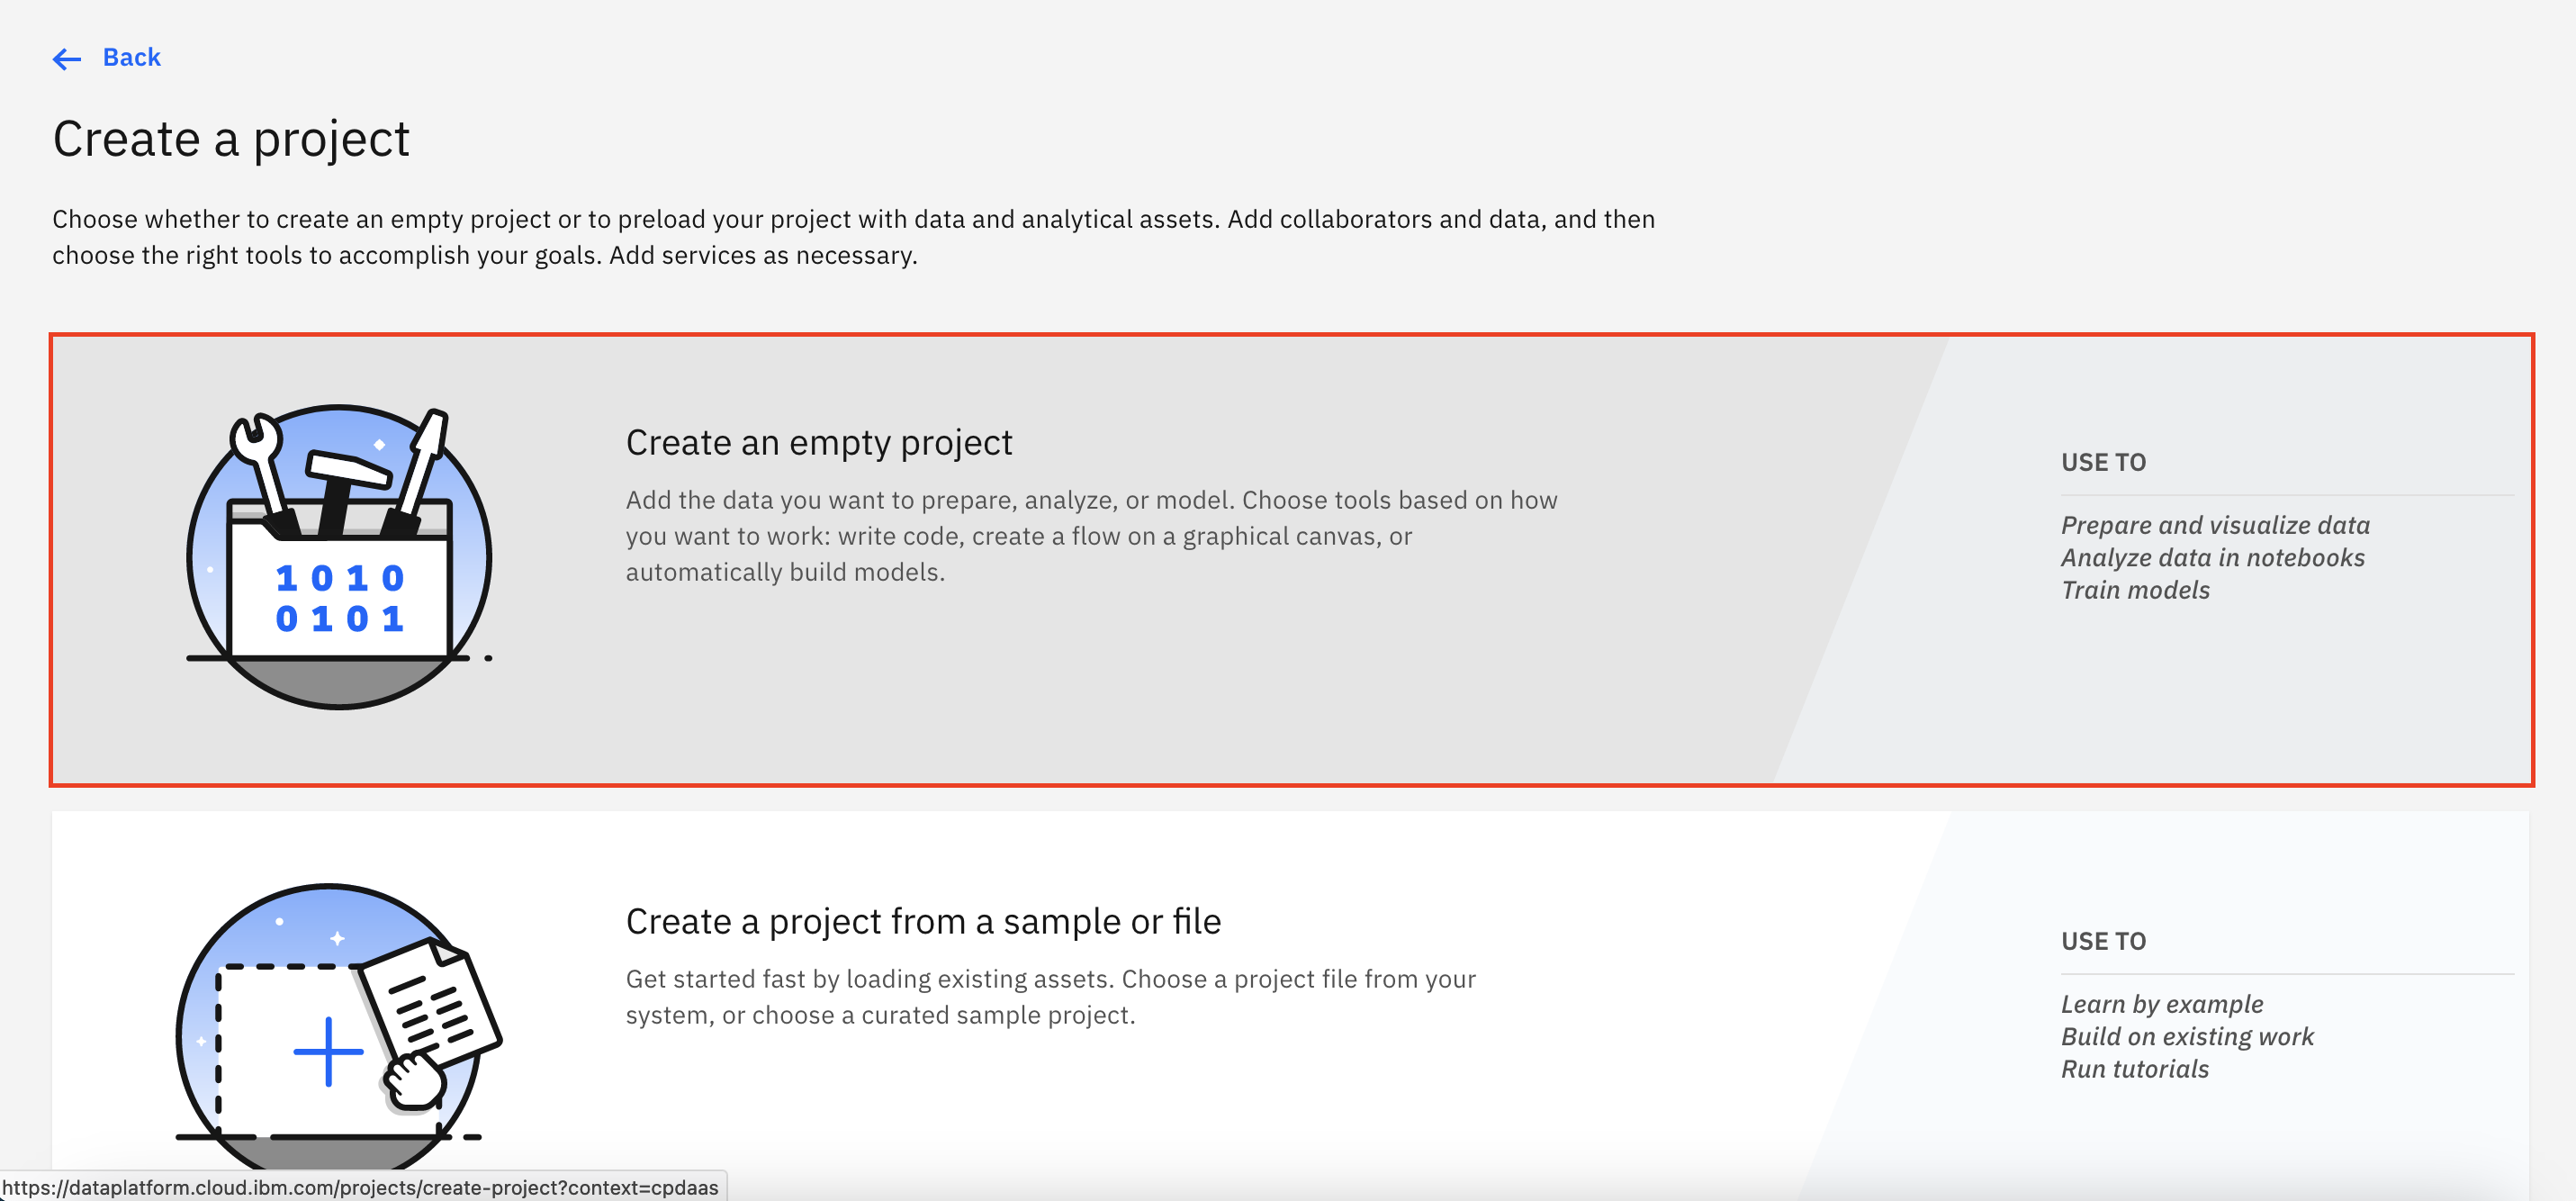
Select Create an empty project.
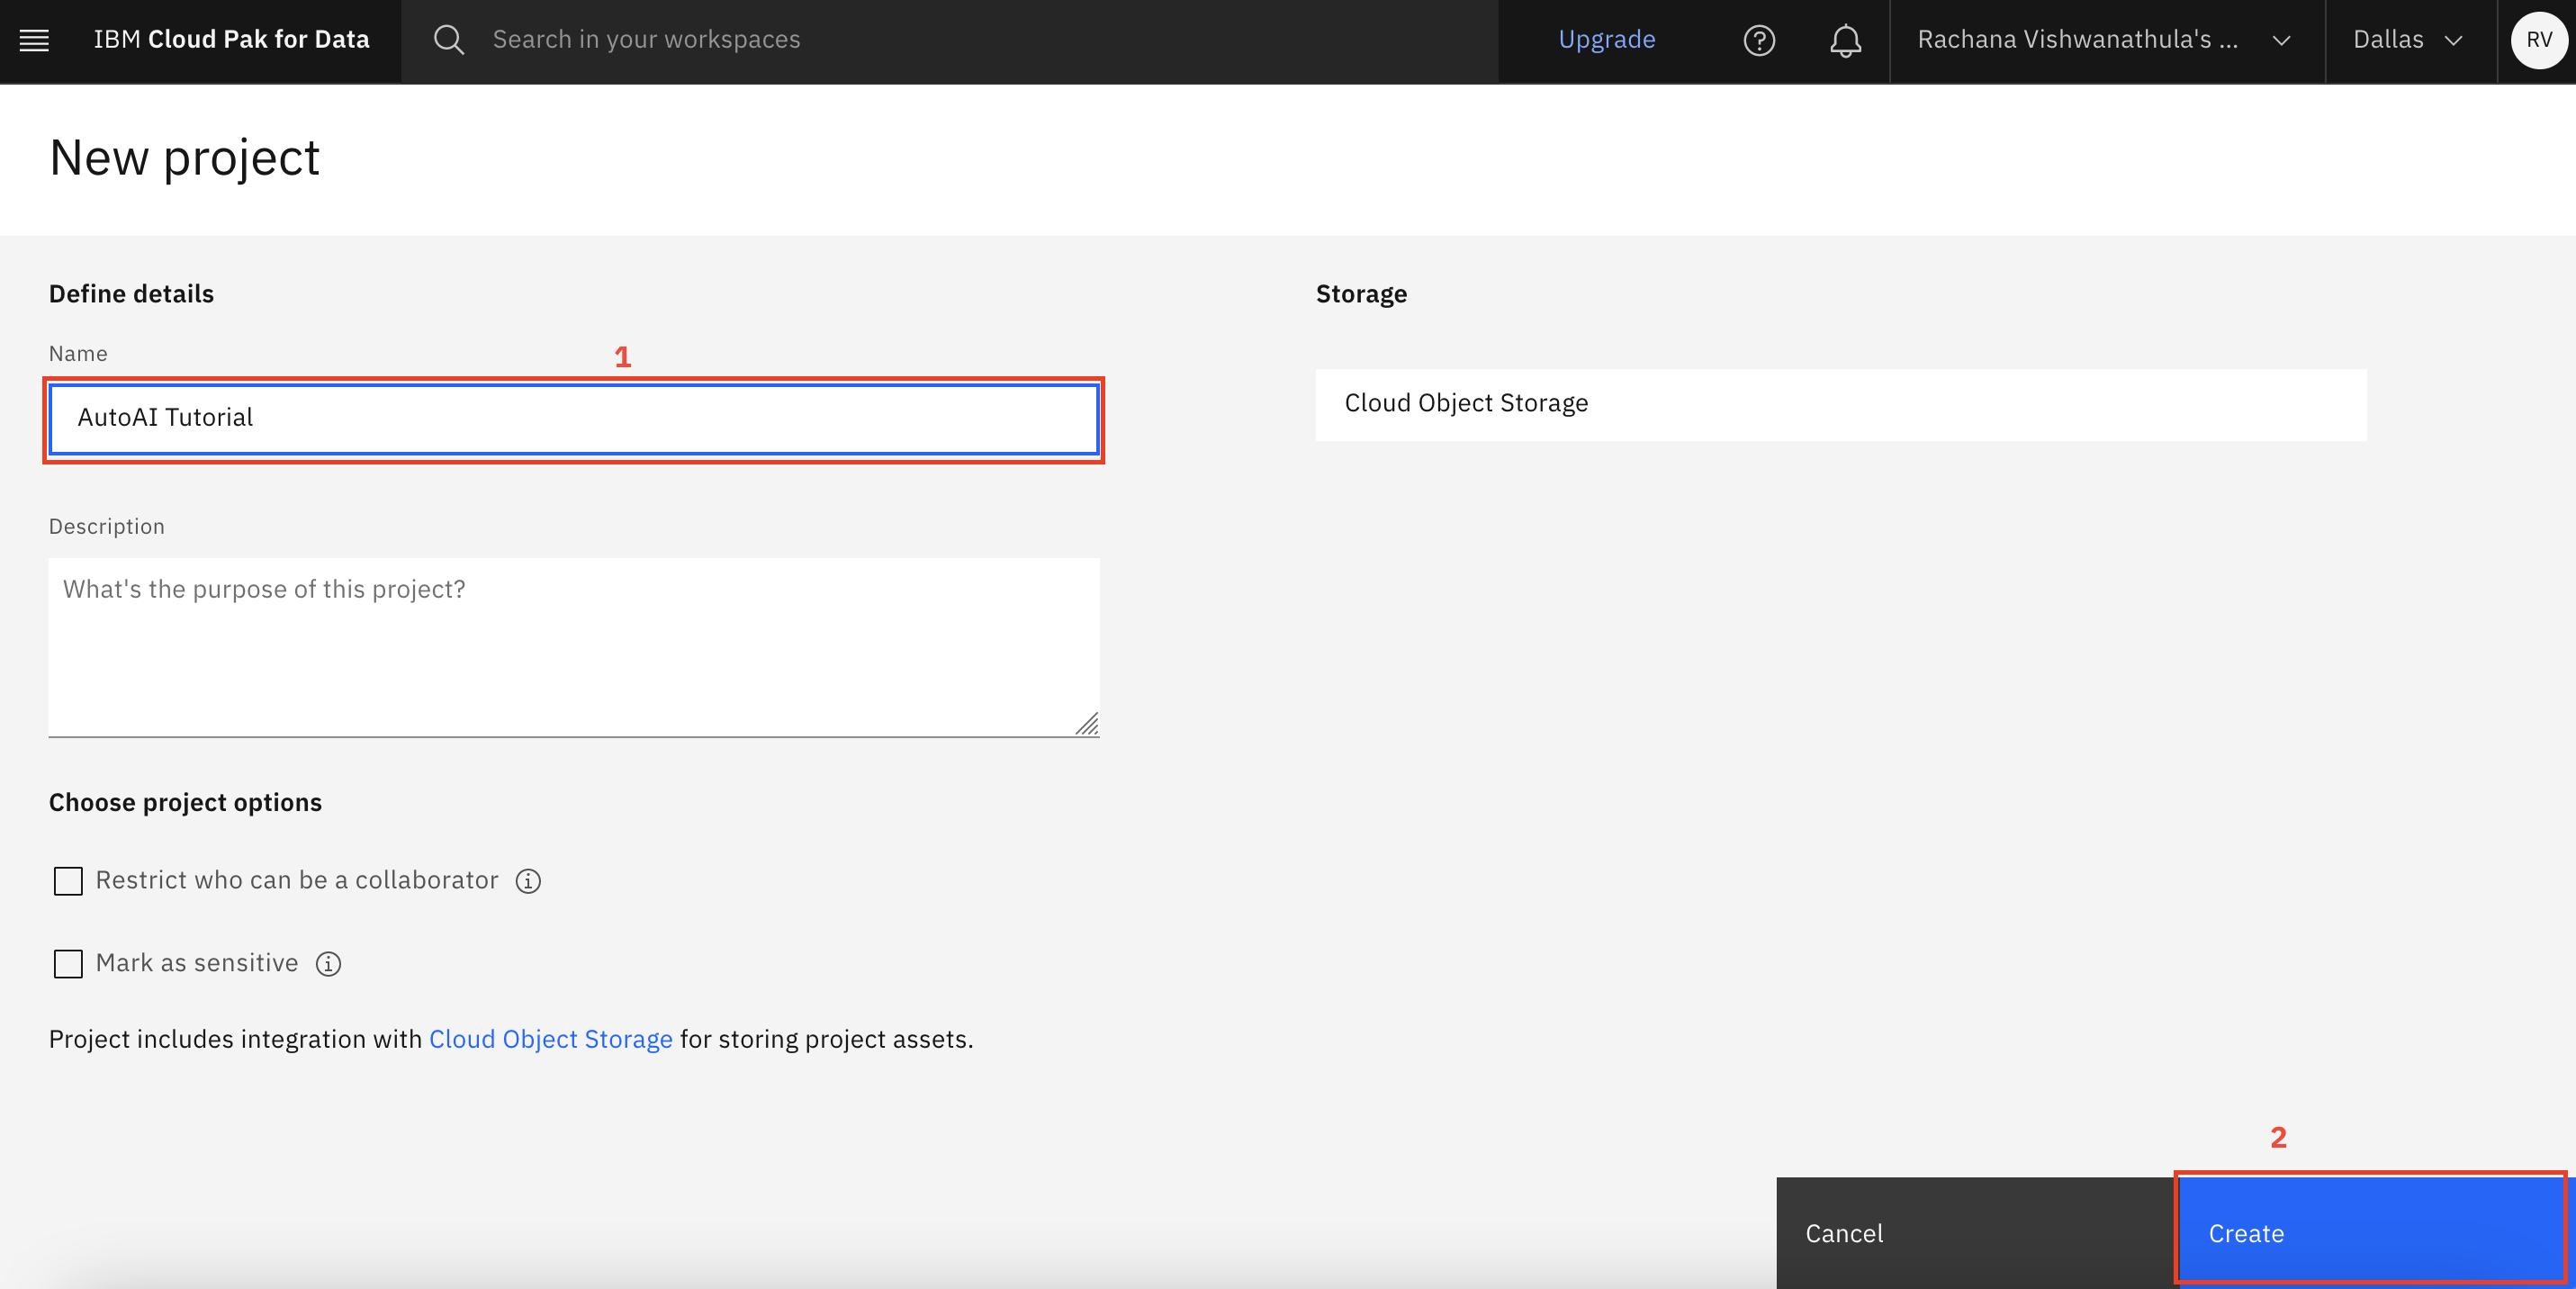
Name the project 'AutoAI Tutorial', and make sure that the Cloud Object Storage instance is selected. Click Create.
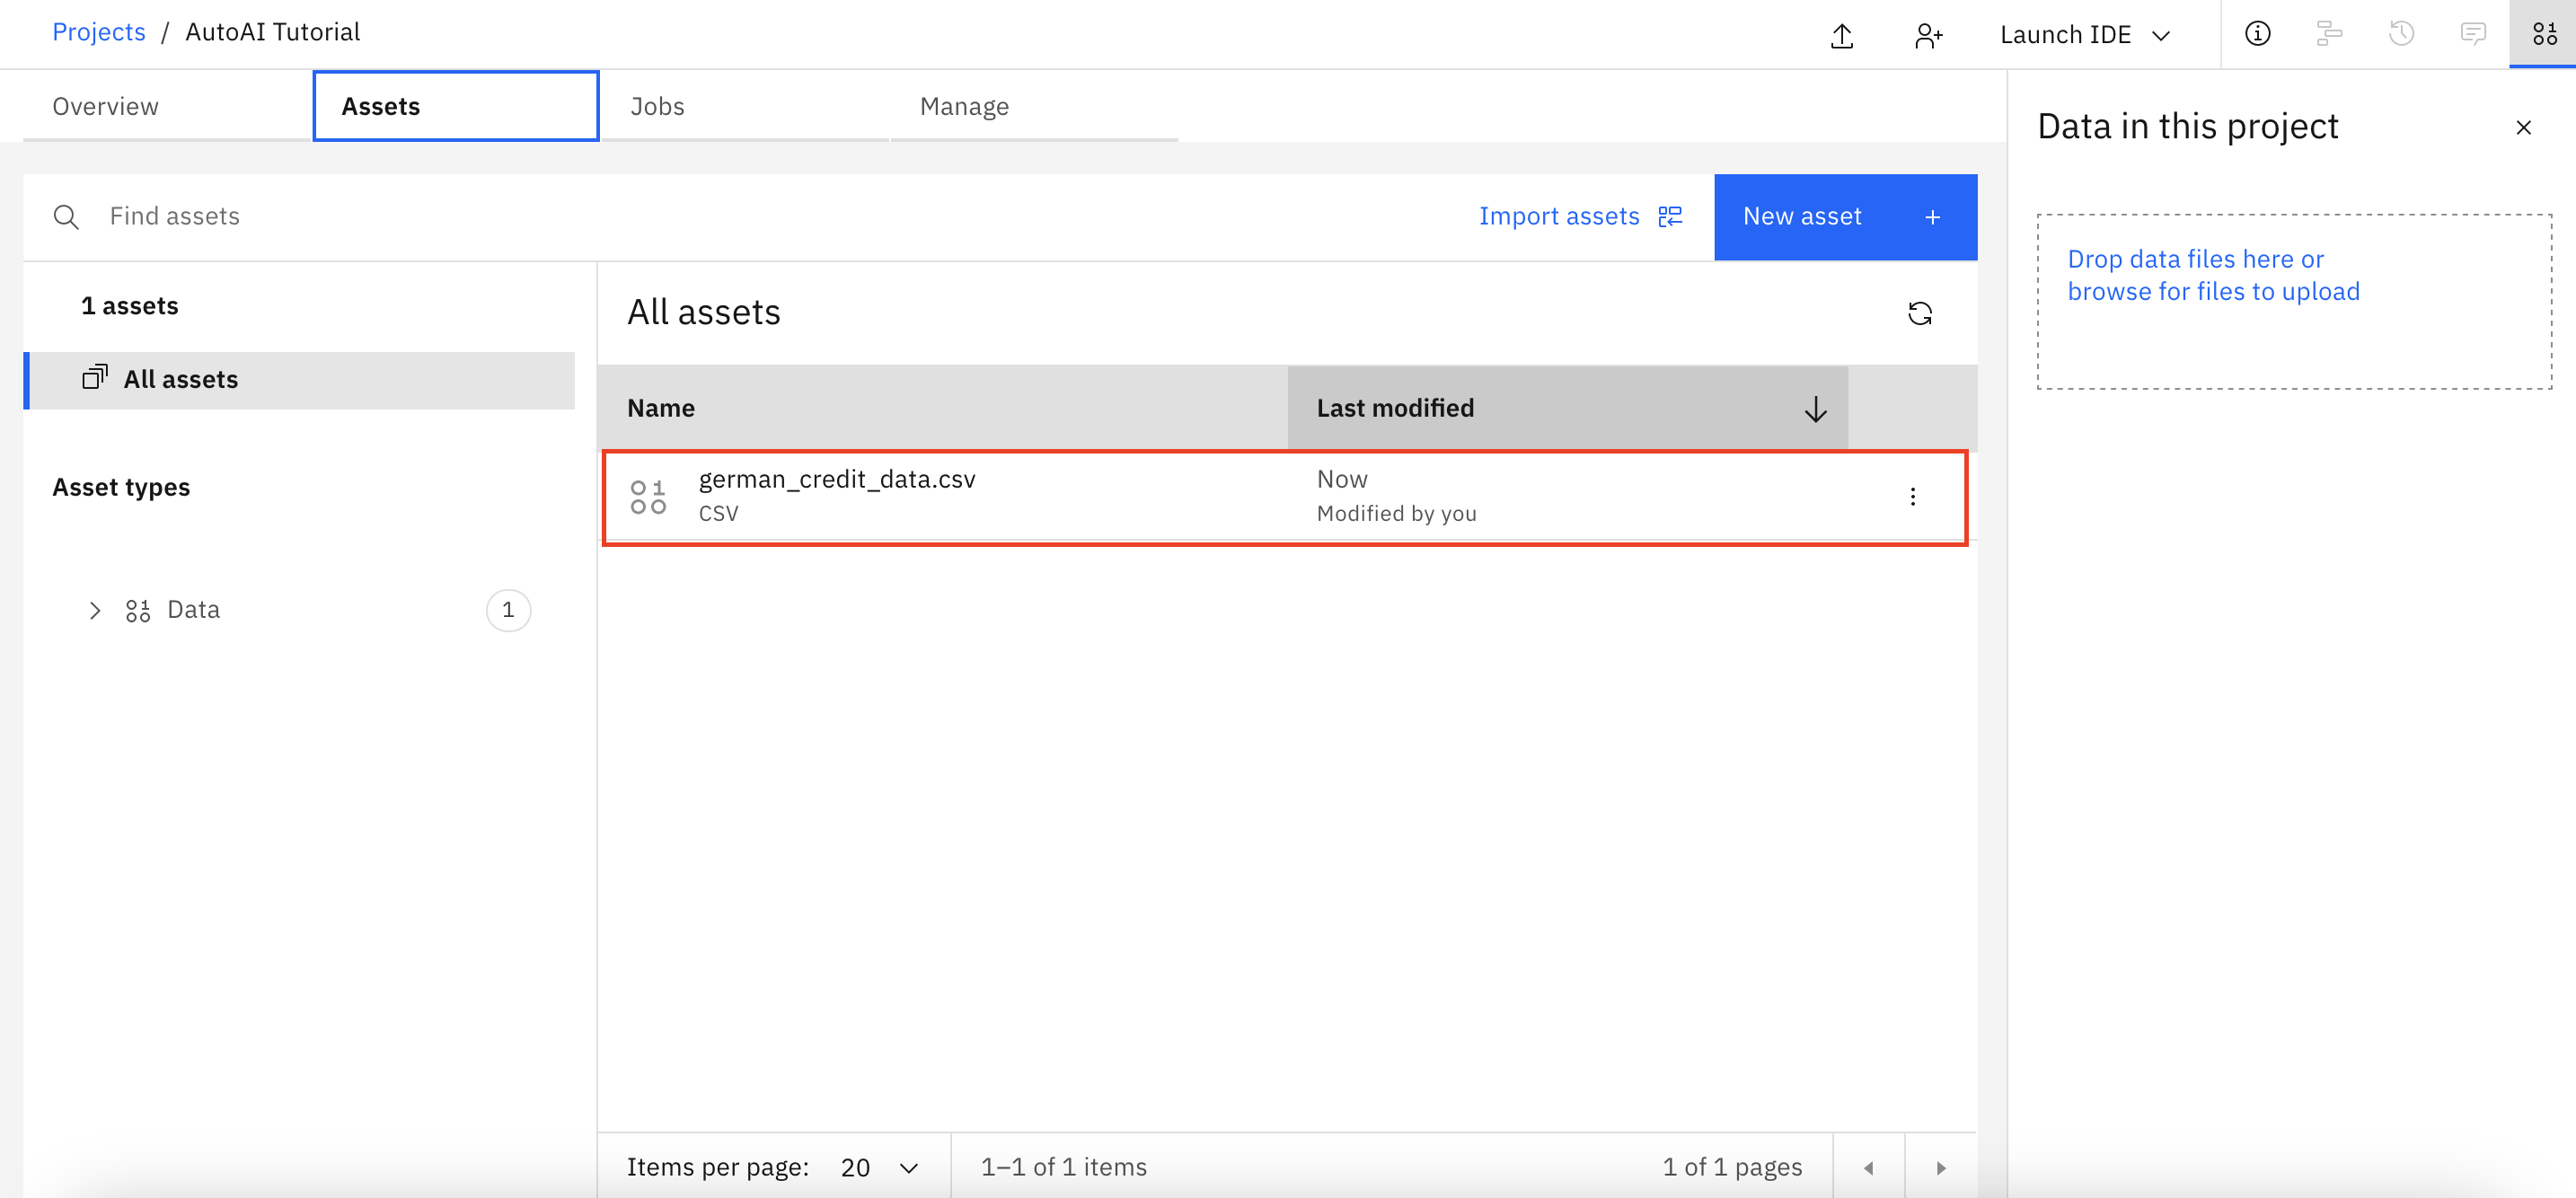
Drag the german_credit_data.csv file to the project.
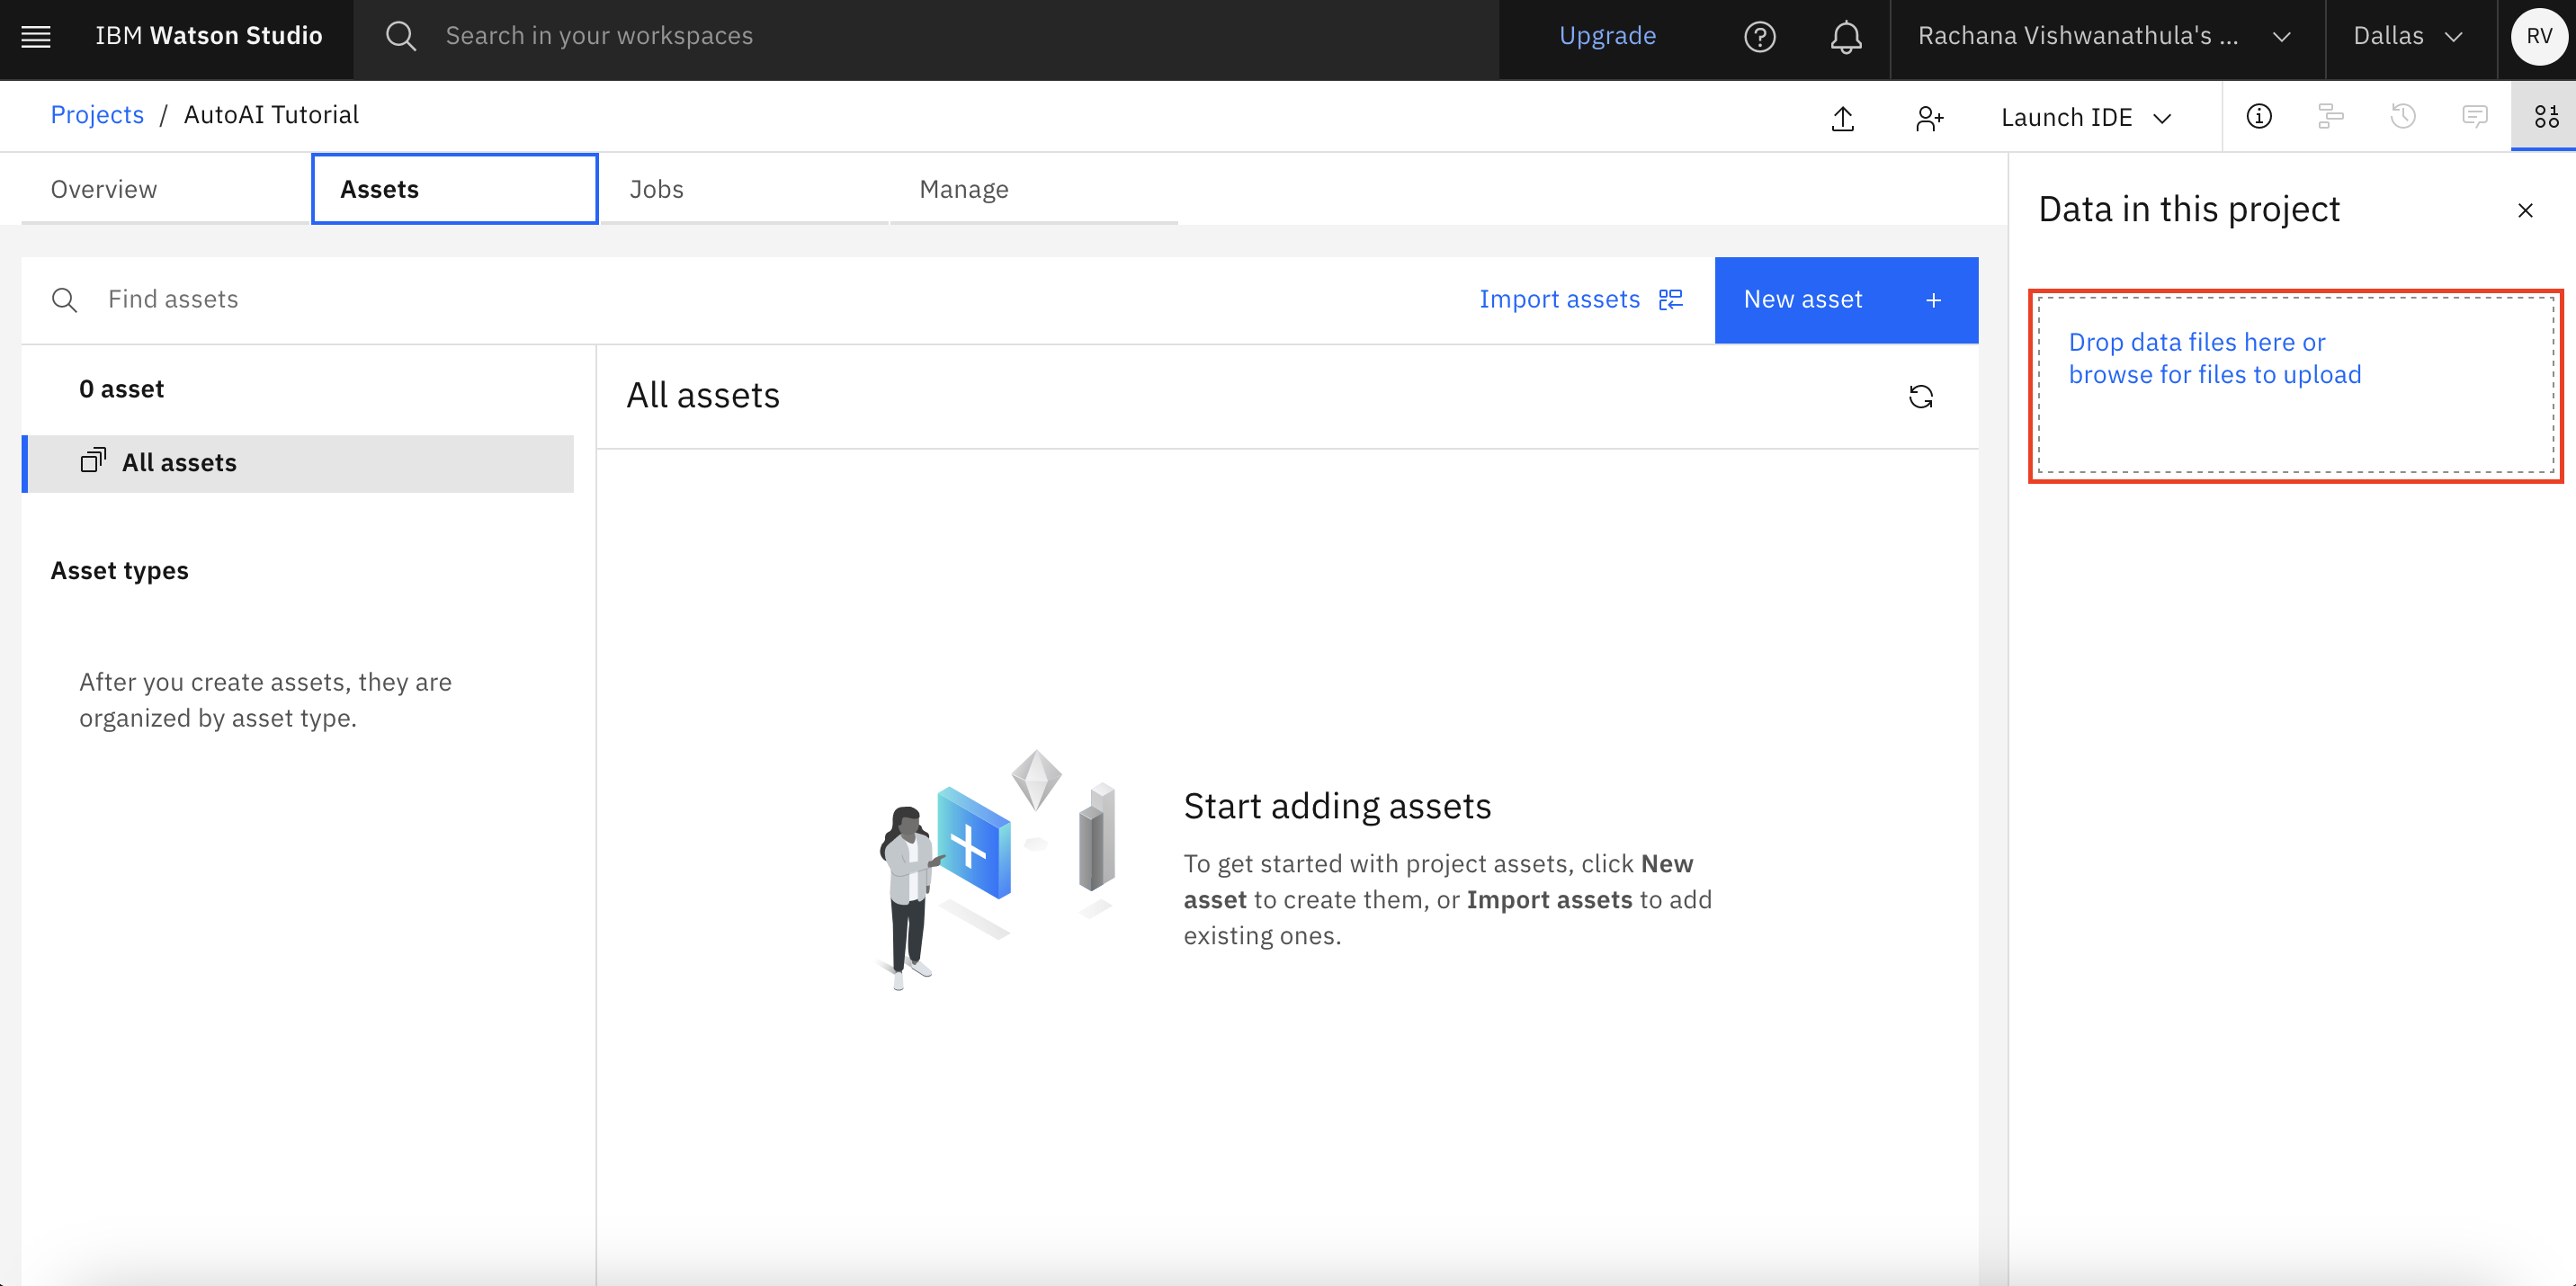
You see that a data asset is added to the project upon a successful upload.
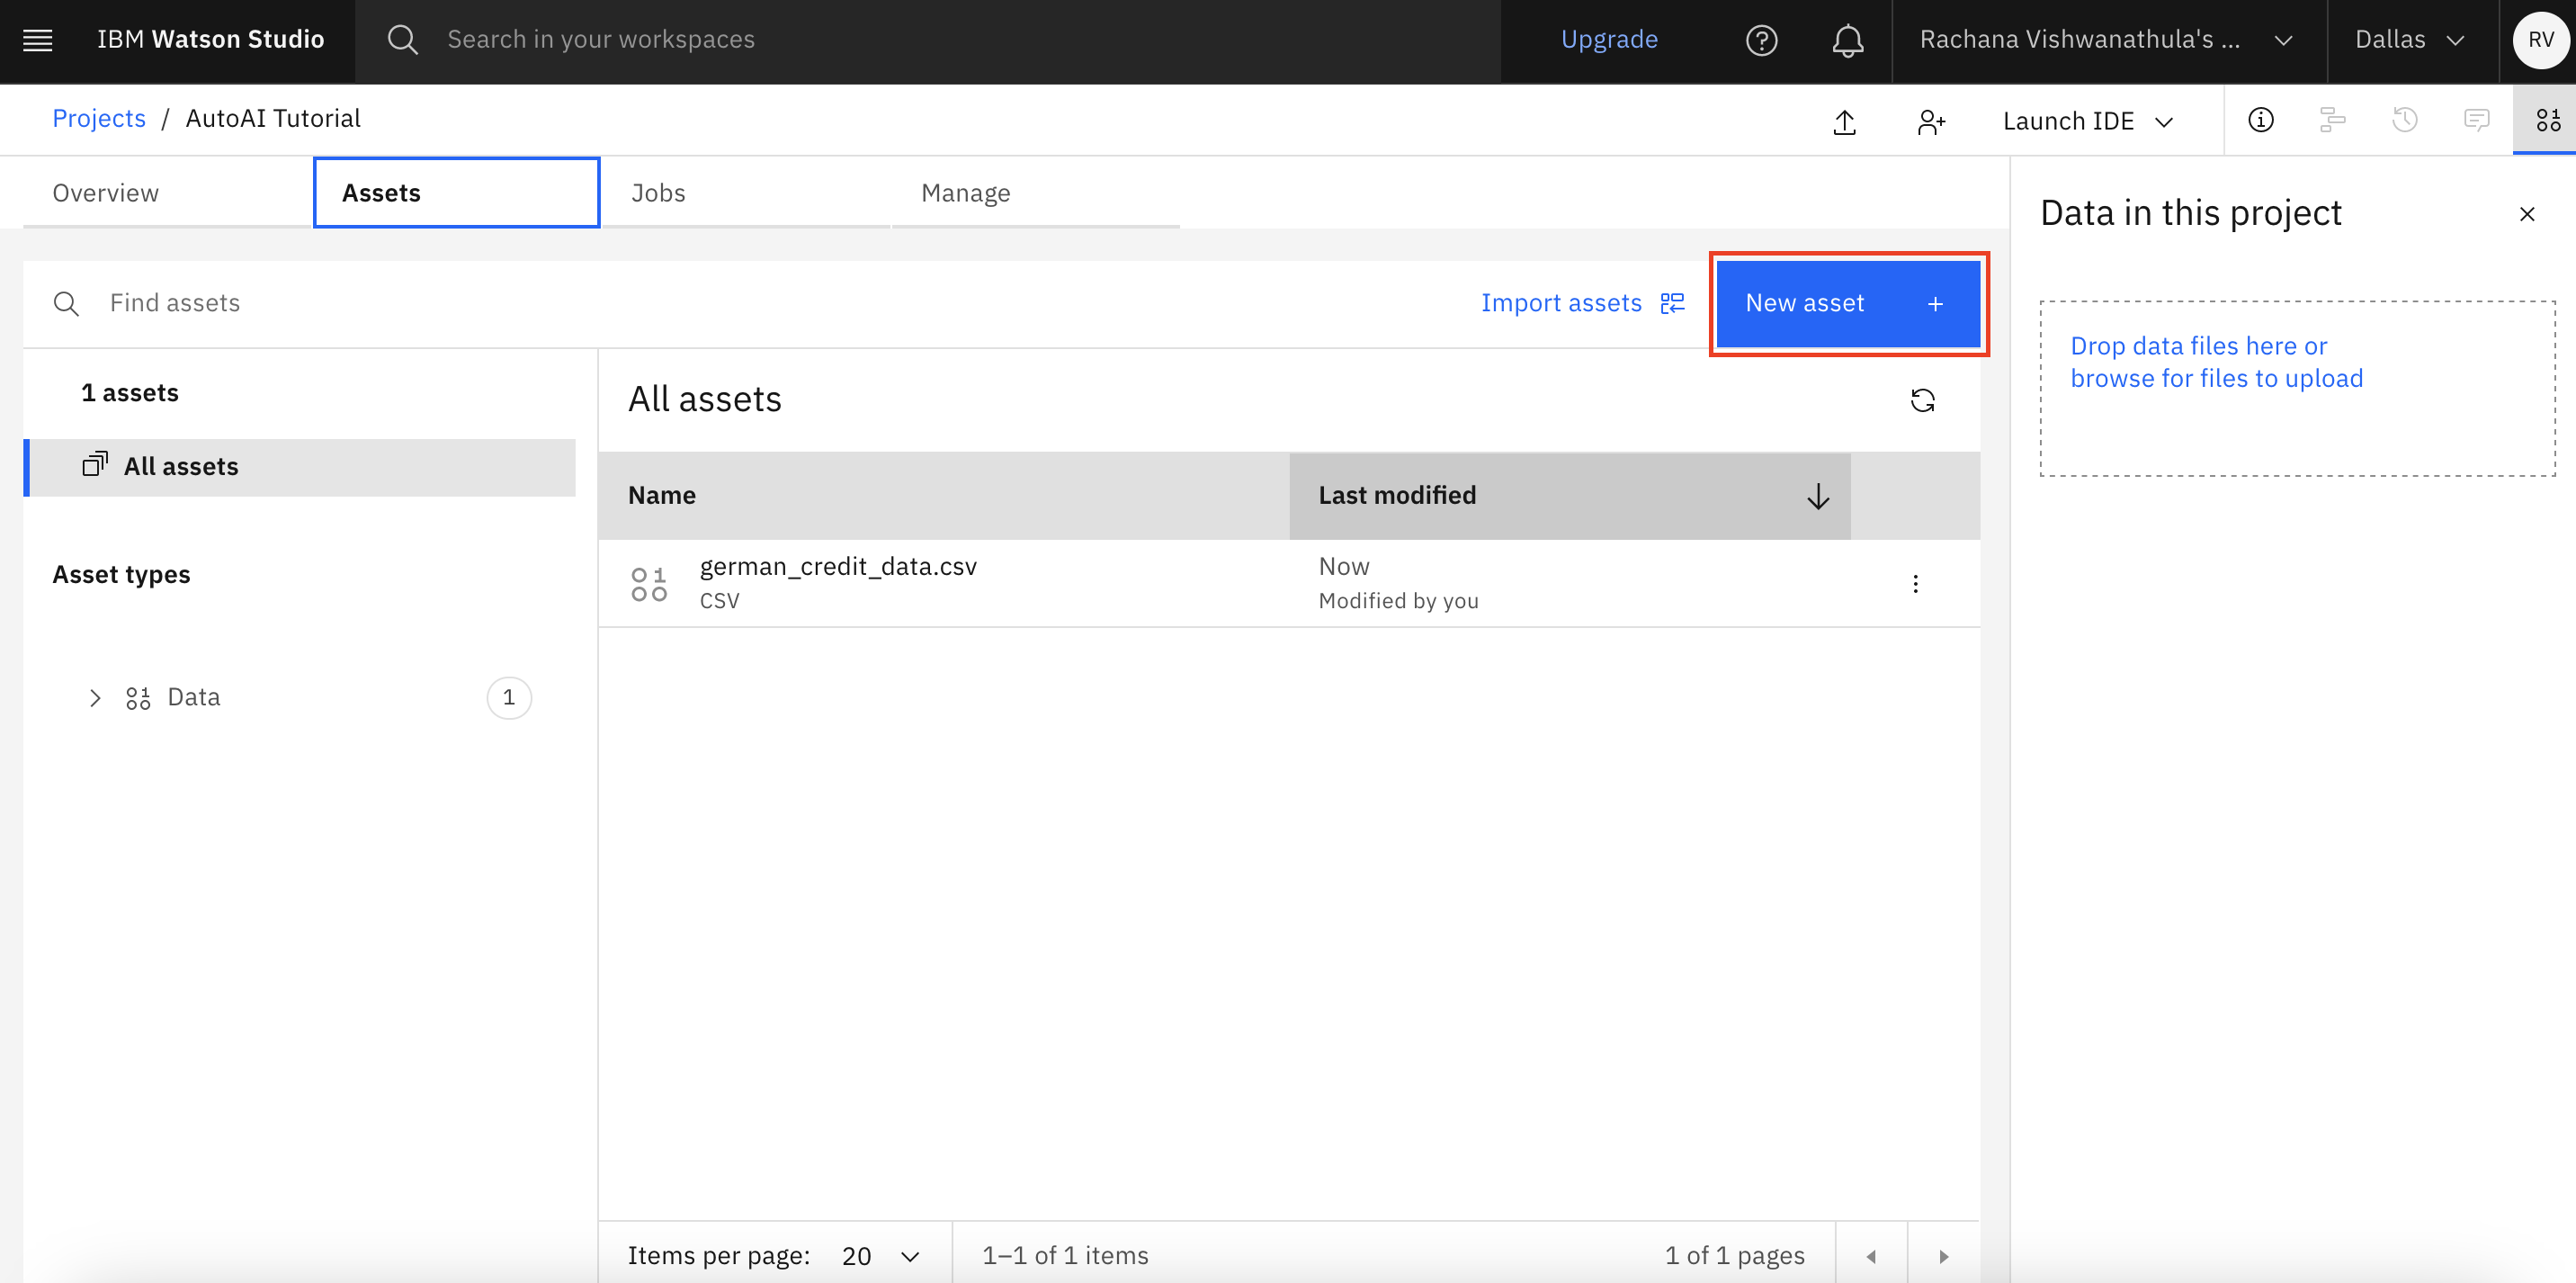
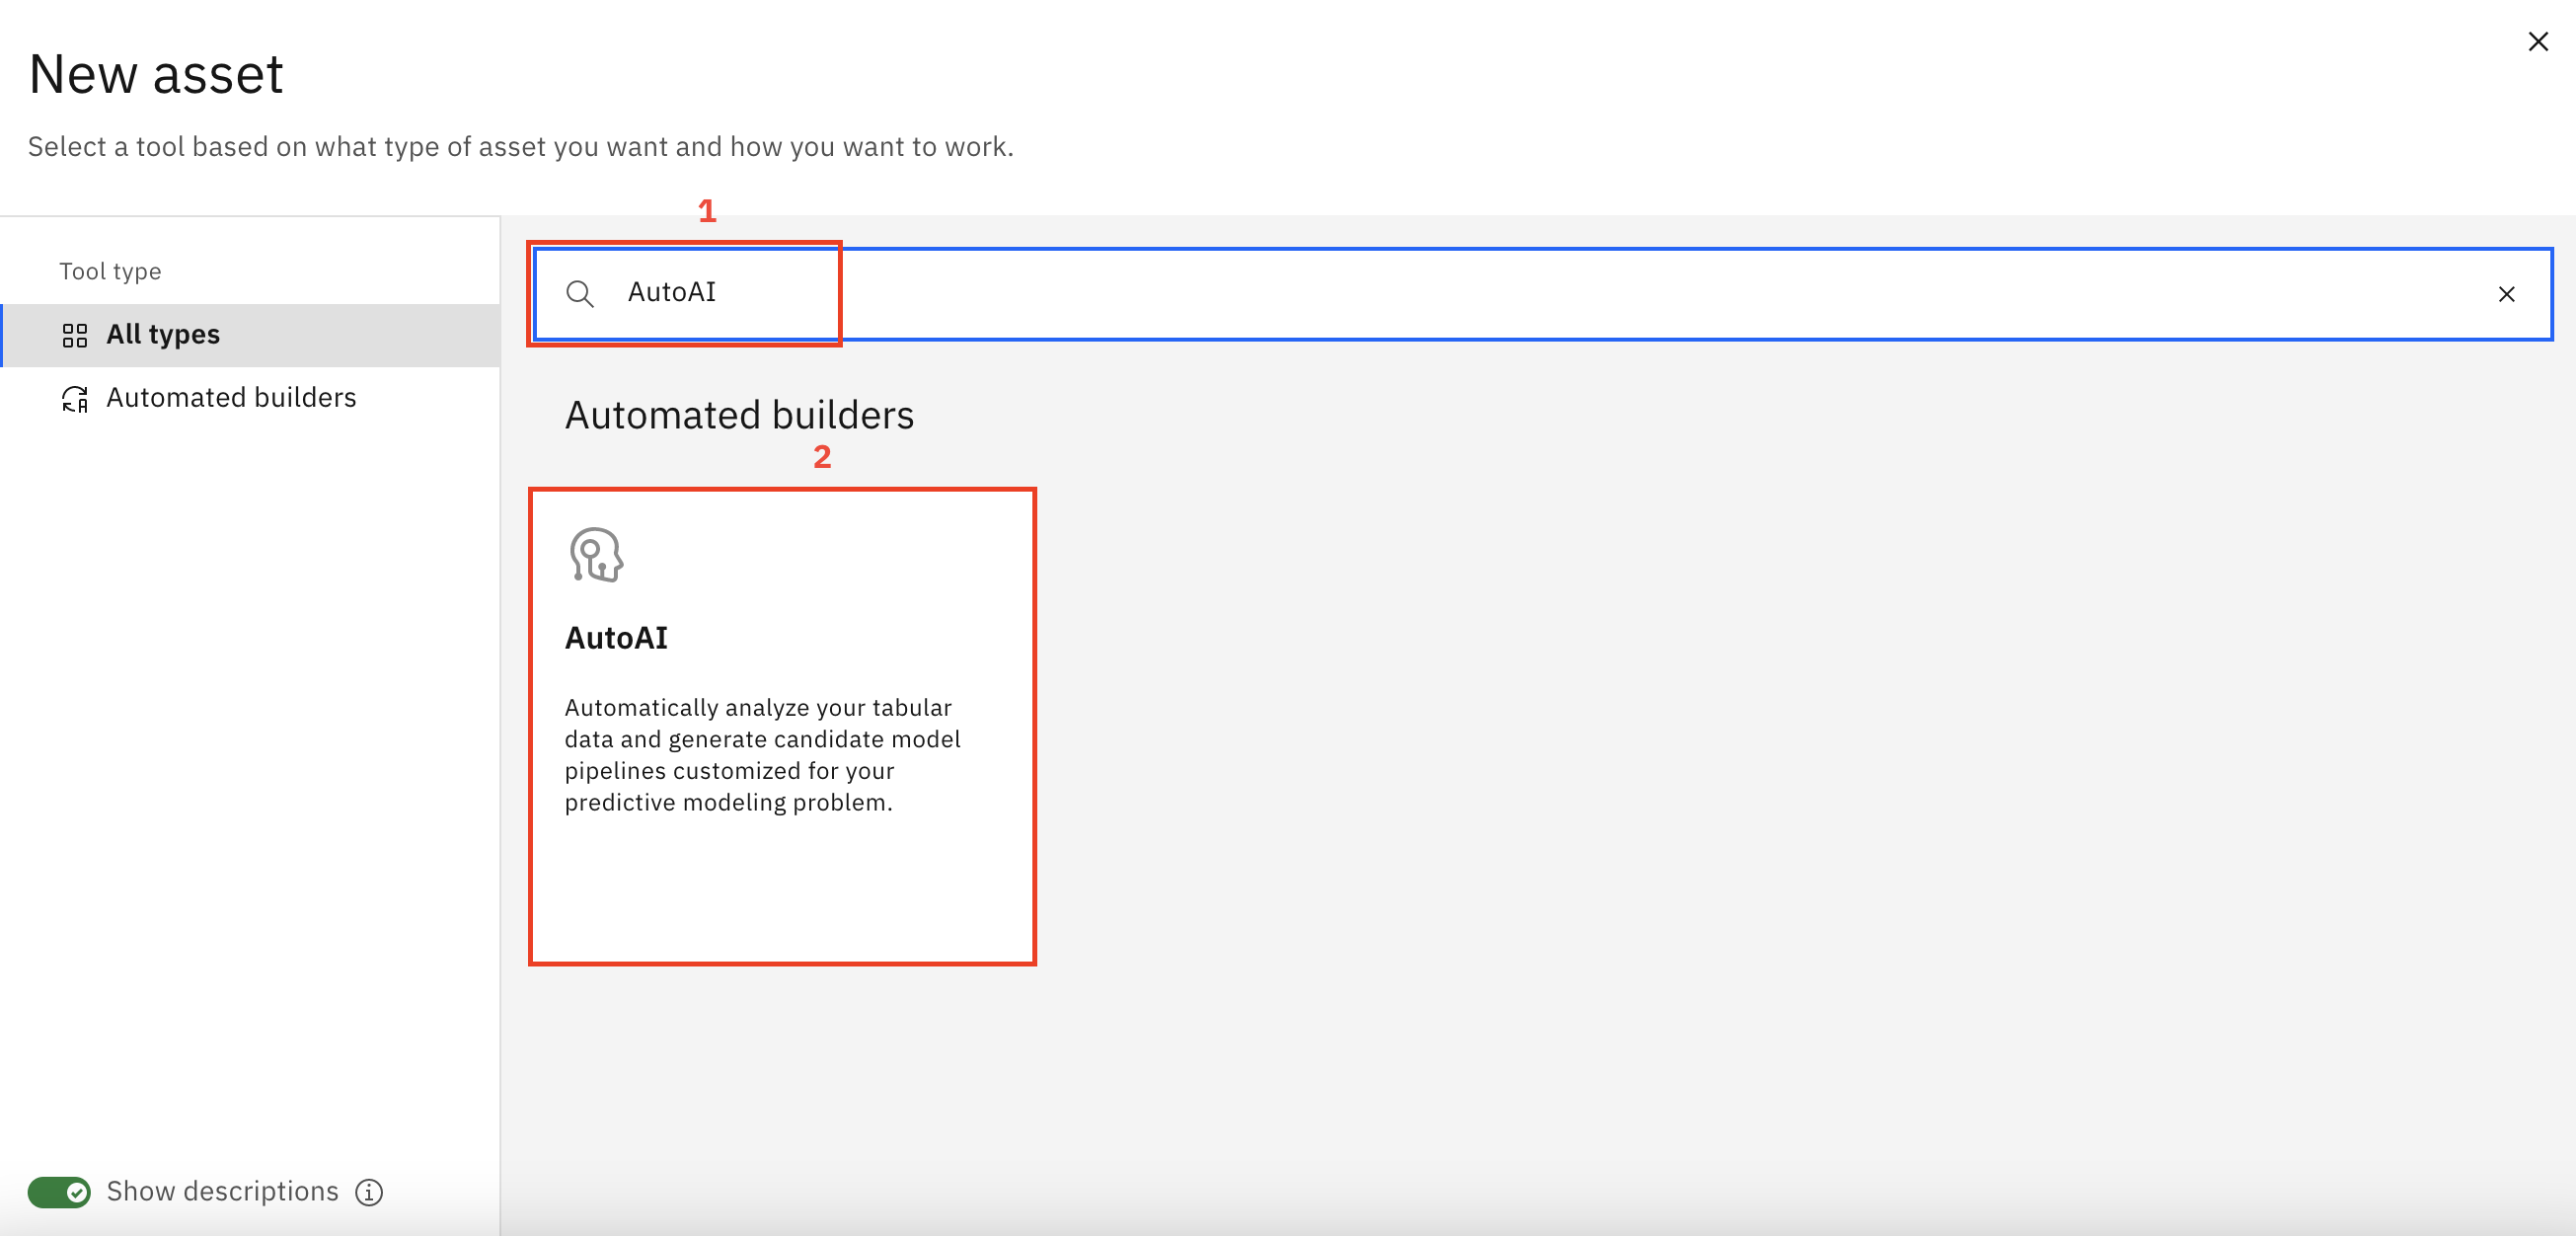
Click New asset.
Search for AutoAI, and click the AutoAI asset.
Name the project
Credit Data Analysis, and click the Associate a Machine Learning service instance link.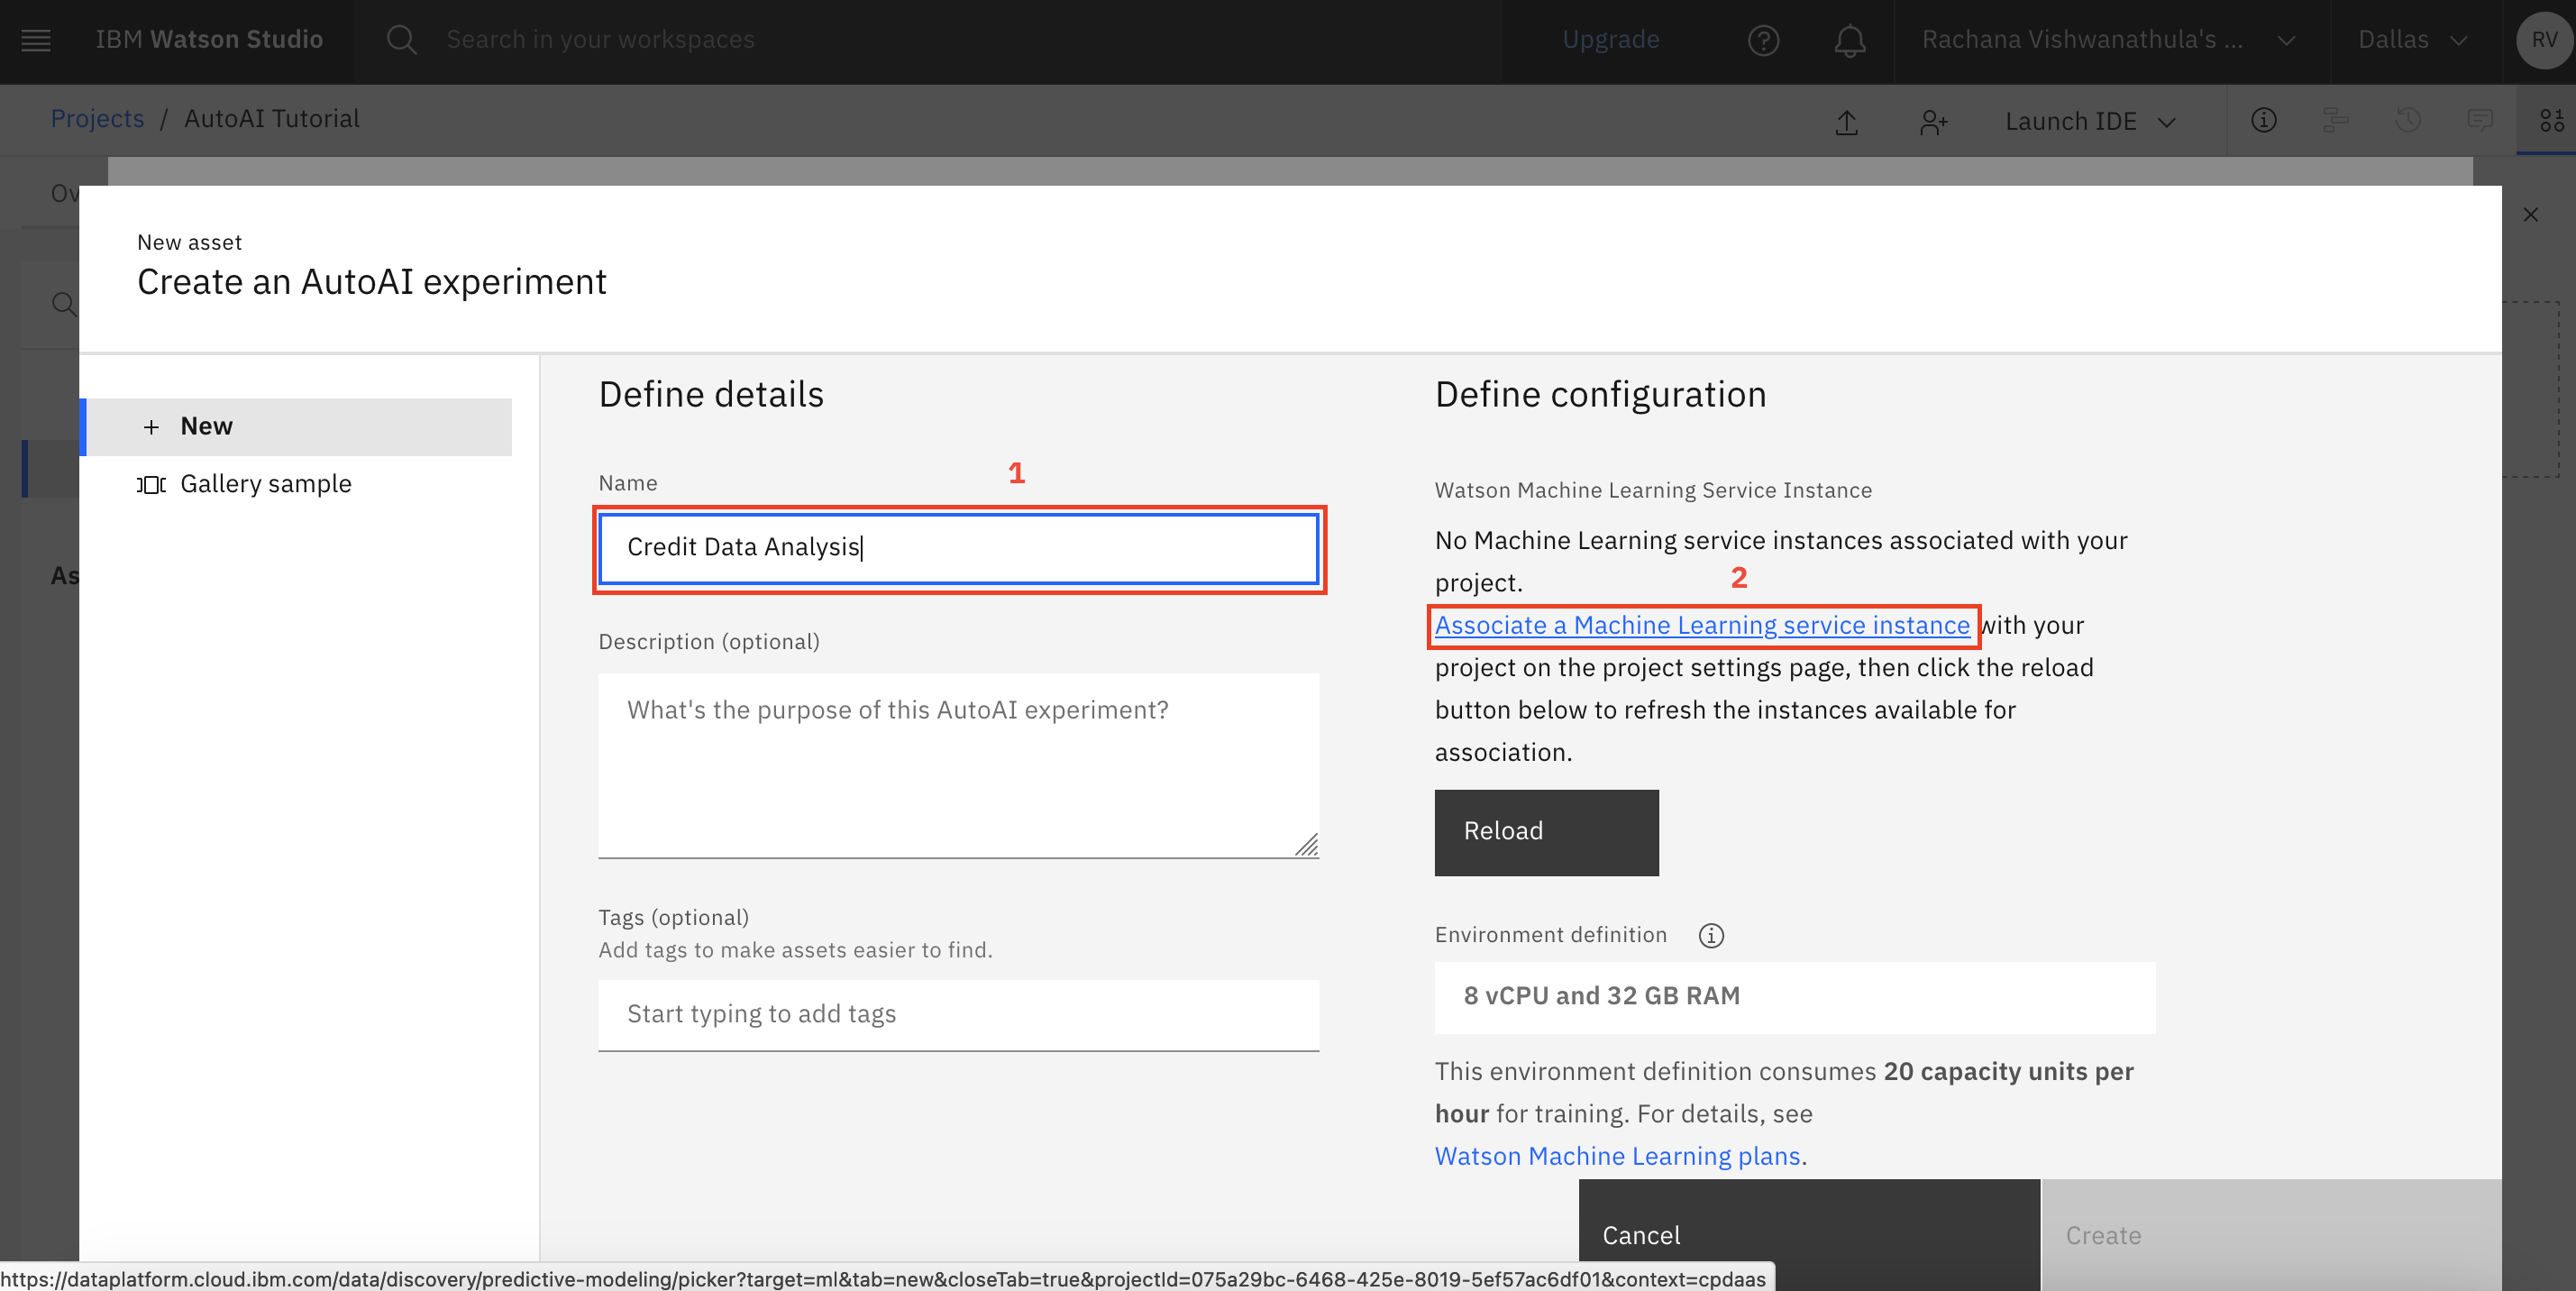
This redirects you to a new page where you see the list of instances.
Select the Watson Machine Learning instance that you created earlier, and click Associate.
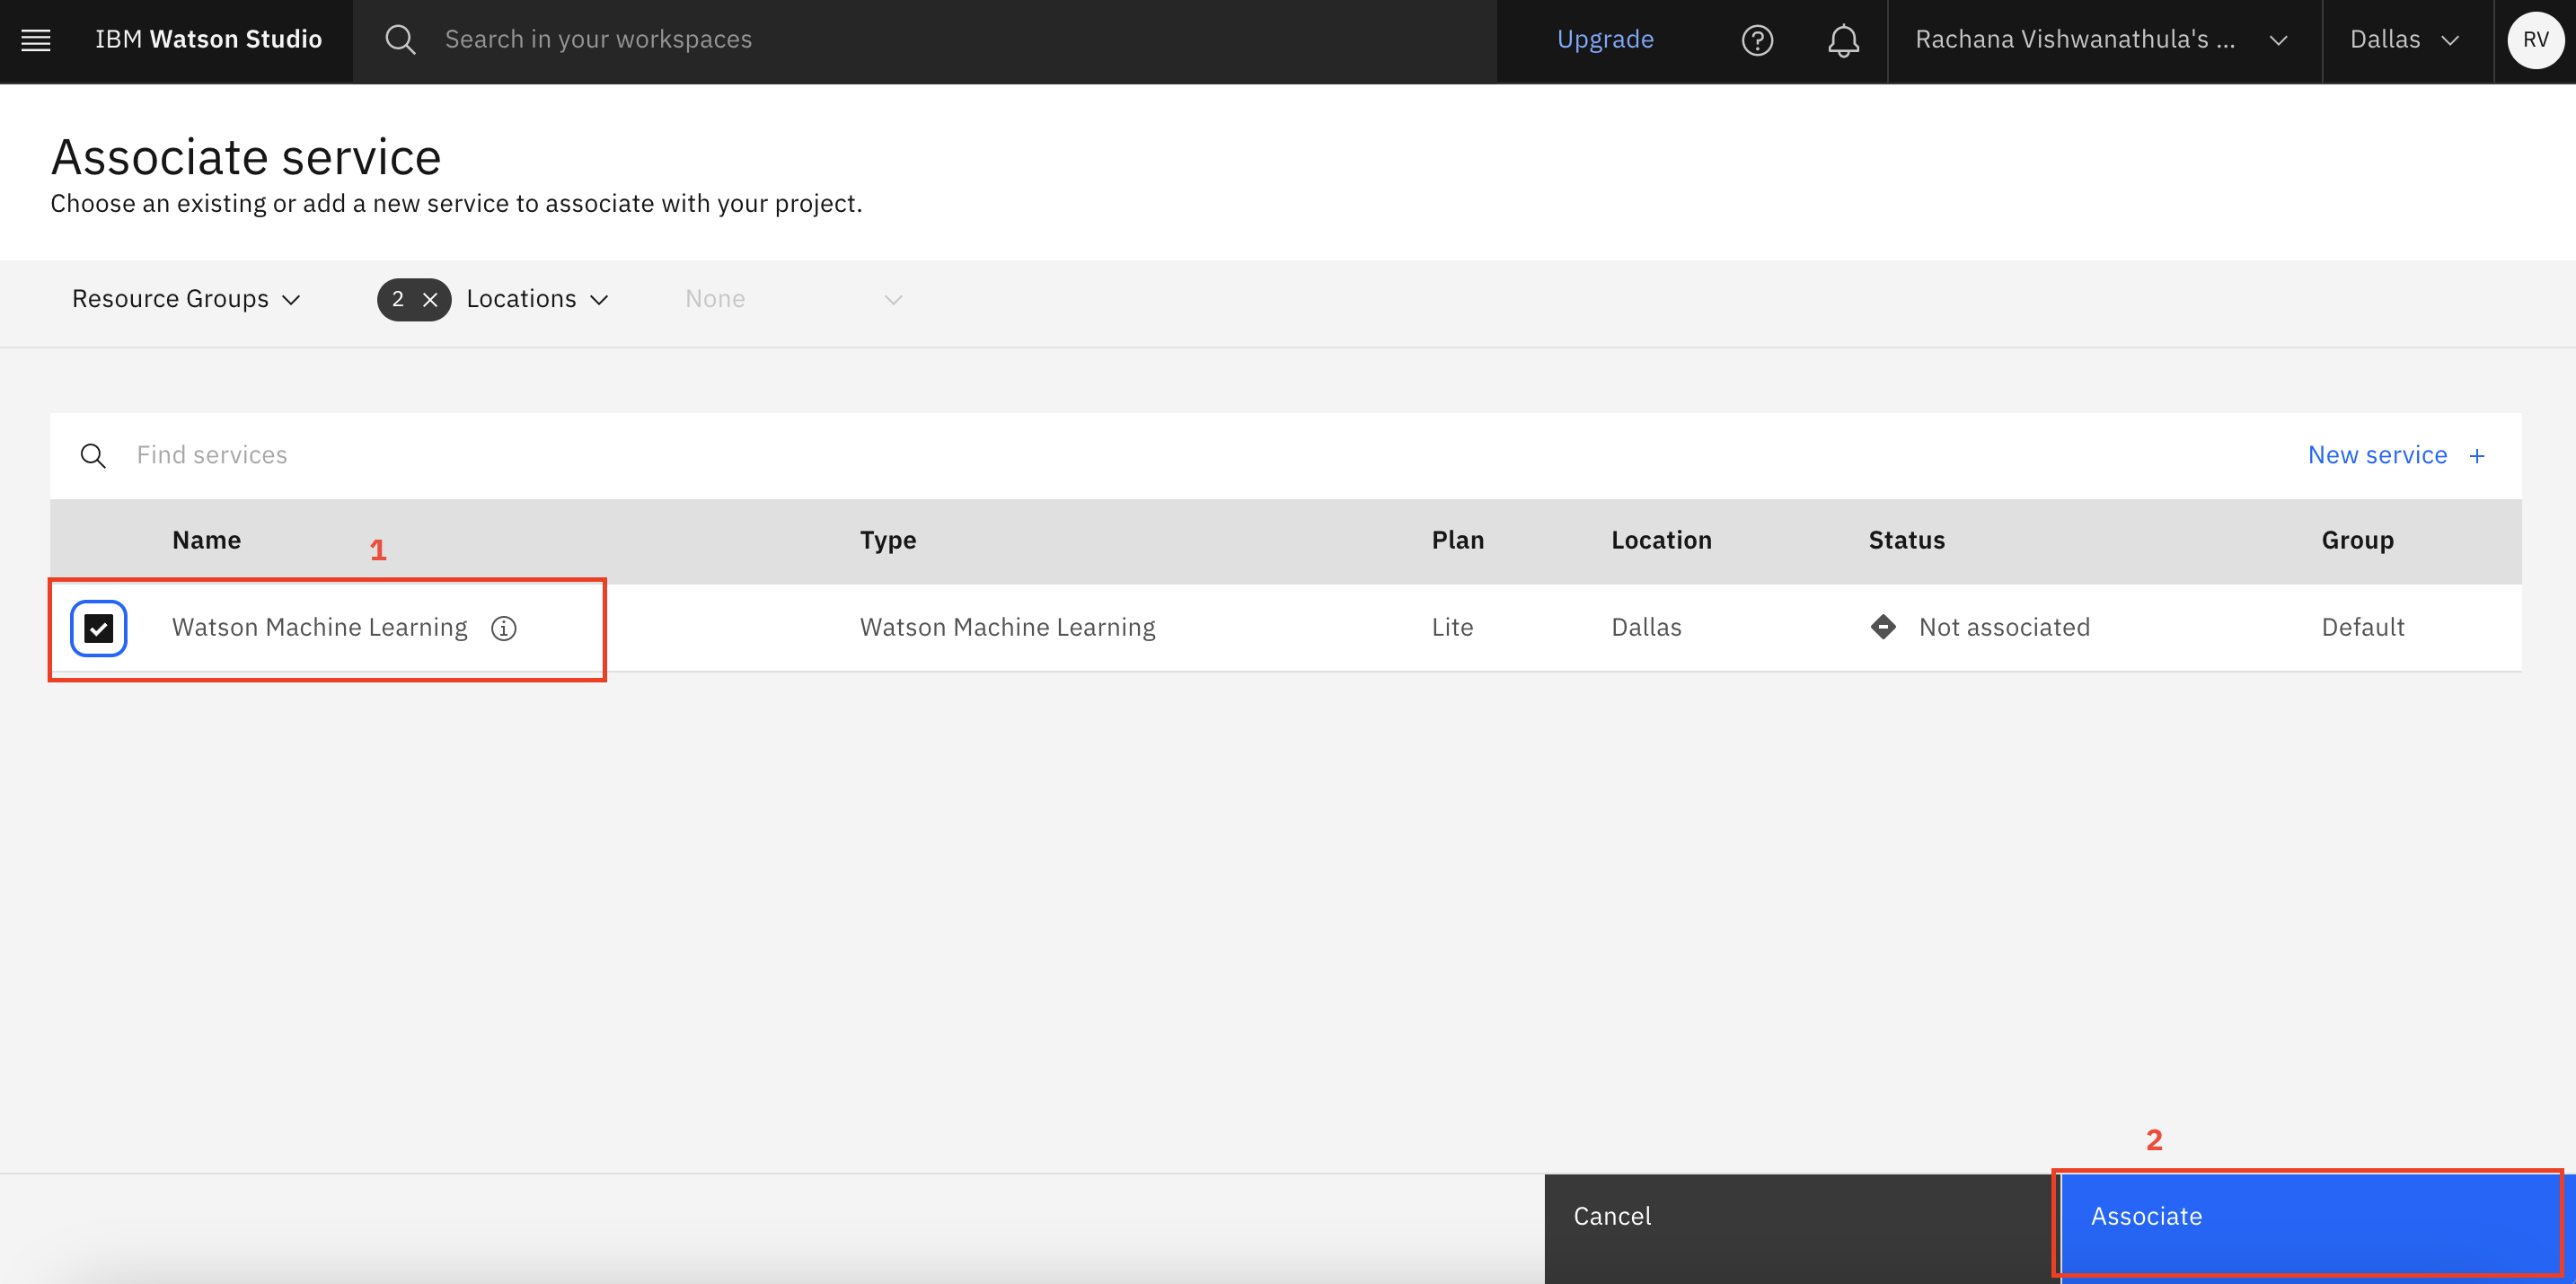
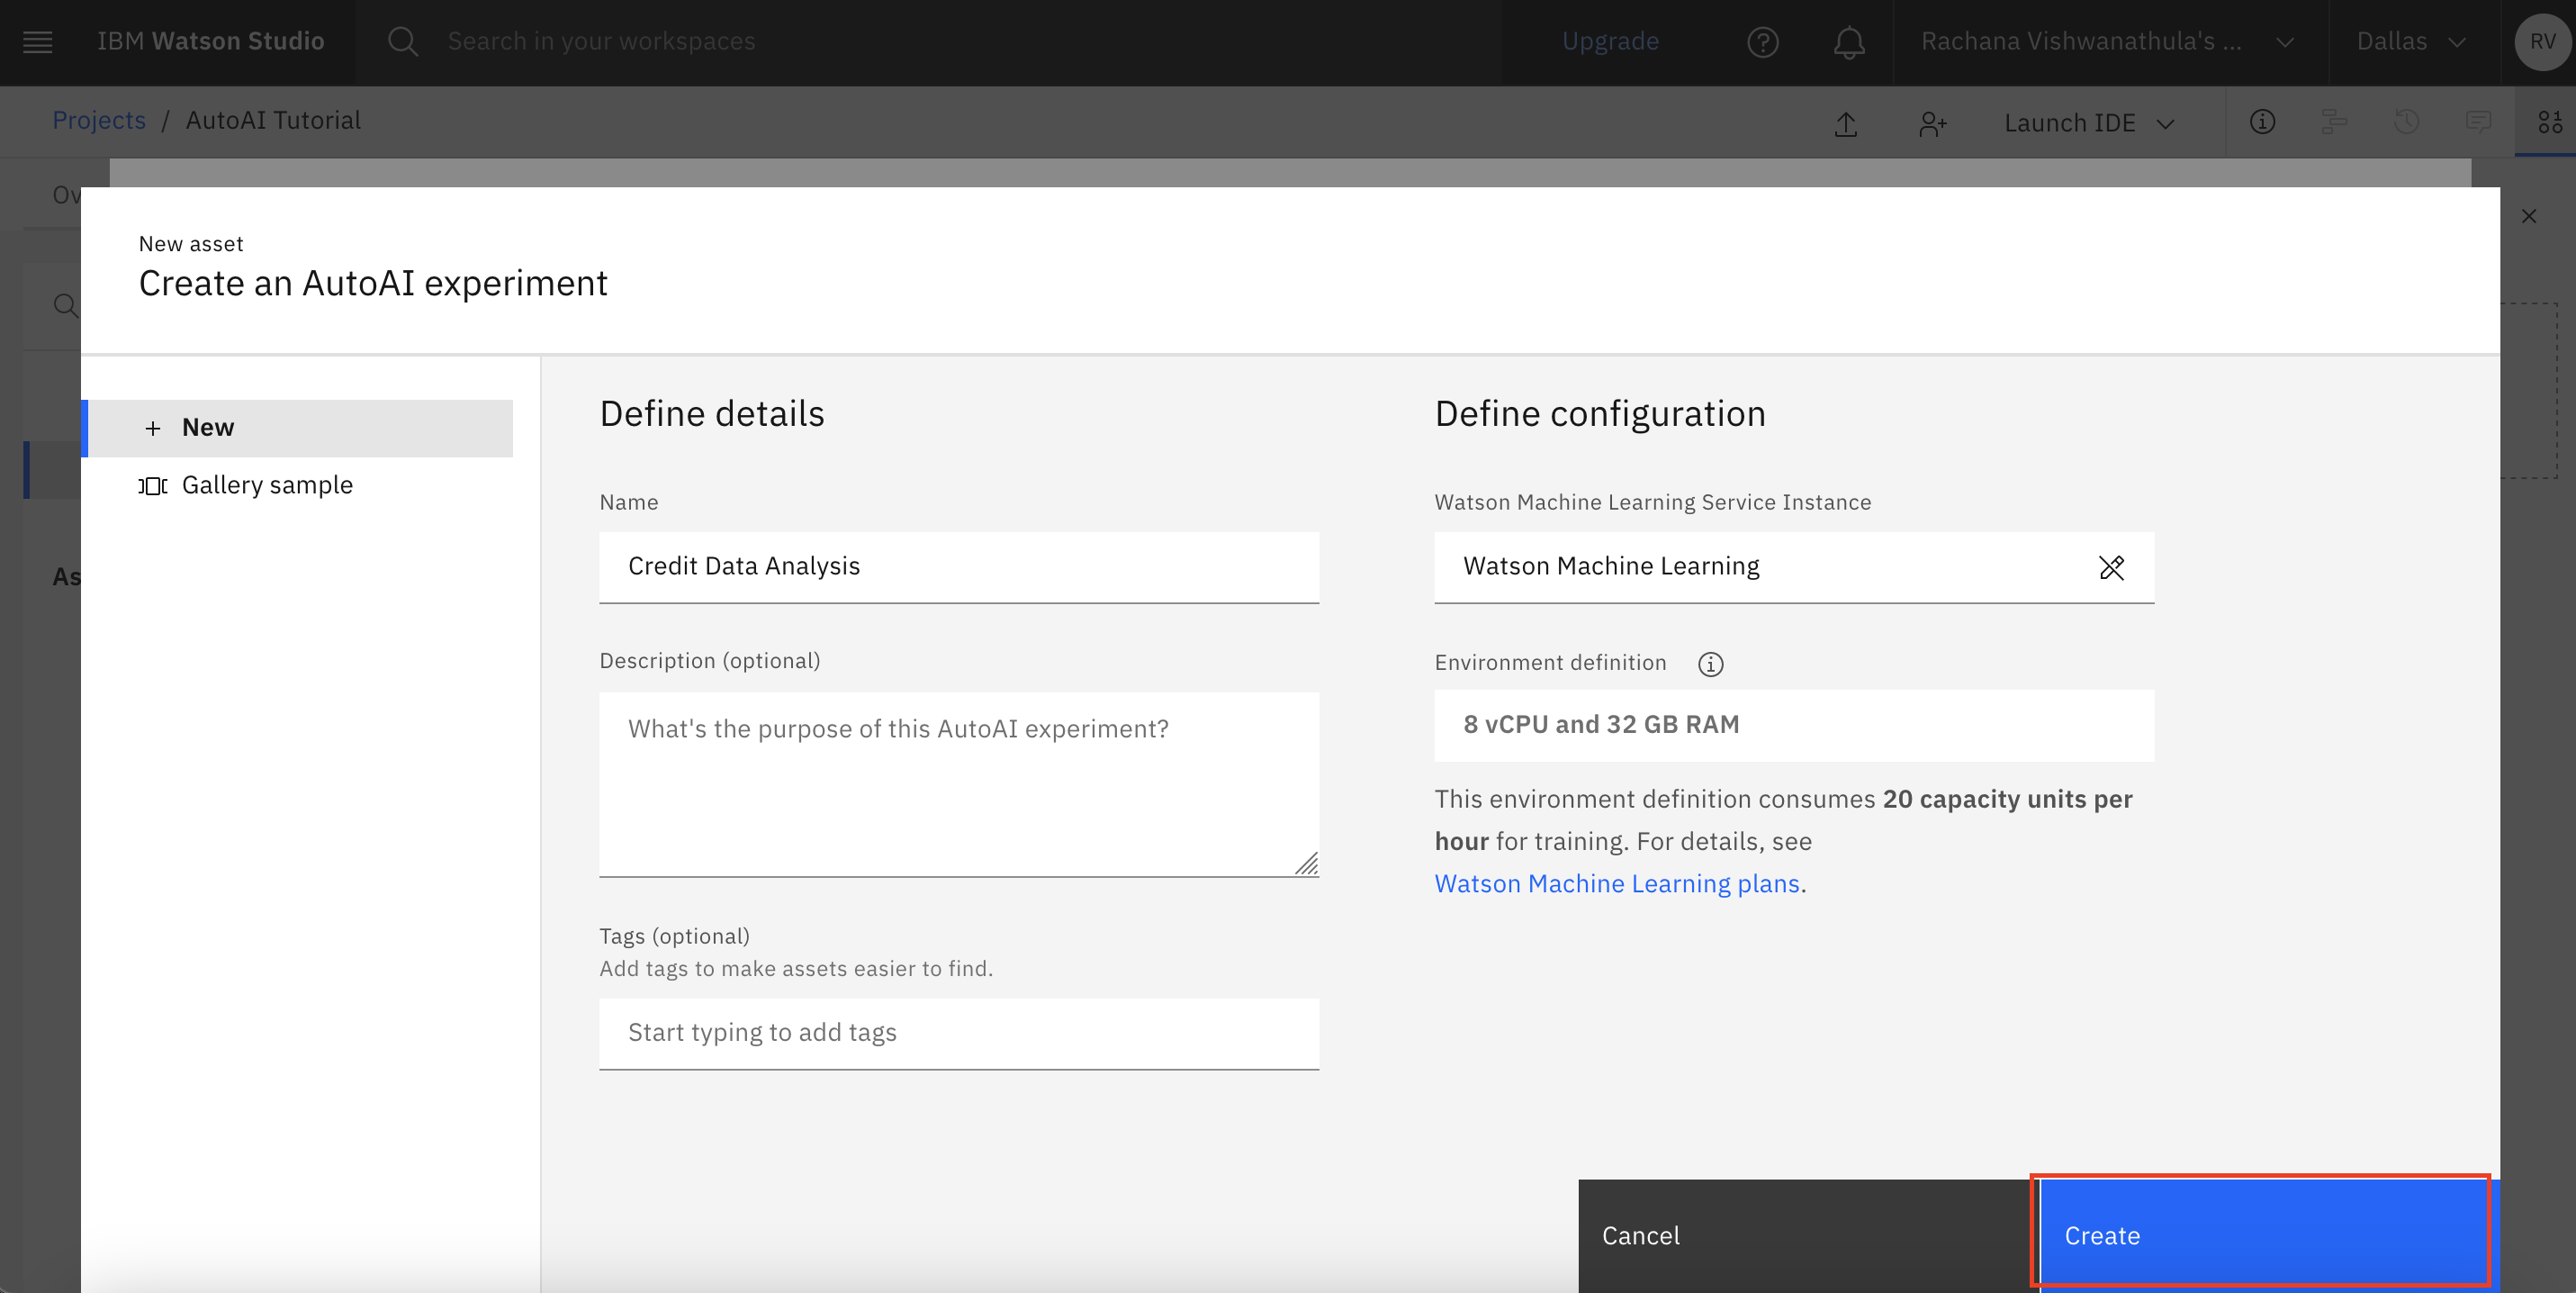
After you click Associate, the page redirects you back to the AutoAI creation page. Here, click Reload, and make sure that your Watson Machine Learning instance is selected. Click Create. This creates an AutoAI experiment.
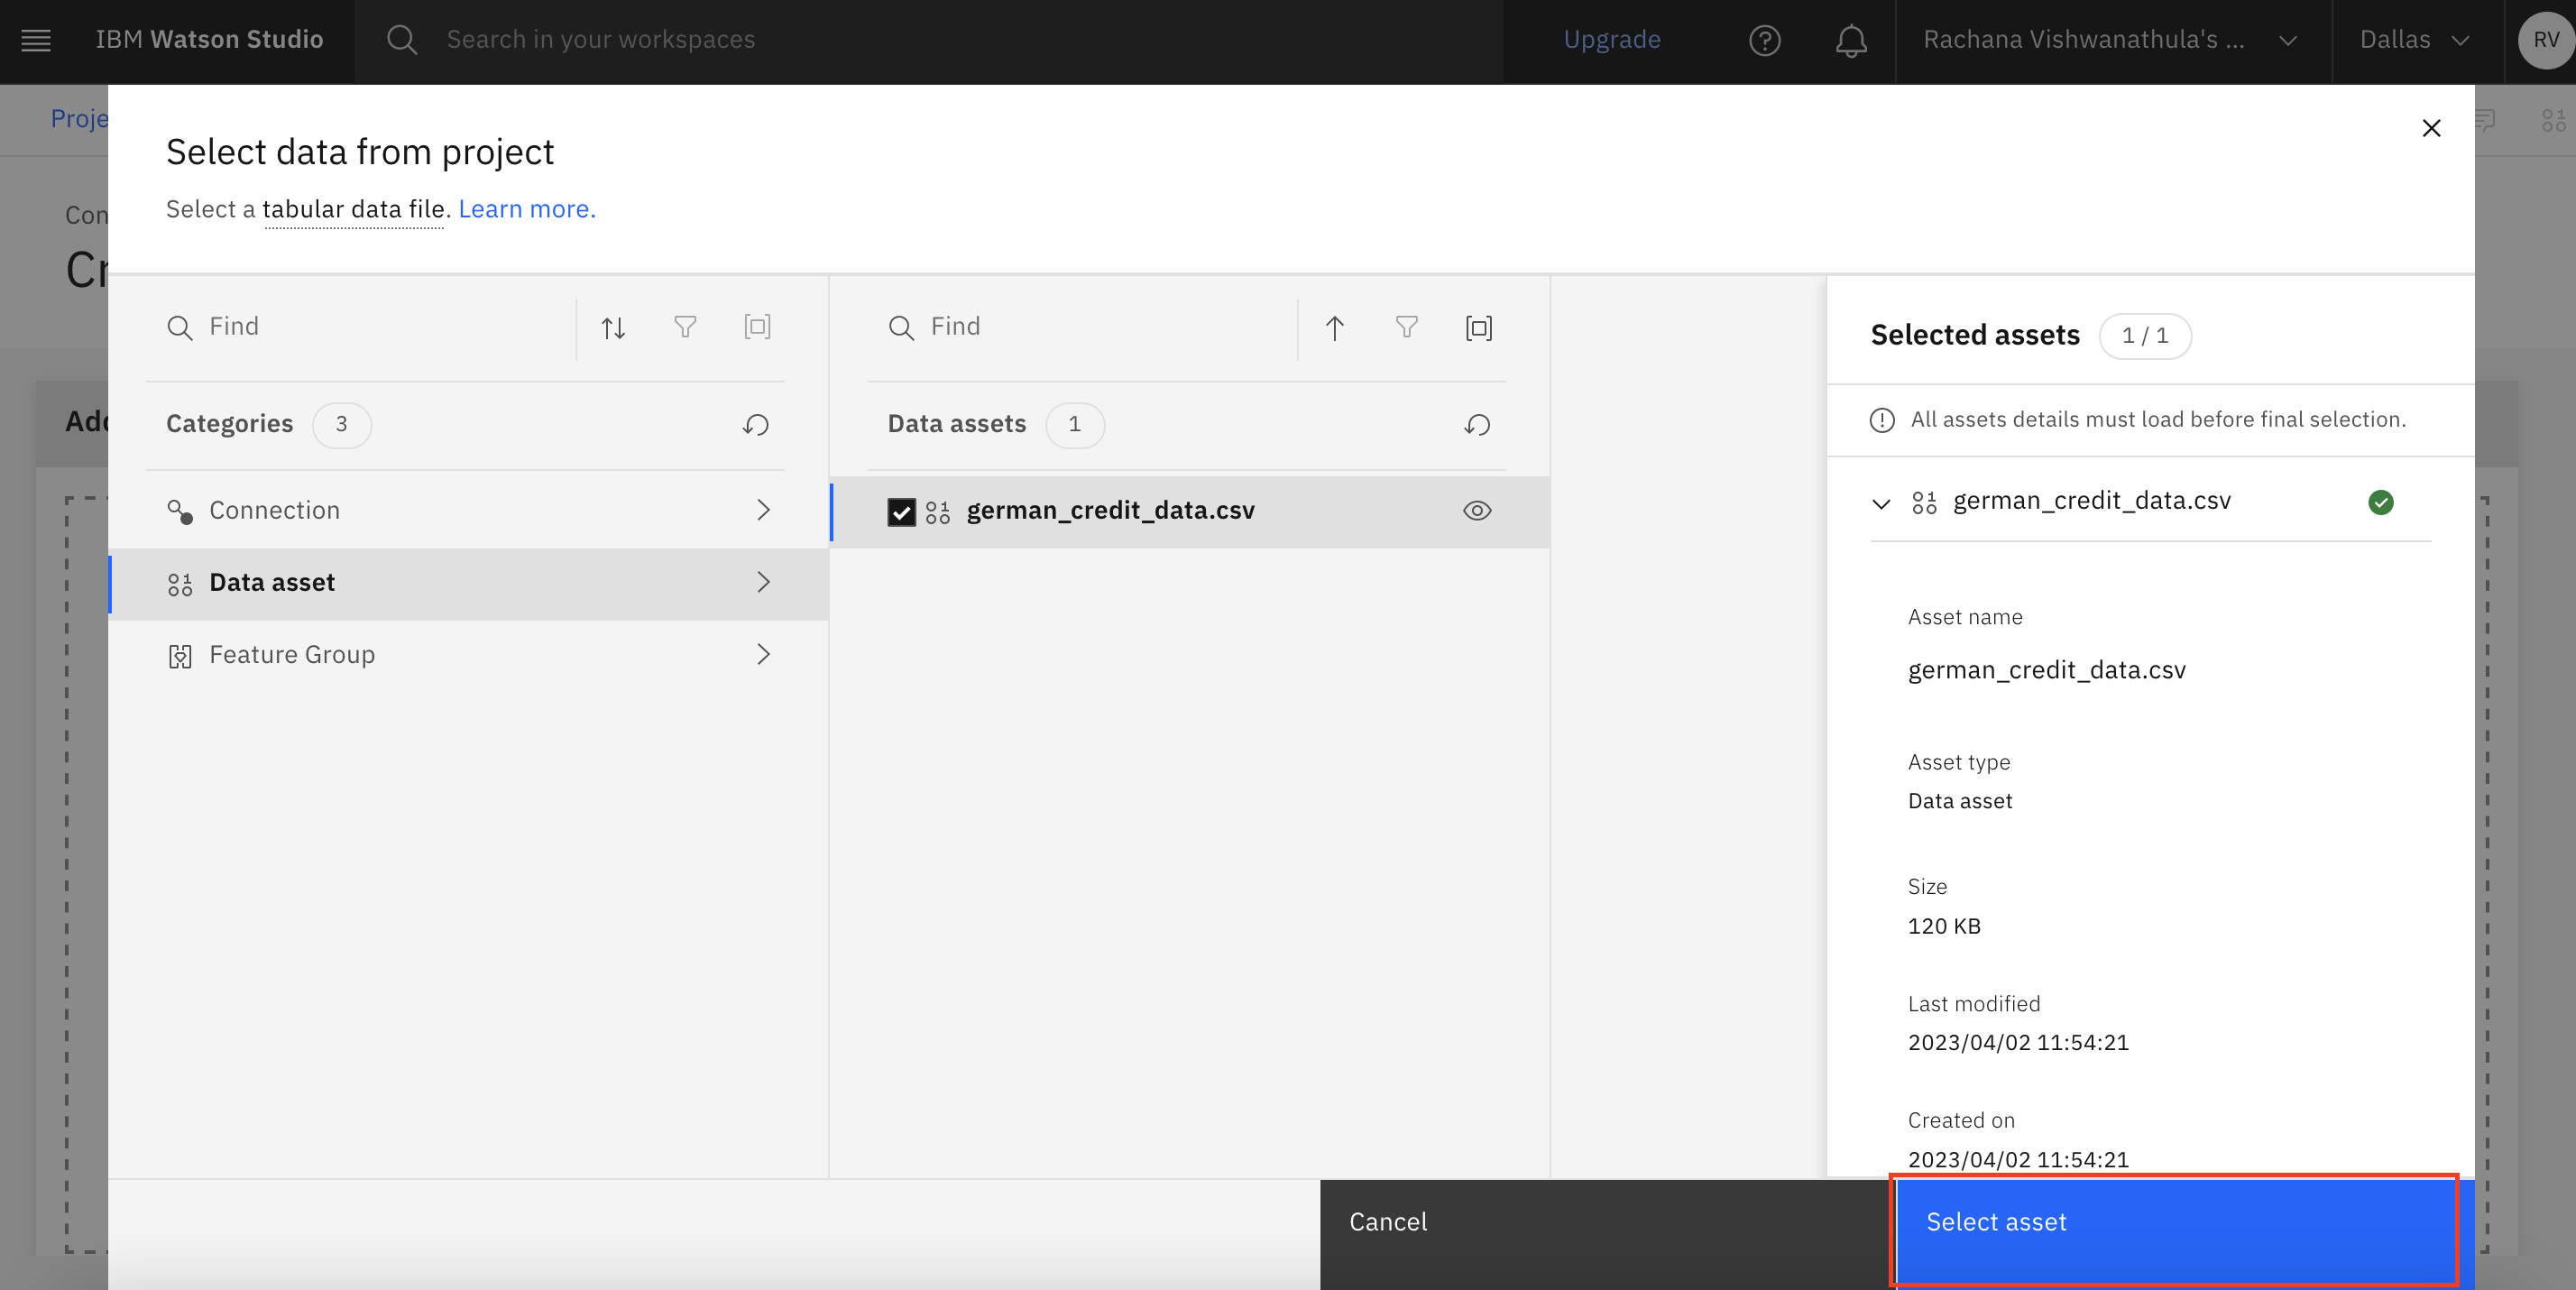
After the AutoAI experiment is created, click Select data from project to select the data asset that you uploaded to the project.
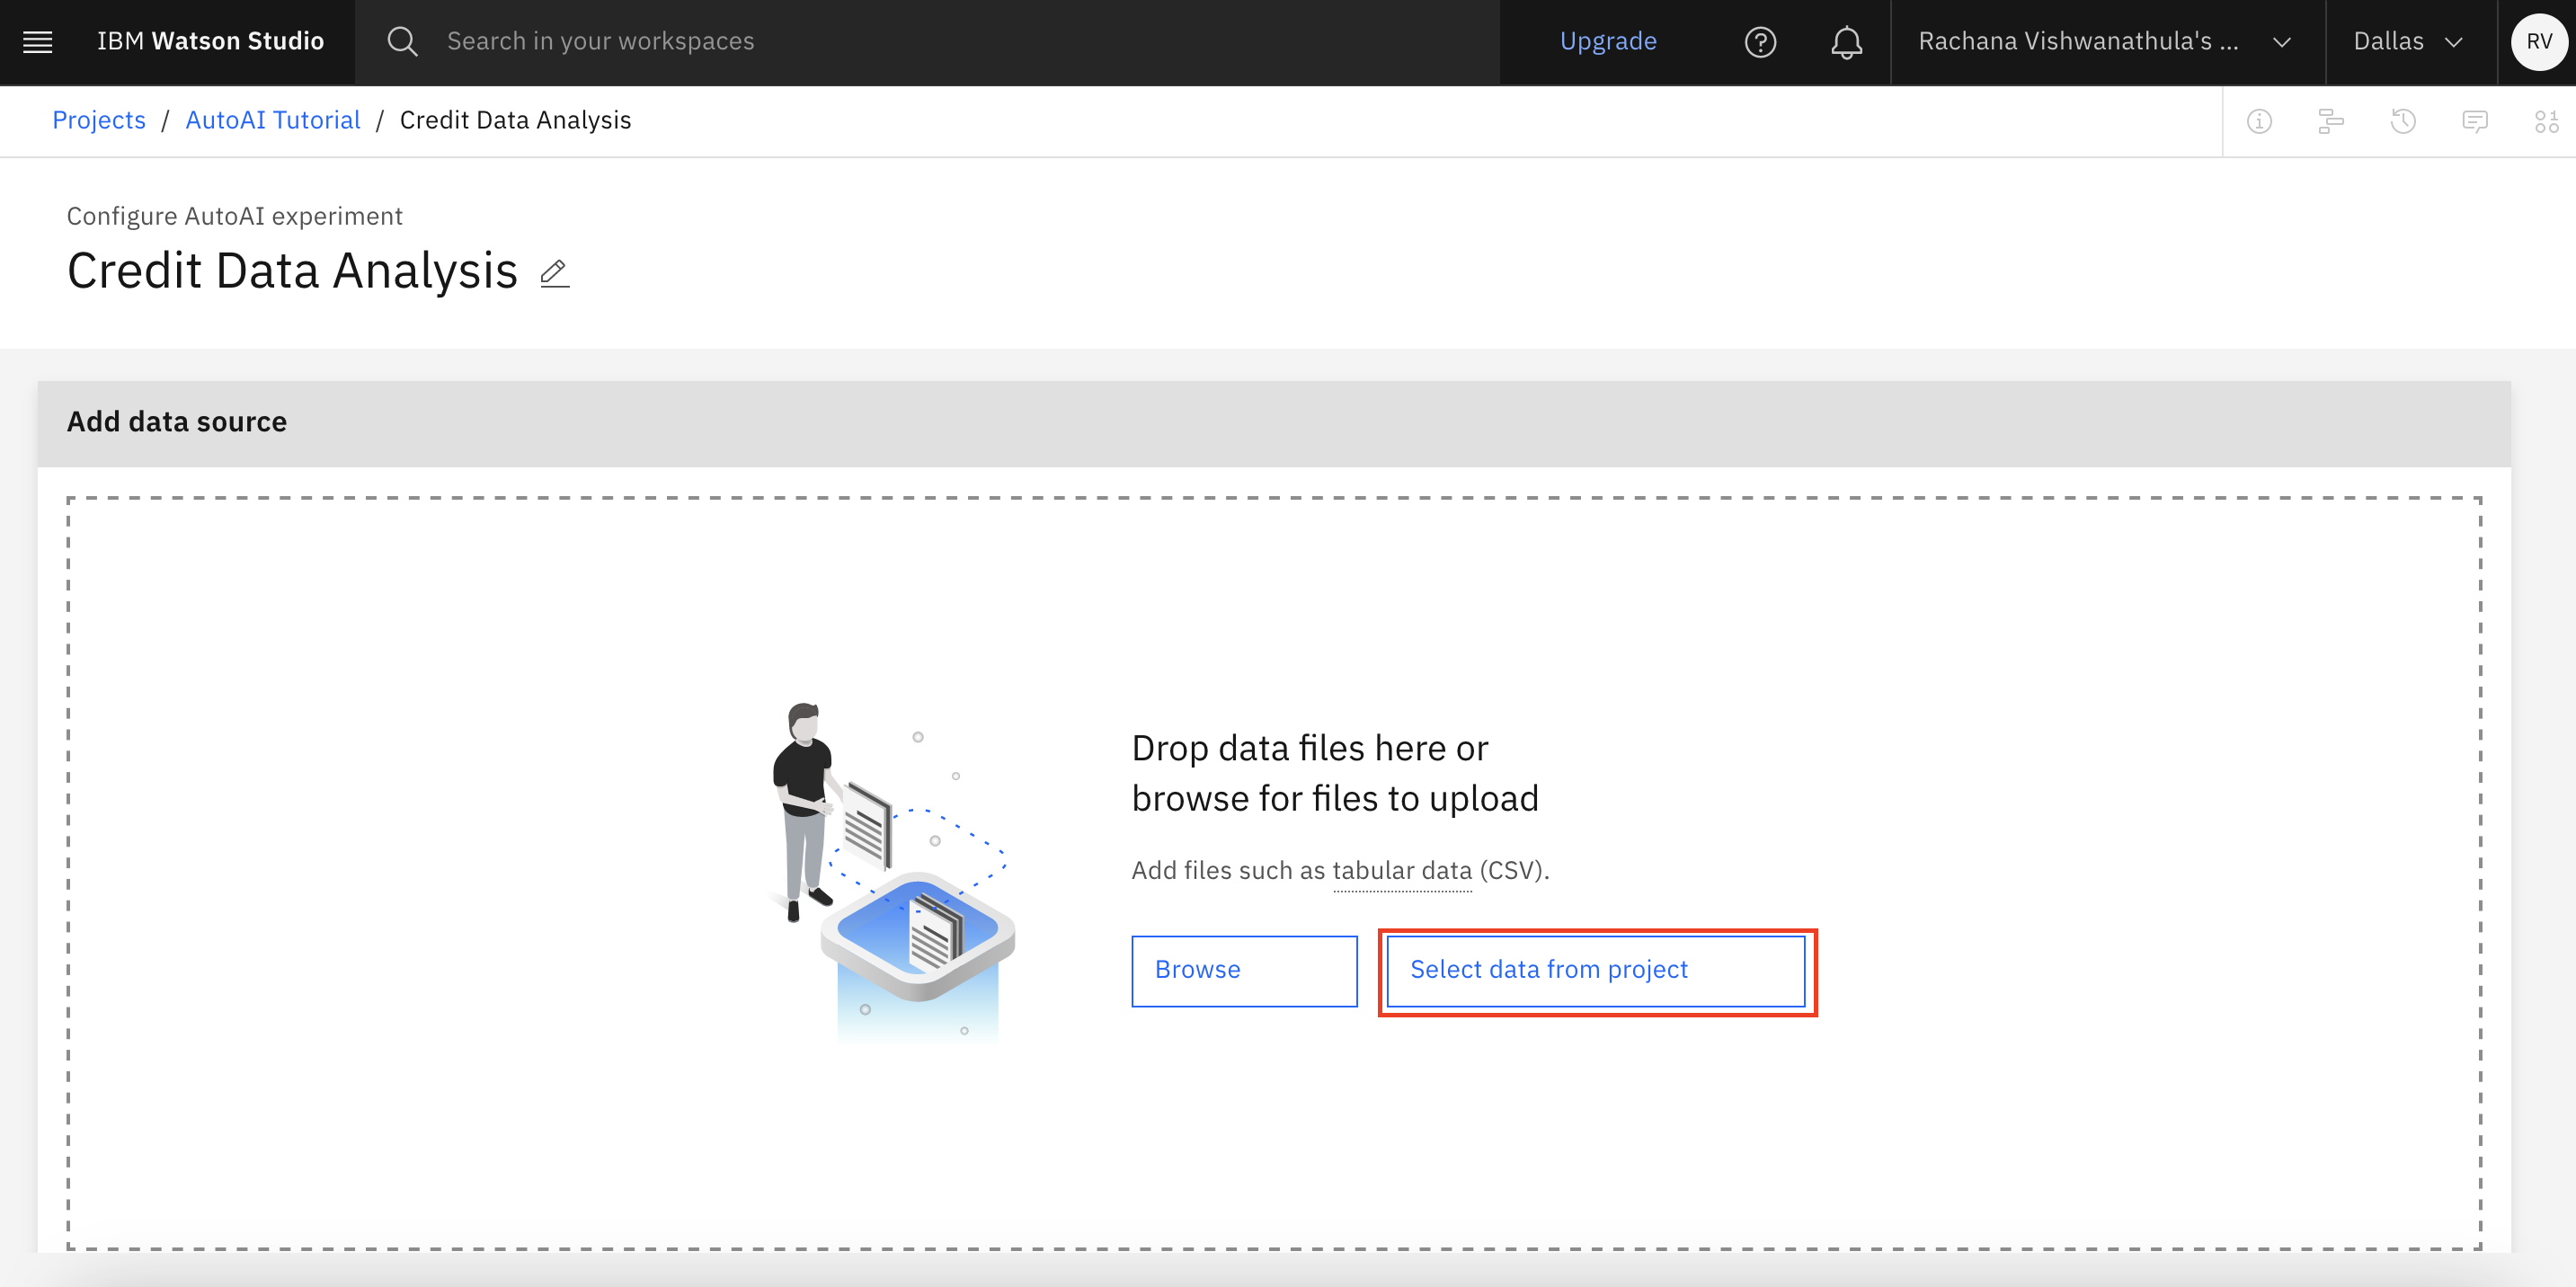
In this example, you're selecting the german_credit_data.csv file that is in the data assets of the project.
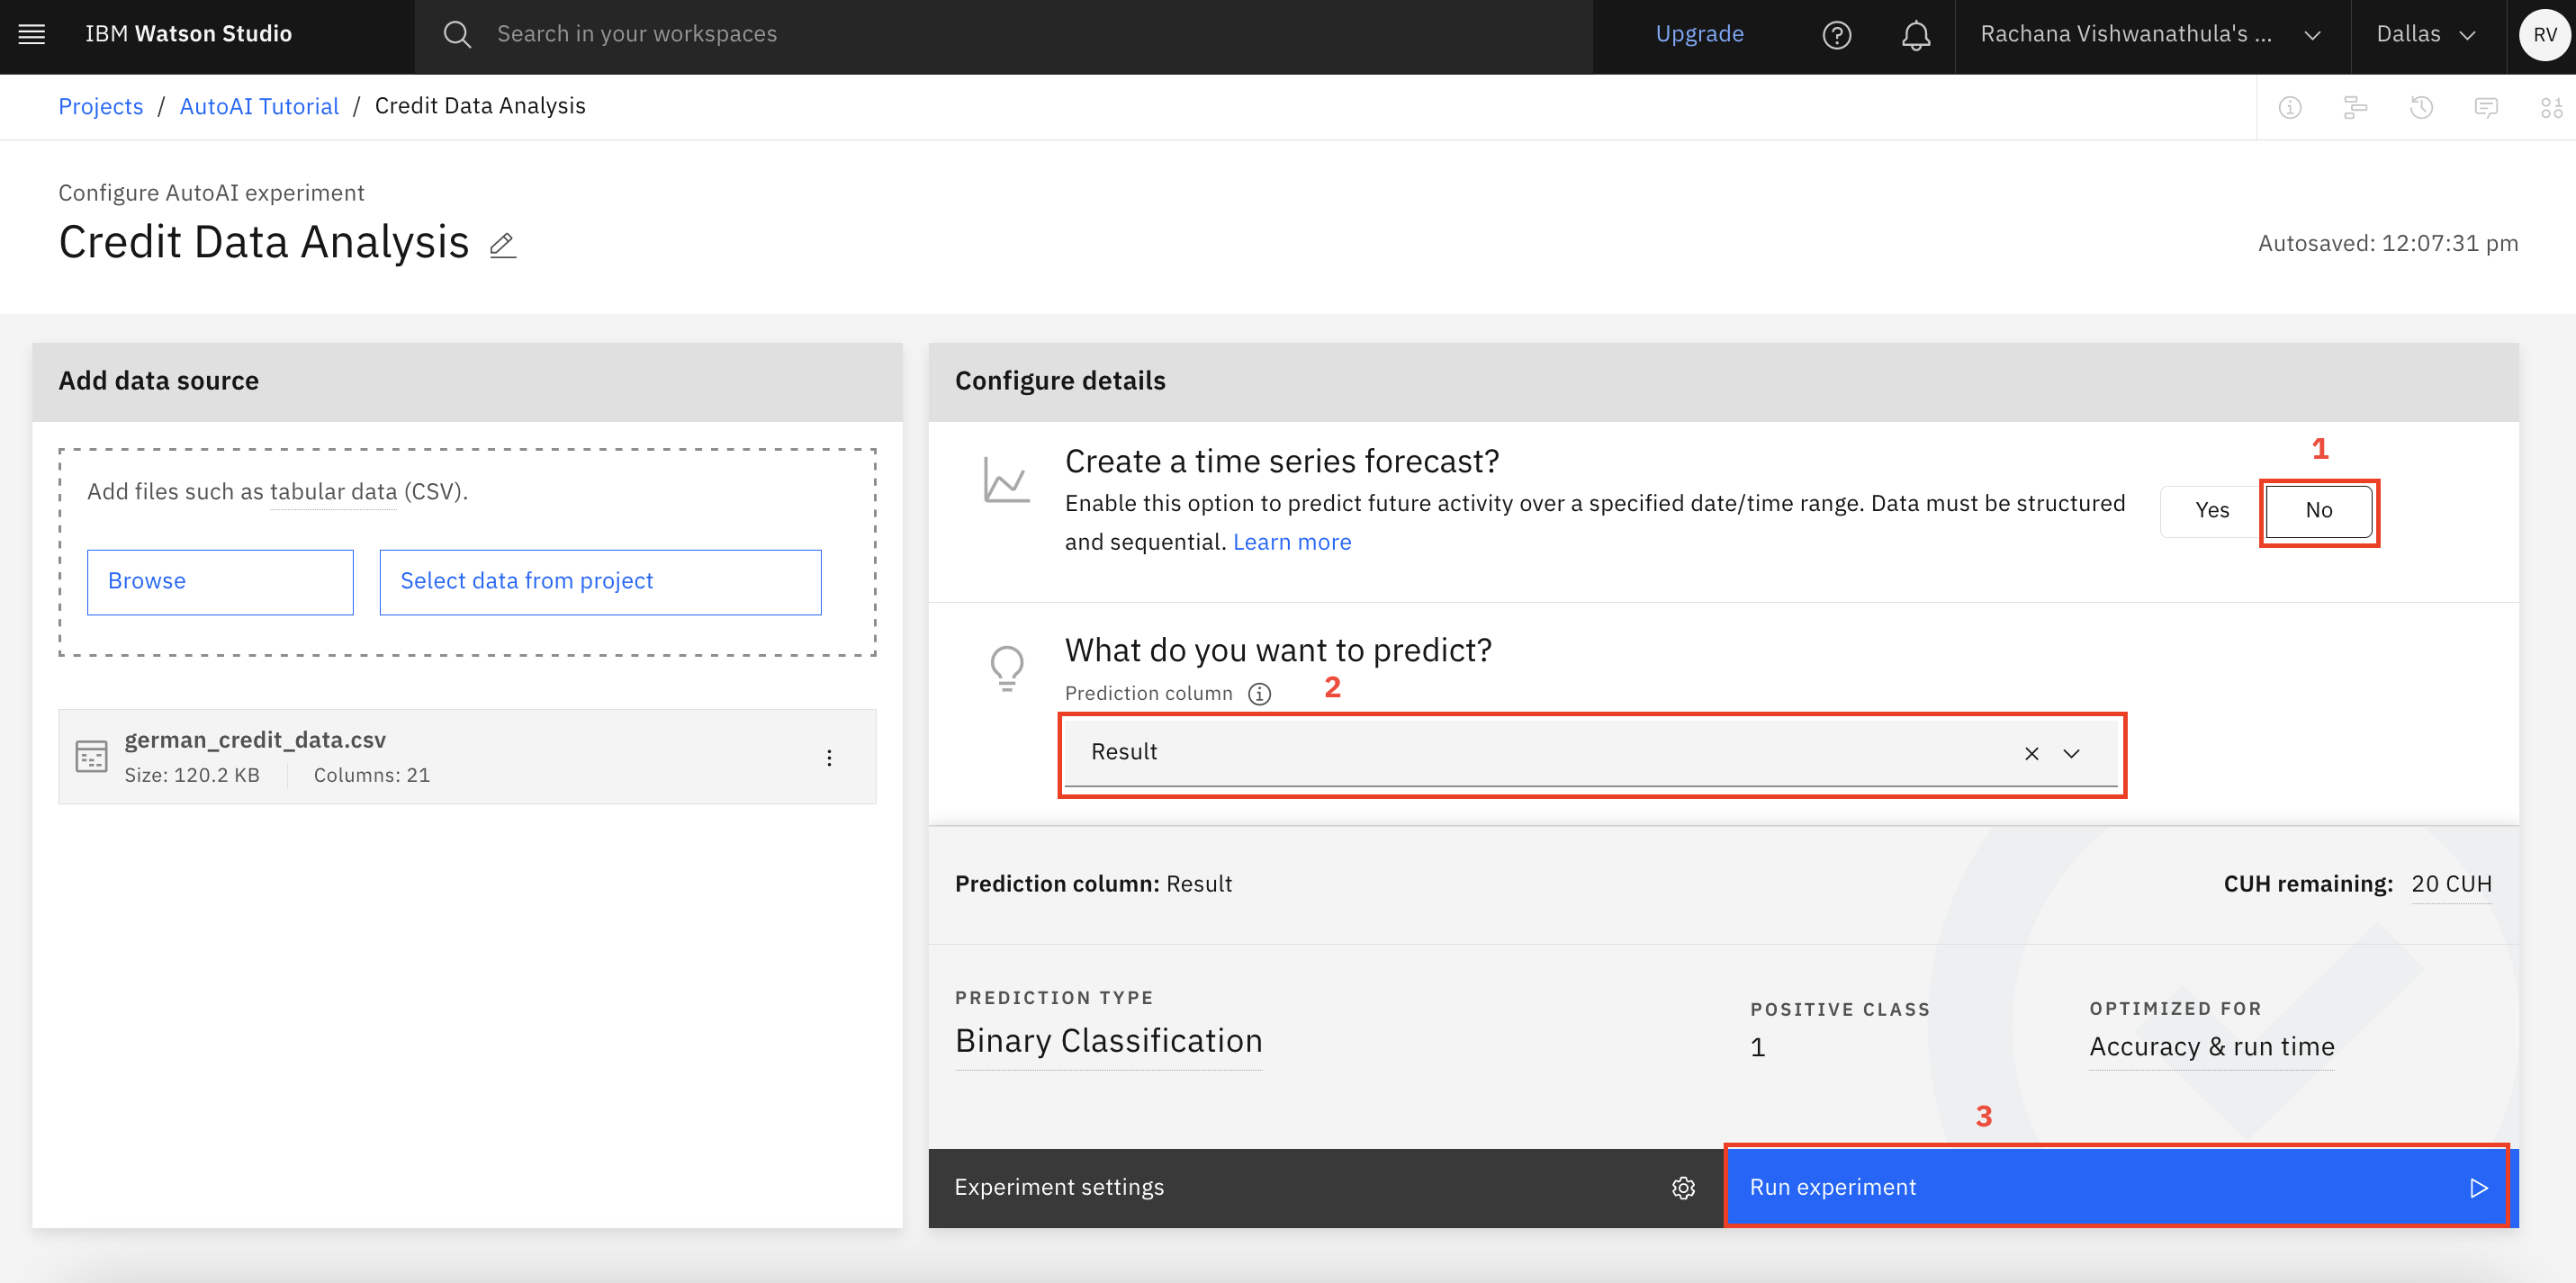
After the data is selected, select the project settings.
- Select No to Time Series Forecast because the data is not time series data.
- Select the target variable that is to be predicted by AutoAI, which is the 'Result' column in this data asset.
- Click Run Experiment.
AutoAI pipeline
The experiment begins after you complete the previous processes.
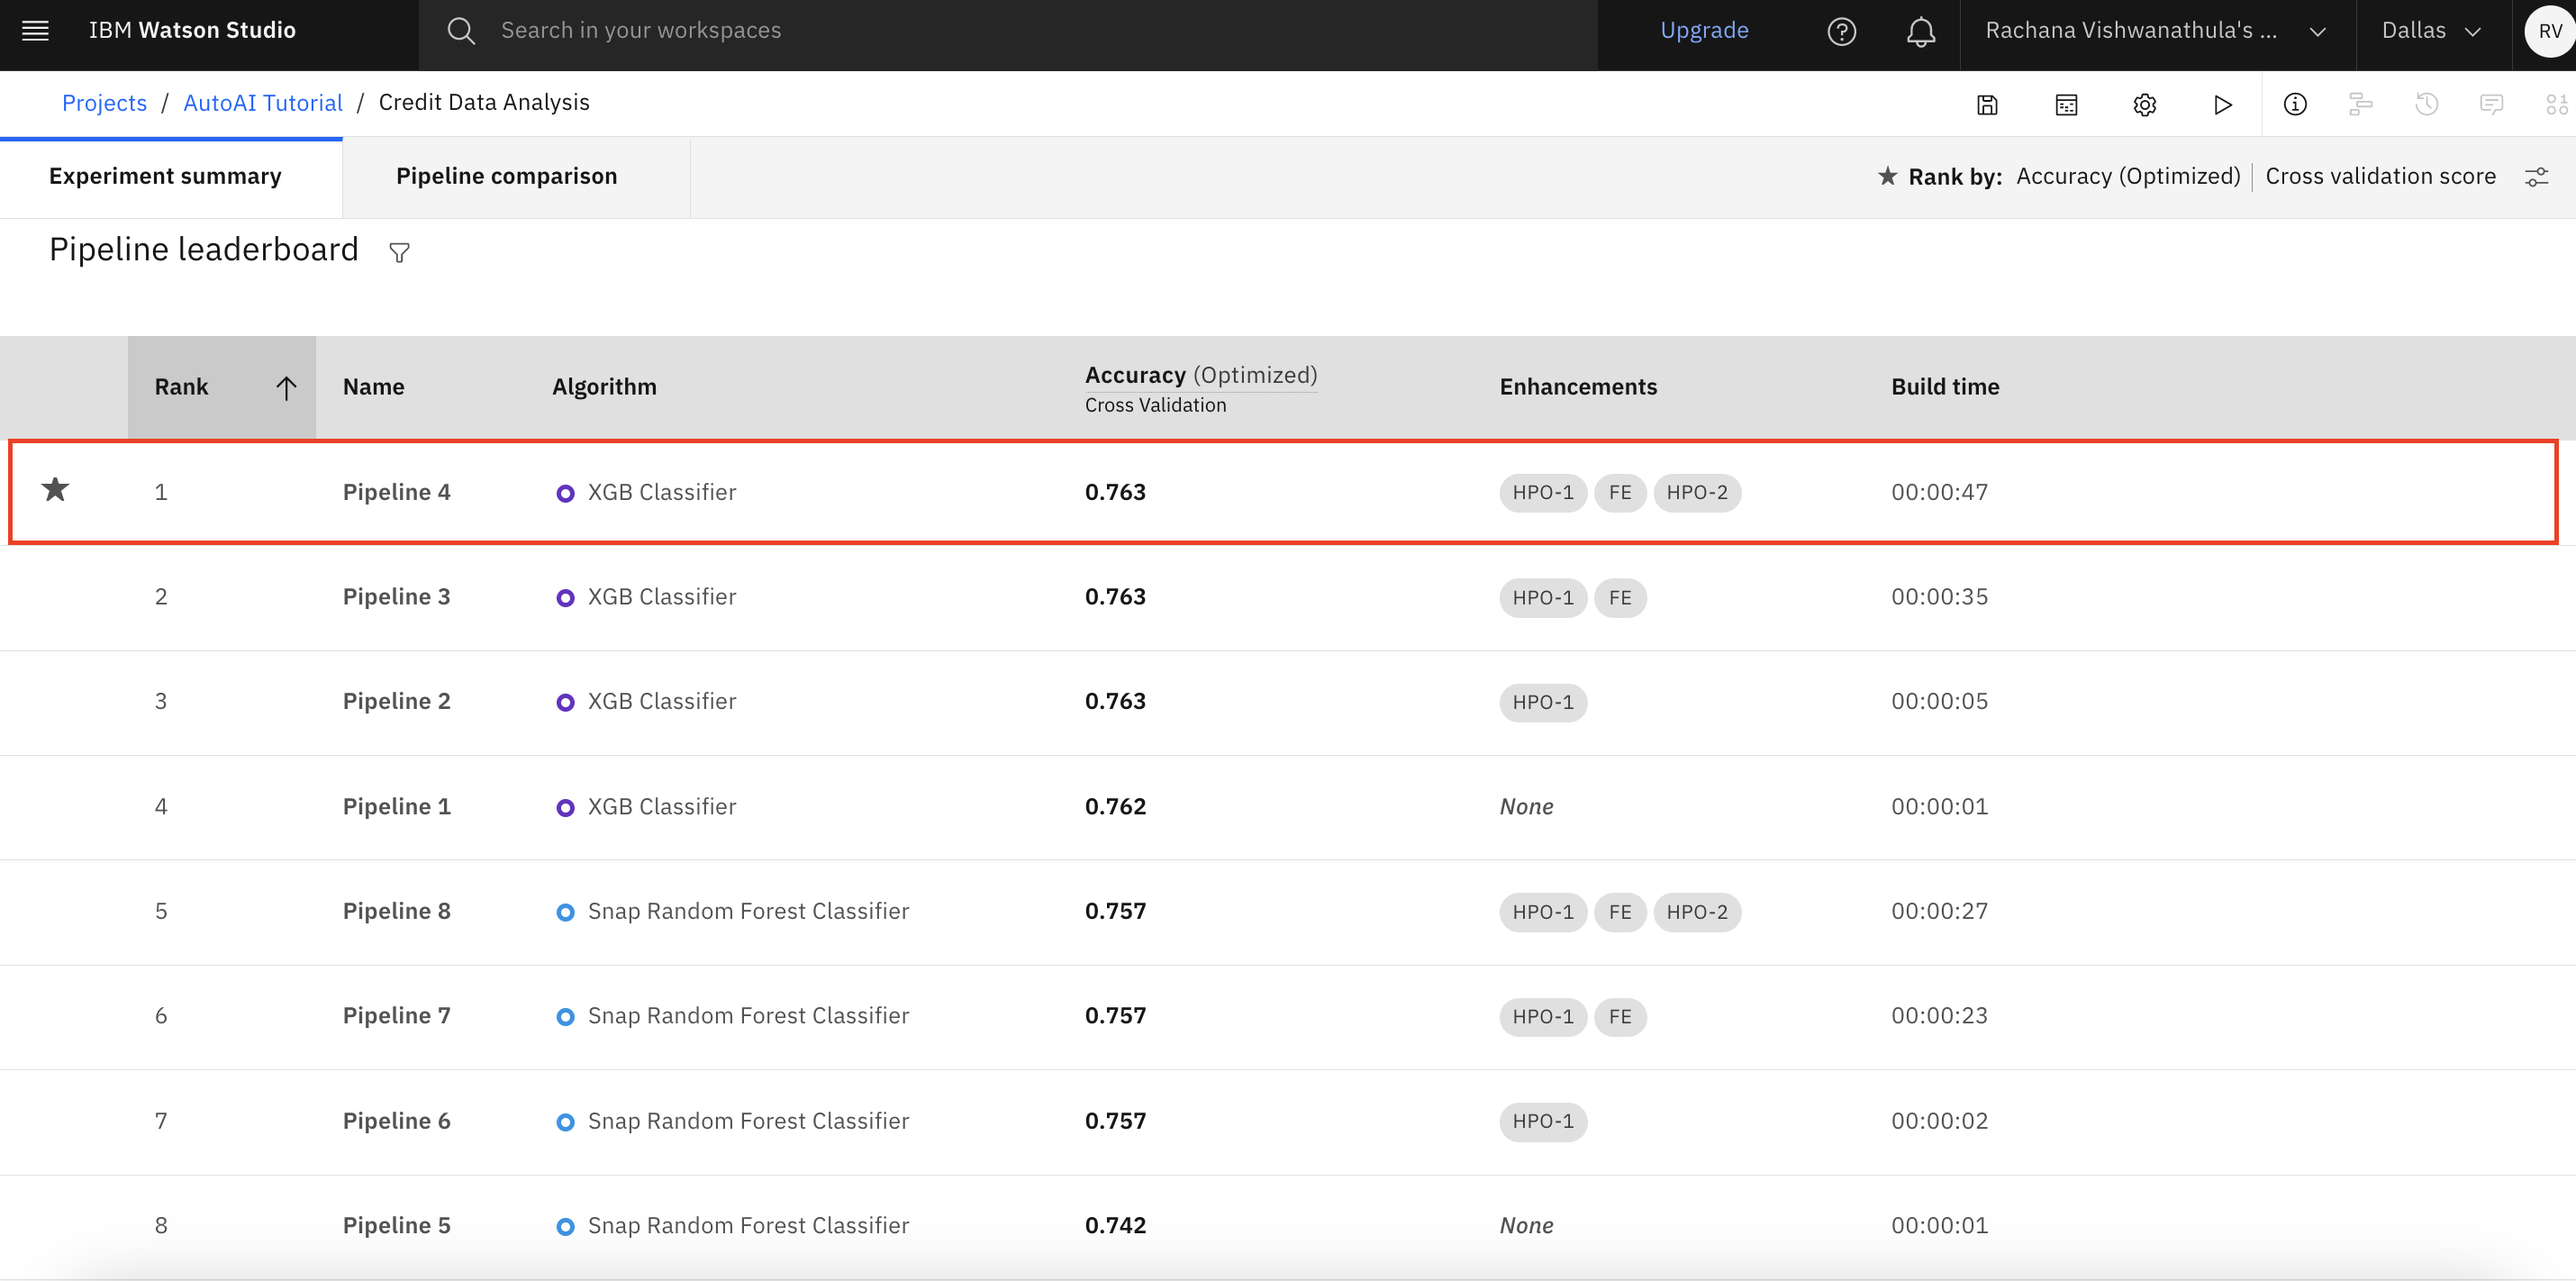
After data preprocessing, AutoAI identifies the top two performing algorithms and for each of these algorithms, AutoAI generates the following four pipelines.
- Automated model selection (Pipeline 1)
- Hyperparameter optimization (Pipeline 2)
- Automated feature engineering (Pipeline 3)
- Hyperparameter optimization (Pipeline 4)
In this manner, AutoAI generates a total of eight pipelines that you can view, compare, and save as models.
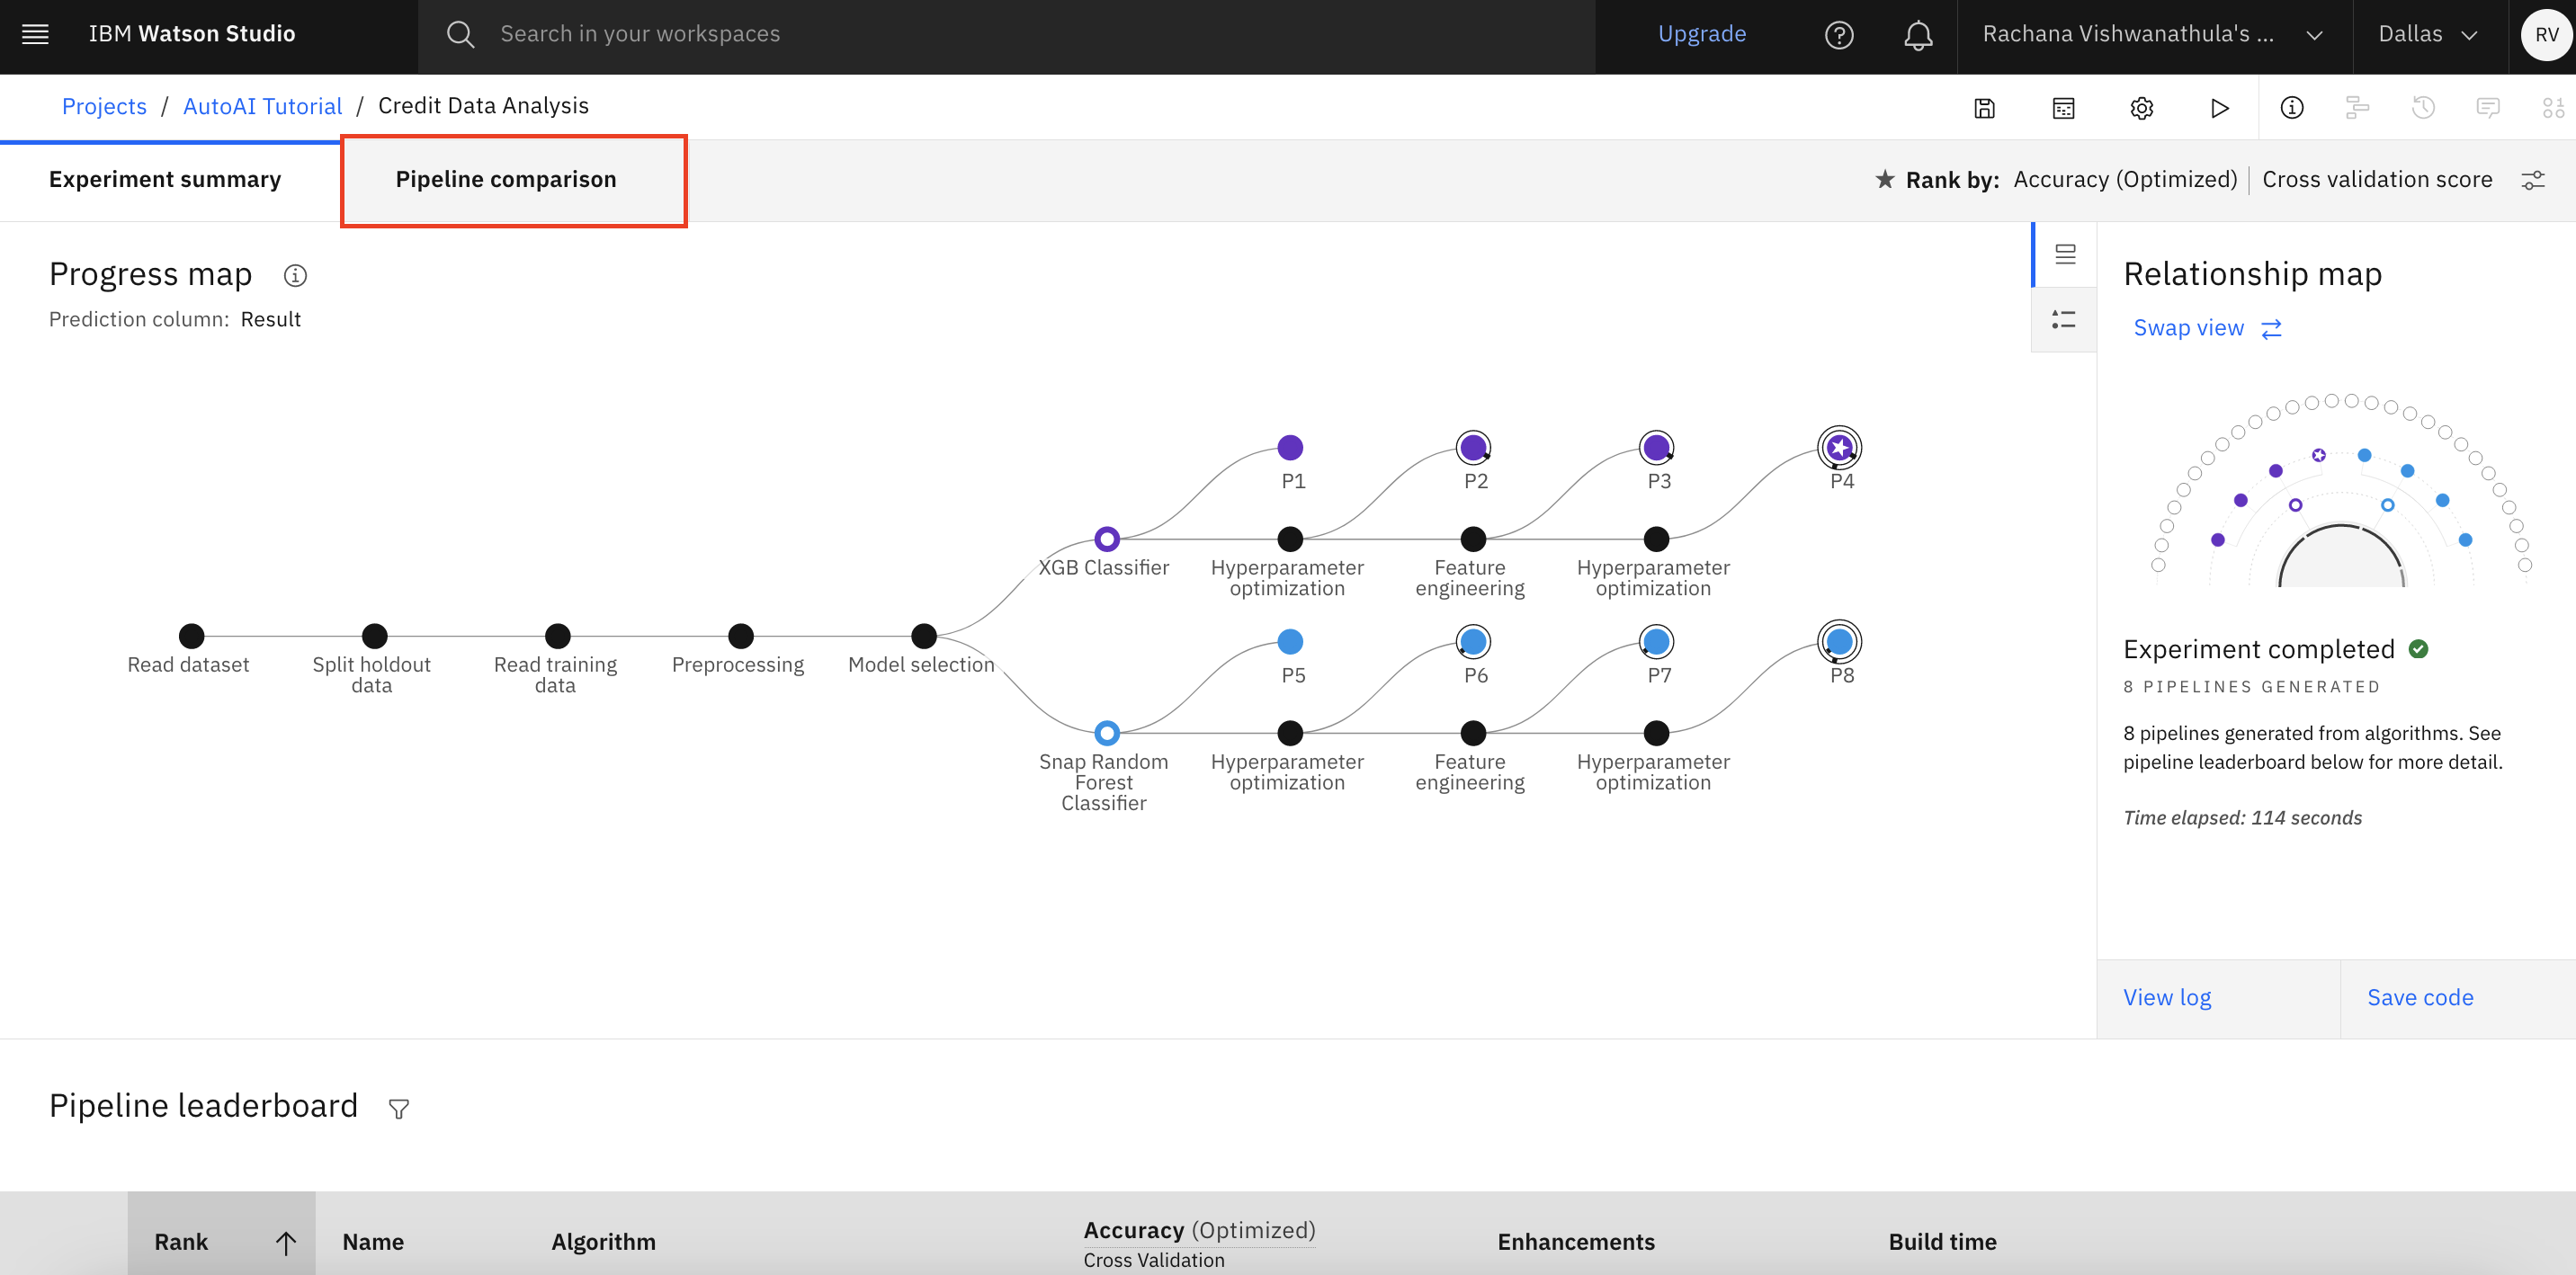
Visualizing pipelines
While AutoAI is generating the models, there are two different views through which you can visualize the progress of these pipelines being created. They are the progress map and the relationship map, as seen in the following images. You see that AutoAI has choosen XGB and Snap Random Forest as the top performing algorithms for this use case.
The following figures show the relationship map with the relations between each of these pipelines.
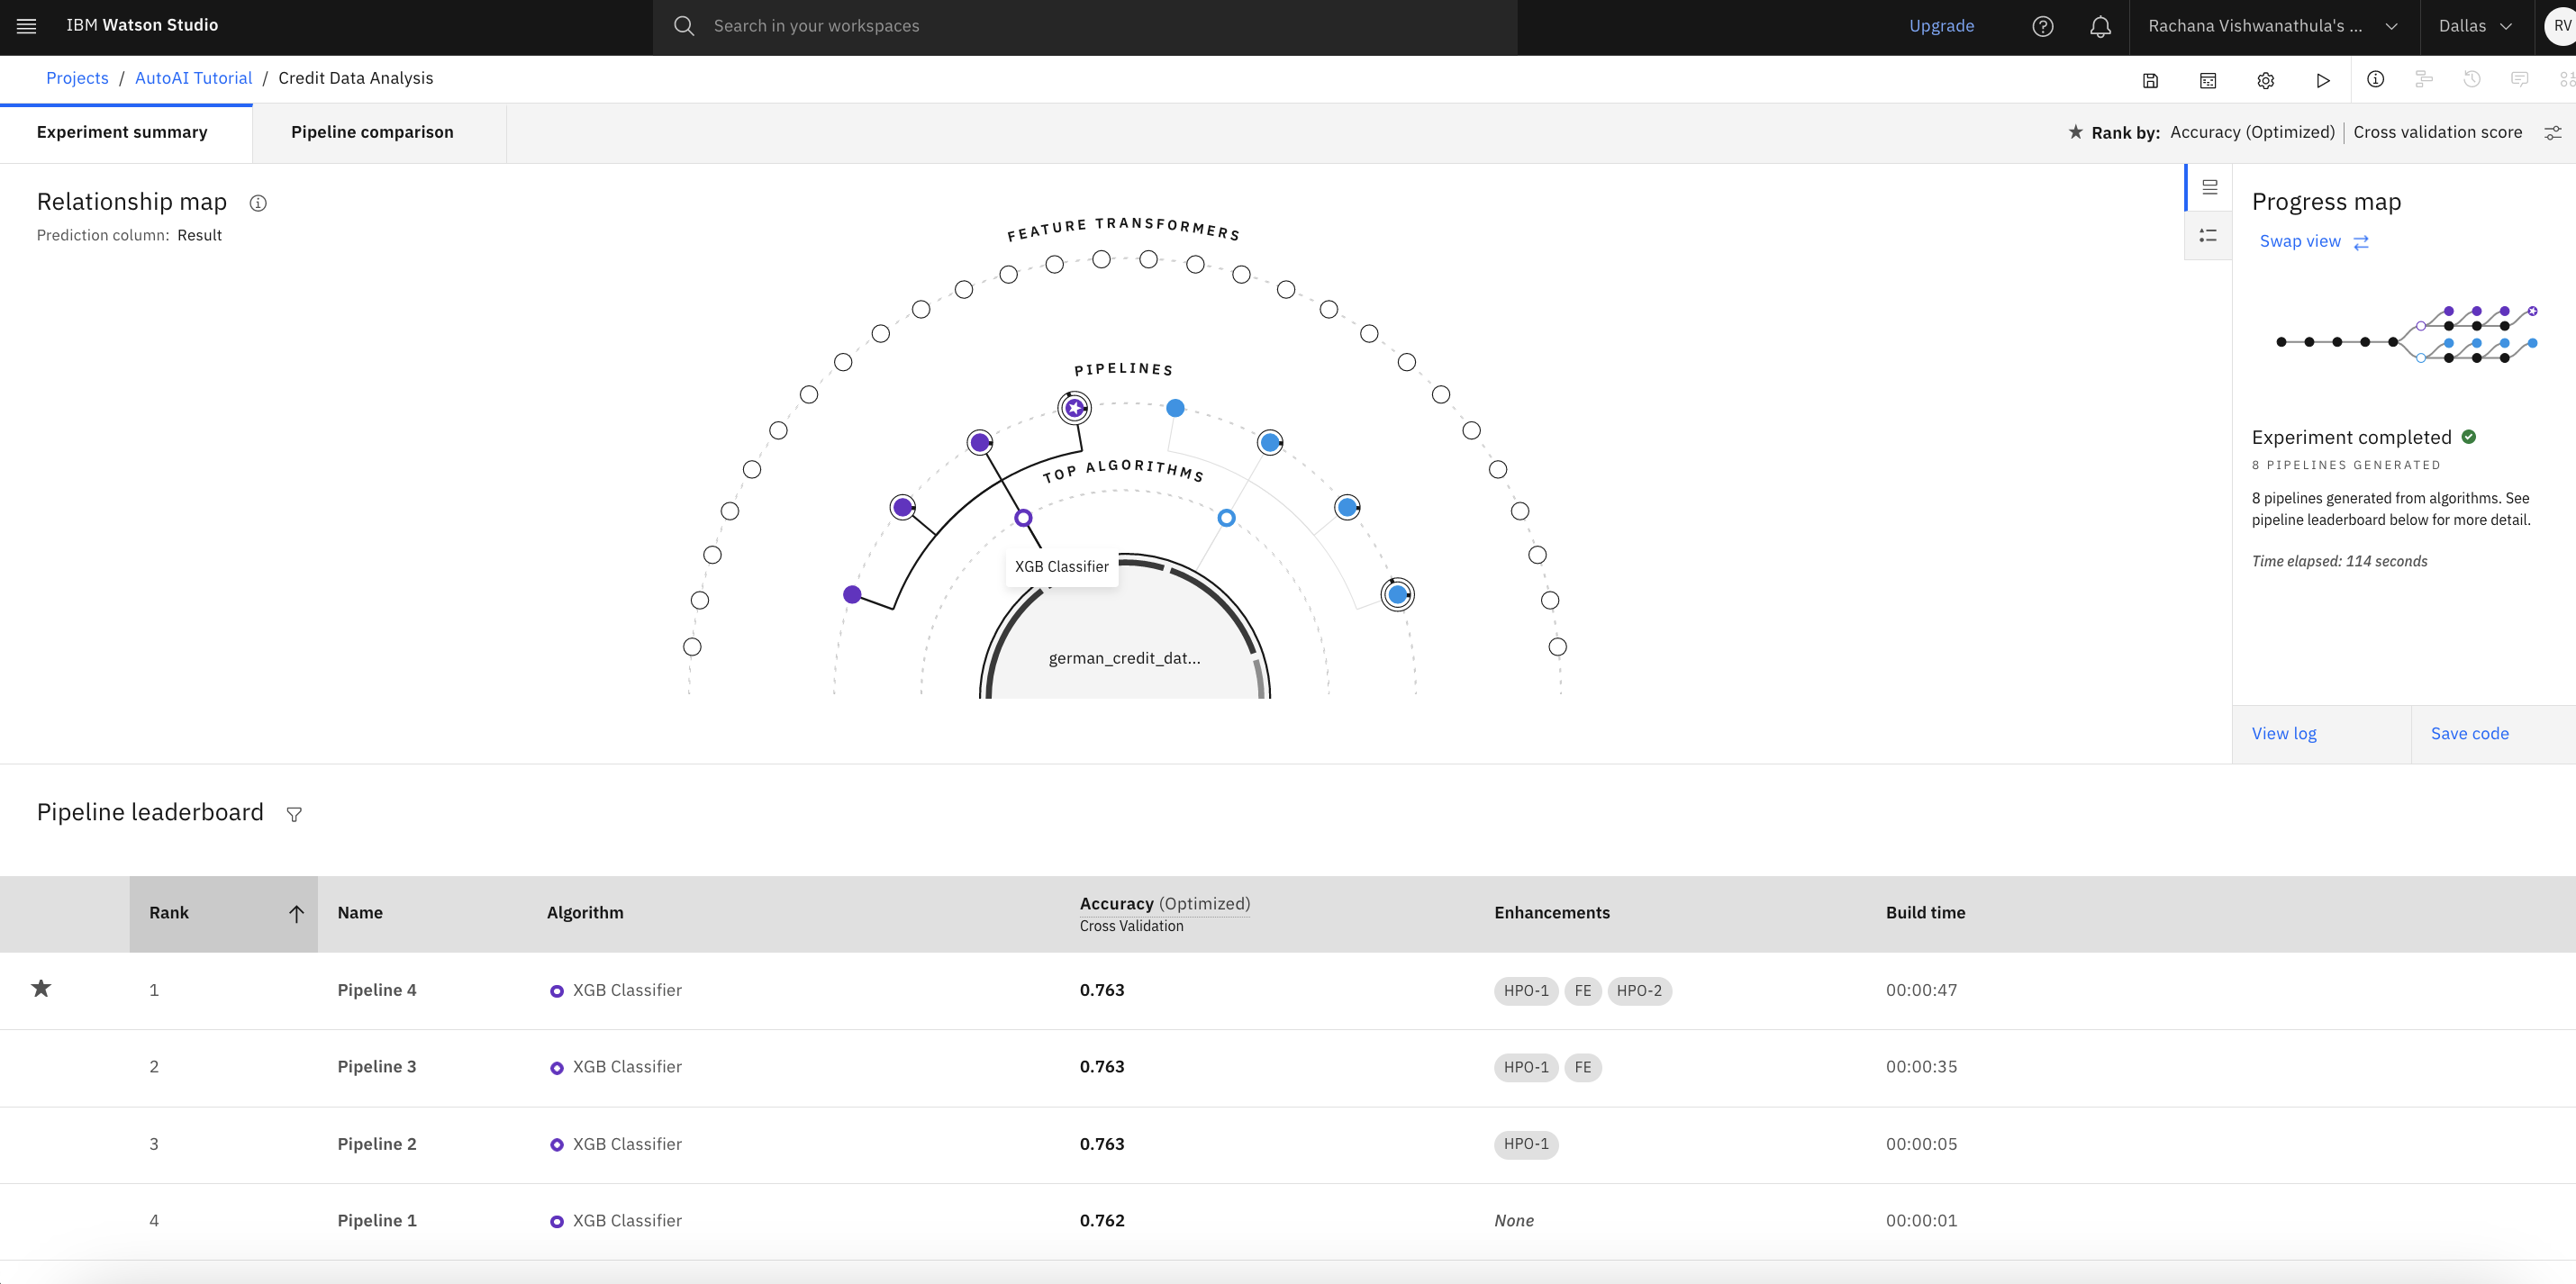
You can hover over the map to view more information.

The following figure shows the progress map with the sequence and details of the eight pipelines created.
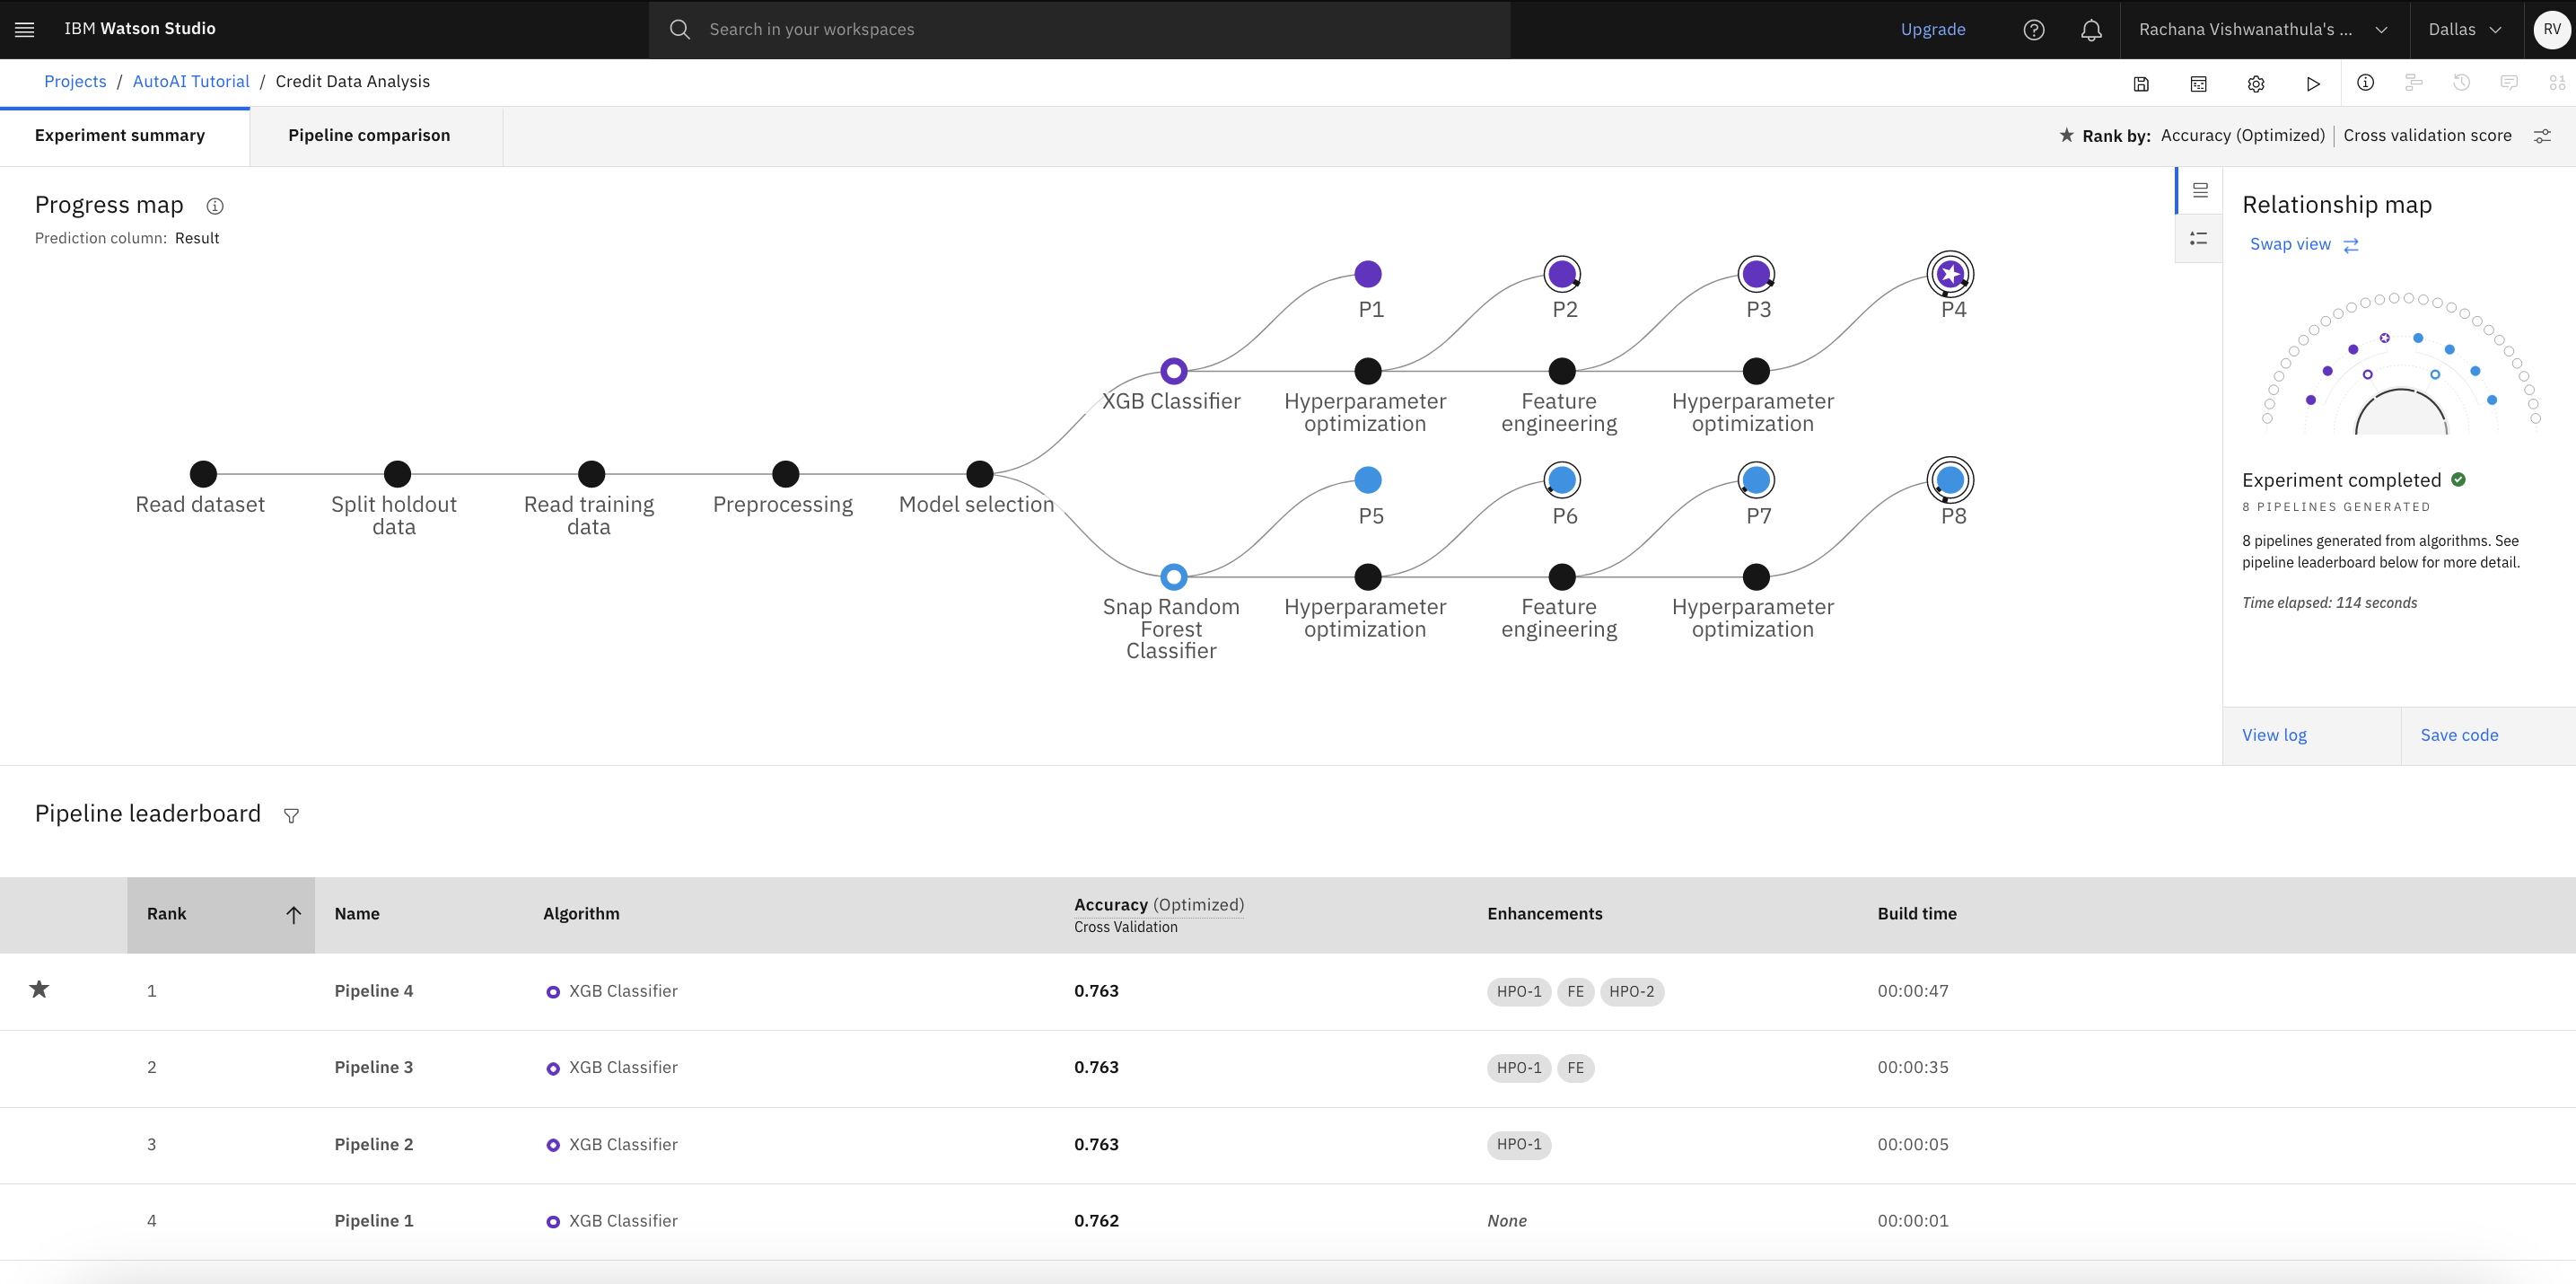
The following figure shows the view of the pipeline leaderboard with the details of all eight pipelines along with high-level metrics. We infer that the XGB classifier with two sets of hyperparameter optimization and feature engineering has generated the best possible model. This is the fourth pipeline in the sequence.
You can click Pipeline Comparision to compare the pipelines.
AutoAI also provides a visual to compare how each of these models performs based on different metrics.

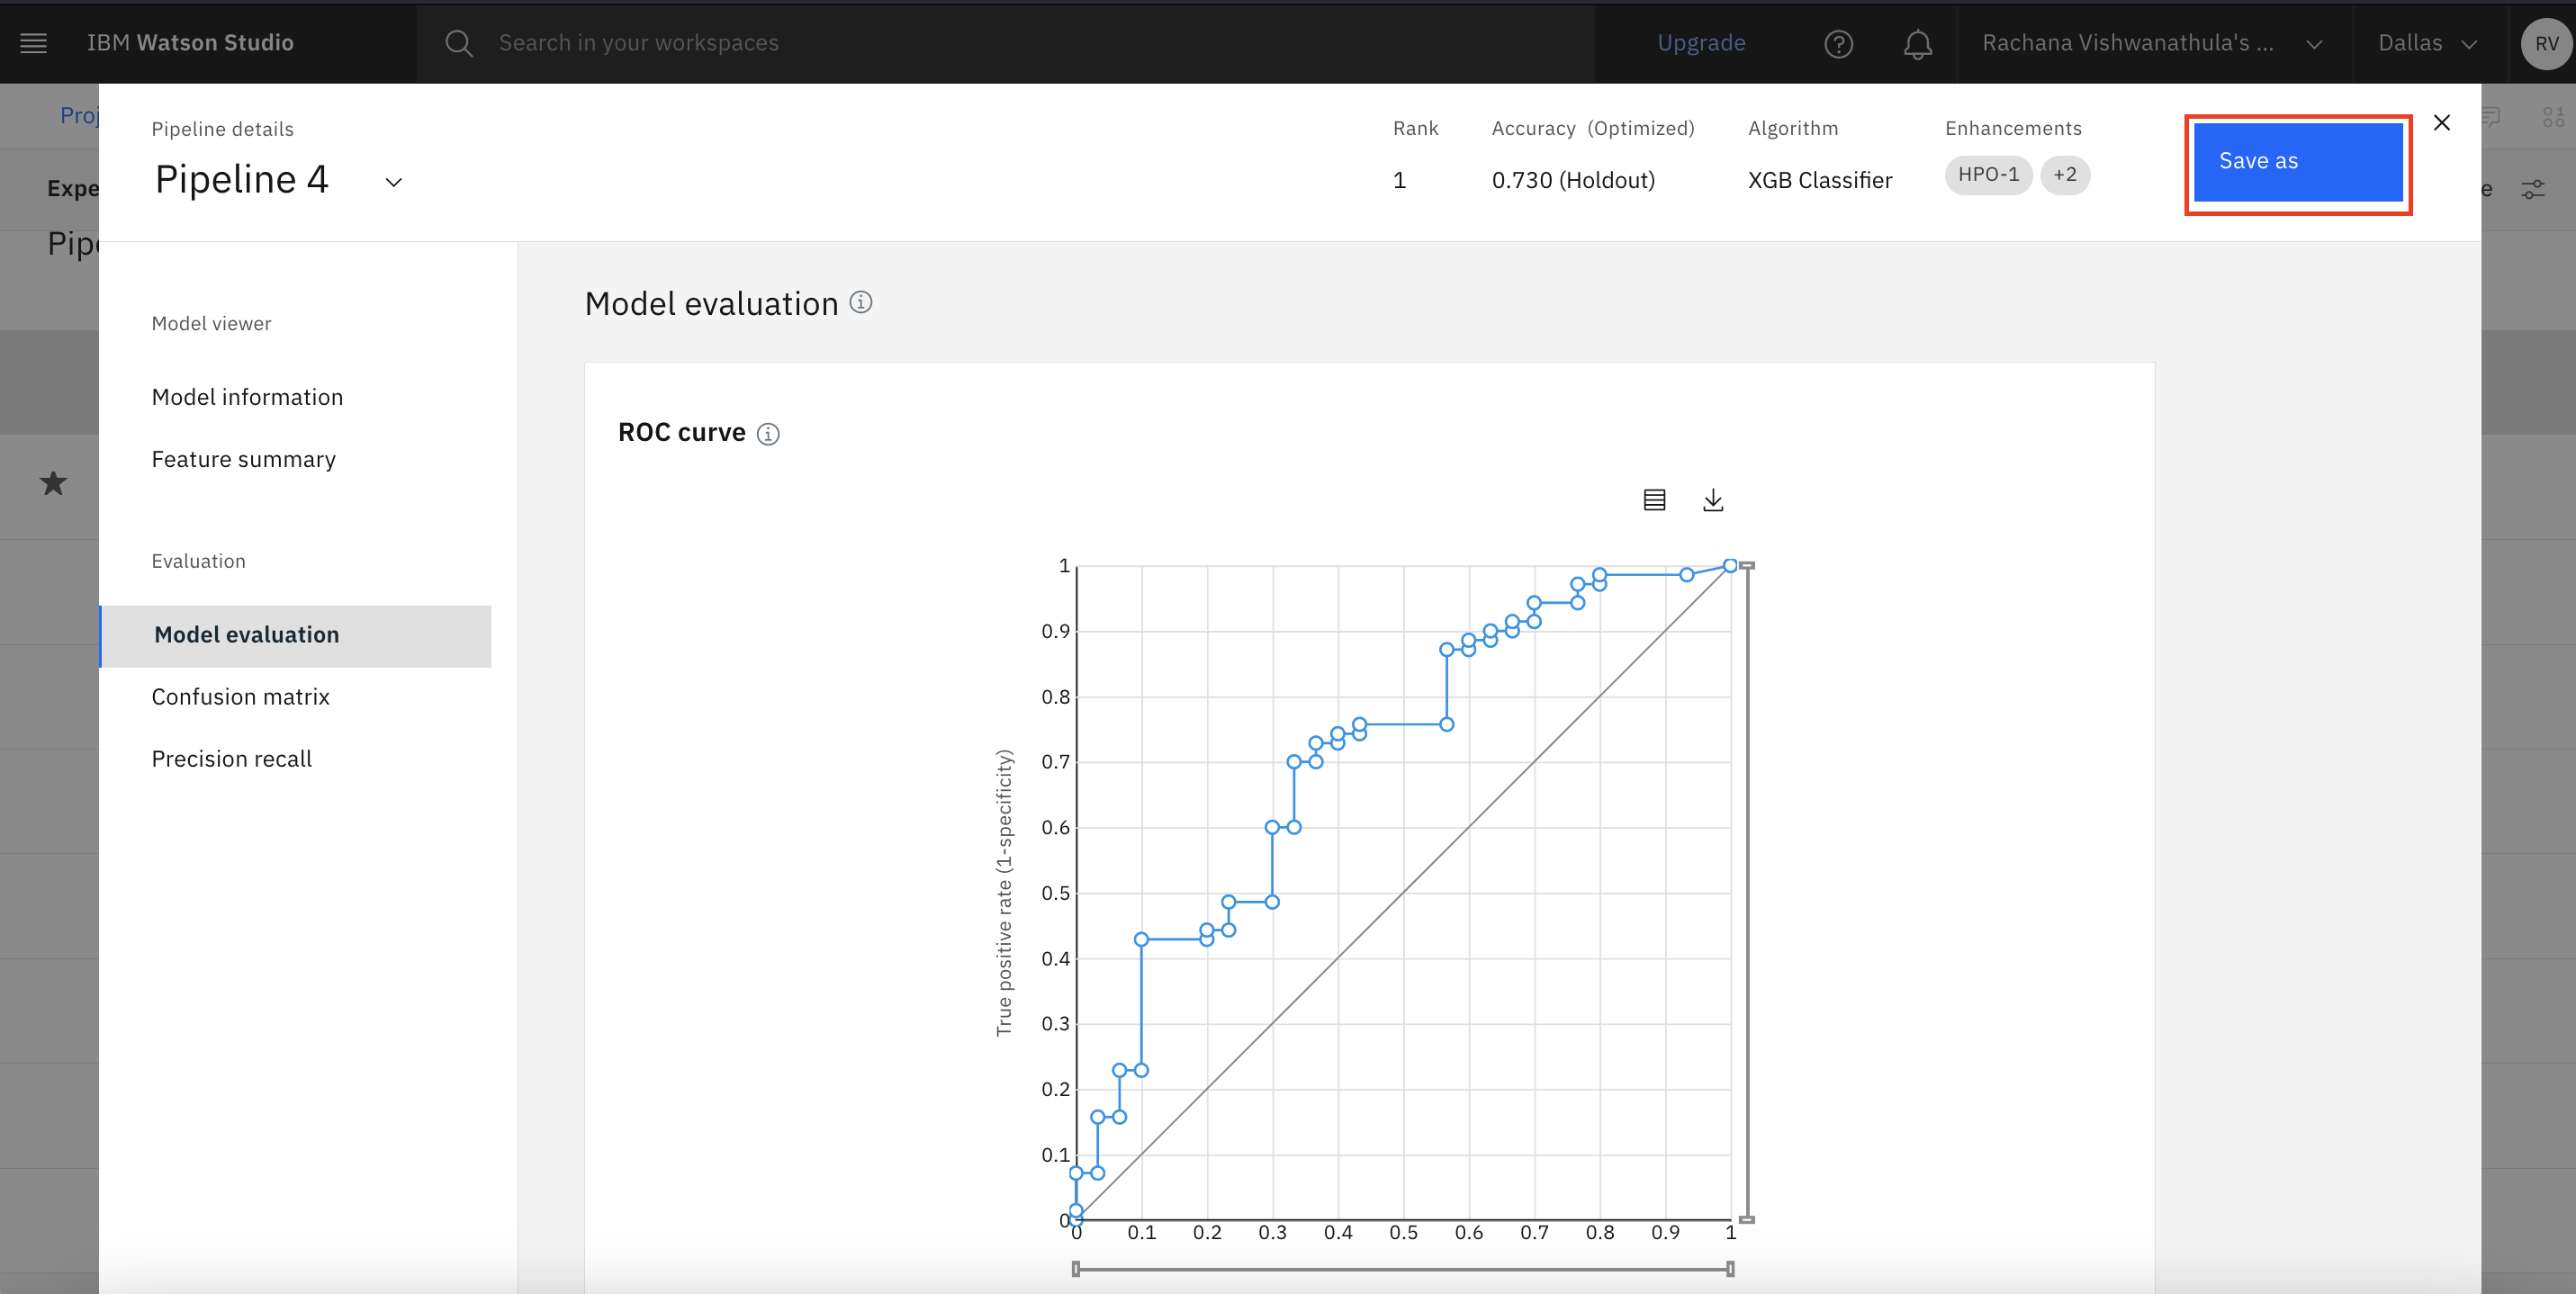
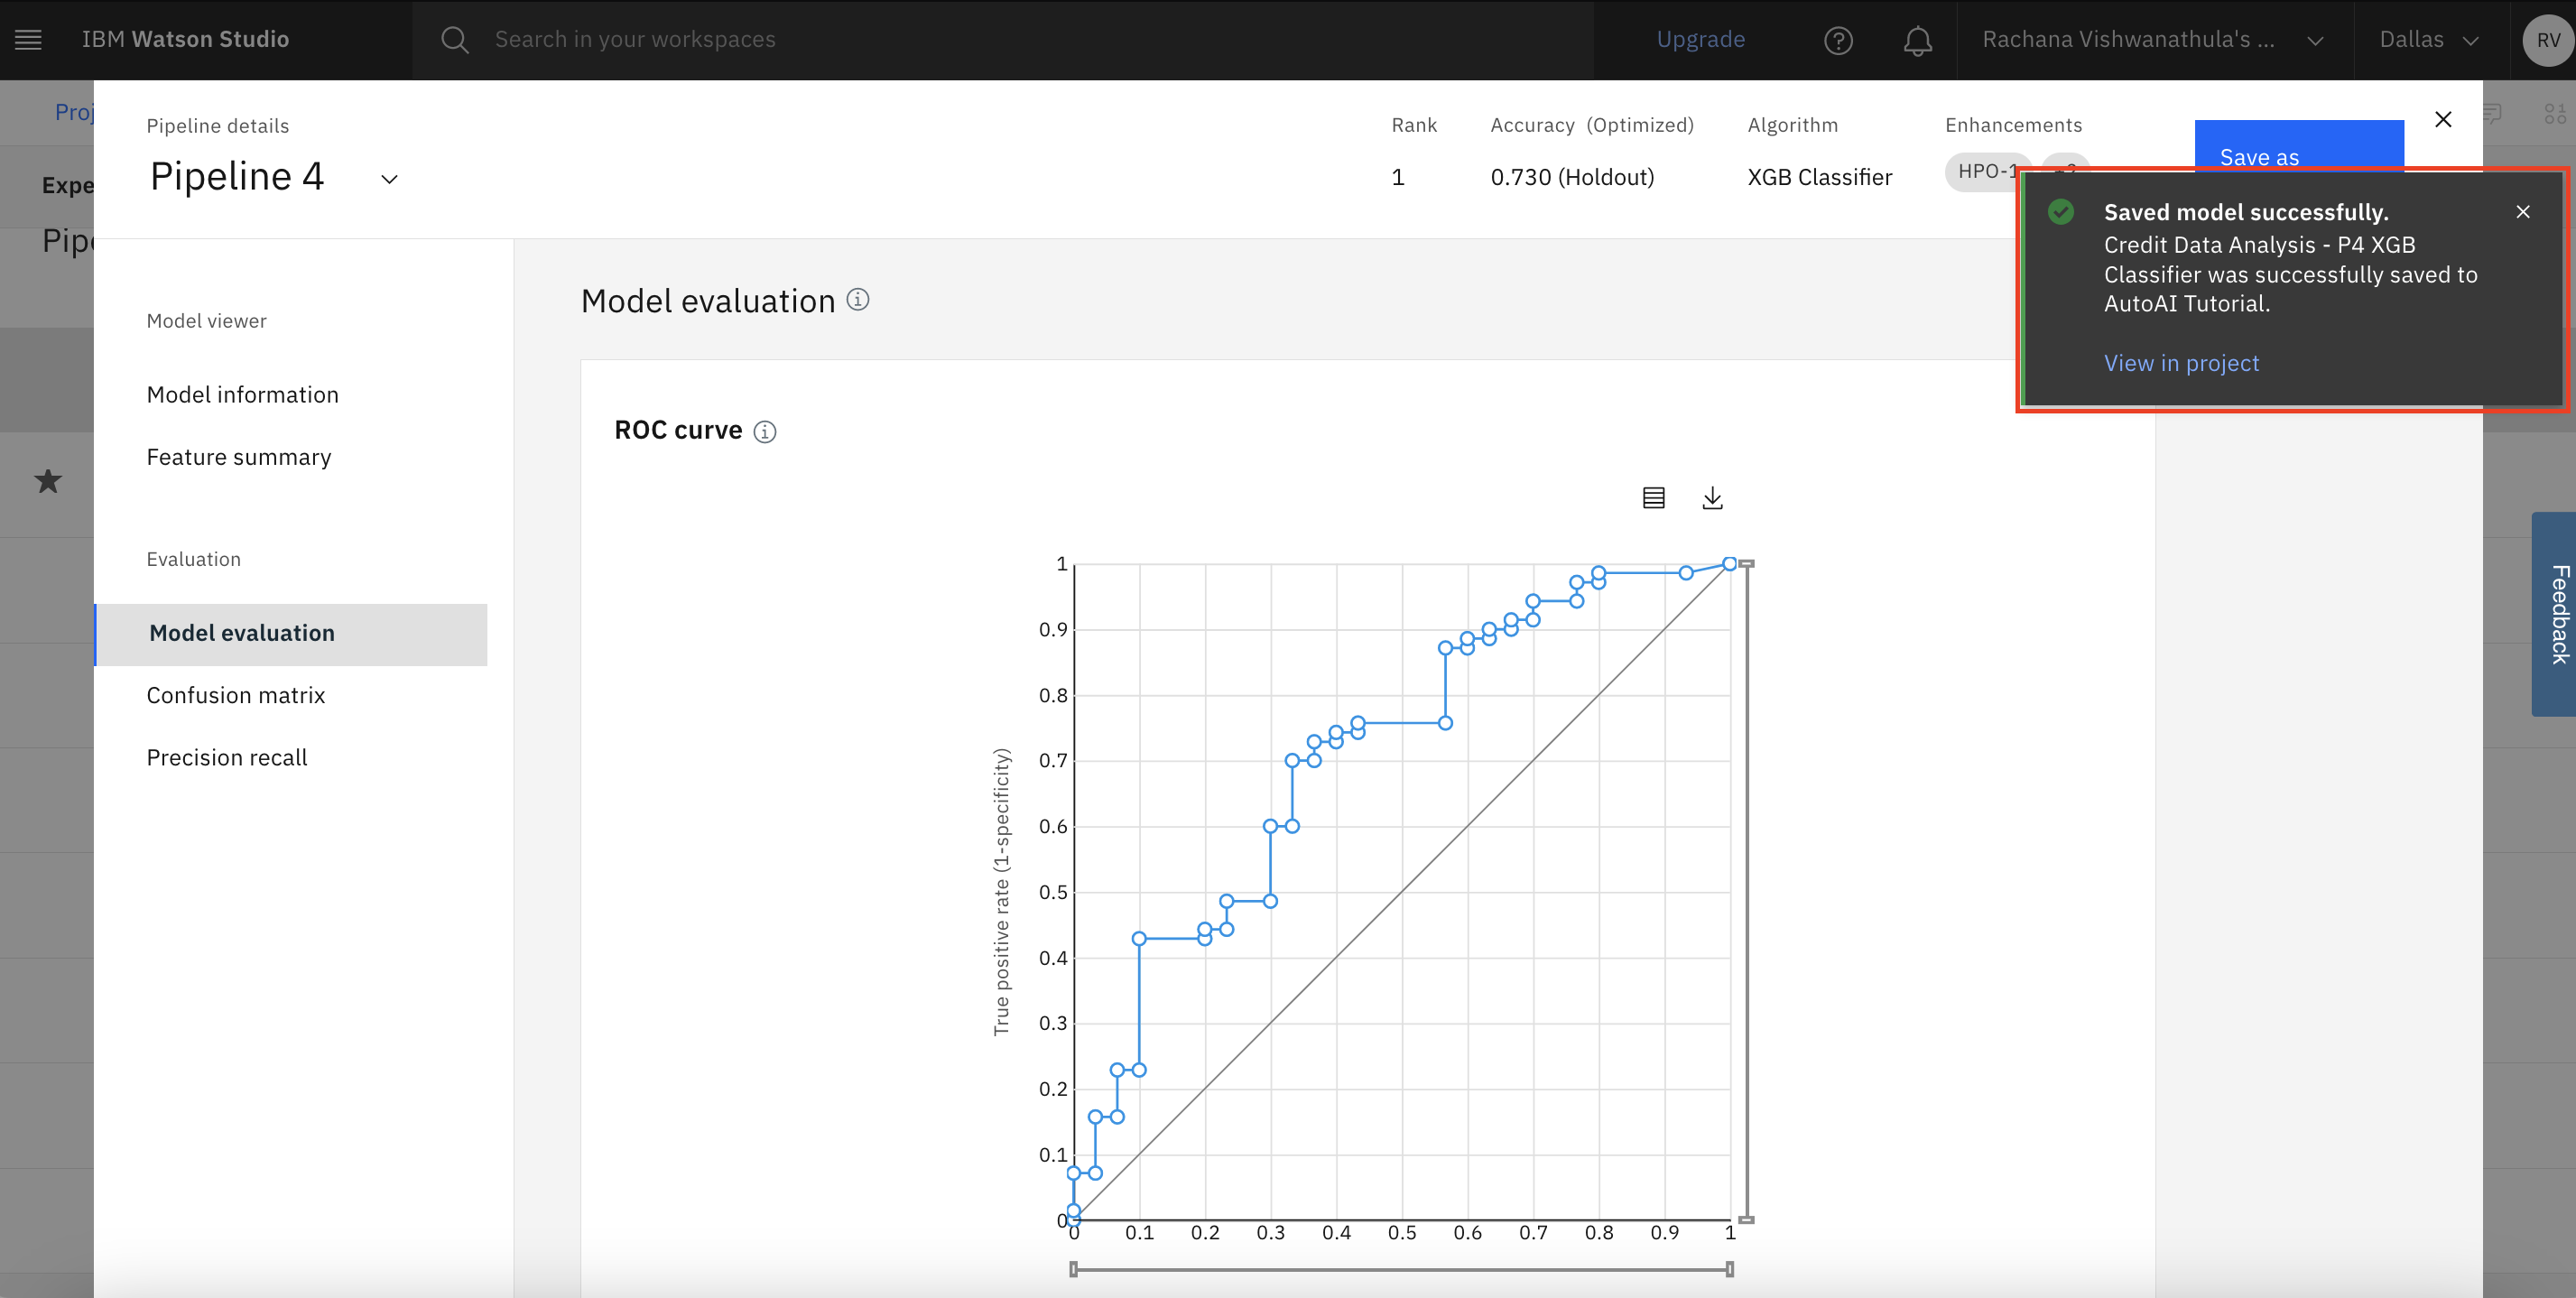
You can select the model that gives the best result by looking at the metrics. In this case, Pipeline 4 gave the best result with the metric "Accuracy." You can view the detailed results by clicking the corresponding pipeline from the leaderboard. Additionally, you can save your model pipeline by clicking Save as, and then choosing Model from the leaderboard or pipeline page. You are going to simply save the model that gave the best result.
Open Pipeline 4, and click Save as.
Select Model, and click Create.
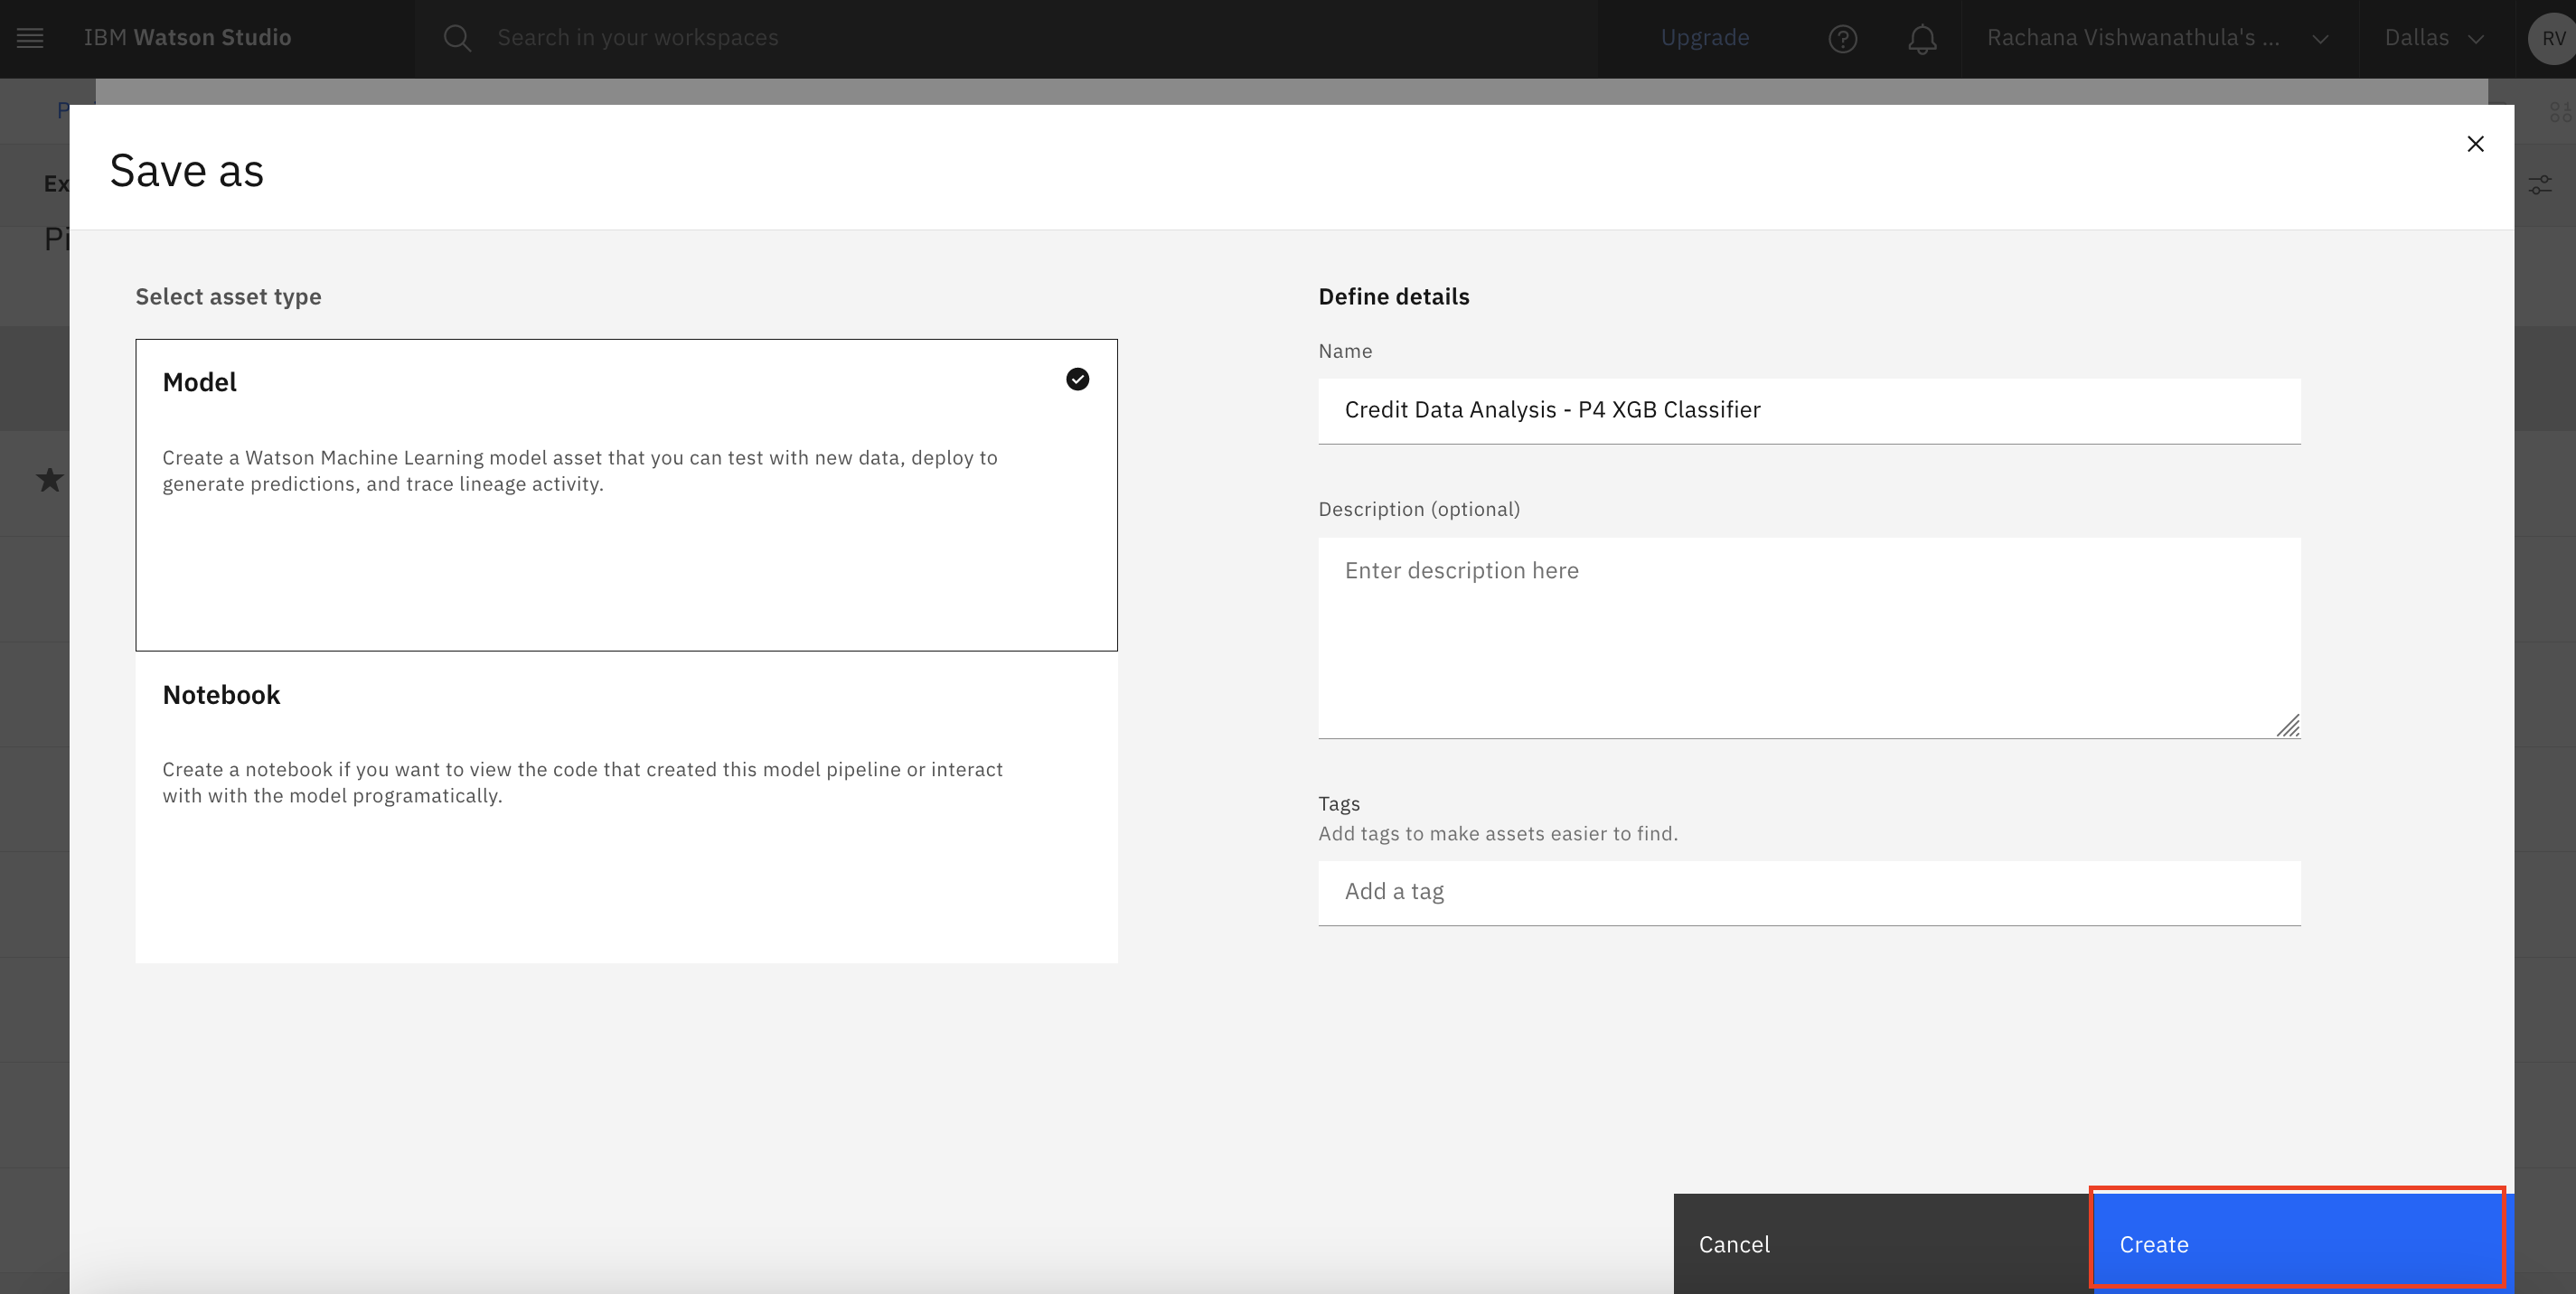
You are redirected to the page for Pipeline 4 and a 'saved as model' notification is generated.
Now, you're going to create an online deployment endpoint to the model that is saved by using AutoAI.
Go back to the projects, and you see that a new model asset for Pipeline 4 is added. Select the promote option for the model.

Click Select, or create a space and click Create a new deployment space.
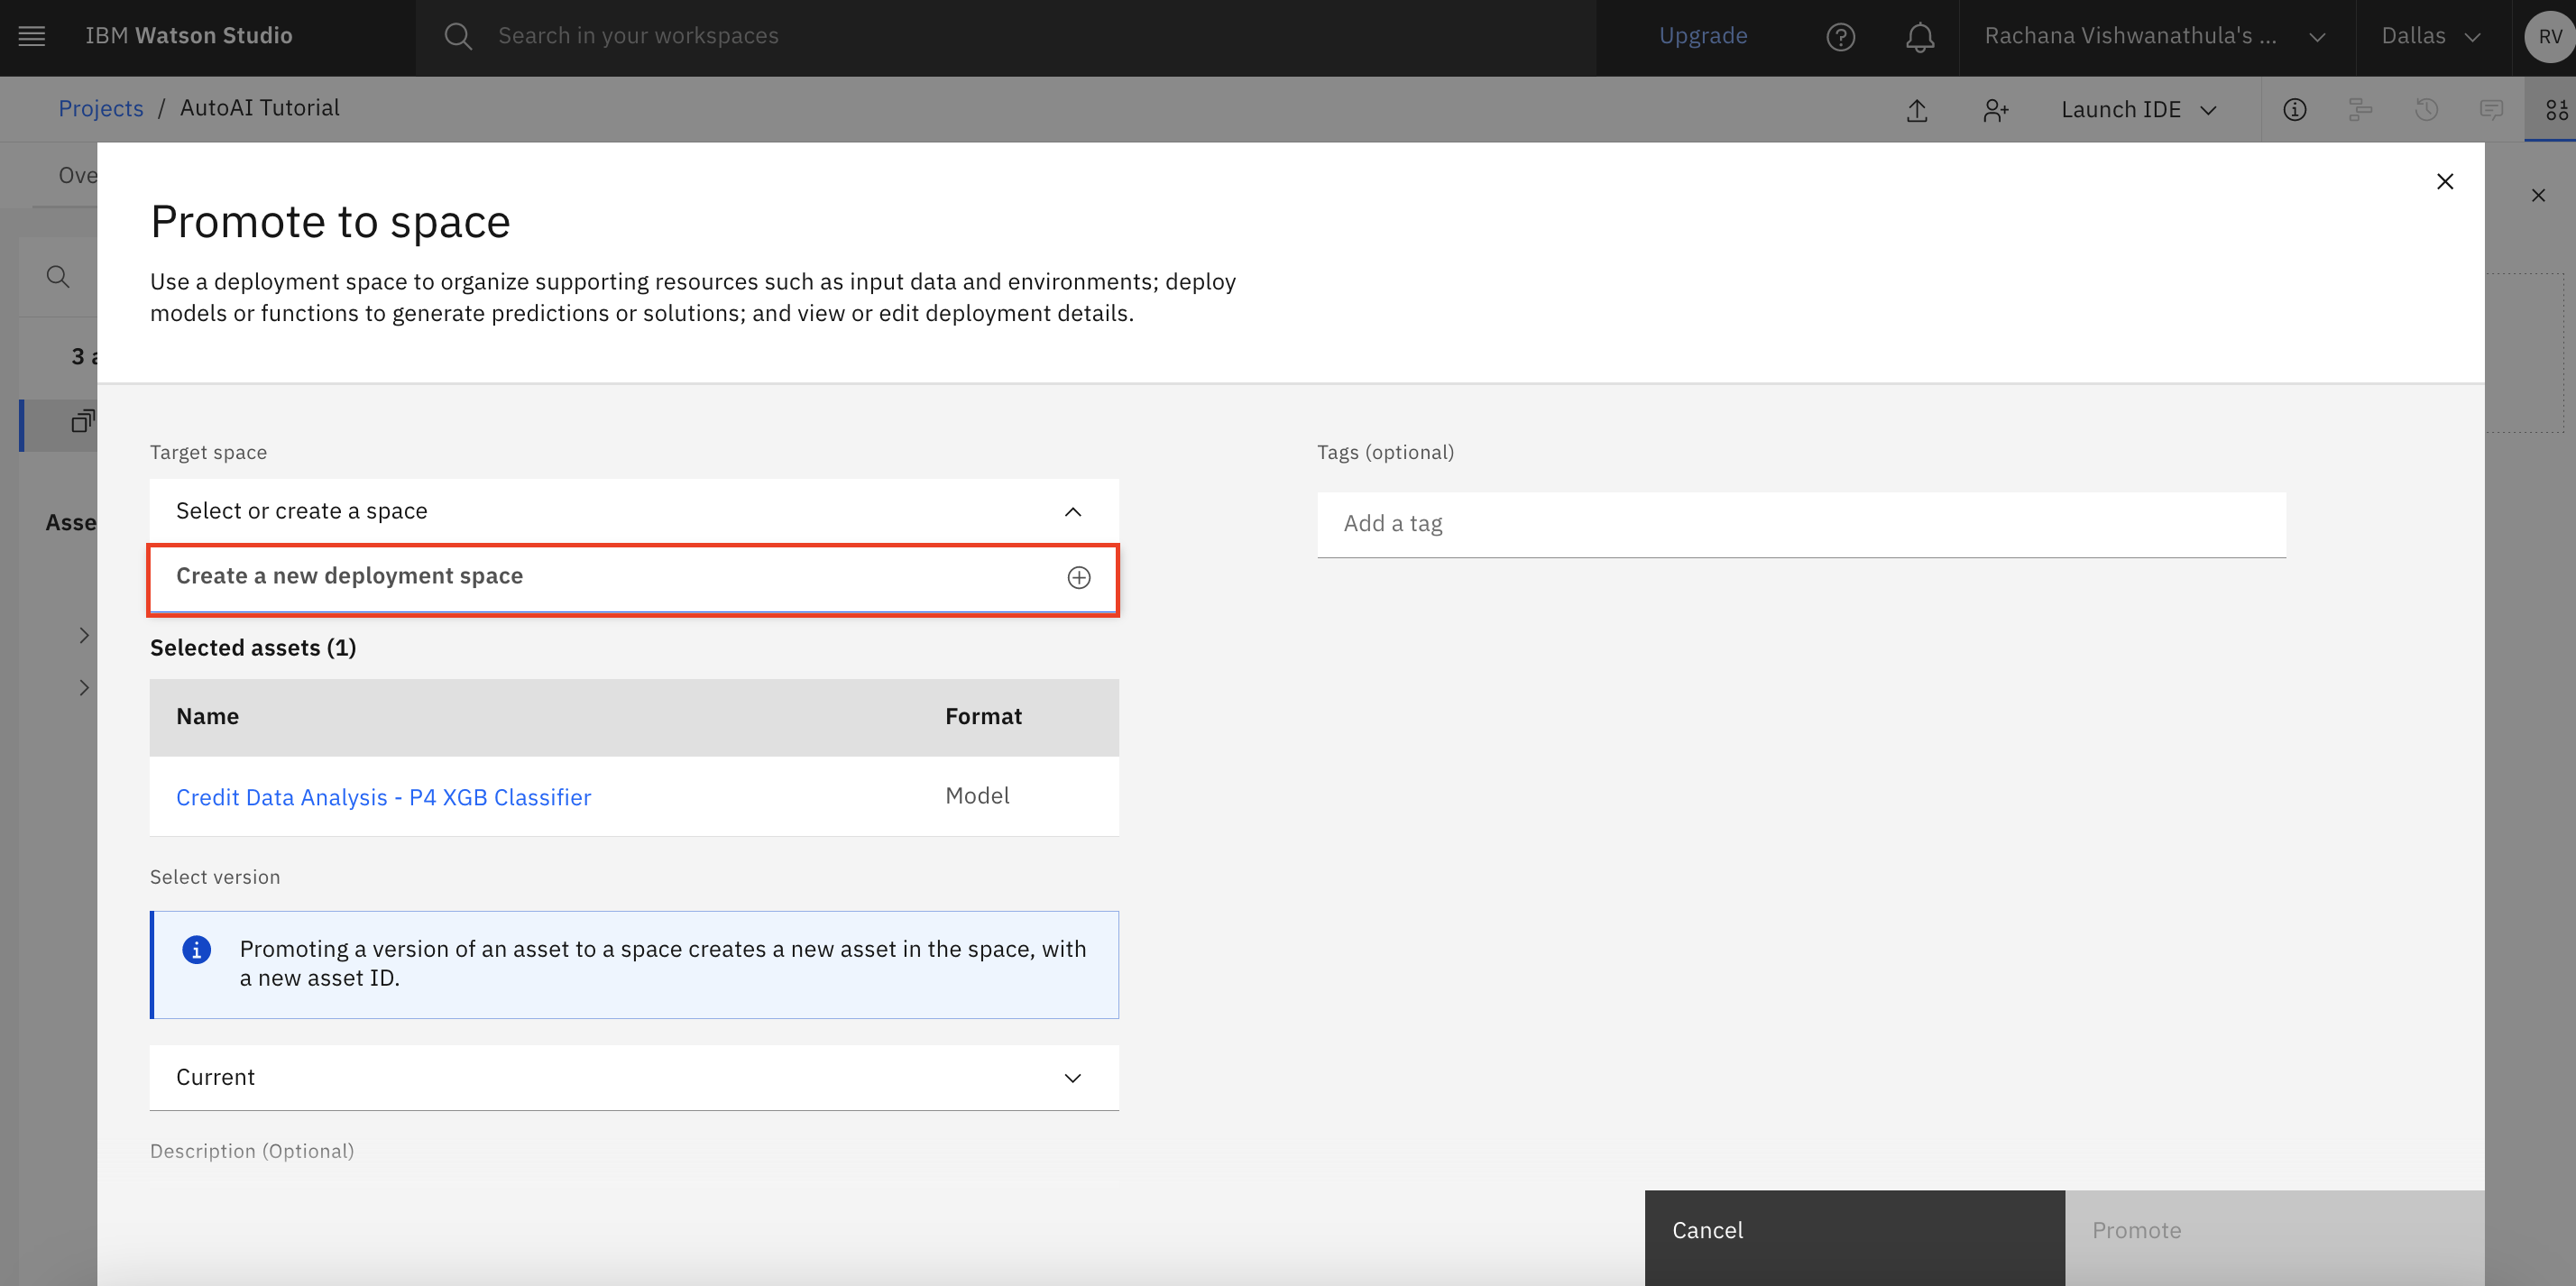
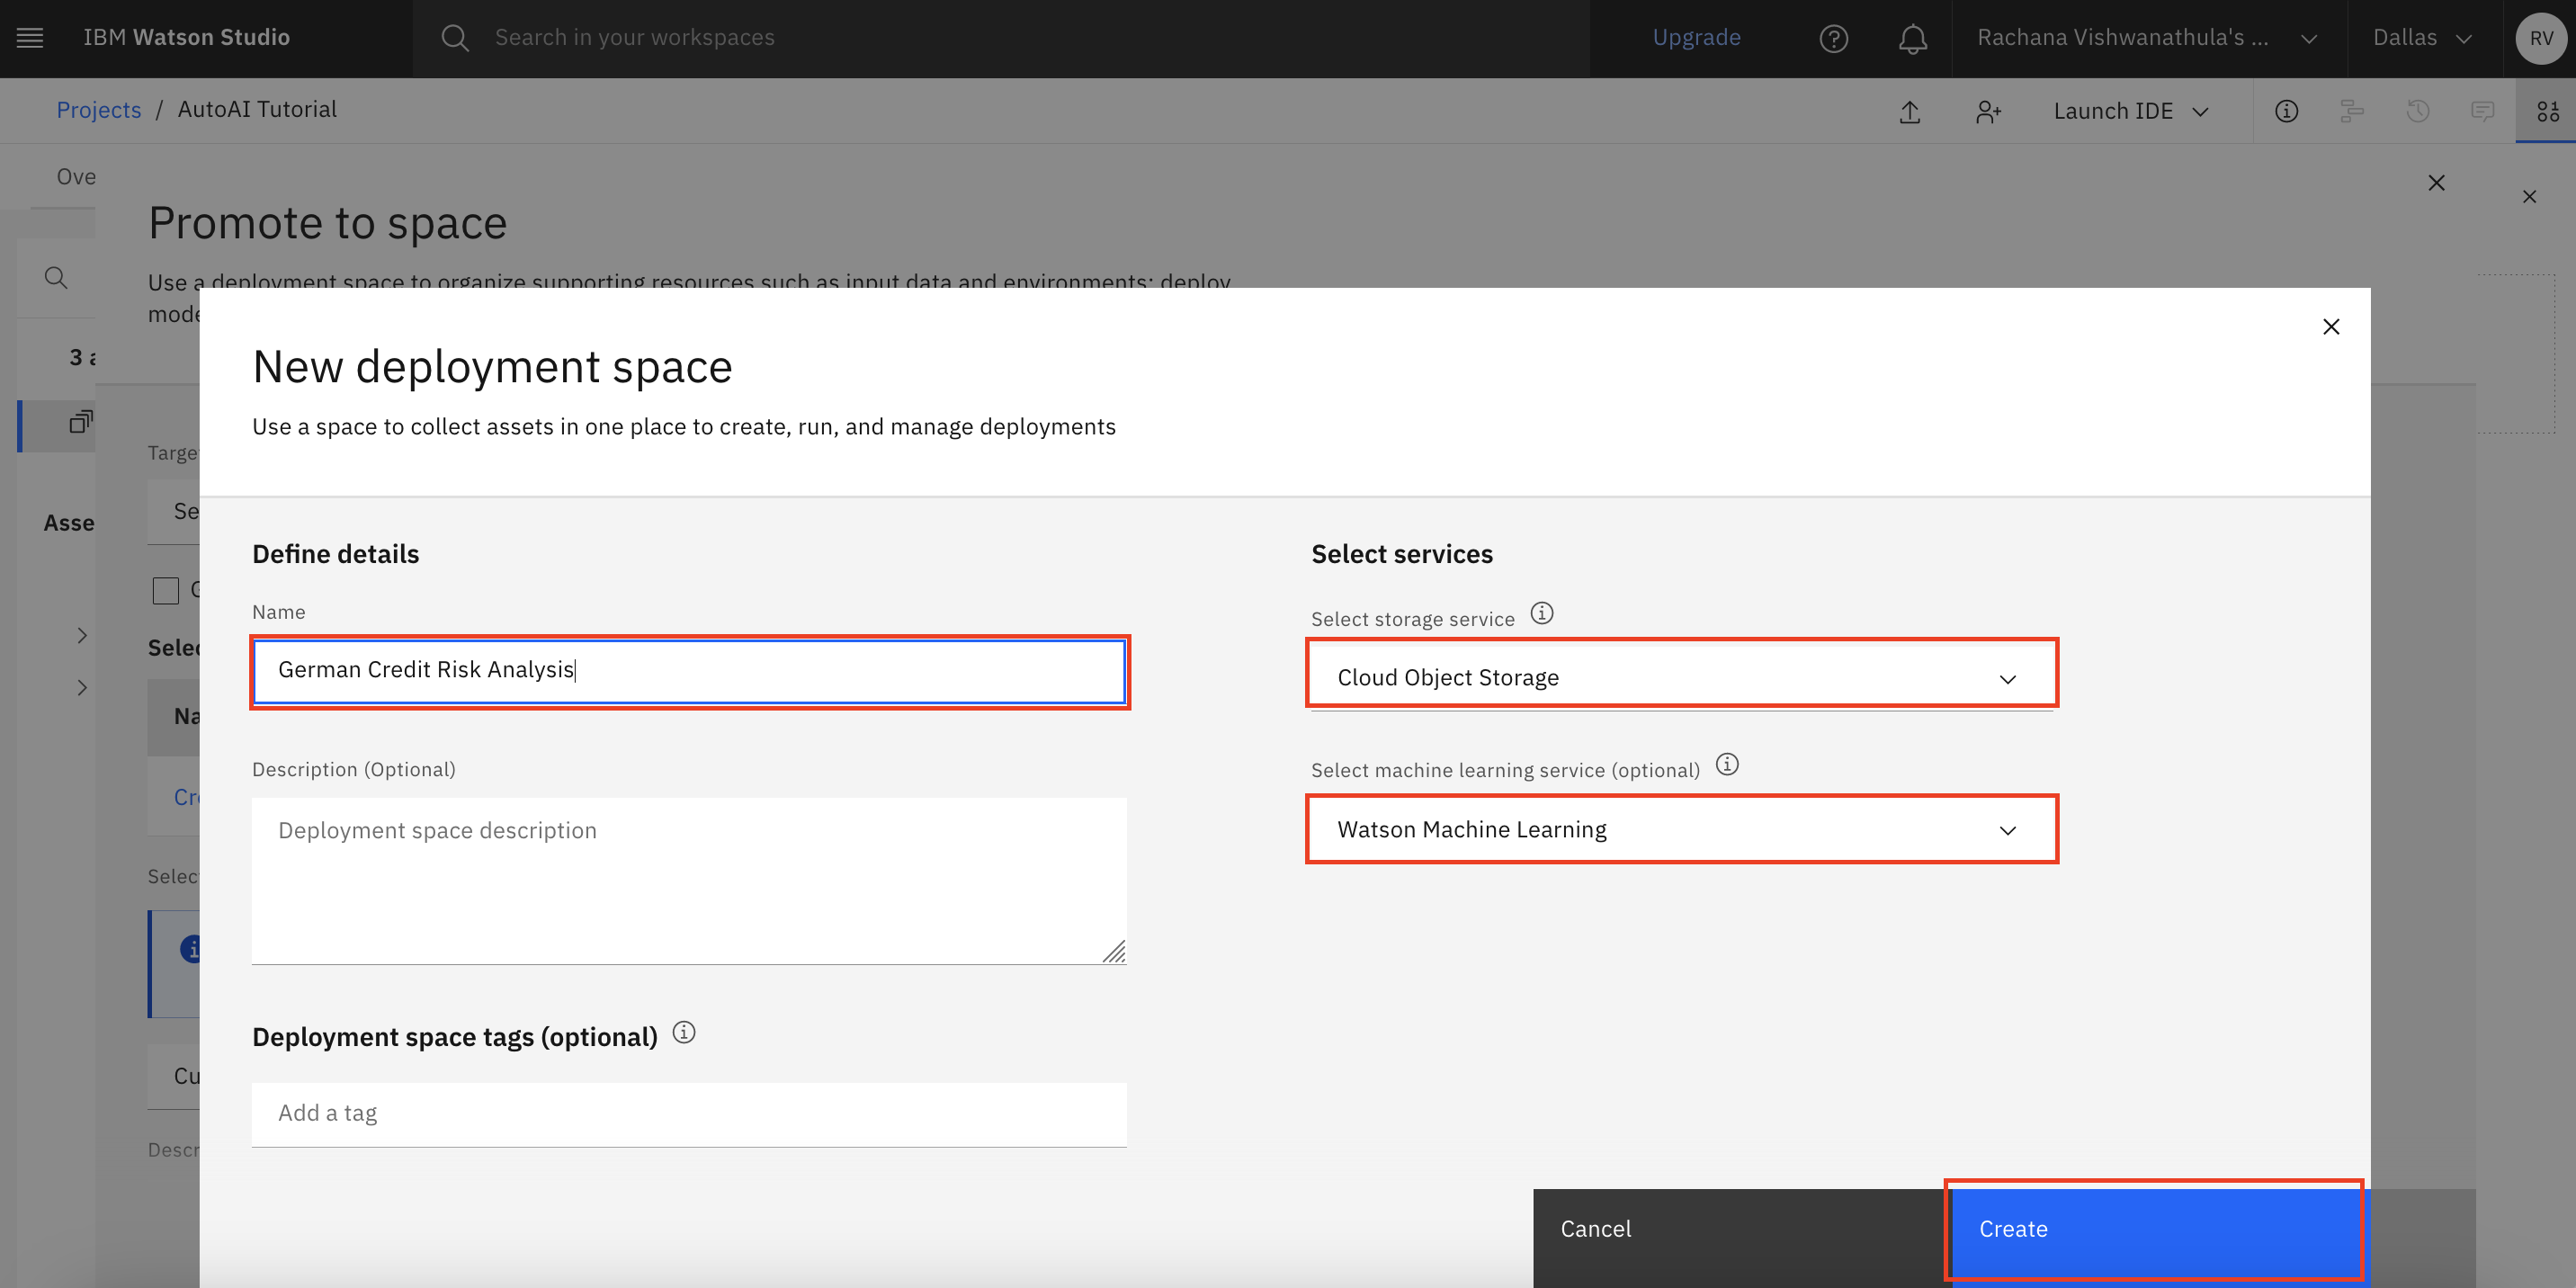
Provide a new space name, select the Cloud Object Storage and Watson Machine Learning instance, and click Create.
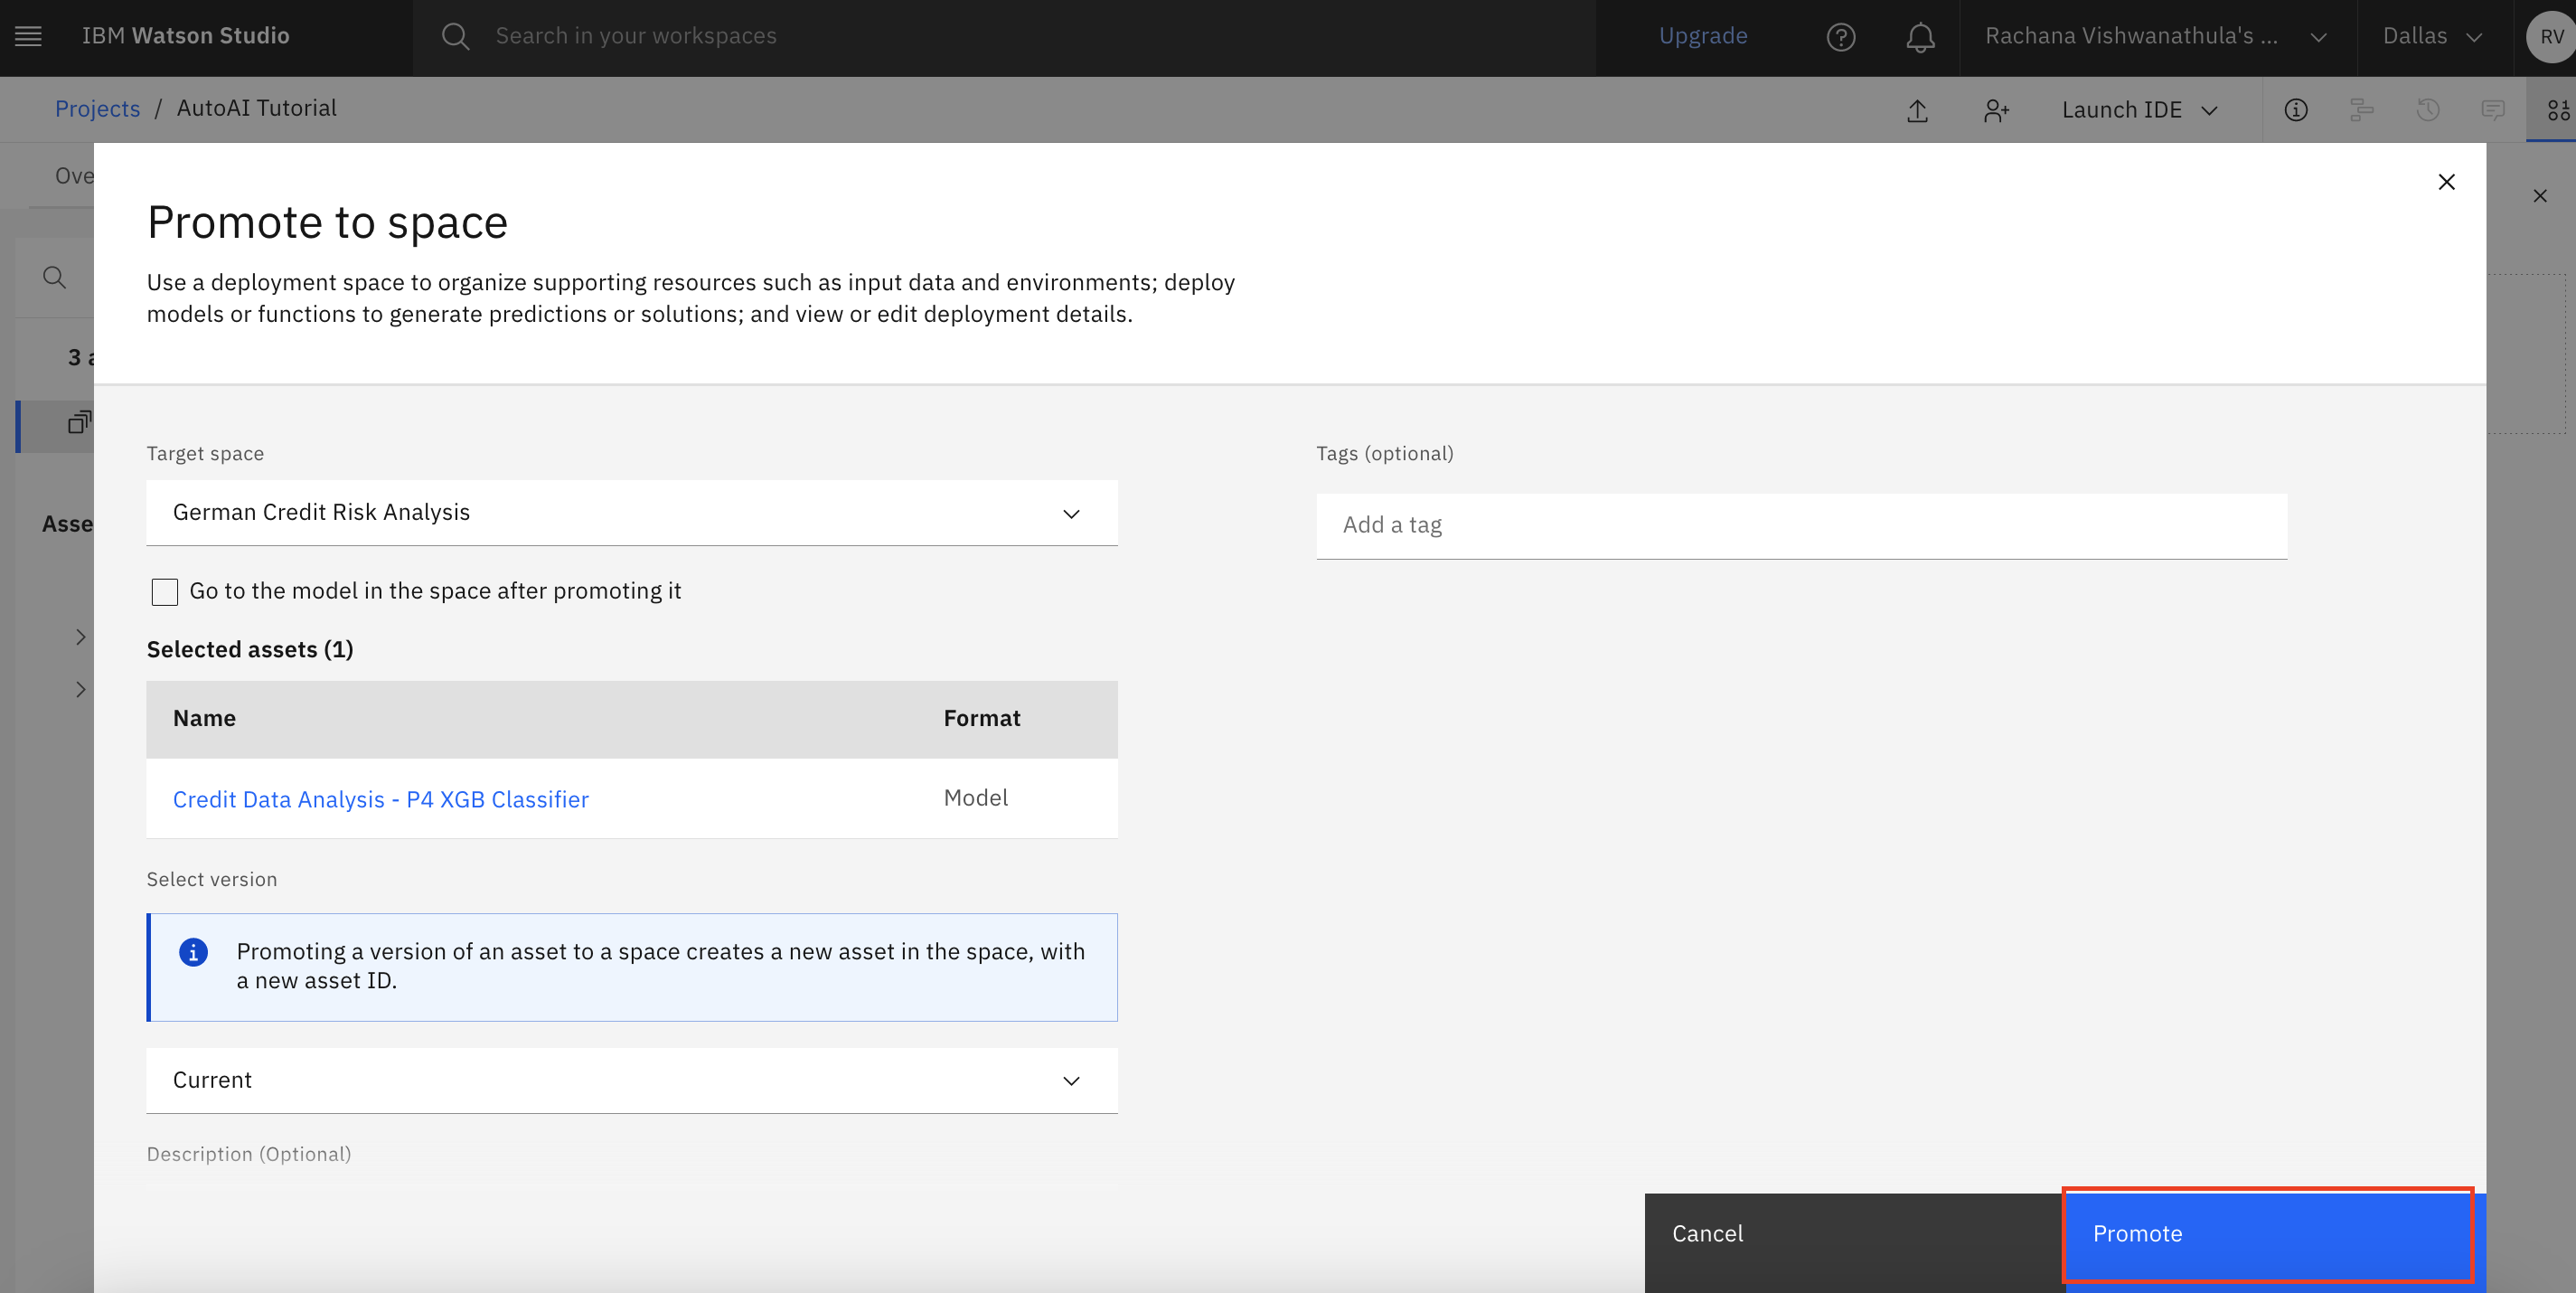
After the deployment space is created, click Promote.
Next, you create an online endpoint from where the model can be accessed.
Navigate to Deployments.
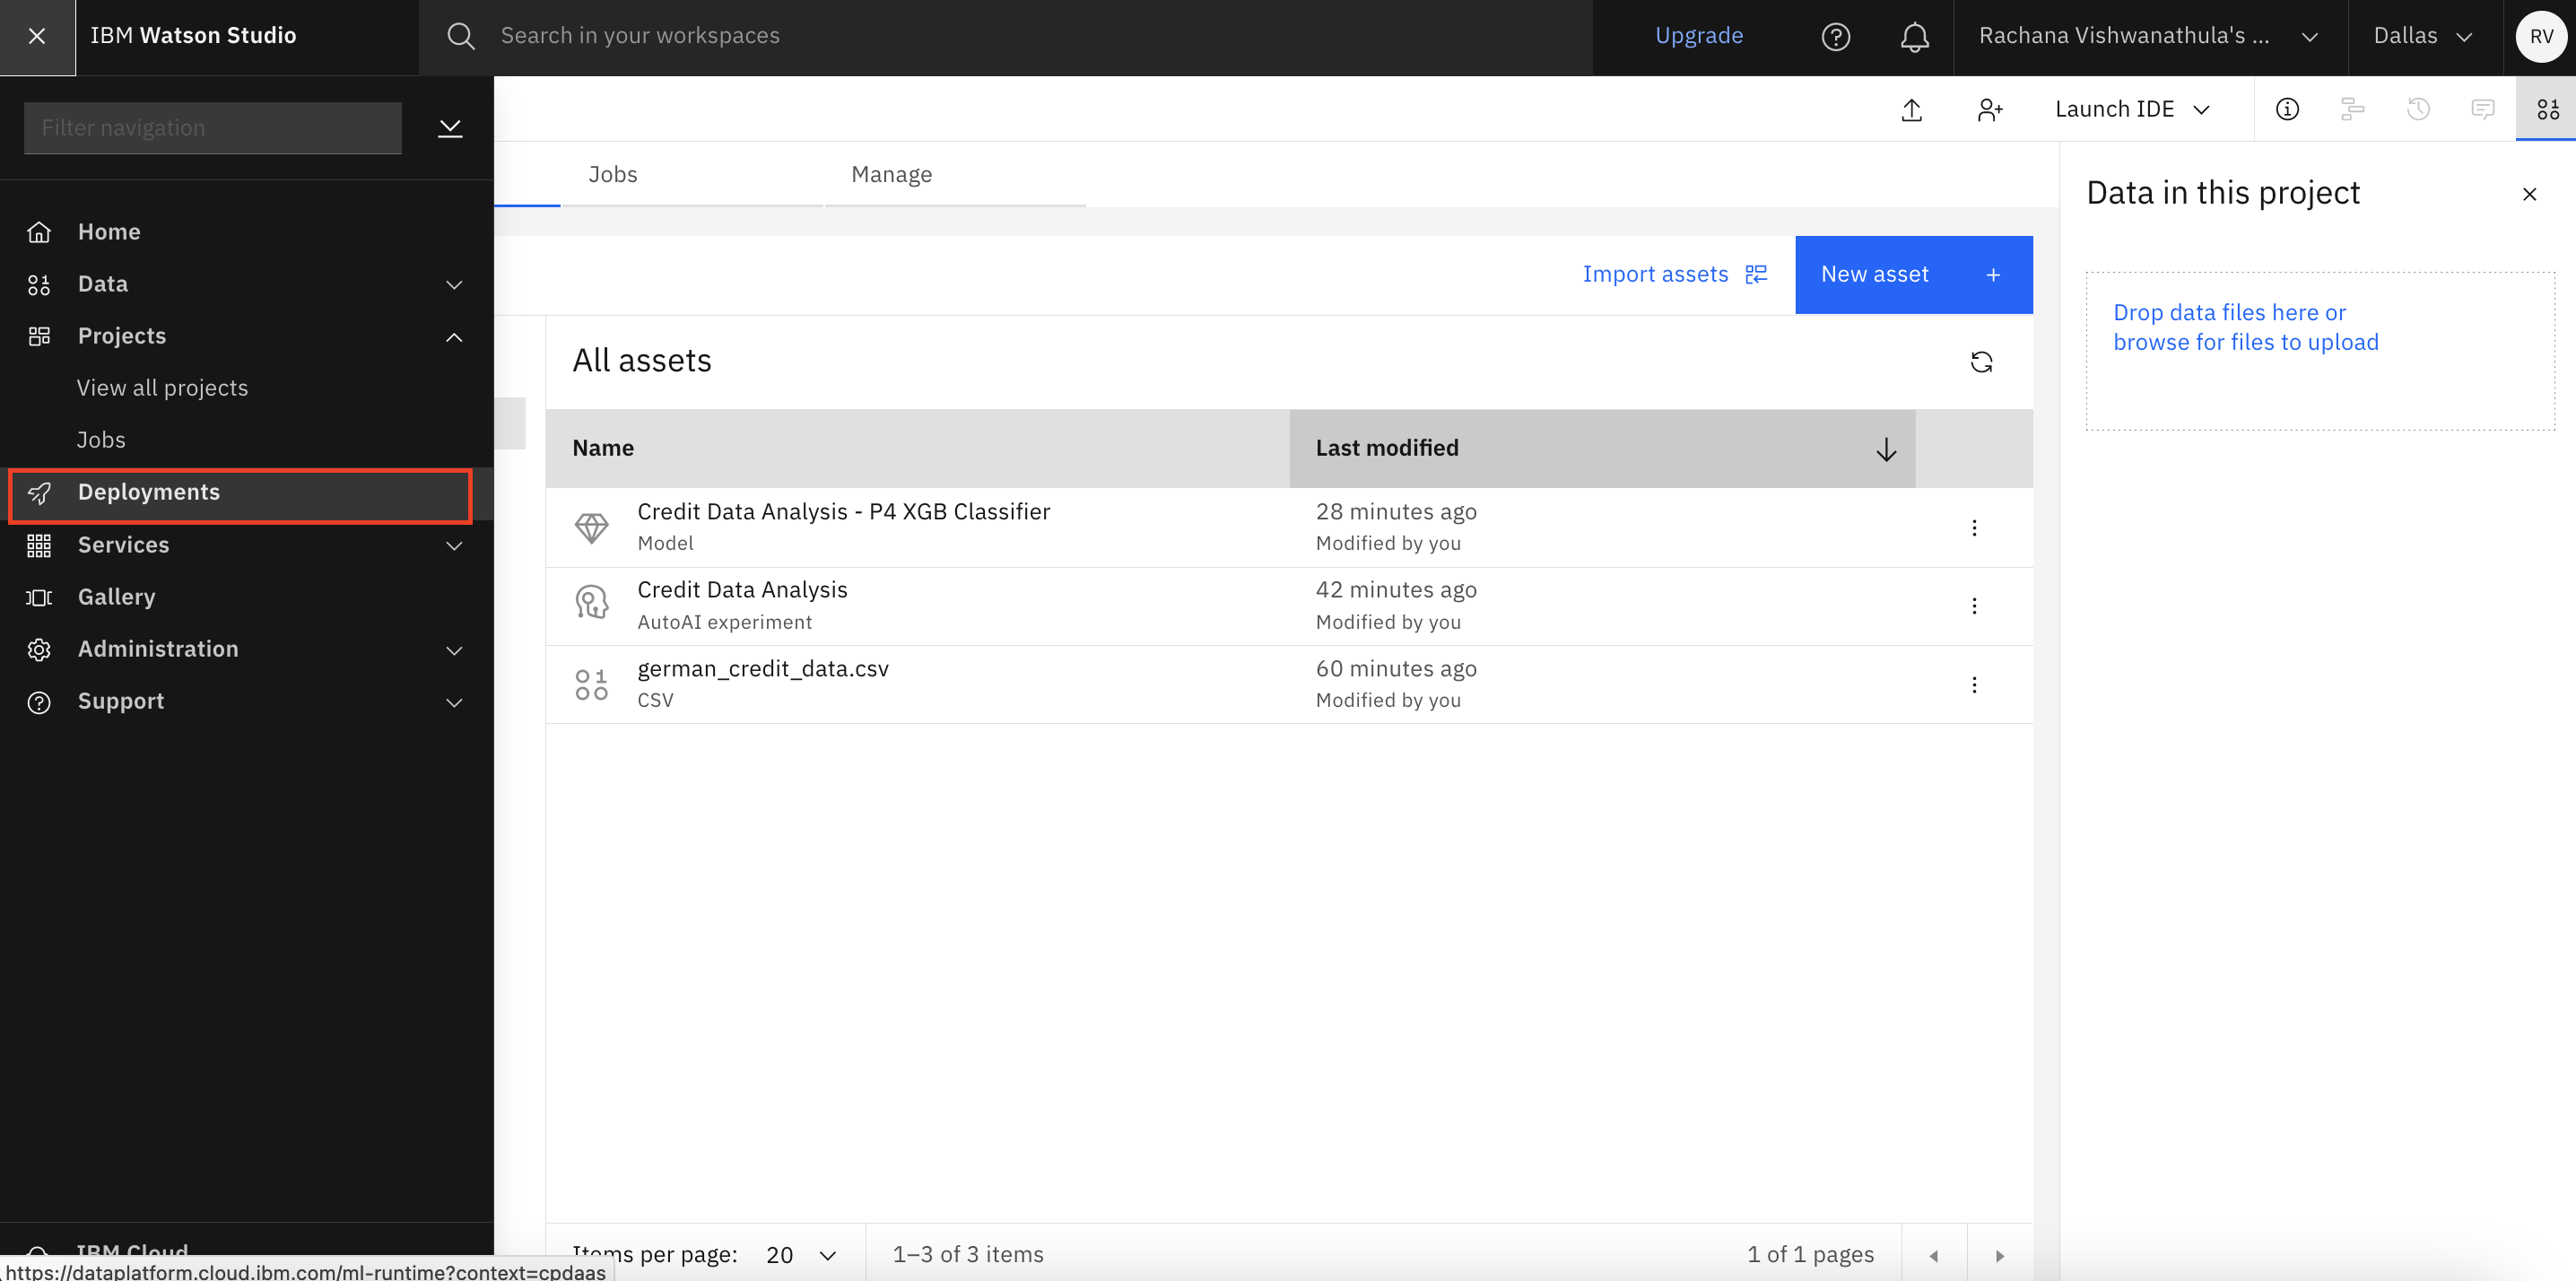
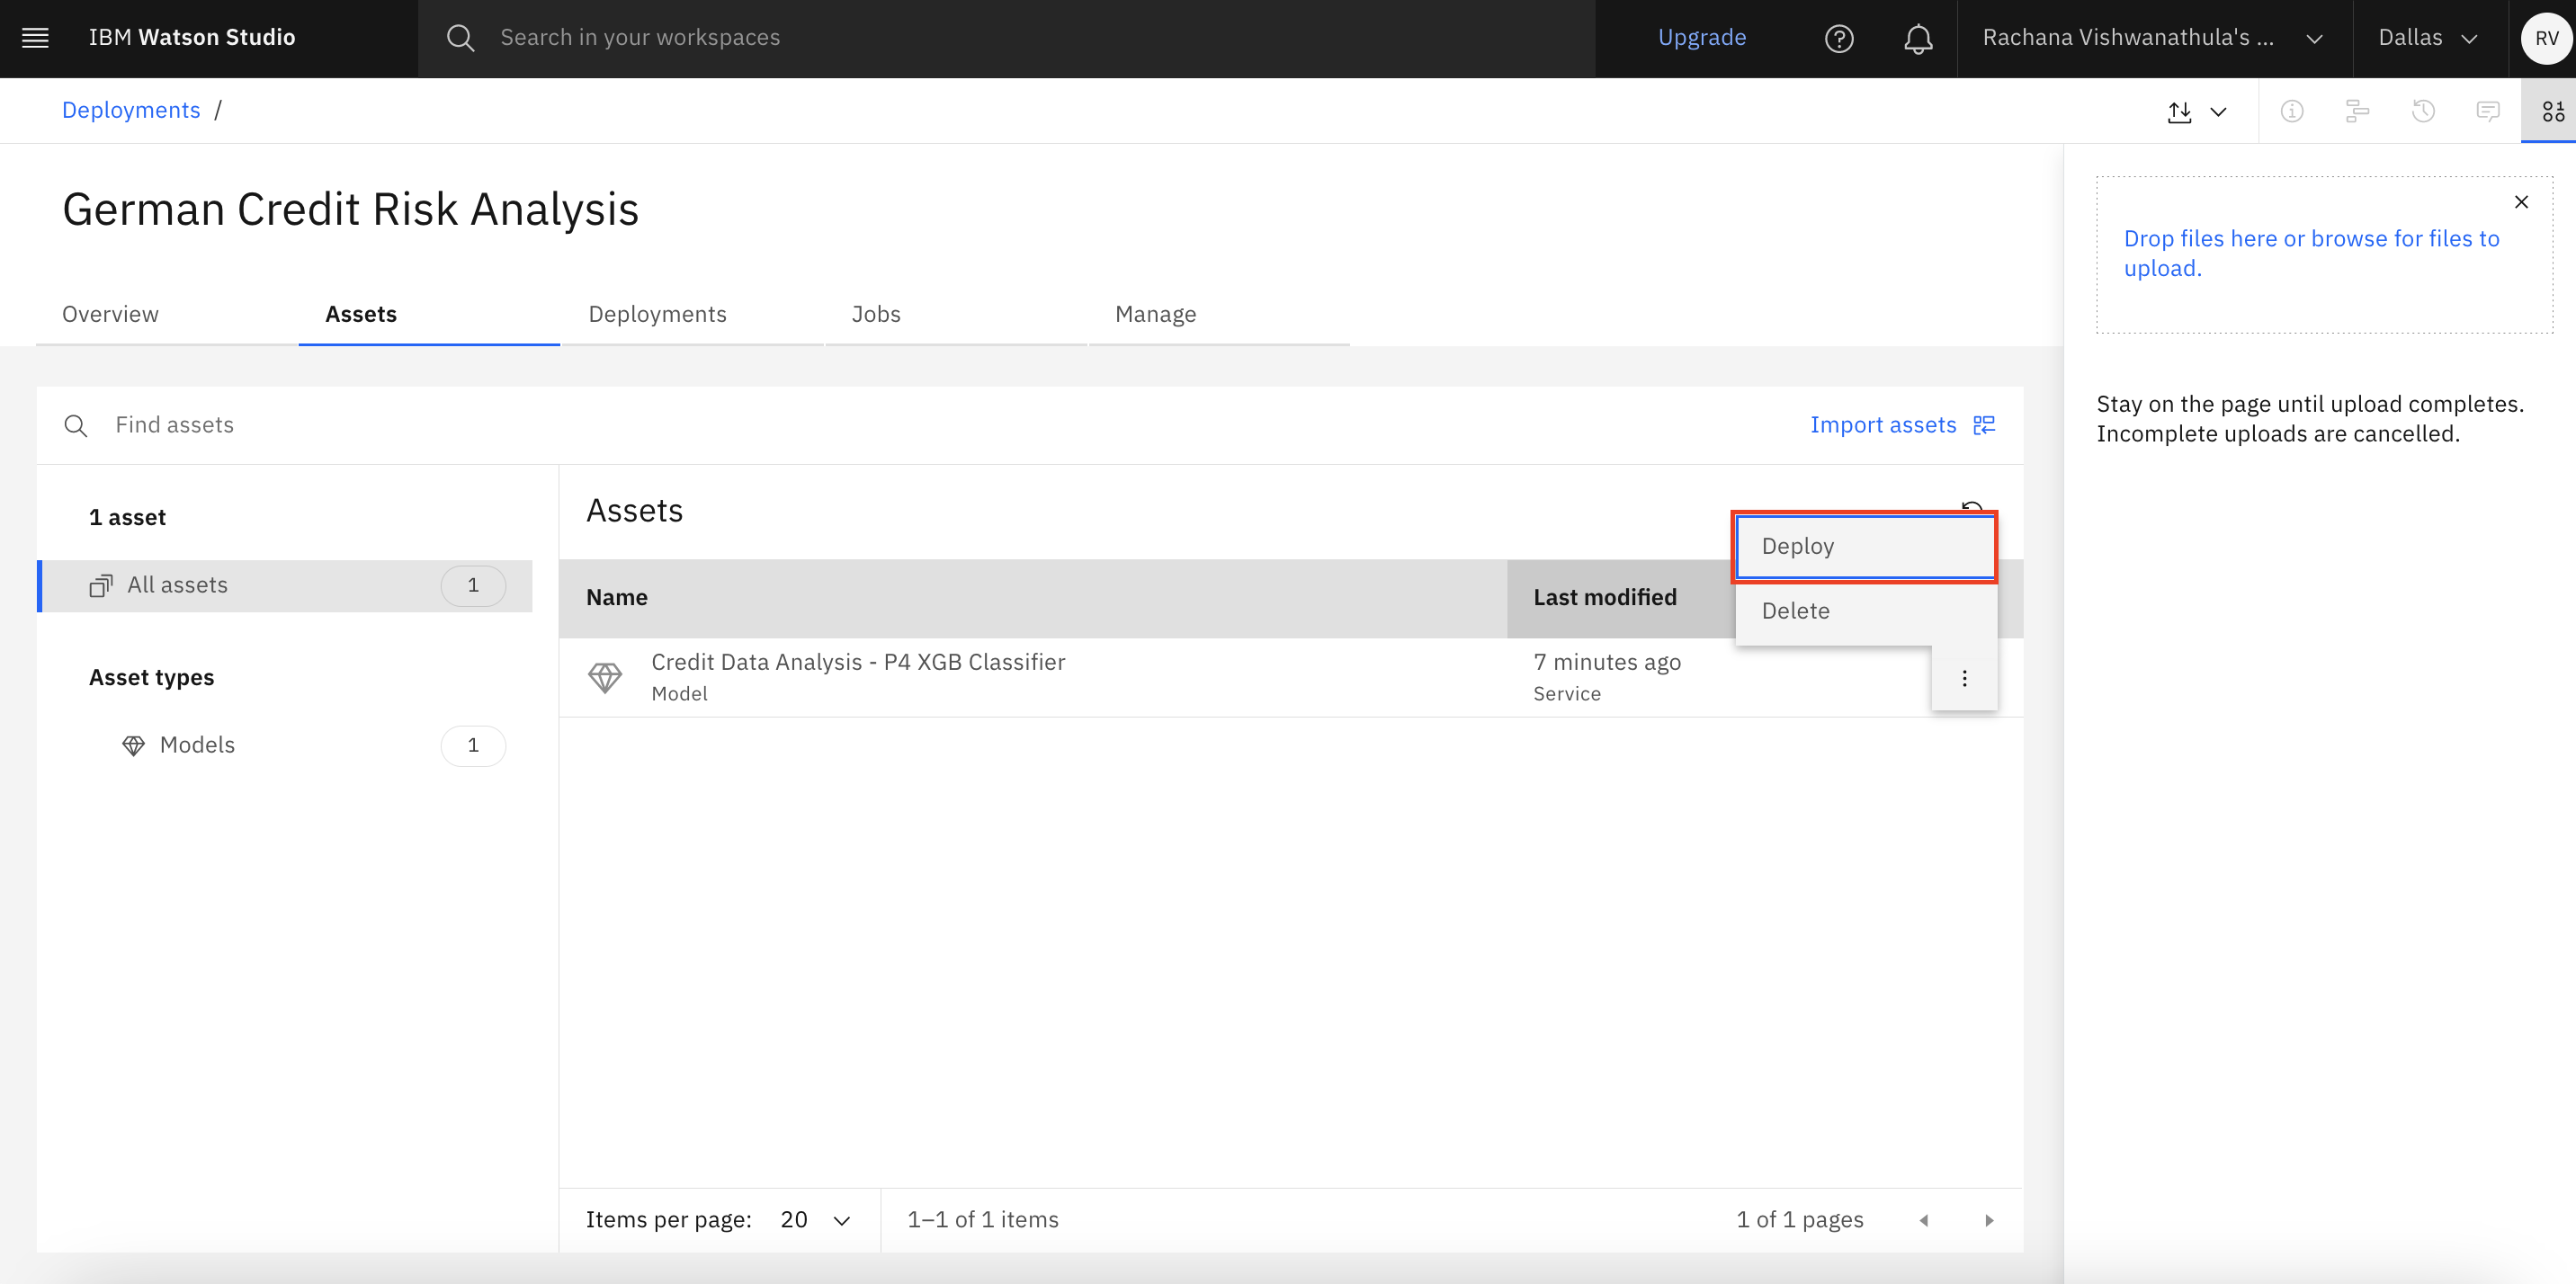
Open the German Credit Risk Analysis deployment that you created from the project.

Select the model that's promoted, and click Deploy.
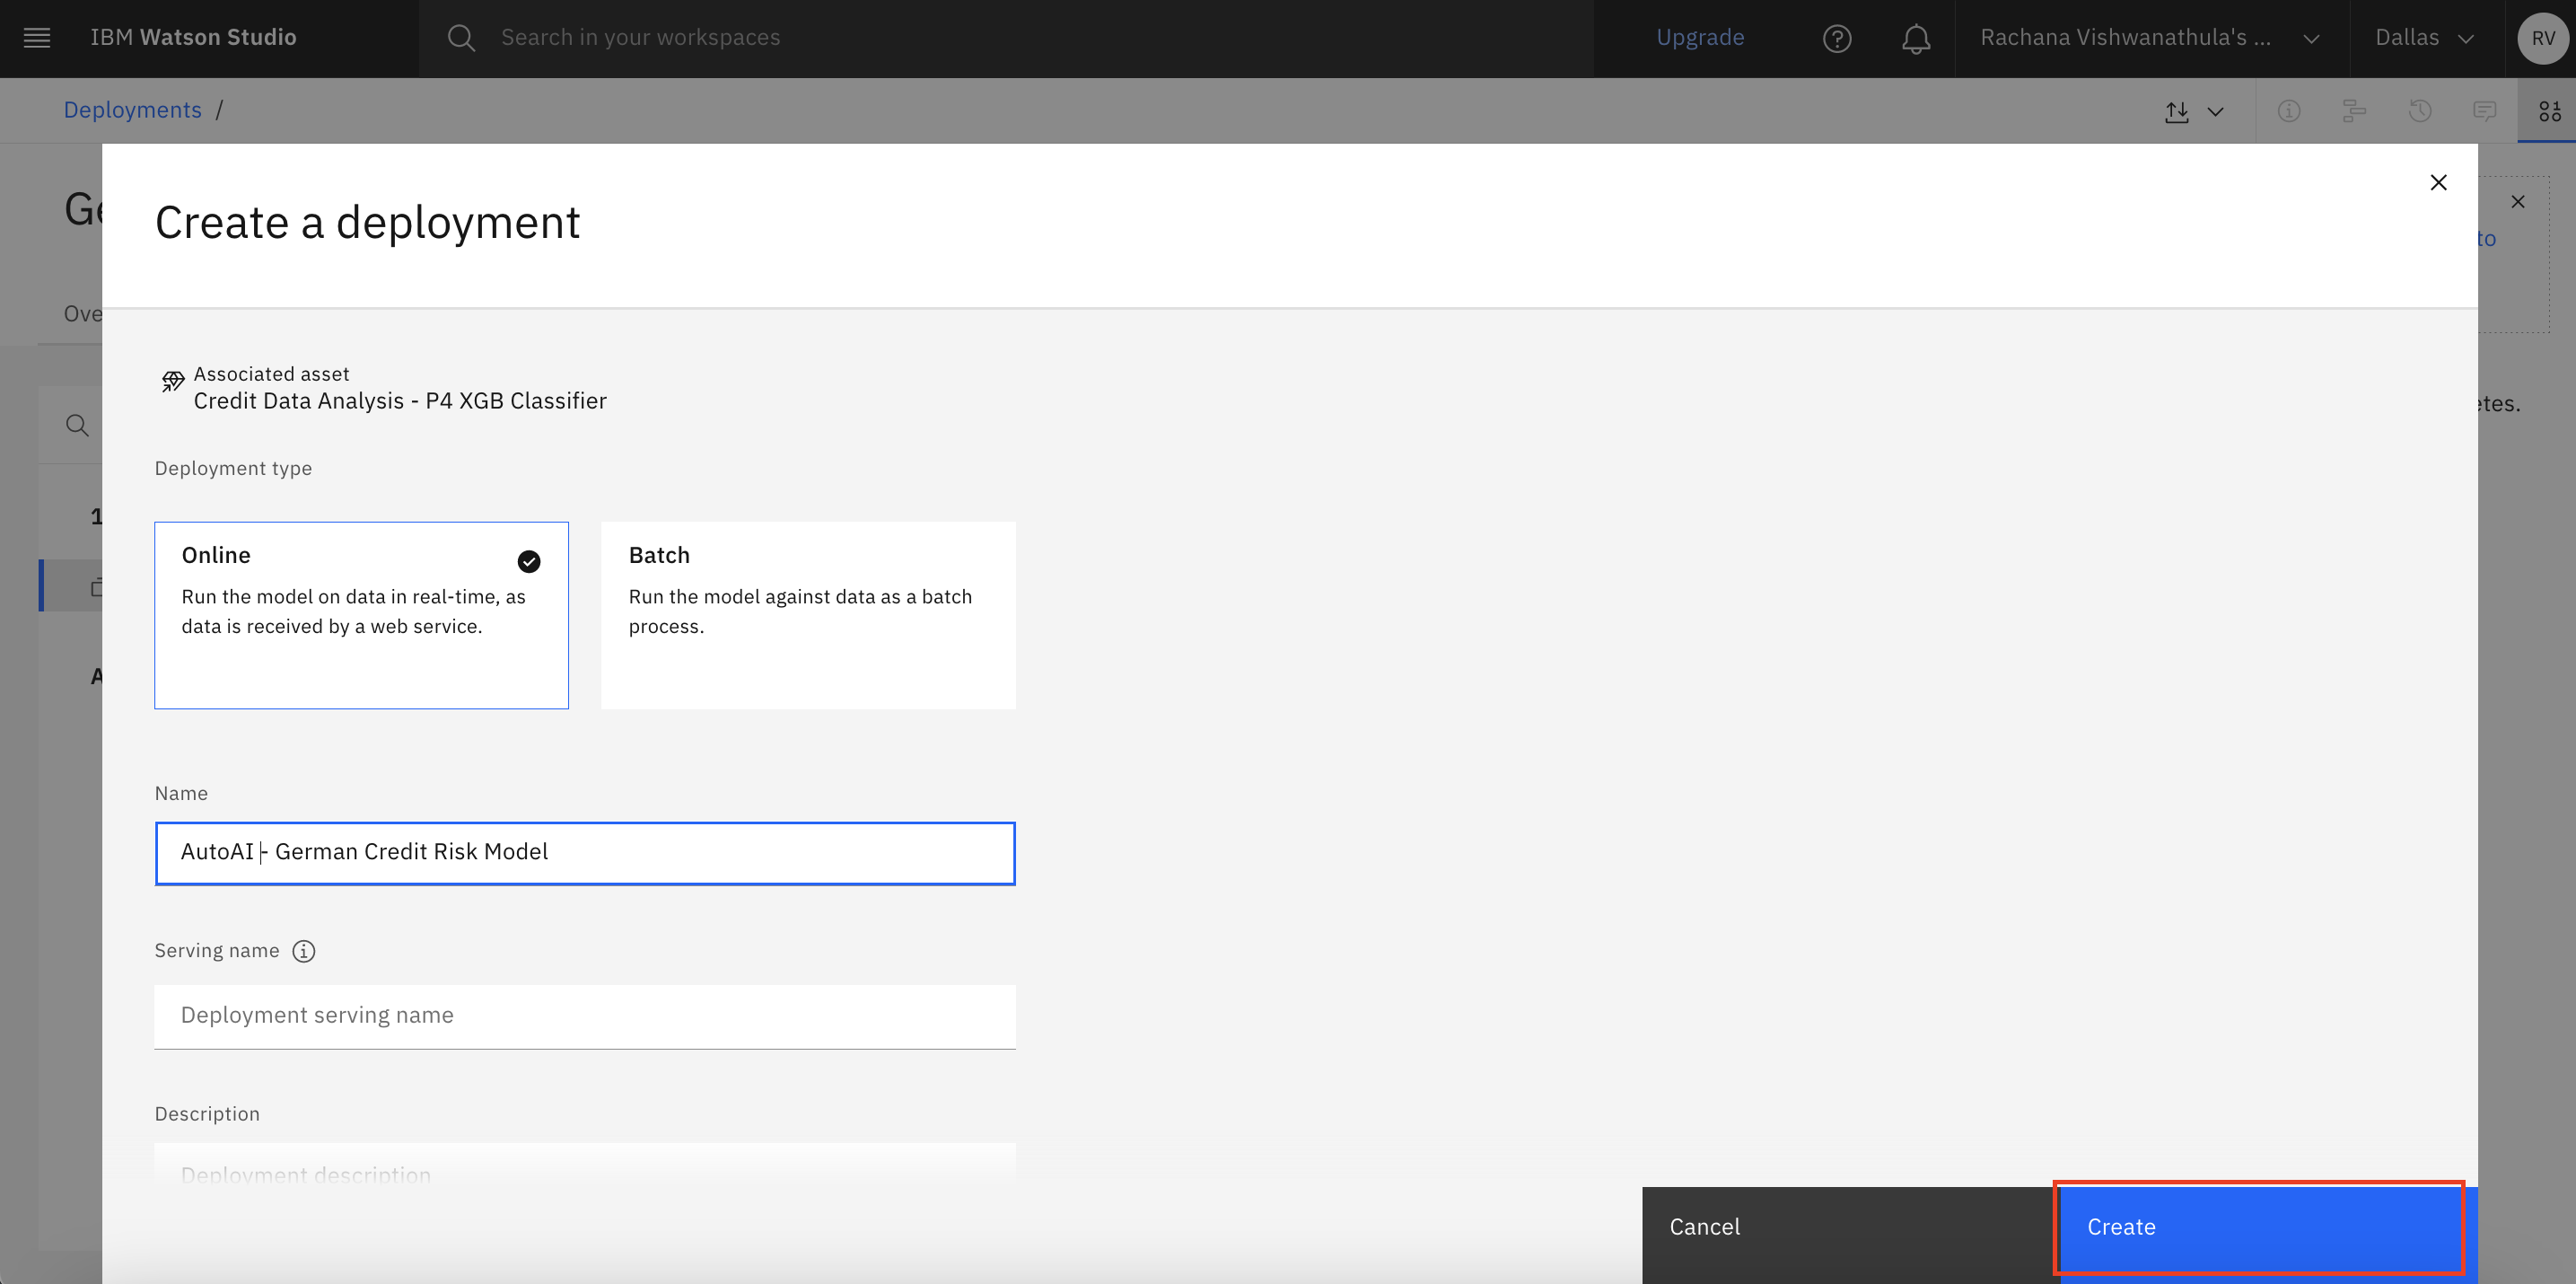
Select Online, and give a name to the deployment. Click Create.
Use the following steps to test the online endpoint.
After the deployment status says "deployed," click the deployment.
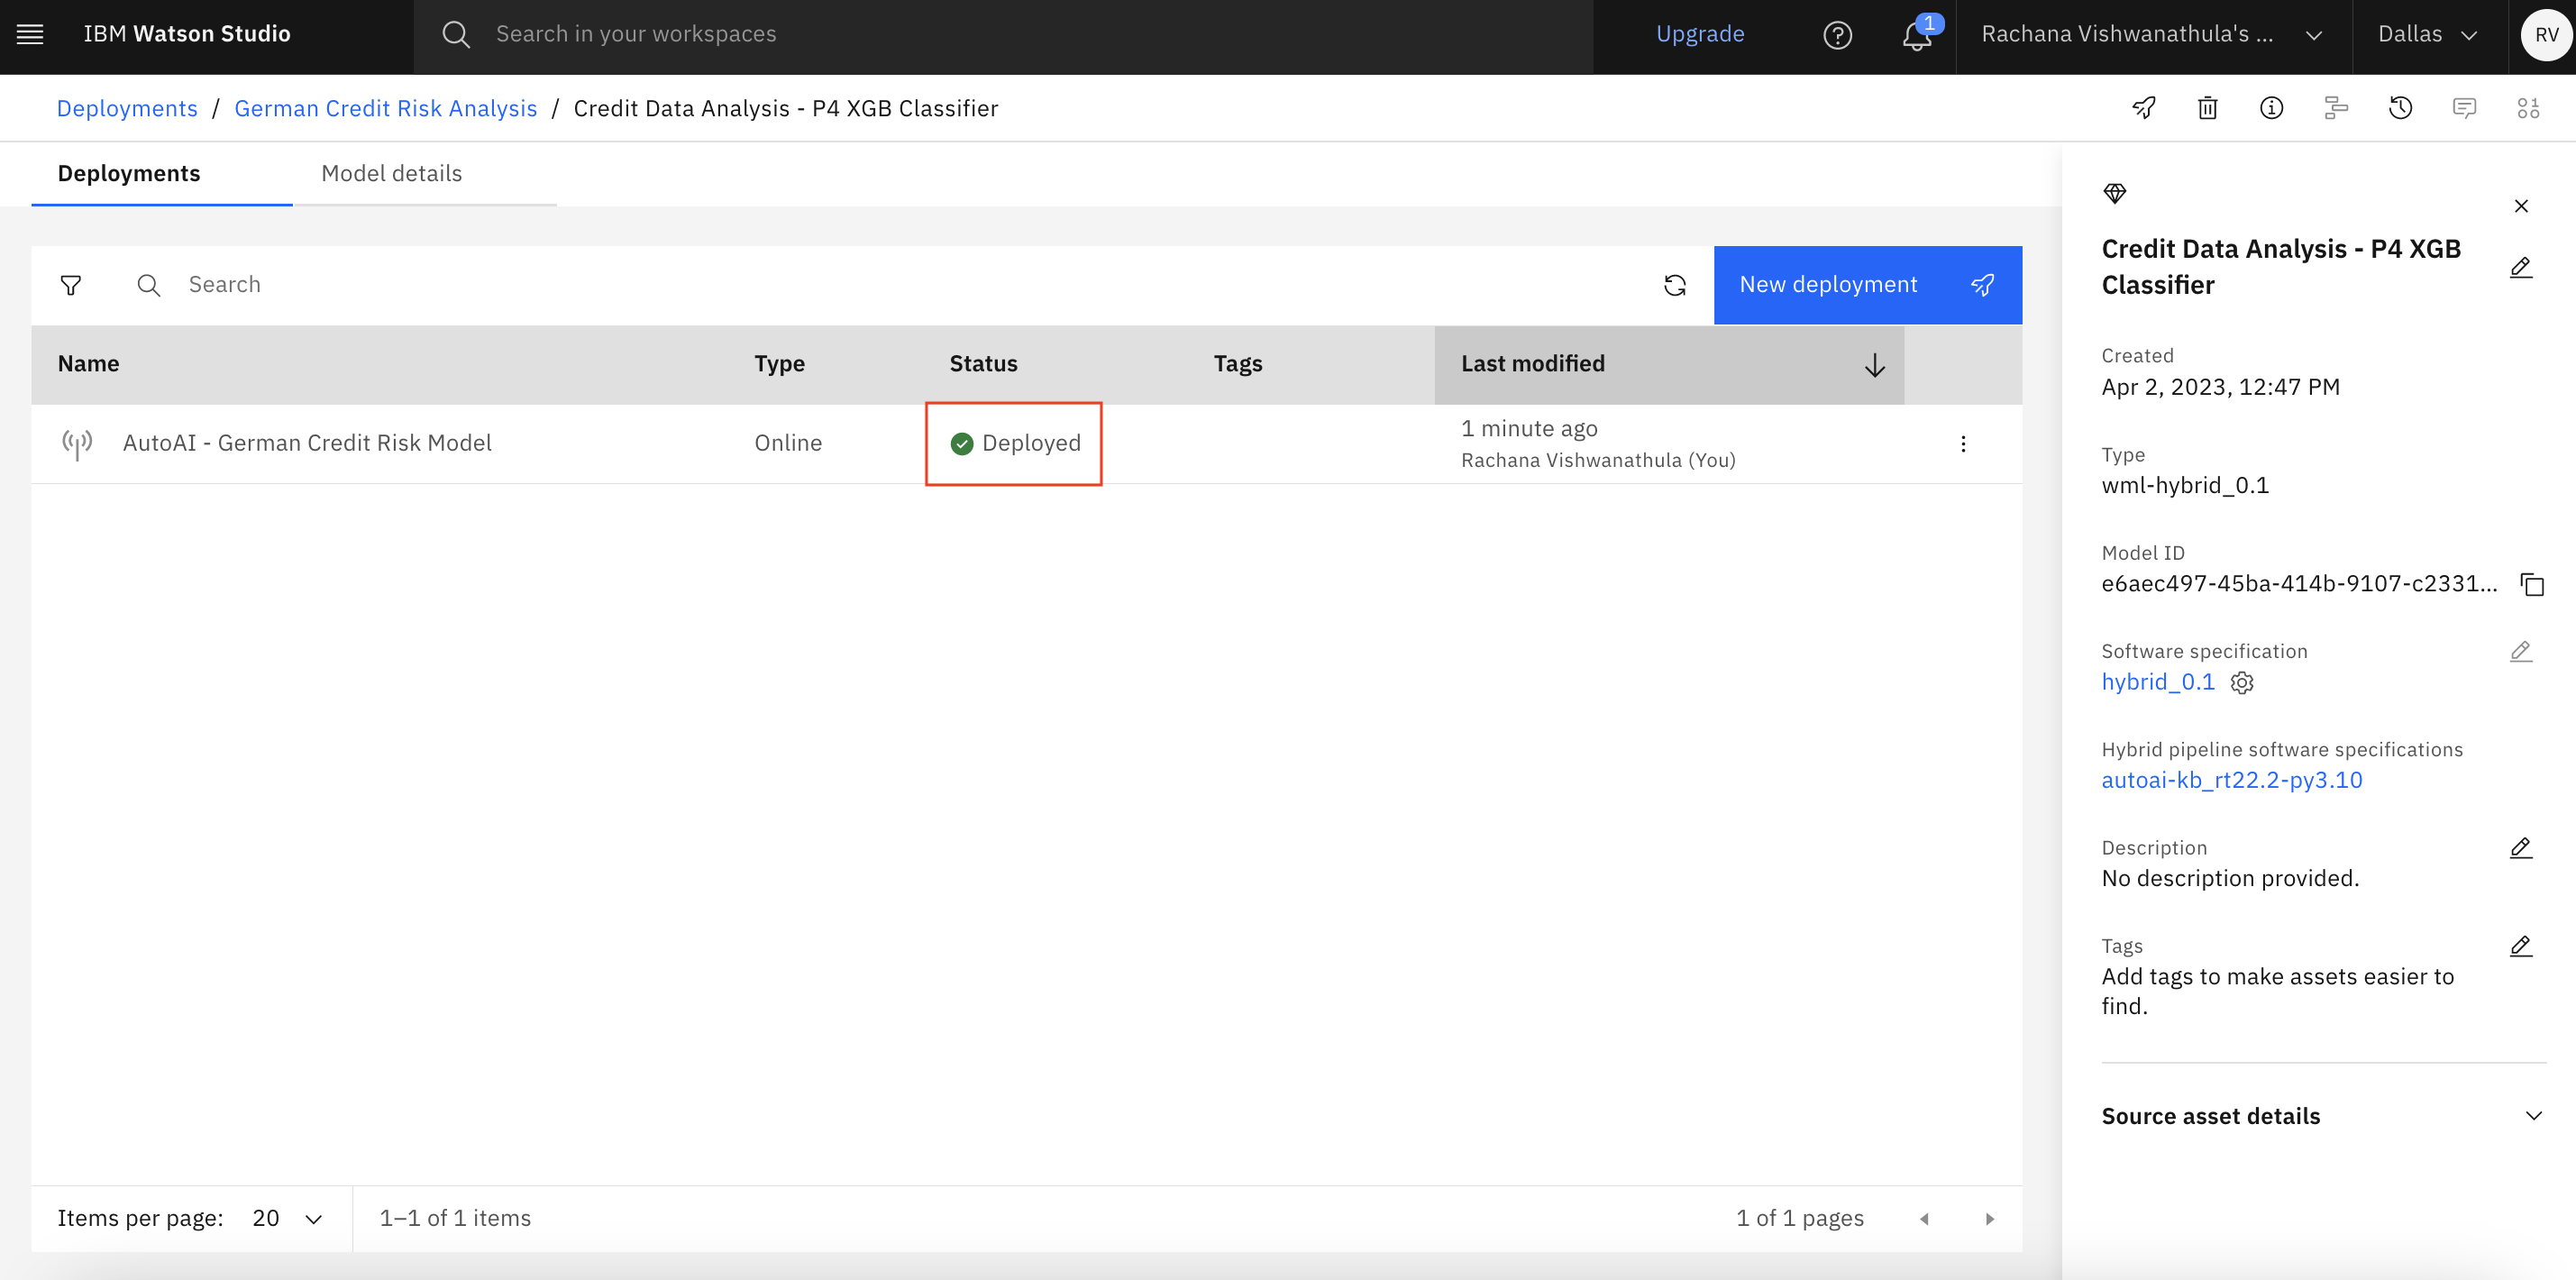
An online endpoint link is generated that can be used in web applications to call the model.

Go to Test, and select JSON Input. Copy the following JSON data, and click Predict.
{
        "input_data": [
                {
                        "fields": [
                                "Check_Account ",
                                "Duration",
                                "Credit_history",
                                "Purpose",
                                "Credit amount ",
                                "Saving_account",
                                "Employment",
                                "Install_rate",
                                "Personal_status",
                                "Other_debrotors",
                                "Present_residence",
                                "Property",
                                "Age",
                                "Installment_plant",
                                "Housing",
                                "Num_credits",
                                "Job",
                                "Num_dependents",
                                "Telephone",
                                "Foreign"
                        ],
                        "values": [["A14", "48", "A34", "A43", "3573", "A65", "A75", "4", "A93", "A101","1","A121","47","A143","A152","1","A173","1","A192","A201"]]
                }
        ]
}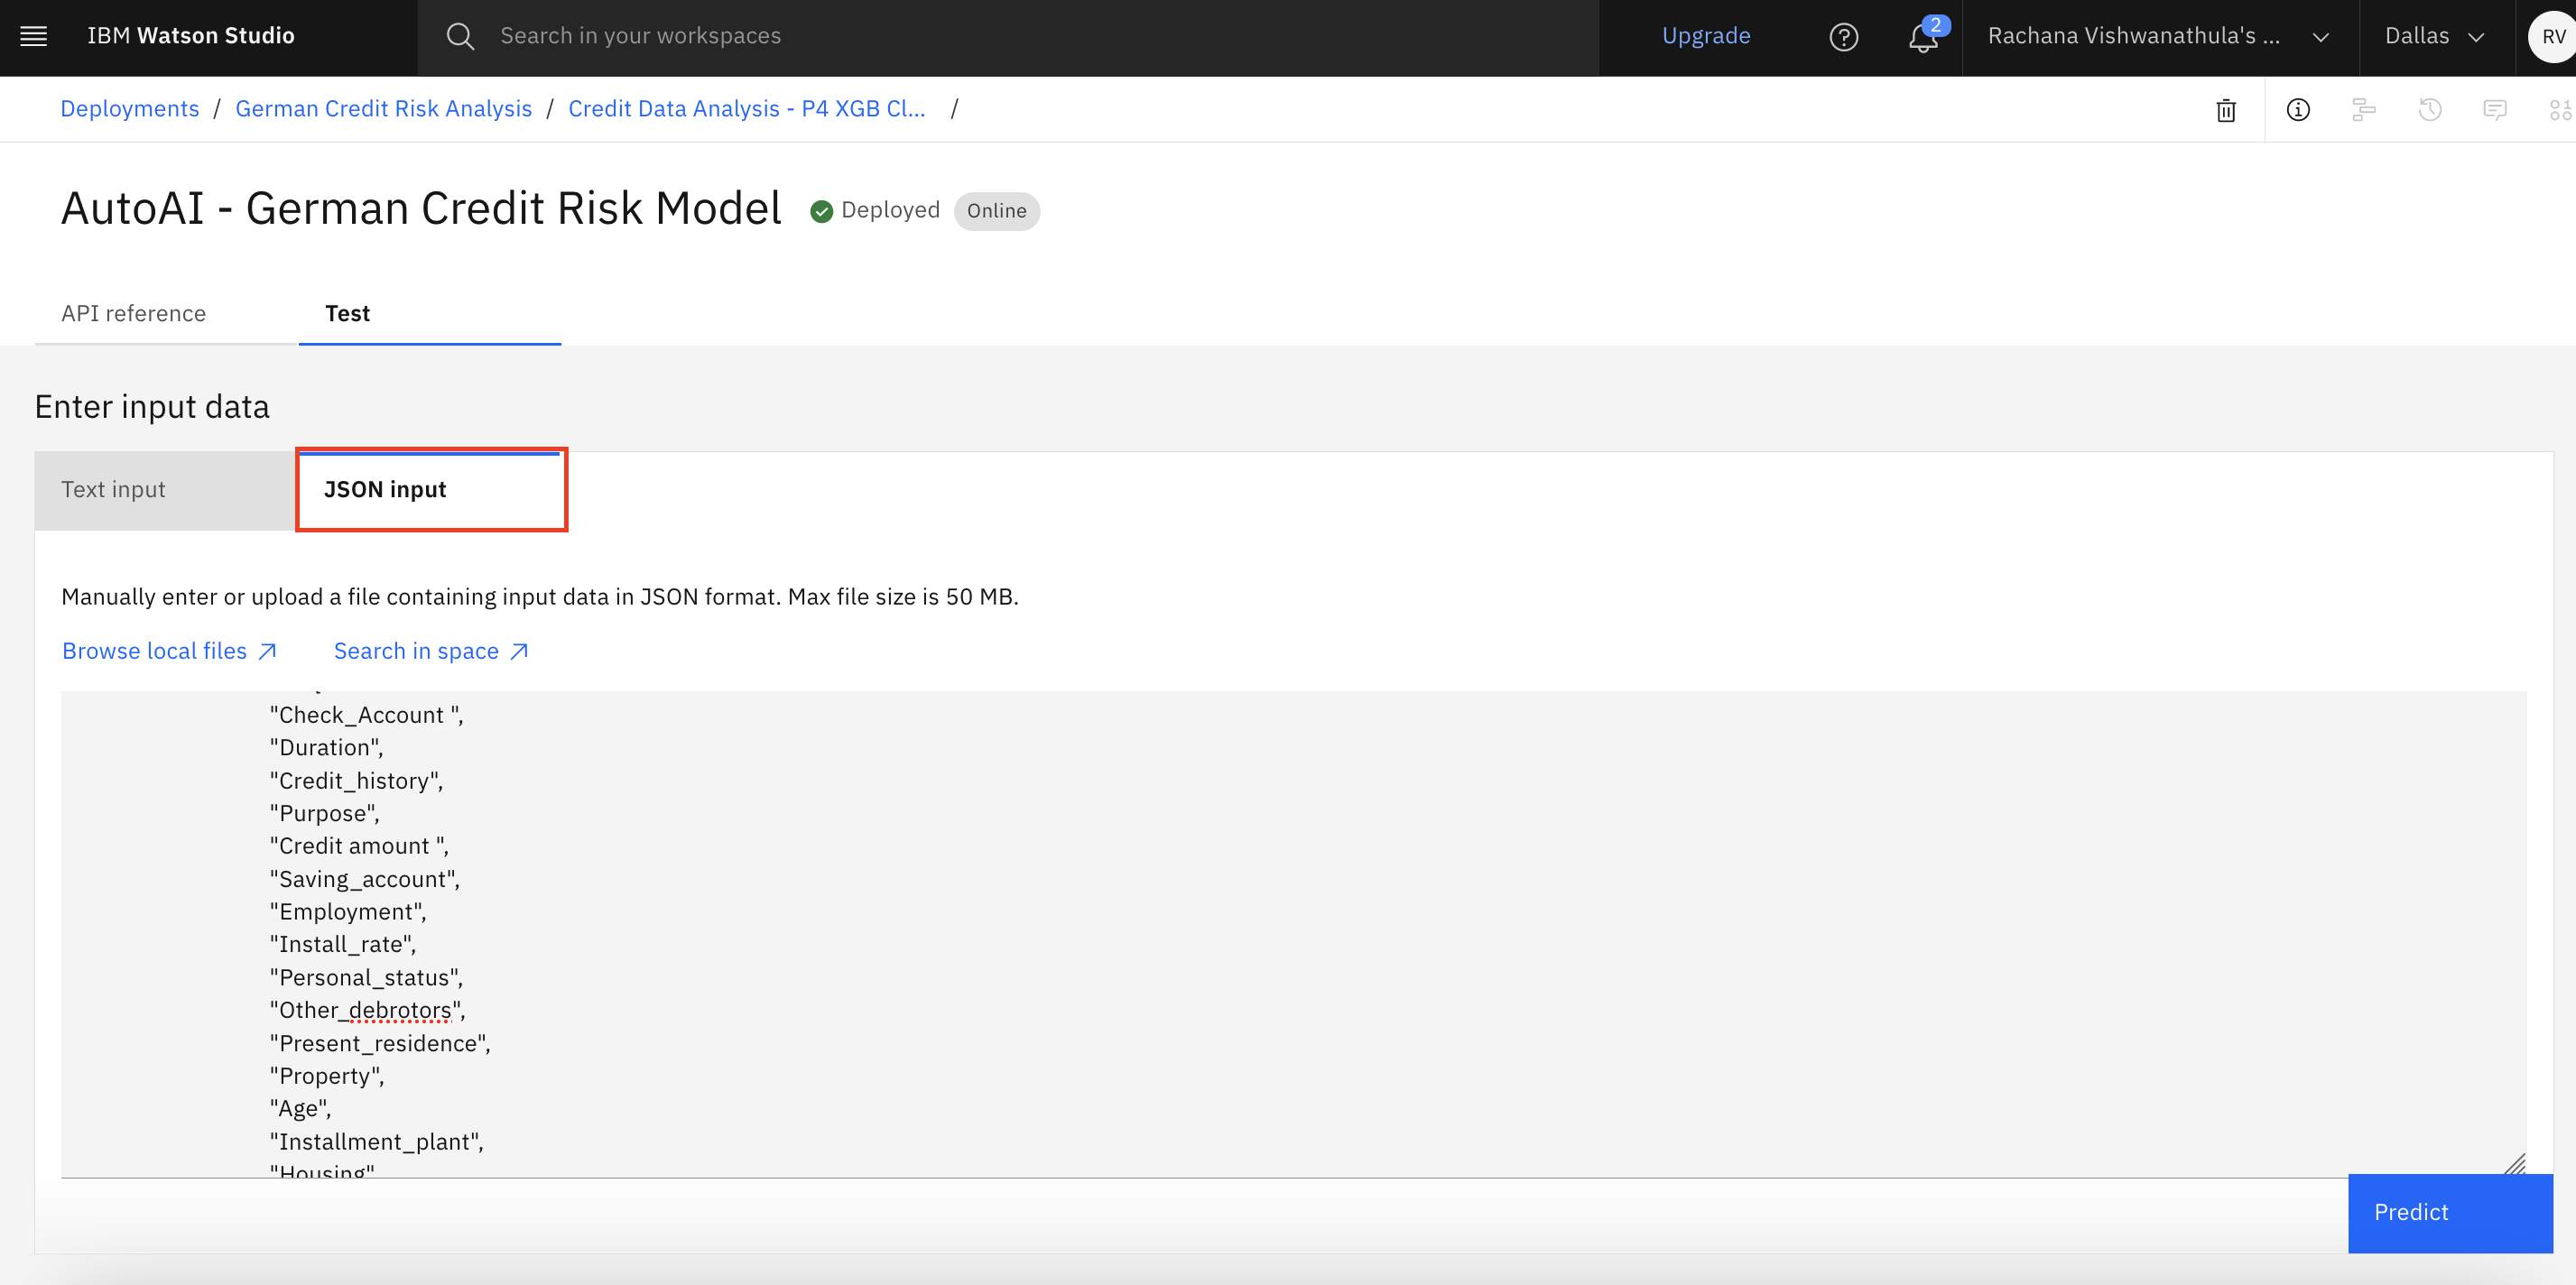
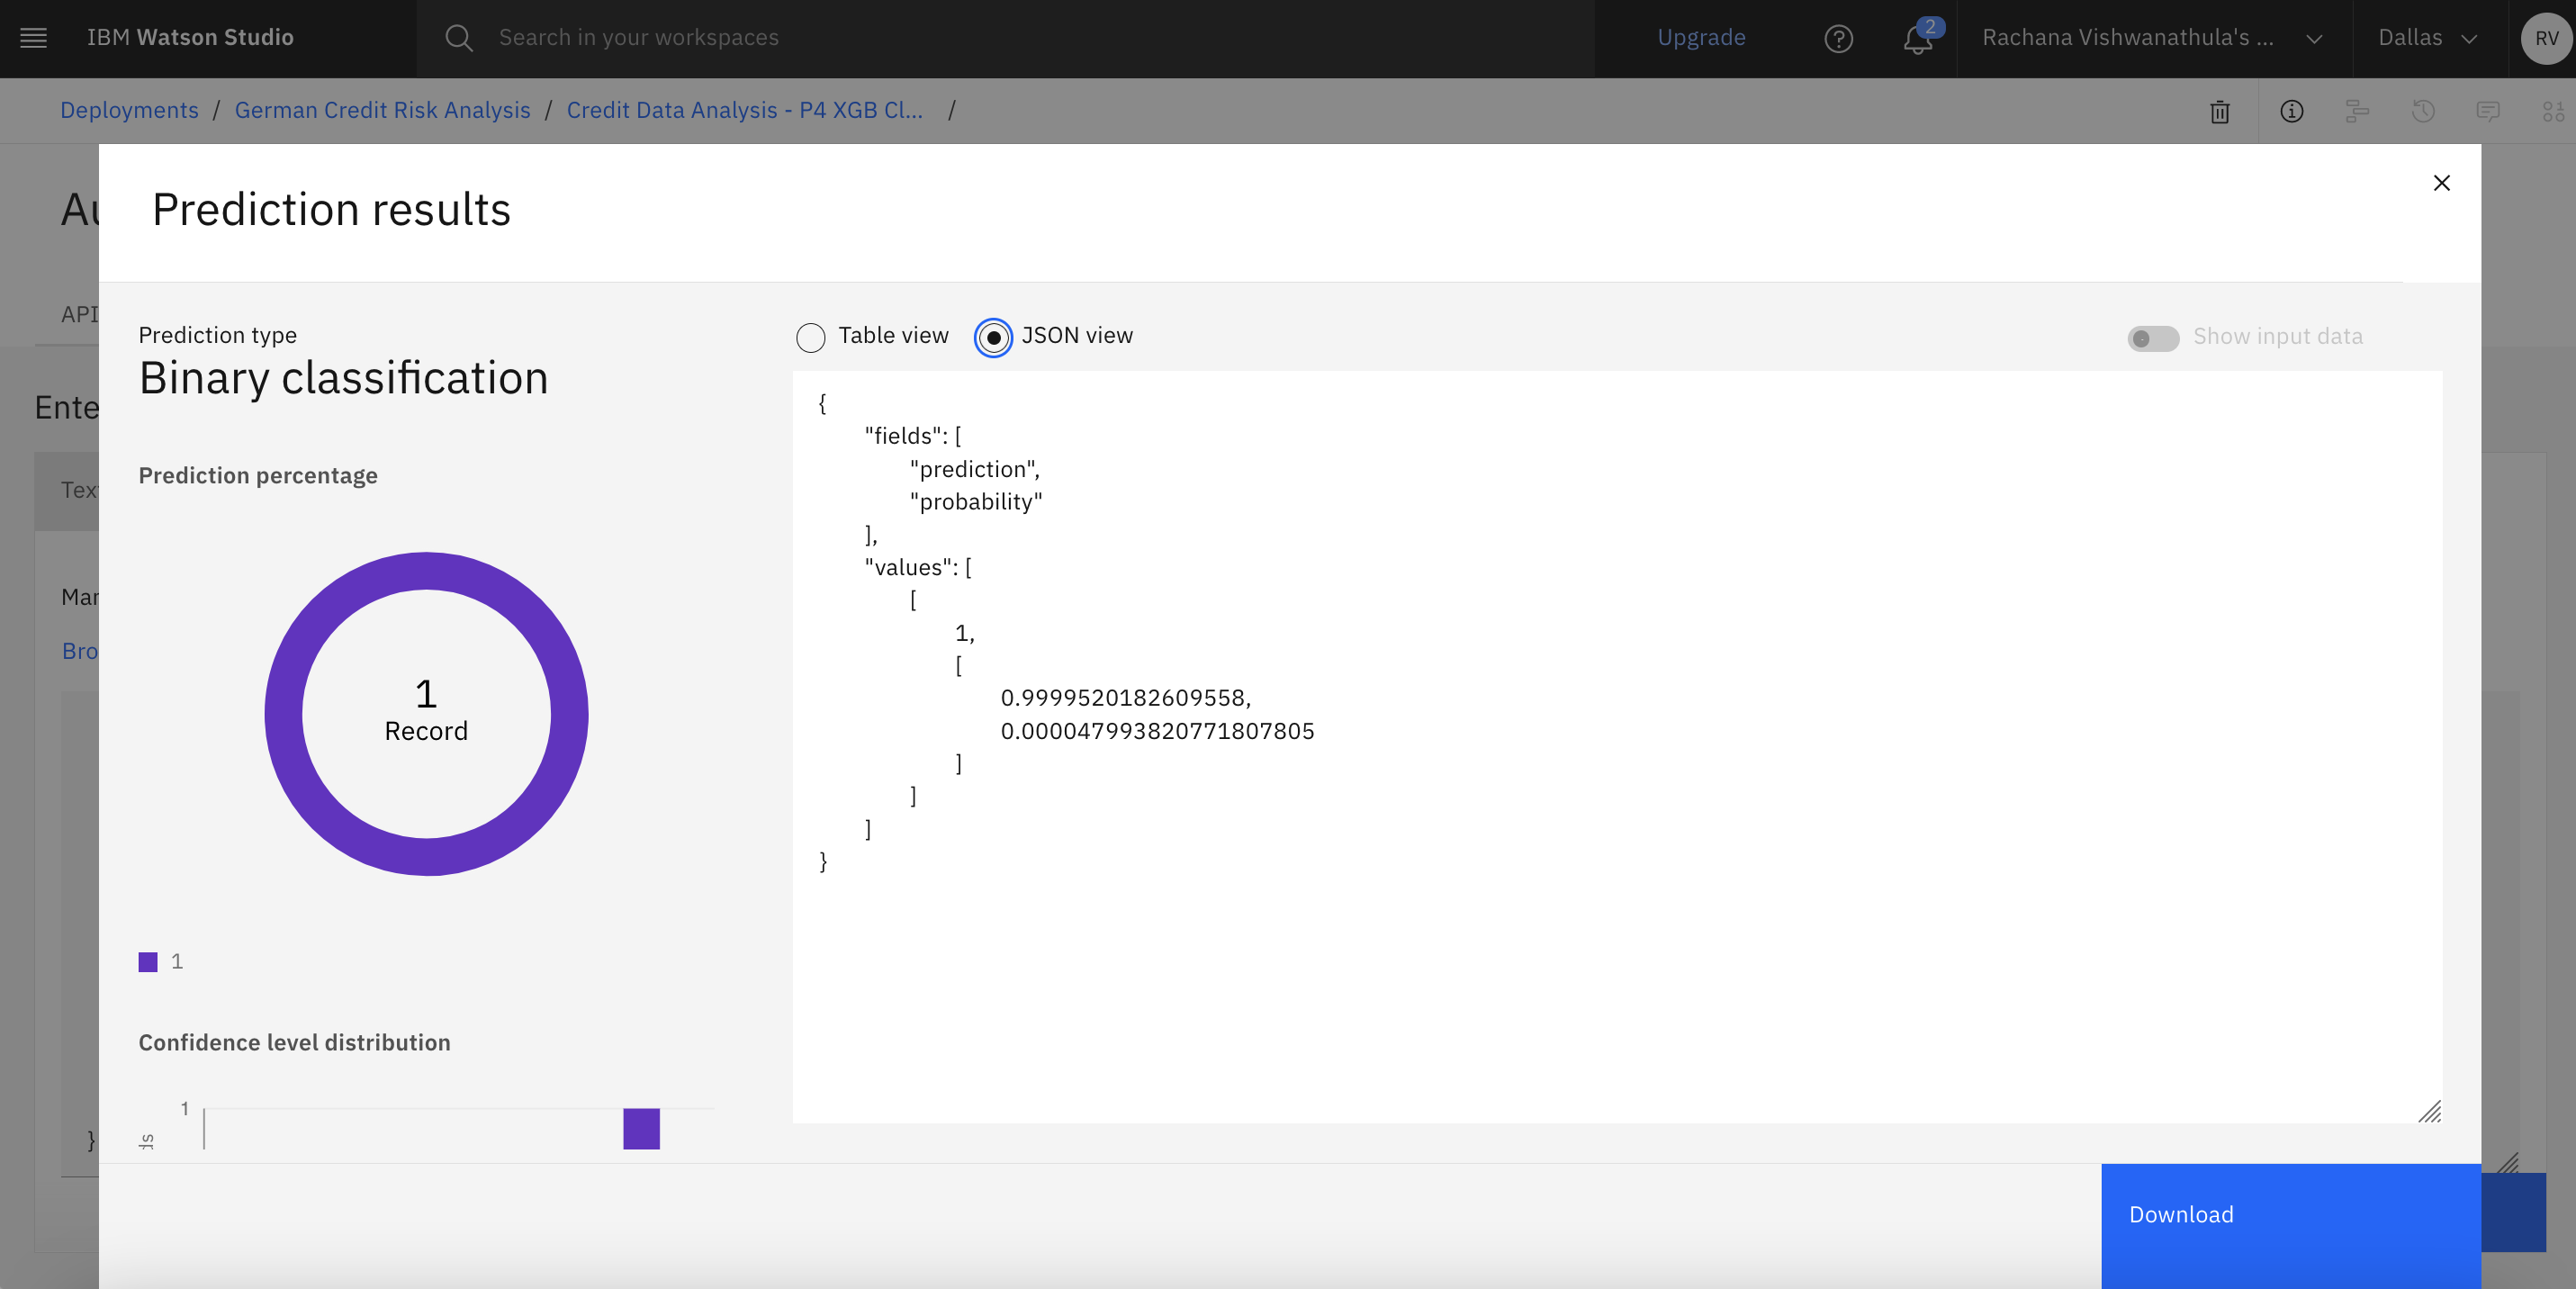
Observe the prediction generated by the endpoint.
Conclusion
In this tutorial, we explained how to train your model with the AutoAI Watson service. Along with this training process, you have learned how to deploy and test the models. You also gained an understanding of how to make an API call for the deployed model through a notebook.