About cookies on this site Our websites require some cookies to function properly (required). In addition, other cookies may be used with your consent to analyze site usage, improve the user experience and for advertising. For more information, please review your options. By visiting our website, you agree to our processing of information as described in IBM’sprivacy statement. To provide a smooth navigation, your cookie preferences will be shared across the IBM web domains listed here.
Tutorial
Dataflow automation for sending UDC excel to AWS S3 bucket in Envizi
Streamline data ingestion into Envizi by automating the process of sending UDC excel files to AWS S3 with this step-by-step guide.
On this page
This tutorial provides a step-by-step guide for setting up Envizi dataflow automation to send Universal Data Connector (UDC) excel templates to Envizi via an AWS S3 bucket for data ingestion and integration.
Prerequisites
To follow this tutorial, you need access to the IBM Envizi ESG Suite with administrator privileges.
Steps
These are the steps you need to follow:
- Create a data service for AWS S3 bucket.
- Create a data pipeline.
- Send an UDC excel file to an AWS S3 bucket.
Step 1. Create a data service for AWS S3 bucket
Open
Data Servicesby navigating toAdmin > Data Flow Automation.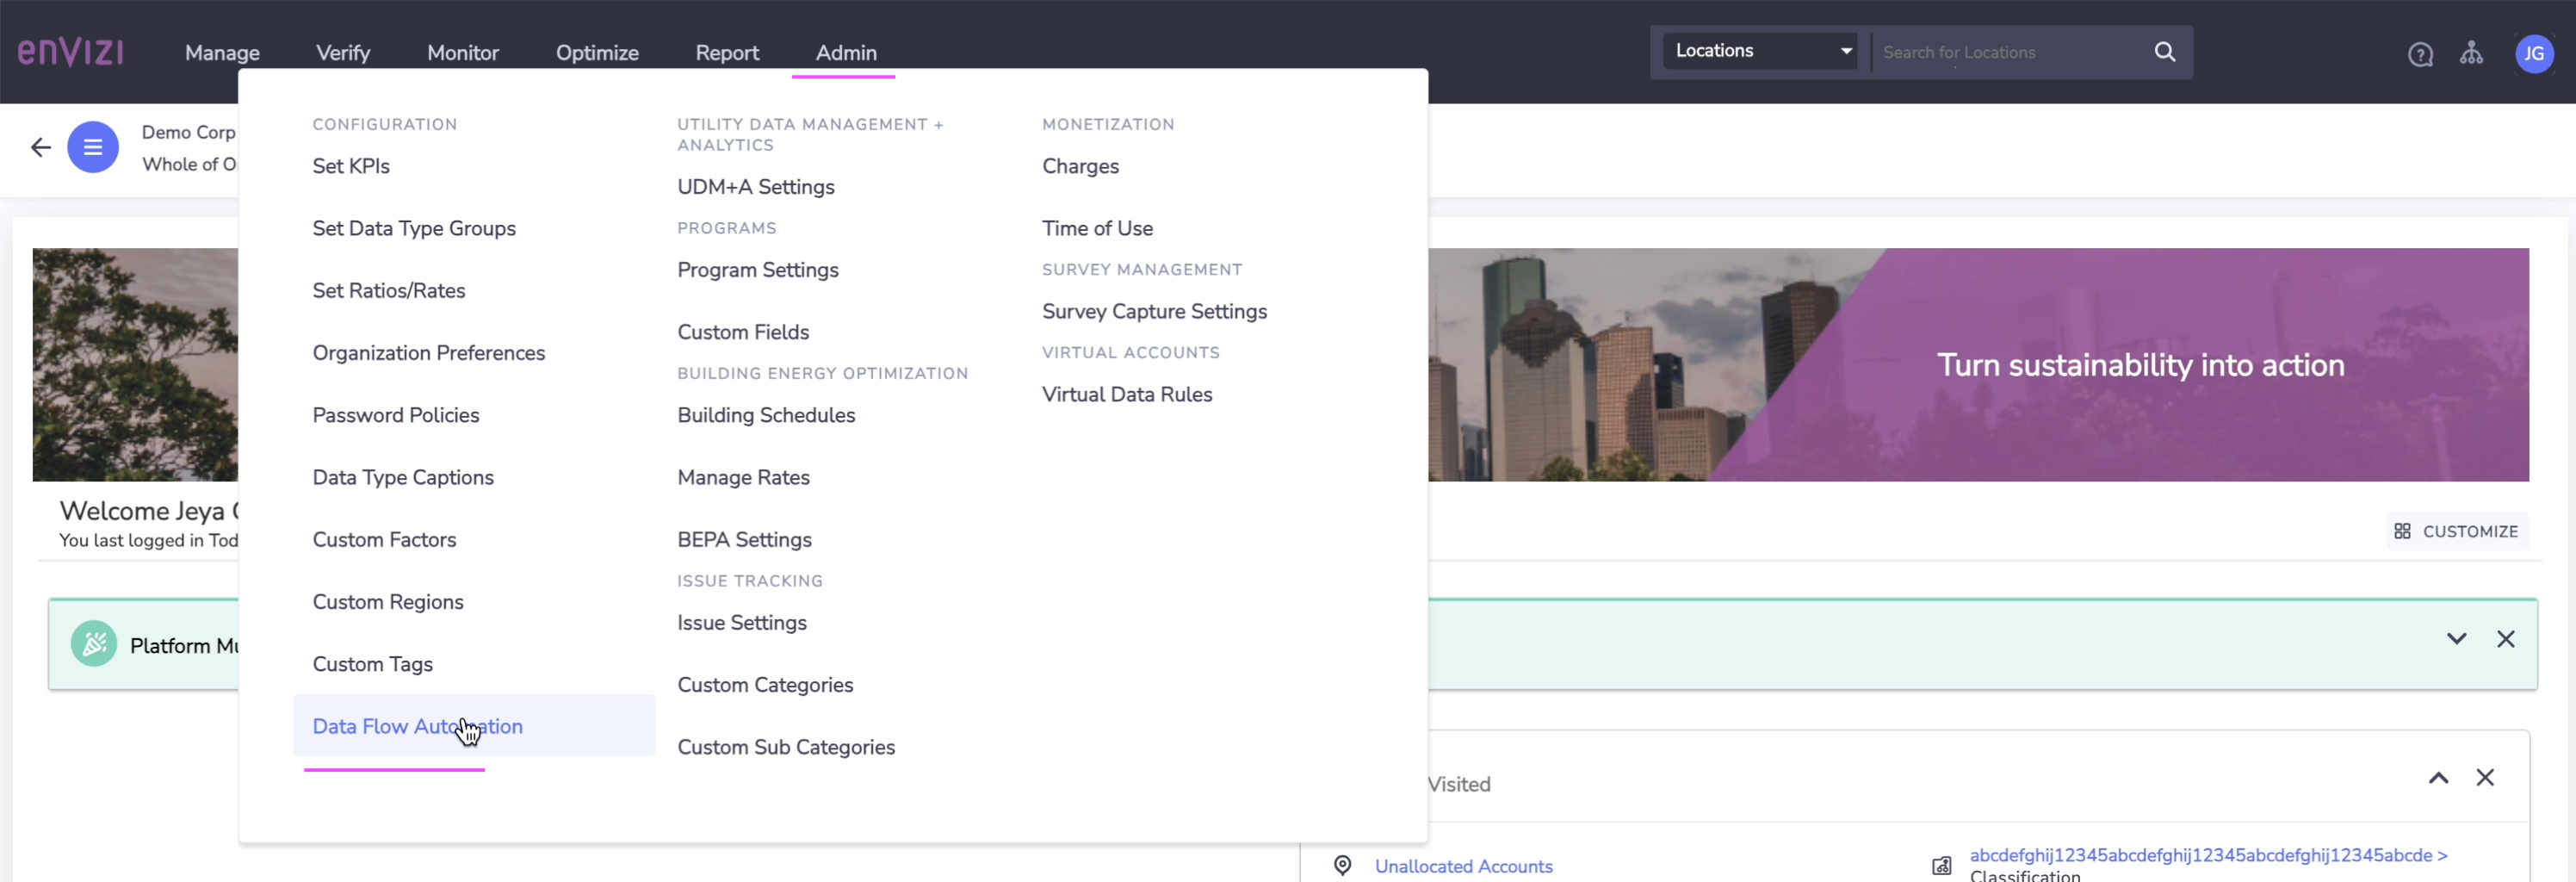
In the
Data Servicespage, clickAdd New Service.
Configure the data service:
- From the
Typelist, selectAmazon S3 (Cloud Storage). - From the
Ownerlist, selectEnvizi. In the
Namefield, enter a name for the data service.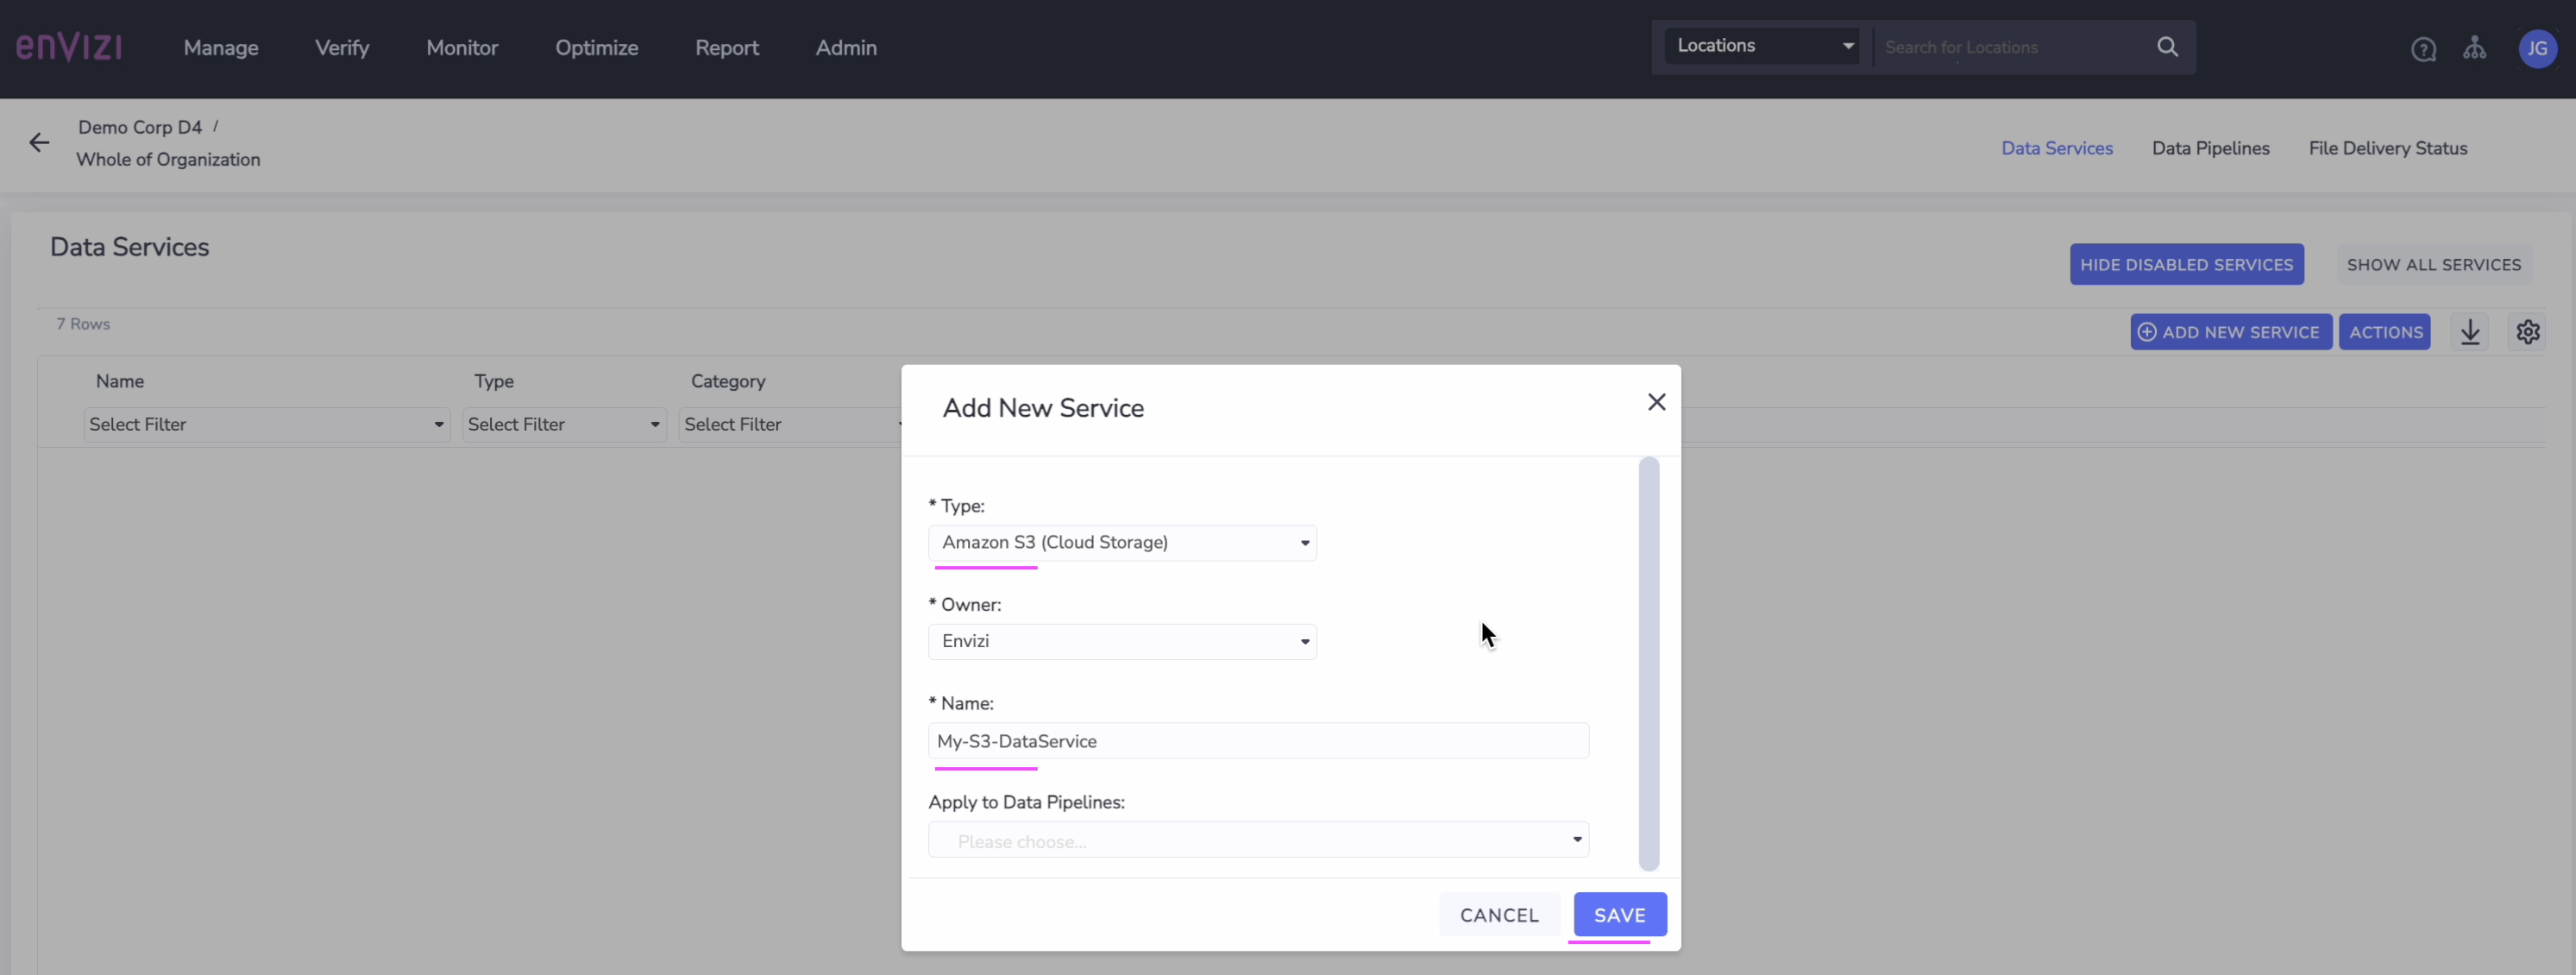
- From the
Click
Save. The data service is created.Access the
Data Servicespage by selectingActions > Manage Connections.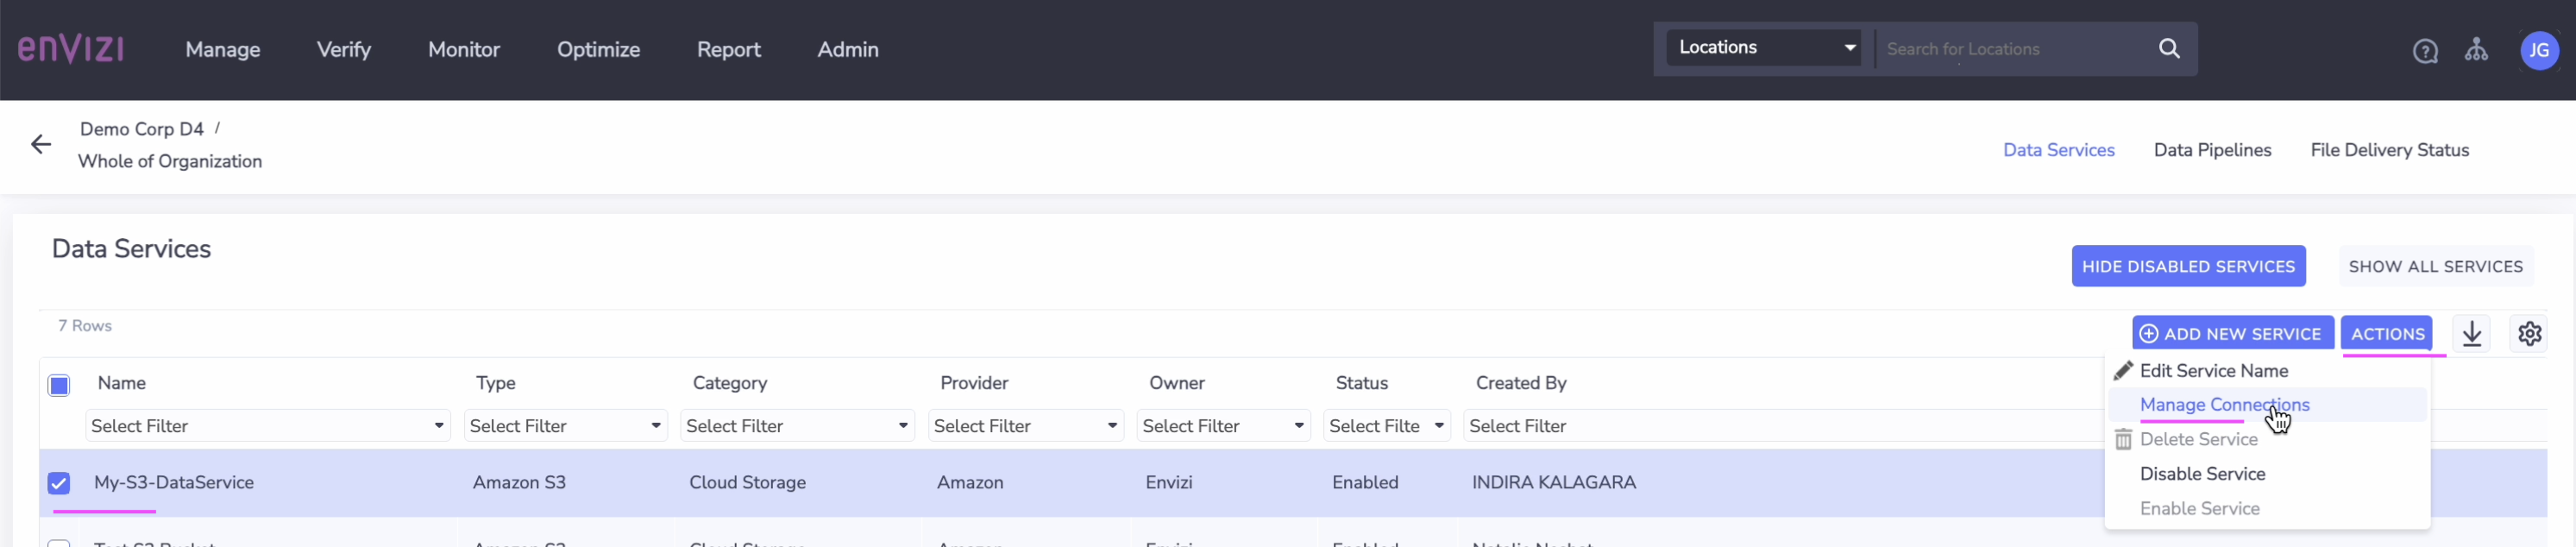
The
Manage Connectionspage of the Data Service is displayed.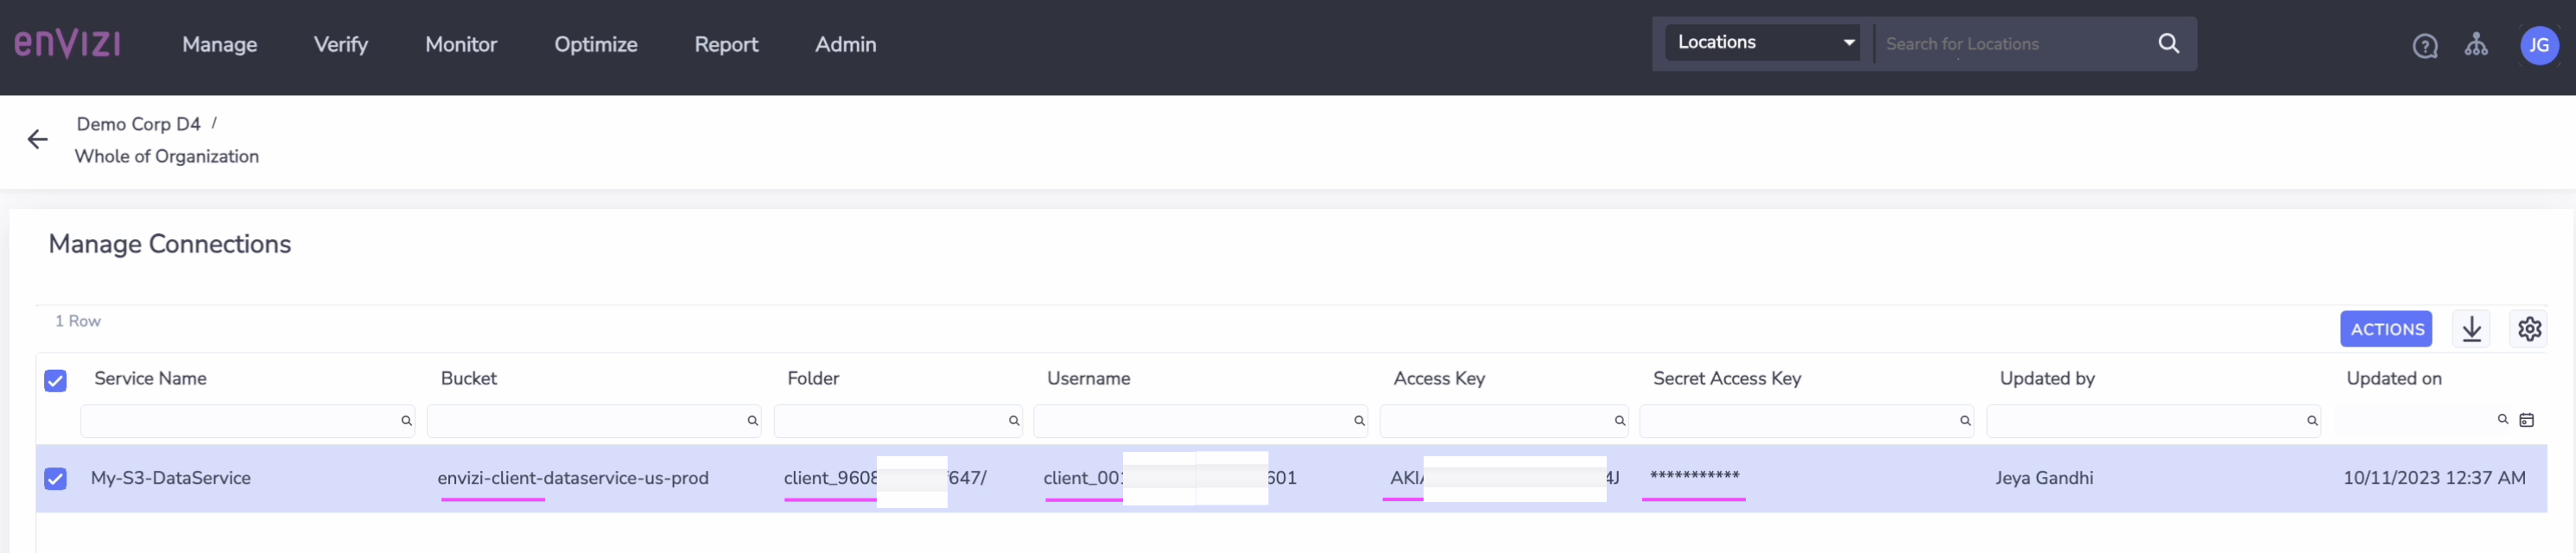
Note down the following values for future reference:
- Bucket
- Folder
- Username
- Access Key
- Secret Access Key
Step 2. Create a data pipeline
To create a data pipeline for downloading UDC excel files from an AWS S3 bucket and to faciliate data ingestion into Envizi, complete the following steps:
Open the data pipeline by selecting
Data Pipelinesfrom the top menu.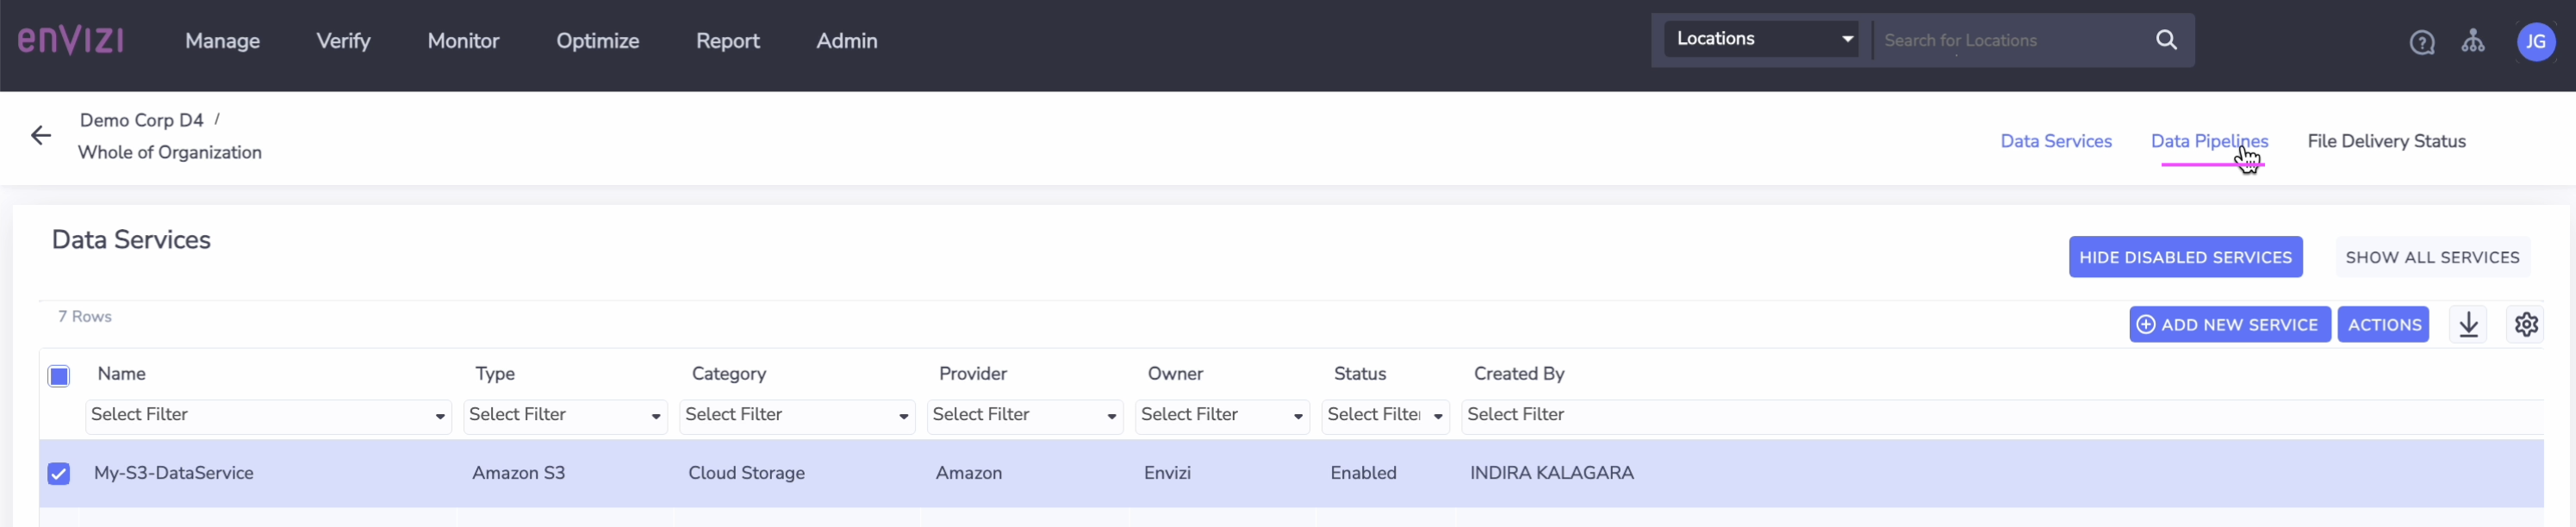
In the
Data Pipelinespage, clickAdd New Pipeline.
Configure the data pipeline:
- In the
Namefield, enter a name for the data pipeline. - In the
Descriptionfield, enter a description for the data pipeline. - From the
Target Systemlist, selectAccount(or your desired target system). - In the
Filename Patternfield, specify a regex pattern (for example, ^POC.*.xlsx). - From the
Data sourceslist, choose the AWS S3 data source that you created in Step 1. From the
Data Transformerlist, selectNone(pass through).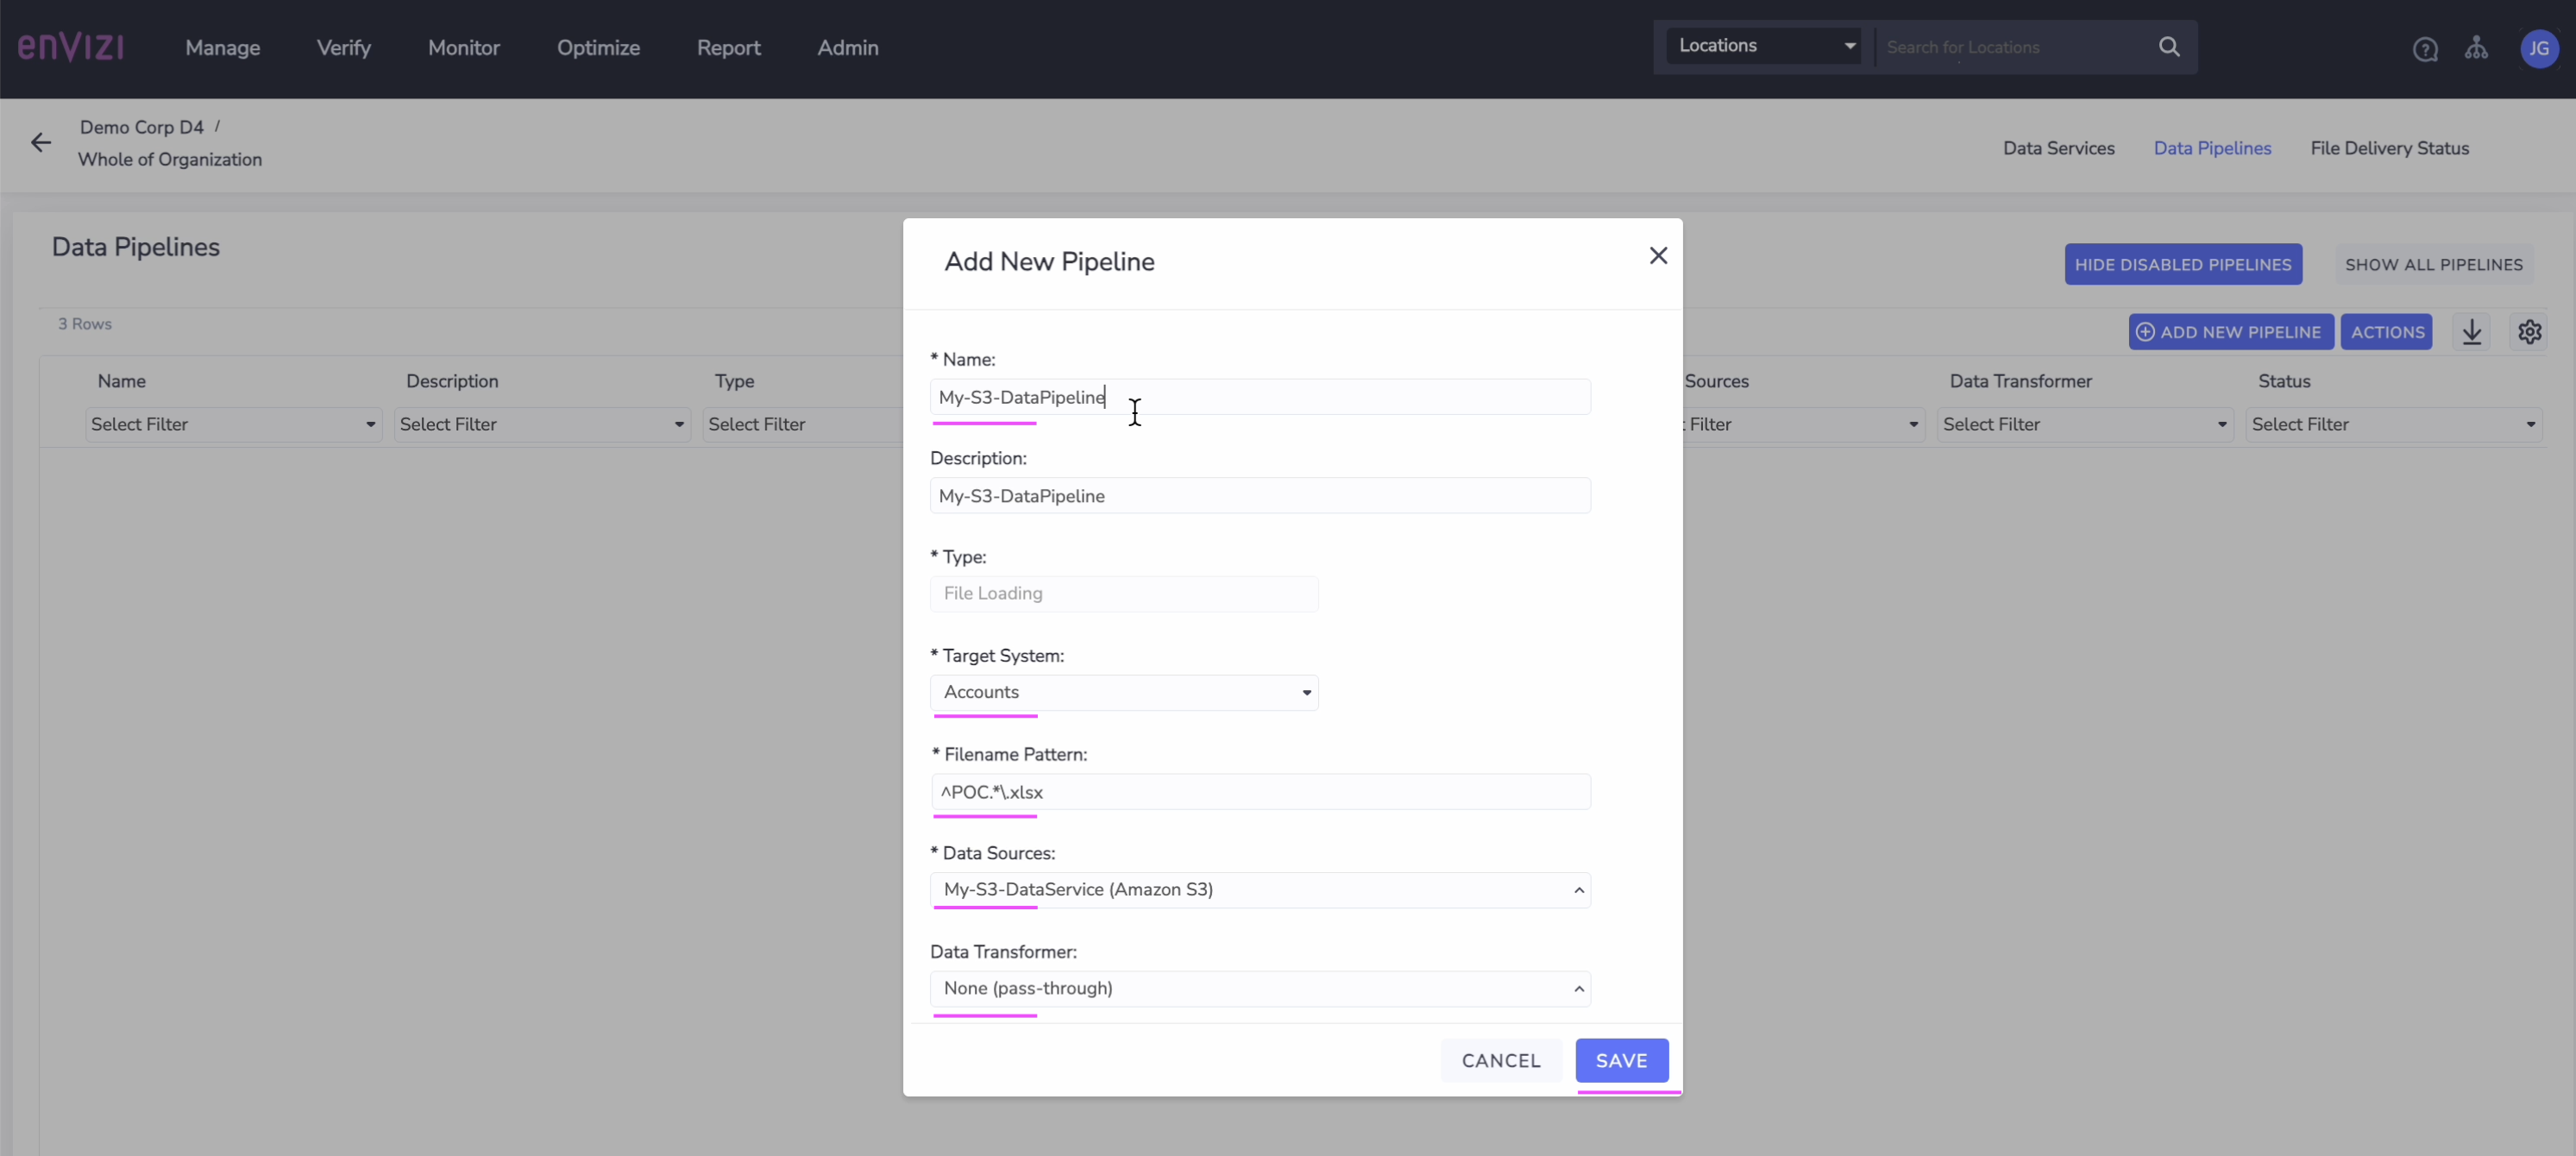
- In the
Click
Saveto create the data pipeline.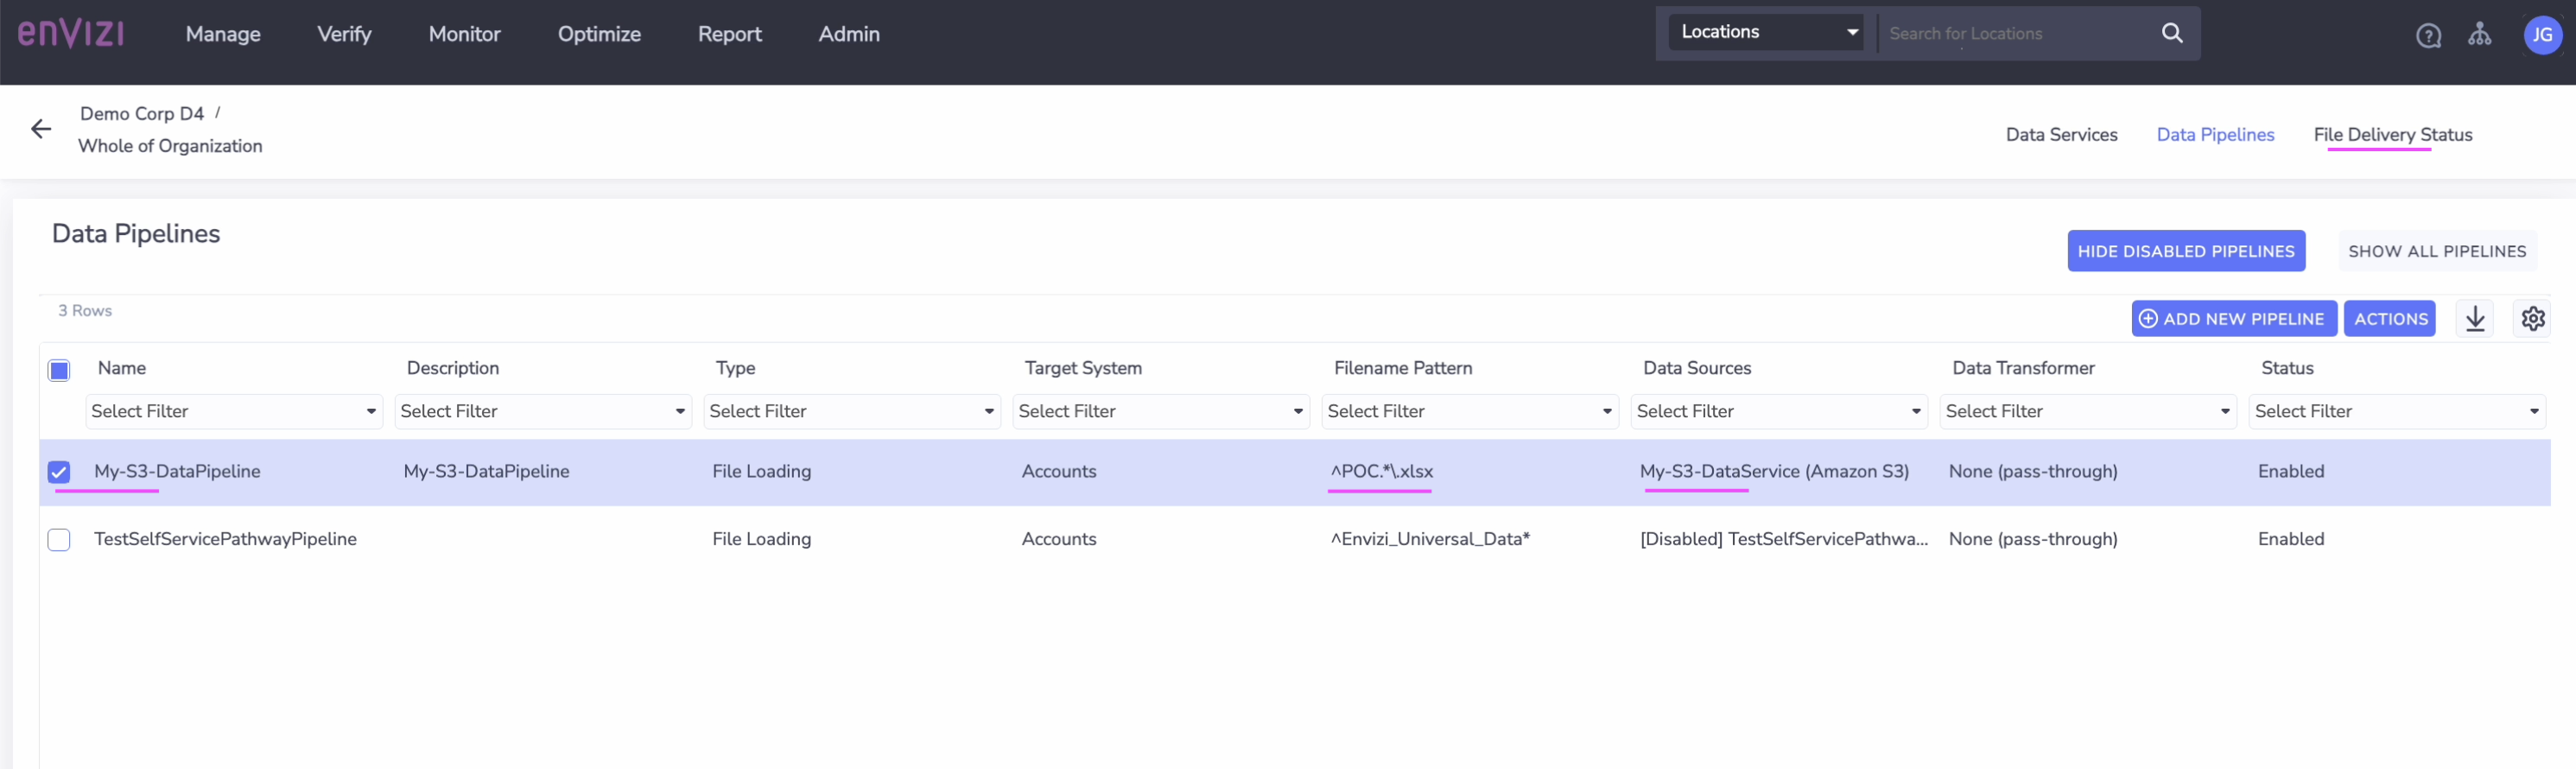
Step 3. Send an UDC excel file to an AWS S3 bucket
Let's use the sample python script main.py to upload the data.xlsx file to an AWS S3 bucket.
Download the sample
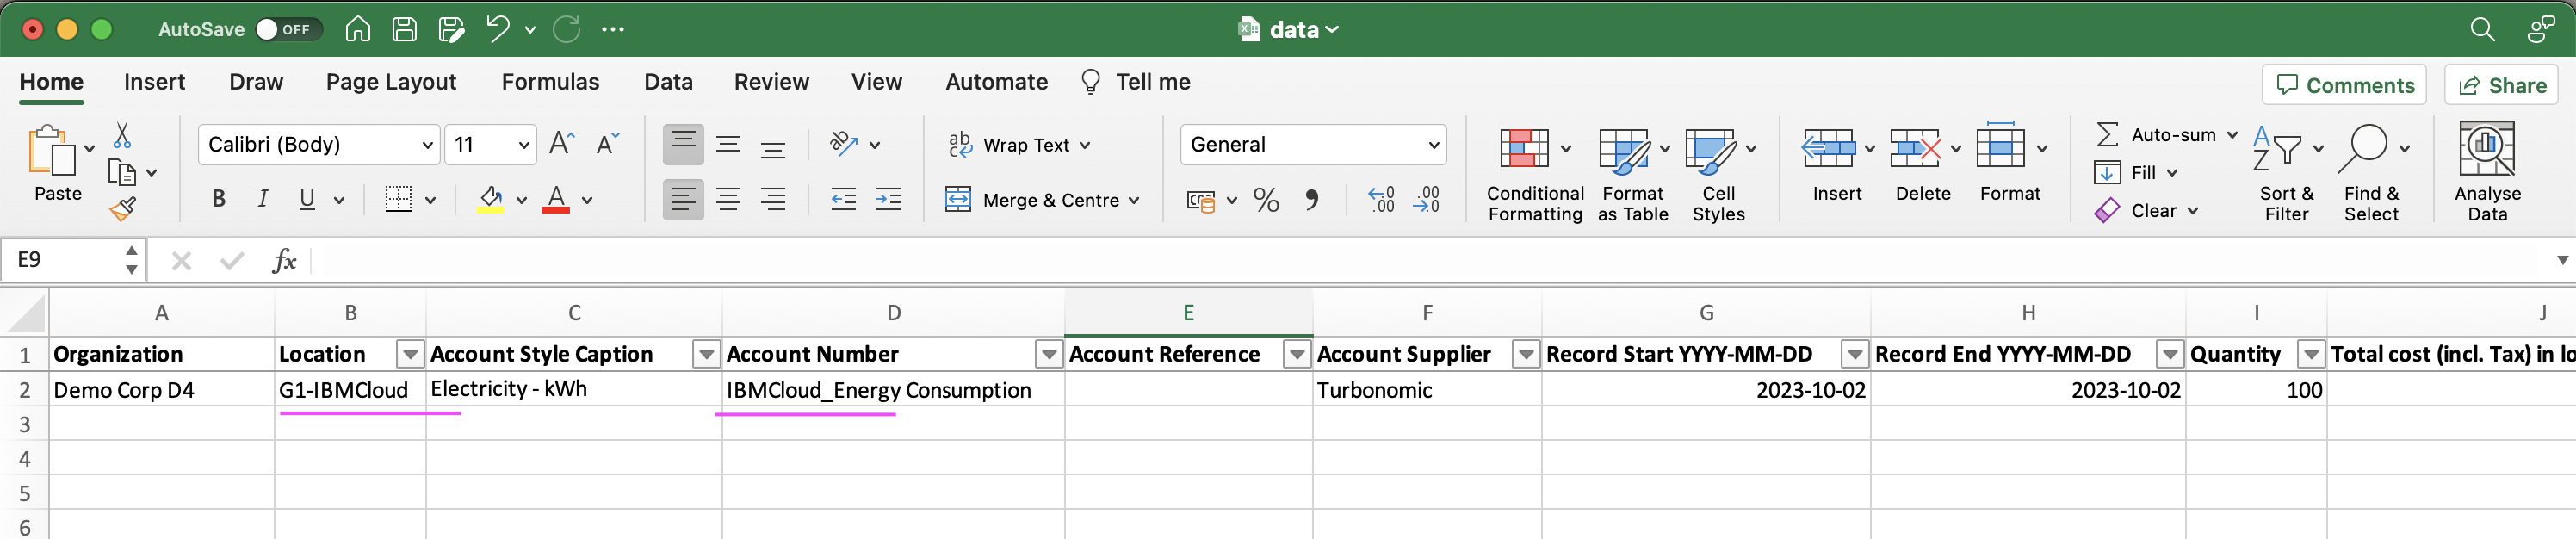
main.pyanddata.xlsxfiles into a folder.Update the columns
Organization, Location, Account Style Caption, and Account Numberin thedata.xlsxwith your Envizi environment specific values.Here is the sample content of an excel file:
Open the Linux/Mac terminal window and navigate to the folder containing the
main.pyfile.If you don't have
boto3Python installed, run the following command to install it:python -m pip install boto3Set the AWS S3 Data Service values with the following commands:
export s3_BUCKET_NAME=envizi-client-dataservice-us-prod export s3_FOLDER_NAME=client_9608cd600af647 export s3_ACCESS_KEY=AKIxxxxxxxxxxxxxxx export s3_SECRET_KEY=axhHxxxxxxxxxxxxxxUpload the file to AWS S3 bucket by running the following command:
python main.pyAn output similar to the following example is displayed:
S3Handler ... ENVIZI_S3_AWS_BUCKET_NAME : envizi-client-dataservice-us-prod ENVIZI_S3_AWS_FOLDER_NAME : client_9608cd600af647 output/results-10122023-110535-725742/POC Account Setup and Data Load_G1_20231012-110543.xlsx is uploaded to envizi-client-dataservice-us-prod : client_9608cd600af647/POC Account Setup and Data Load_G1_20231012-110543.xlsx 2023-10-12 11:05:45,747 - INFO:127.0.0.1 - - [12/Oct/2023 11:05:45] "POST /api/turbo/query HTTP/1.1" 200 -Envizi should have successfully processed your file.
Navigate to the
File Delivery Statusscreen by clickingFile Delivery Status. You can check the status of your file and observe that it is processed.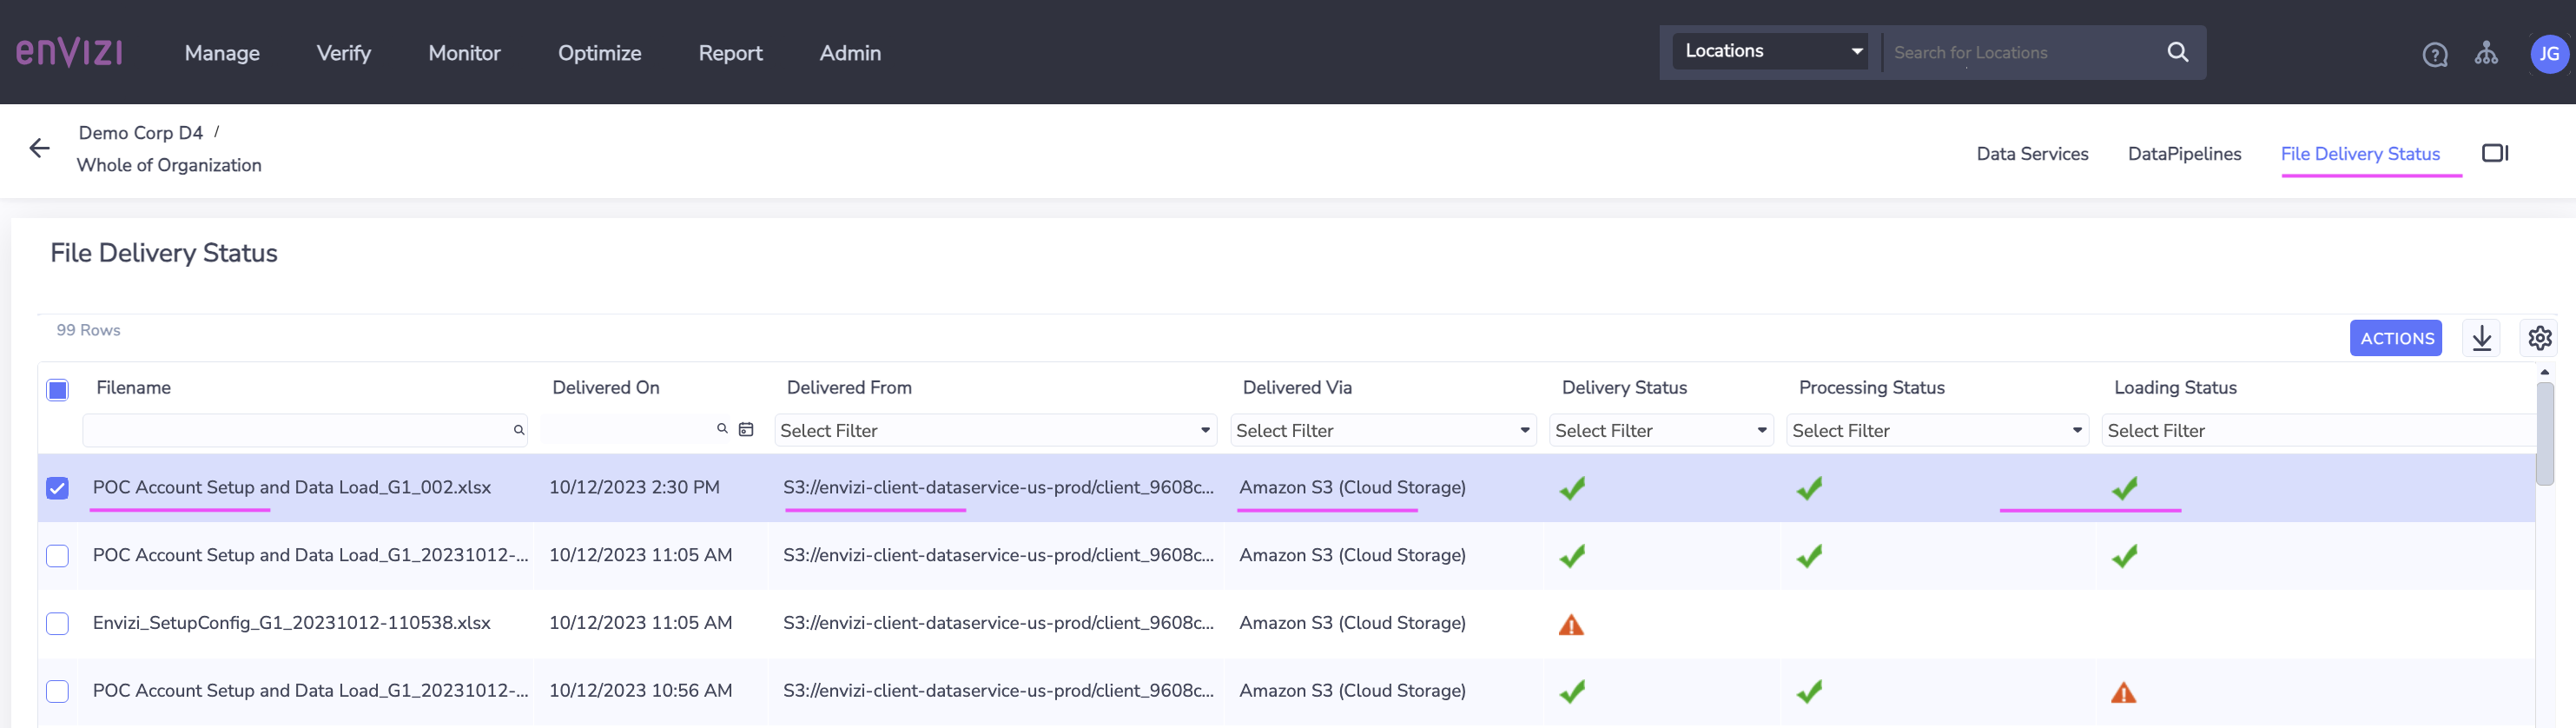
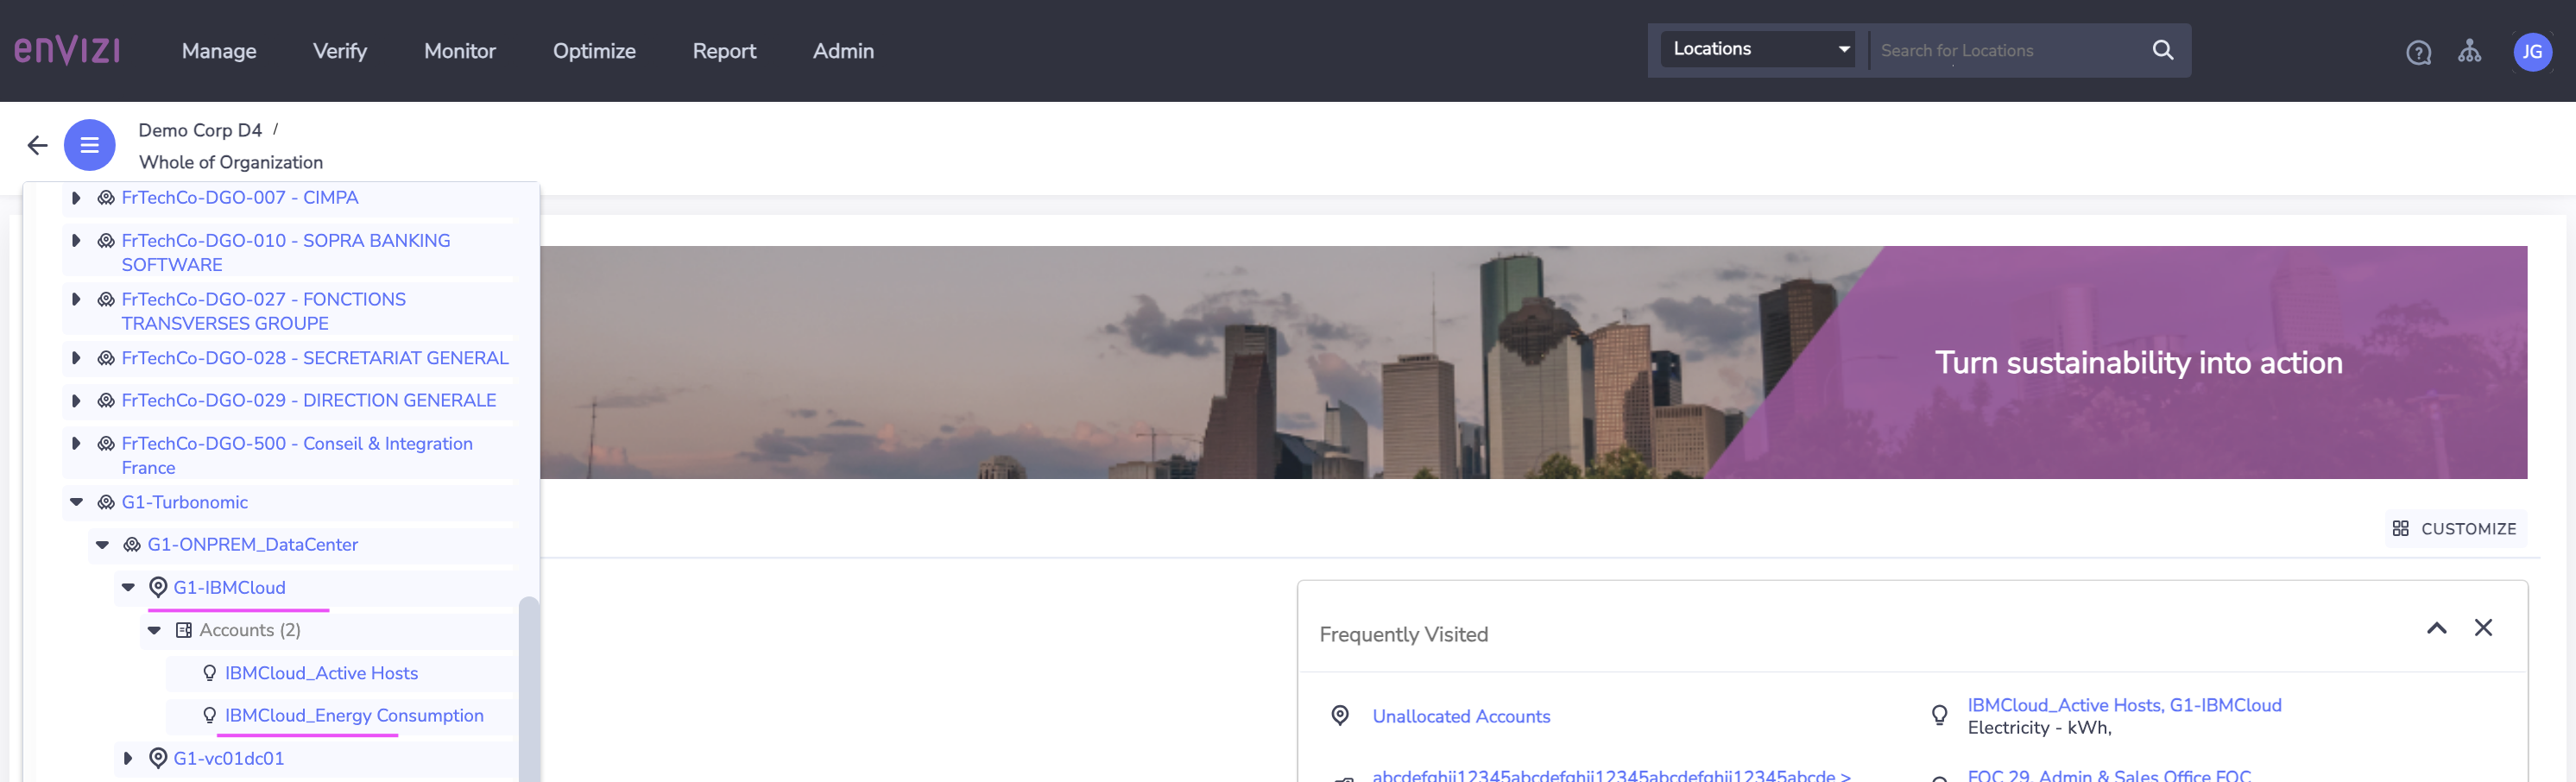
You can observe that the account is successfully created and is now accessible in the Organizational Hierarchy.
Summary and next steps
This tutorial guided you through creating a data service for AWS S3 bucket, setting up a data pipeline, and sending a UDC excel template to Envizi via an AWS S3 bucket for data ingestion.
To get more information about Envizi or to try it out yourself, start your 14-day IBM Envizi ESG Suite trial. You can also request a personalized IBM Envizi demo.