About cookies on this site Our websites require some cookies to function properly (required). In addition, other cookies may be used with your consent to analyze site usage, improve the user experience and for advertising. For more information, please review your options. By visiting our website, you agree to our processing of information as described in IBM’sprivacy statement. To provide a smooth navigation, your cookie preferences will be shared across the IBM web domains listed here.
Tutorial
Get an IBM MQ queue for development running on AWS Cloud using Terraform
Configure your queue for app connections
To see how IBM MQ works, you will be guided through creating and configuring a queue manager (server). Then, you will connect an application (client) to it.
After completing the tutorial, you will be able to send messages to and retrieve messages from a queue.
AWS provides several cloud technologies into which it is possible to deploy an IBM MQ queue manager: AWS Elastic Compute Cloud (EC2), AWS Elastic Kubernetes Services (EKS) and AWS Elastic Container Services (ECS). Amazon Elastic Compute Cloud (Amazon EC2) is a web service that provides scalable computing capacity in the cloud. AWS Fargate is a serverless compute engine, which works with both Amazon ECS and Amazon EKS.
In this tutorial, we will use Terraform to interact with Amazon ECS (Elastic Container Service) to deploy an IBM MQ queue manager onto AWS Fargate.
(You can instead manually download, install, and run IBM MQ queue manager (server) on AWS.)
Prerequisites
This tutorial assumes you are using the AWS free tier for hosting, however the queue manager deployment onto Amazon ECS and AWS Fargate requires some AWS resources that are outside the free tier. At the time of this writing, we estimate a minimal configuration will cost approximately $2 per day. The exact cost is dependent on several factors including size of container requested, volume of messages stored and network traffic. To avoid unnecessary cost, users should monitor their utilization carefully and remove resources when they are no longer required. This tutorial provides steps on how to remove the resources that are created.
To protect your AWS account credentials, do not run this tutorial as an account root user, and ensure that you enable multi-factor authentication for all AWS accounts. Your root user has complete unrestricted access, so it should not be used for everyday access. Only grant the permissions needed to each user account for the services that that user needs.
Also, do not grant policy permissions directly to users, but instead grant permissions to groups and associate users with groups. In creating this tutorial, we used the IAM (Identity and Access Management) service to create an admin user. The admin user was associated with an admin group for which we granted the inbuilt system policy AdministratorAccess.
As the admin user you will be using the command line, so you will need an active access key (IAM>USERS>compose user>Security credentials from the AWS Console).
To complete this tutorial, you will need:
- Git CLI.
- Terraform CLI.
- If you don’t already have it, you will need cURL installed on your computer.
- An AWS Account.
- The AWS CLI. Also, you need to configure the AWS CLI with the AWS Account access key. That is, you must have run
aws configurefrom the command line. - `AdministratorAccess`` IAM permission.
Steps
You can downlowd the files from our mq-dev-patterns repo.
Step 1. Clone the mq-dev-patterns repo
- Open a command line terminal.
Run the following command.
git clone https://github.com/ibm-messaging/mq-dev-patternsChange directory to the directory that contains the terraform scripts for this tutorial.
cd mq-dev-patterns/container/queuemanager/terraform-aws/
There are two sets of configuration files.
- One Step to create a queue manager with no external persistent storage and all the required AWS infrastructure including VPC, Load balancer, Security groups and CloudWatch logs.
- Multi-step to create a queue manager with with EFS as external persistent storage. Initialisation of the storage and the required VPC must be performed separately.
We will be going through the multi-step process in this tutorial. Change directory to the multi-steps-with-efs directory.
cd multi-step-with-efs
Step 2. Create an Amazon Virtual Private Cloud
In this step you will create an Amazon Virtual Private Cloud(VPC) with 2 private and 2 public subnets.
In the terminal run the following command.
cd 01-vpcIf you make no changes the VPC will be created in the
eu-west-2region. If you want to deploy to another region, you can edit thevariables.tffile or override the region setting when running the terraform commands.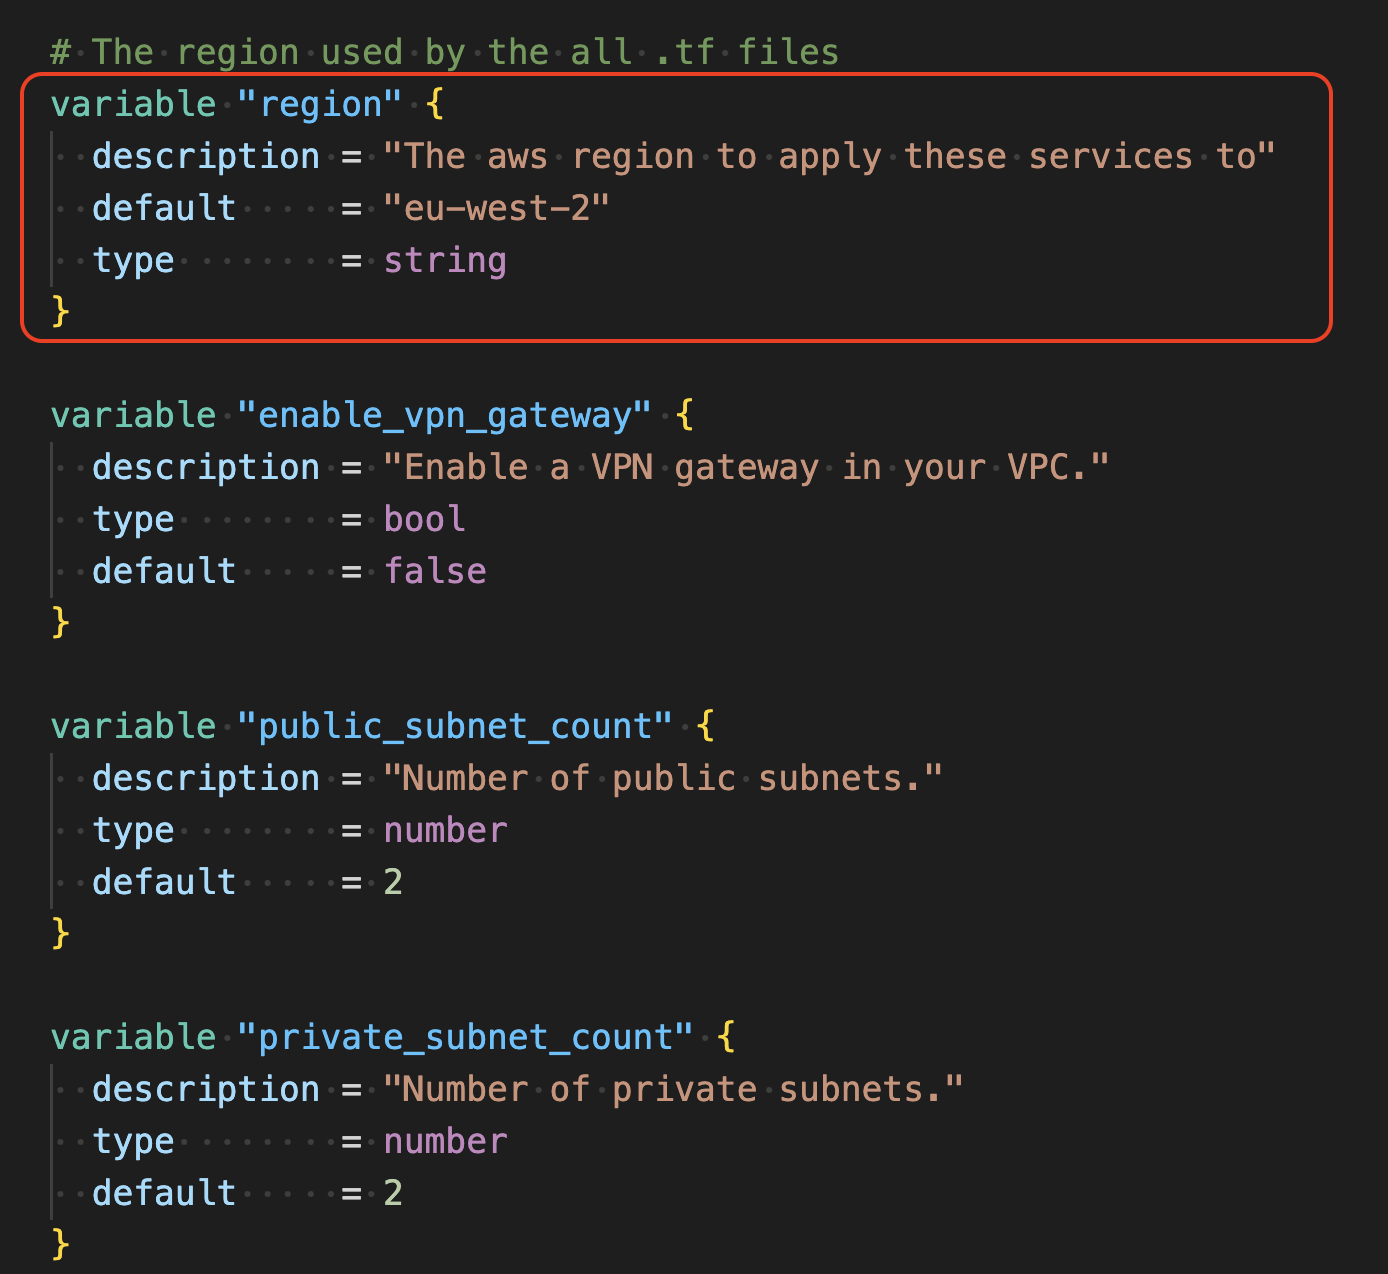
In your command line run the following command.
terraform initThis command downloads and configures the required AWS modules.
In your command line run the following command.
terraform applyYou can override any of the variables in the
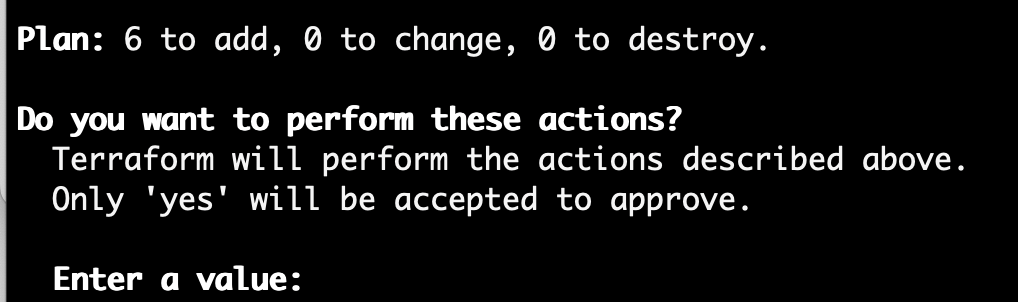
variables.tffile using the-varparameter. For example:terraform apply -var region="eu-west-1"Terraform will list the actions that it needs to undertake, followed by a summary, and finally a request for approval.
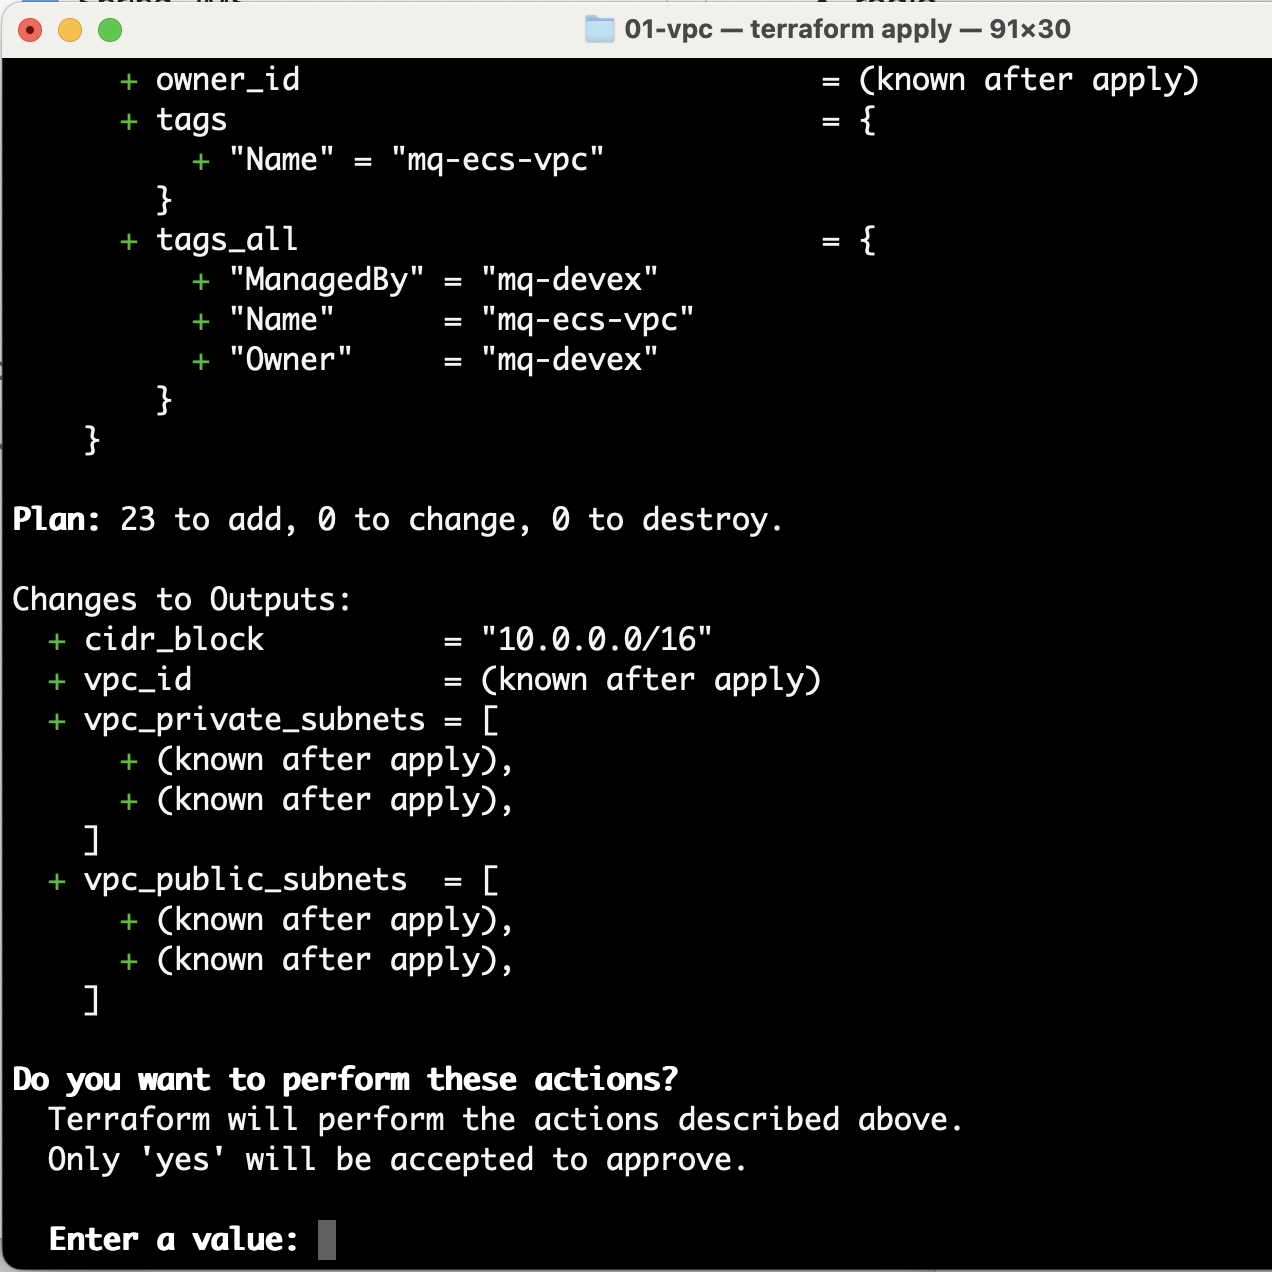
Enter yes to approve the actions.
After Terraform completes the actions it will show the vpc_id that was created. Take a note of the vpc_id.

In a browser, in your VPC dashboard, confirm that this VPC was created in the AWS region you specified.

Step 3. Create an Amazon EFS
In this step you will create an Amazon EFS (external file system) in the VPC that you previously created.
In the terminal, run the following command.
cd ../02-efsIn your command line, run the following command.
terraform initMaking sure that you use the same region and VPC set and created in the previous step, run the following command.
terraform apply -var vpc_id="vpc-…"Terraform will list the actions that it needs to undertake, followed by a summary, and finally a request for approval.
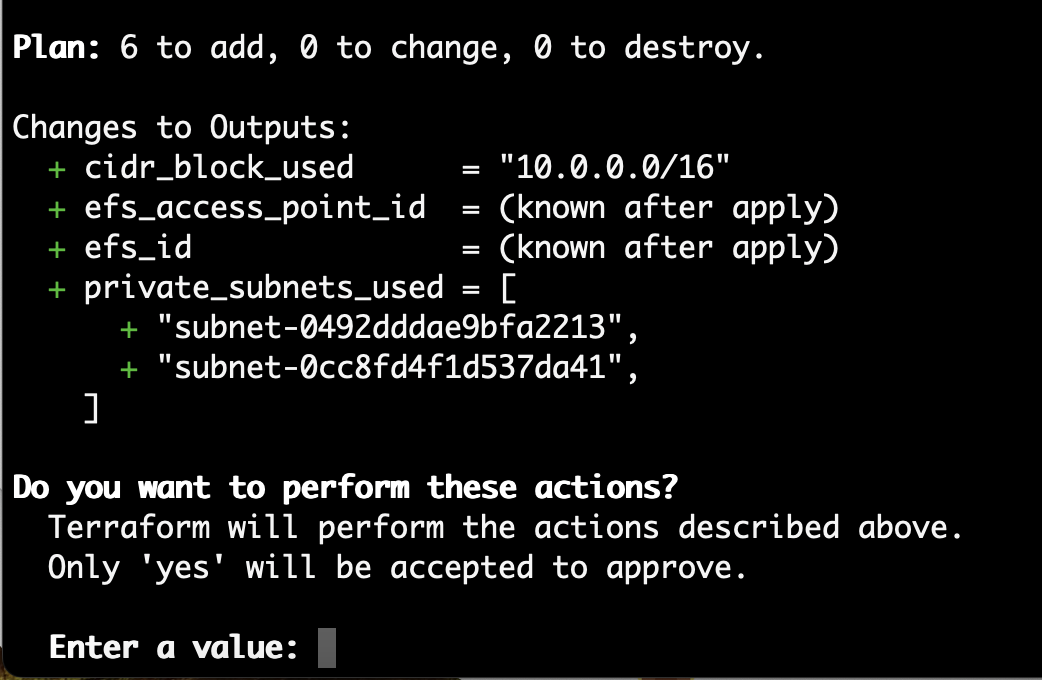
Enter yes to approve the actions.
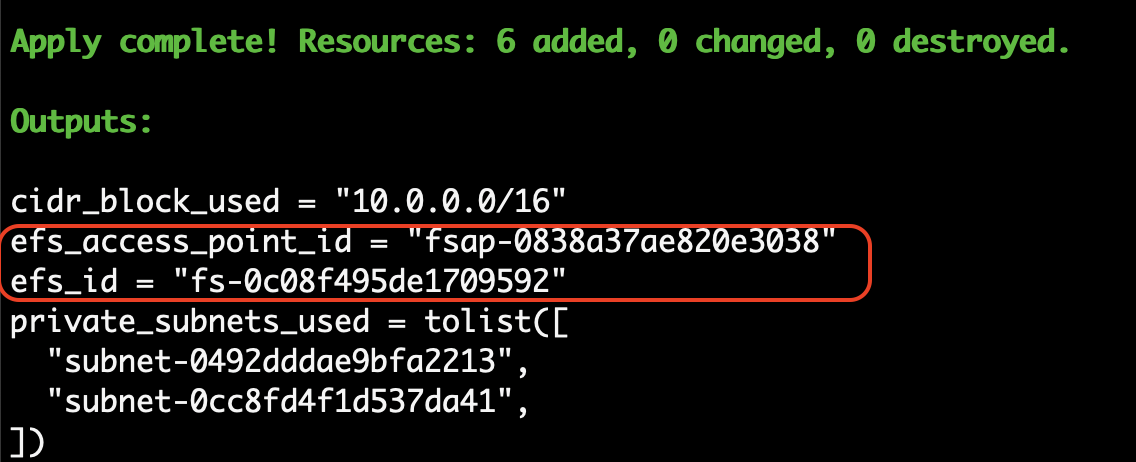
After Terraform completes the actions it will show the efs_id and efs_access_point_id that were created. Take a note of both of these ids.
In a browser confirm that the EFS storage was created in the correct region.

Step 4. Initialize the external storage
In this step we initialise the storage to make is suitable for use by the queue manager.
In the terminal, run the following command.
cd ../03-mq-initIn your command line, run the following command.
terraform initMaking sure that you use the same EFS, EFS access point, region, and VPC that you set and created in the previous steps, run the following command.
terraform apply -var vpc_id="vpc-.." -var efs_id="fs-.." -var efs_access_point="fsap-…" -var region="…"Terraform will list the actions that it needs to undertake, followed by a summary, and finally a request for approval.
Enter yes to approve the actions.
Terraform will start a task that will initialize the disk. After the initialization is complete, the task will complete and end. You can check the progress of the initialization in AWS CloudWatch.

Click on the log group.

Click on the log stream.
Look for log events that indicate that the storage was initialized.

Step 5. Create and start a queue manager
With the external storage prepared, you are now ready to deploy MQ.
In the terminal, run the following command.
cd ../04-mq-qmgrIn your command line, run the following command.
terraform initMaking sure that you use the same EFS, EFS access point, region and VPC that you set and created in the previous steps, run the following command.
terraform apply -var vpc_id="vpc-…" -var efs_id="fs-…" -var efs_access_point="fsap-…" -var region=”…”The script will prompt you to specify an MQ Admin user password and then an MQ App user password. Specify the passwords.
Terraform will list the actions that it needs to undertake, followed by a summary, and finally a request for approval.

Enter yes to approve the actions.
Terraform will start a queue manager. Terraform will output the load balancer DNS name. Make a note of the load balancer name.

In a browser, go to AWS CloudWatch, and click on the new log group Inside the log group, open up the new log stream. Look for messages that indicate that the MQ Web server and queue manager have started.
Step 4. Use cURL to put and get messages
You can use the load balancer address to post messages onto to a queue. As a quick verification we will use curl to post a persistent message over HTTPS.
From a terminal or command window run the following command to post a persistent message. Remember to use your own app password and host IP address.
curl -i -k -X POST \
 -u app:<put your app password here>  \
--header 'Content-Type: text/plain; charset=utf-8' \
--header 'Accept: application/json' \
--header 'ibm-mq-rest-csrf-token: blank' \
--header 'ibm-mq-md-expiry: unlimited' \
--header 'ibm-mq-md-persistence: persistent' \
-d 'This is a persistent message' \
'https://mq-nlb-9730d3d183142f50.elb.eu-west-2.amazonaws.com/ibmmq/rest/v3/messaging/qmgr/QM1/queue/DEV.QUEUE.1/message'
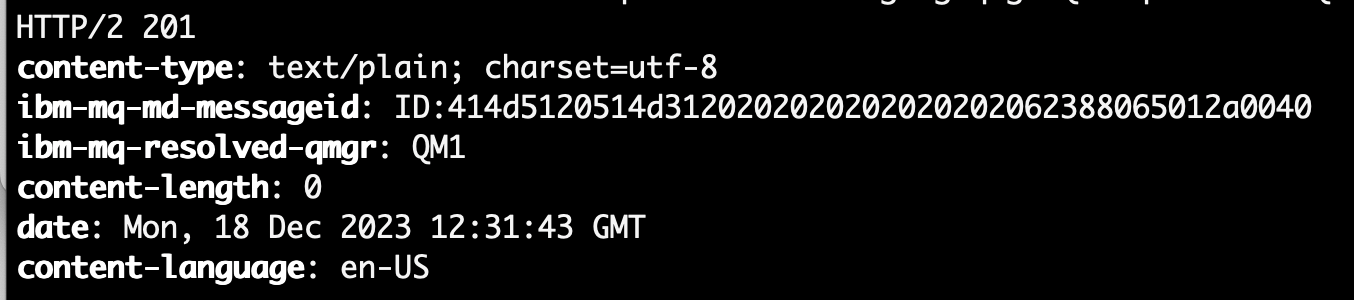
You should see a 201 return code, indicating that the message was successfully posted.
Step 5. Access the IBM MQ web console
The MQ Console can be accessed through the load balancer at the address.
In our case this was: https://mq-nlb-9730d3d183142f50.elb.eu-west-2.amazonaws.com/ibmmq/console.
If you are successfully redirected to the login screen of MQ console, congratulations! You should see an output similar to the one below.

You can now use the IBM MQ console to interact with your queue manager deployed on your AKS cluster.
Inside the console, you can view and edit all of your MQ objects, as well as create others. You can also set permissions for different users and objects. A full MQ Console tour is available in this IBM Docs article, but we'll go over some basic actions here.
Select Manage to open a list of queue managers. You can create or manage them from here. Selecting a queue manager, such as QM1, will display the queues and other objects associated with this queue manager, like the image below.
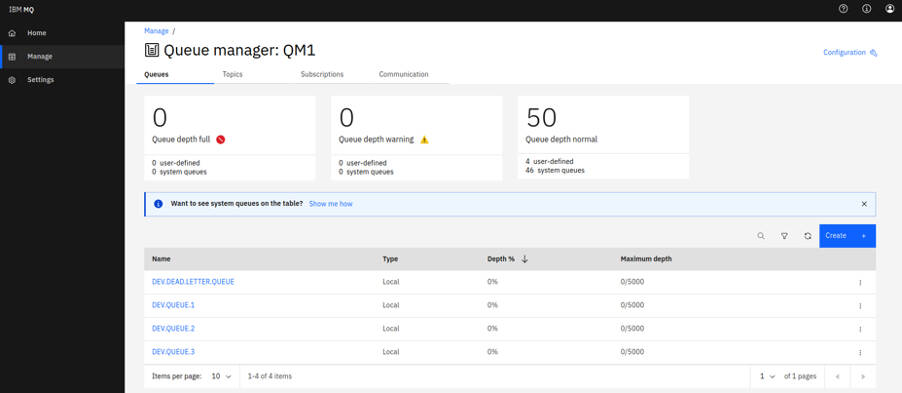
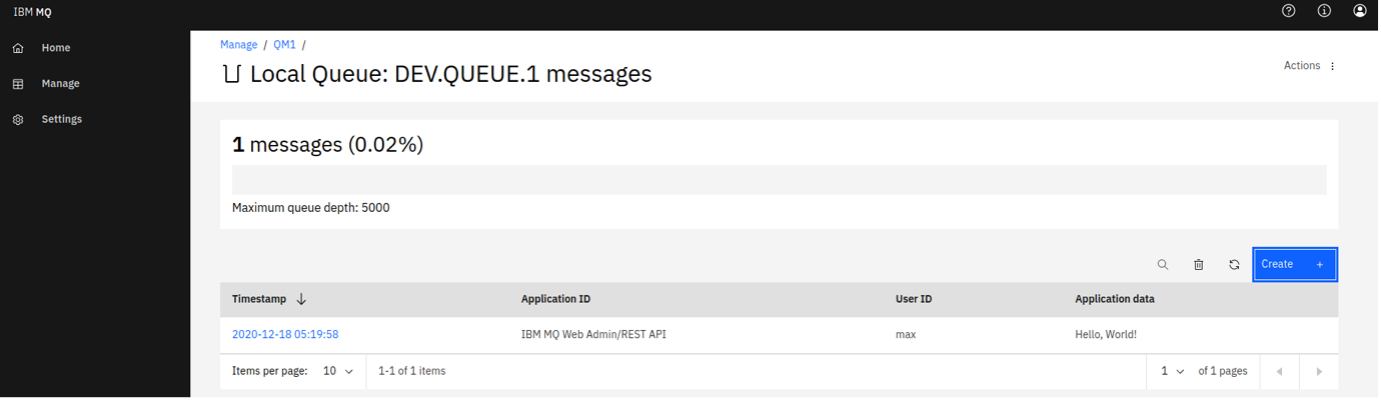
From here, click Create to create your own queues. You can also see the messages on existing queues by selecting an individual queue, as shown in the following screen capture.
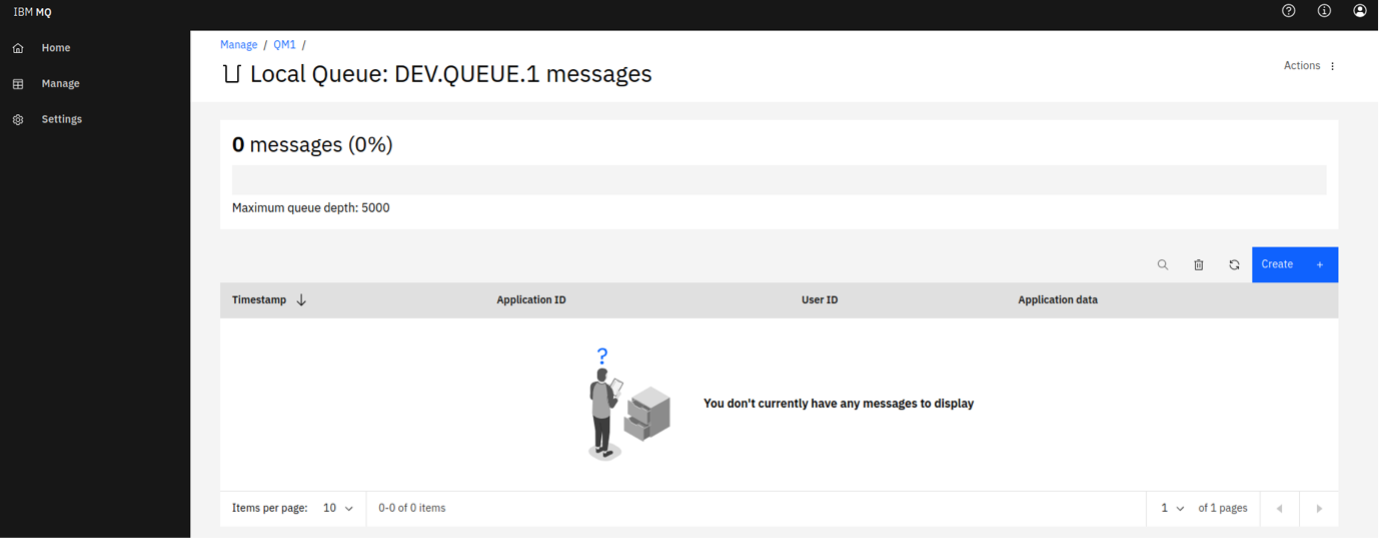
You can put a message onto this queue clicking Create on this page, which here means "create a new message". The Application data field contains the message contents. Clicking Create puts your message onto the queue.
Now, we've set up the MQ Console, which will help us to manage and visualize our messaging system.
Step 6. Optionally, tear down the AWS services
To avoid unnecessary cost, you should shut down all AWS services once you are done with them.
Please be aware that on AWS, security and compliance is a shared responsibility between AWS and AWS customers. As a result you are responsible for the security of guest operating systems, software and data.
Remove the MQ container and all AWS infrastructure by running the following commands.
In the command terminal, starting from the
04-mq-qmgrdirectory, run the following command.terraform destroy -var vpc_id="vpc-…" -var efs_id="fs-…" -var efs_access_point="fsap-…"Terraform will list the actions that it needs to undertake, followed by a summary and a request for approval.
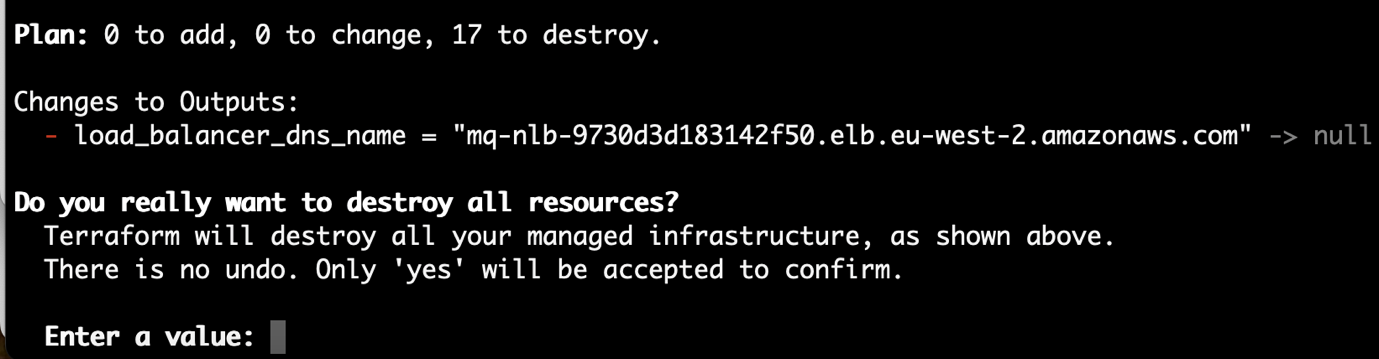
Enter yes to approve the destruction.
Wait for the resources to be destroyed, when you'll see a "Destroy complete!" message.
Change directory to the
03-mq-initdirectory, and in the terminal, starting from the03-mq-initdirectory, run the following command.terraform destroy -var vpc_id="vpc-…" -var efs_id="fs-…" -var efs_access_point="fsap-…"Terraform will list the actions that it needs to undertake, followed by a summary, and finally a request for approval.
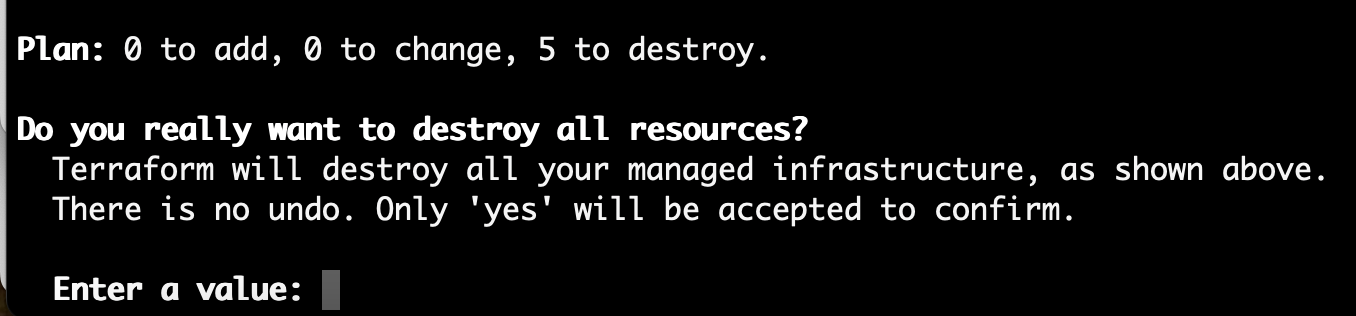
Enter yes to approve the destruction.
Wait for the resources to be destroyed, when you'll see a "Destroy complete!" message.
Change directory to the
02-efsdirectory, and in the terminal starting from the 02-efs directory, run the following command.terraform destroy -var vpc_id="vpc-…"Terraform will list the actions that it needs to undertake, followed by a summary, and a finally request for approval.

Enter yes to approve the destruction.
Wait for the resources to be destroyed, when you'll see a "Destroy complete!" message.
Change directory to the
01-vpcdirectory, and in the terminal starting from the01-vpcdirectory, run the following command.terraform destroyTerraform will list the actions that it needs to undertake, followed by a summary, and finally a request for approval.
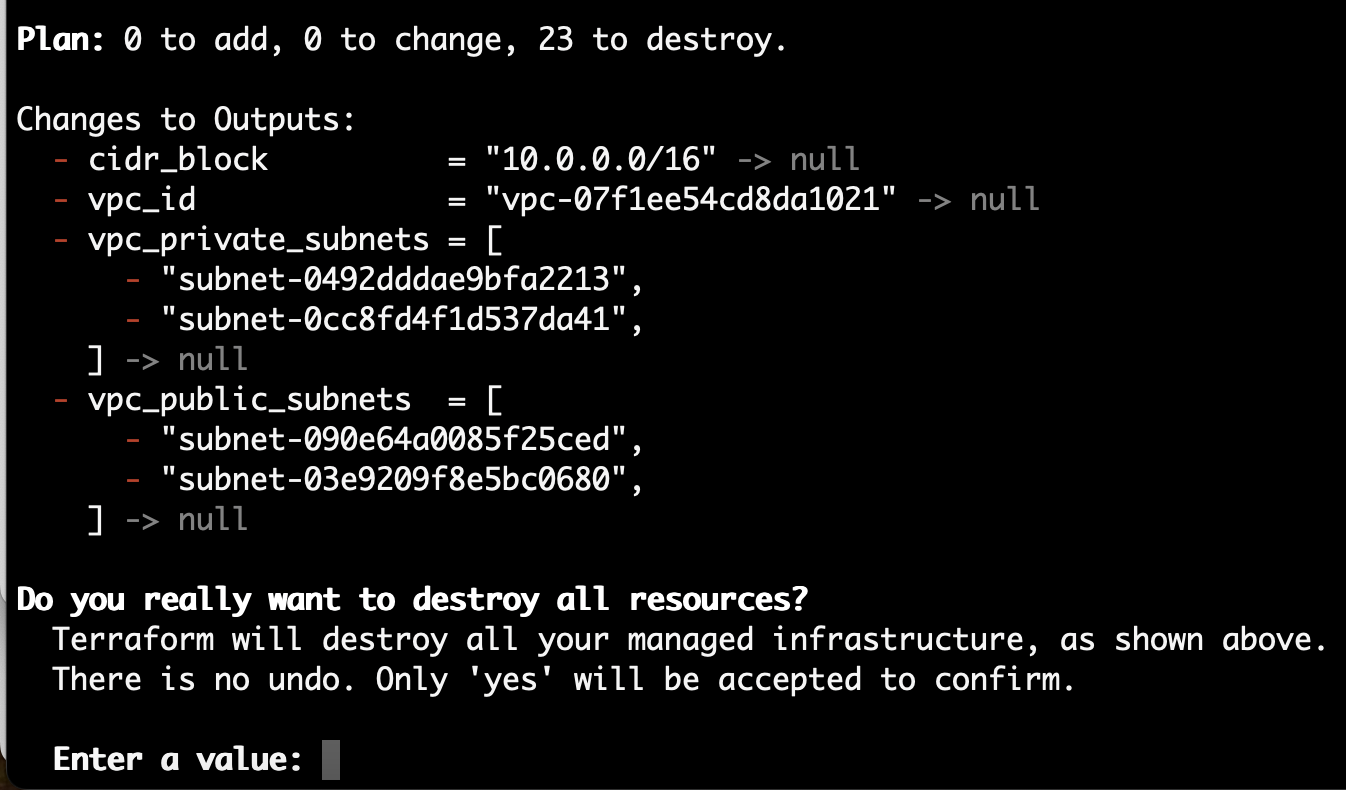
Enter yes to approve the destruction.
Wait for the resources to be destroyed, when you'll see a "Destroy complete!" message.
Summary
Congratulations! In this tutorial you used Terraform to run MQ as a container in Amazon Elastic Container Service (Amazon ECS) / Fargate Cluster. You used AWS / EFS storage that was used as a shared volume allowing persistence across container or host interruptions.
In IBM MQ, the queue manager acts as the server, and the applications that connect to it are the clients. Administrators manage the MQ server and routing, while developers create client applications using IBM MQ libraries.
With IBM MQ now available on AWS, you can develop MQ applications using the queue manager. Now you're ready to build and deploy an IBM MQ app to AWS cloud.