About cookies on this site Our websites require some cookies to function properly (required). In addition, other cookies may be used with your consent to analyze site usage, improve the user experience and for advertising. For more information, please review your options. By visiting our website, you agree to our processing of information as described in IBM’sprivacy statement. To provide a smooth navigation, your cookie preferences will be shared across the IBM web domains listed here.
Tutorial
Integrating Turbonomic with Envizi via webMethods for Green IT data
Learn to integrate Turbonomic with Envizi using webMethods to track data center energy consumption and calculate emissions
On this page
In this tutorial, we will learn how to use IBM webMethods iPaaS integration platform to achieve end-to-end integration between IBM Turbonomic and IBM Envizi ESG Suite. The tutorial explains how to retrieve the data center energy consumption by using Turbonomic API, transform the data into Envizi specific data formats and push it to Envizi data services using webMethods, to further process and load into the Envizi platform to calculate the emissions.
Prerequisites
Environment
- Turbonomic version 8.14.3 or higher.
- Envizi SaaS instance access.
- webMethods Integration SaaS (signup for a free trial).
Turbonomic pre-configuration
Create an user with Observer role in Turbonomic. For instruction, see the Appendix section.
Envizi pre-configuration
Setting up Envizi organization, locations, and accounts
To start with the integration, first we need to have or configure the organization hierarchy defined in Envizi and configure the identified datacenters as locations. For this tutorial, lets say we have identified two data centers IBMCloud | vc01dc01 from which we need to collect electricity consumptions and load into Envizi to calcuatle the emissions. So, these two data centers are represented as two different locations in the Envizi's organization hierarchy as shown.
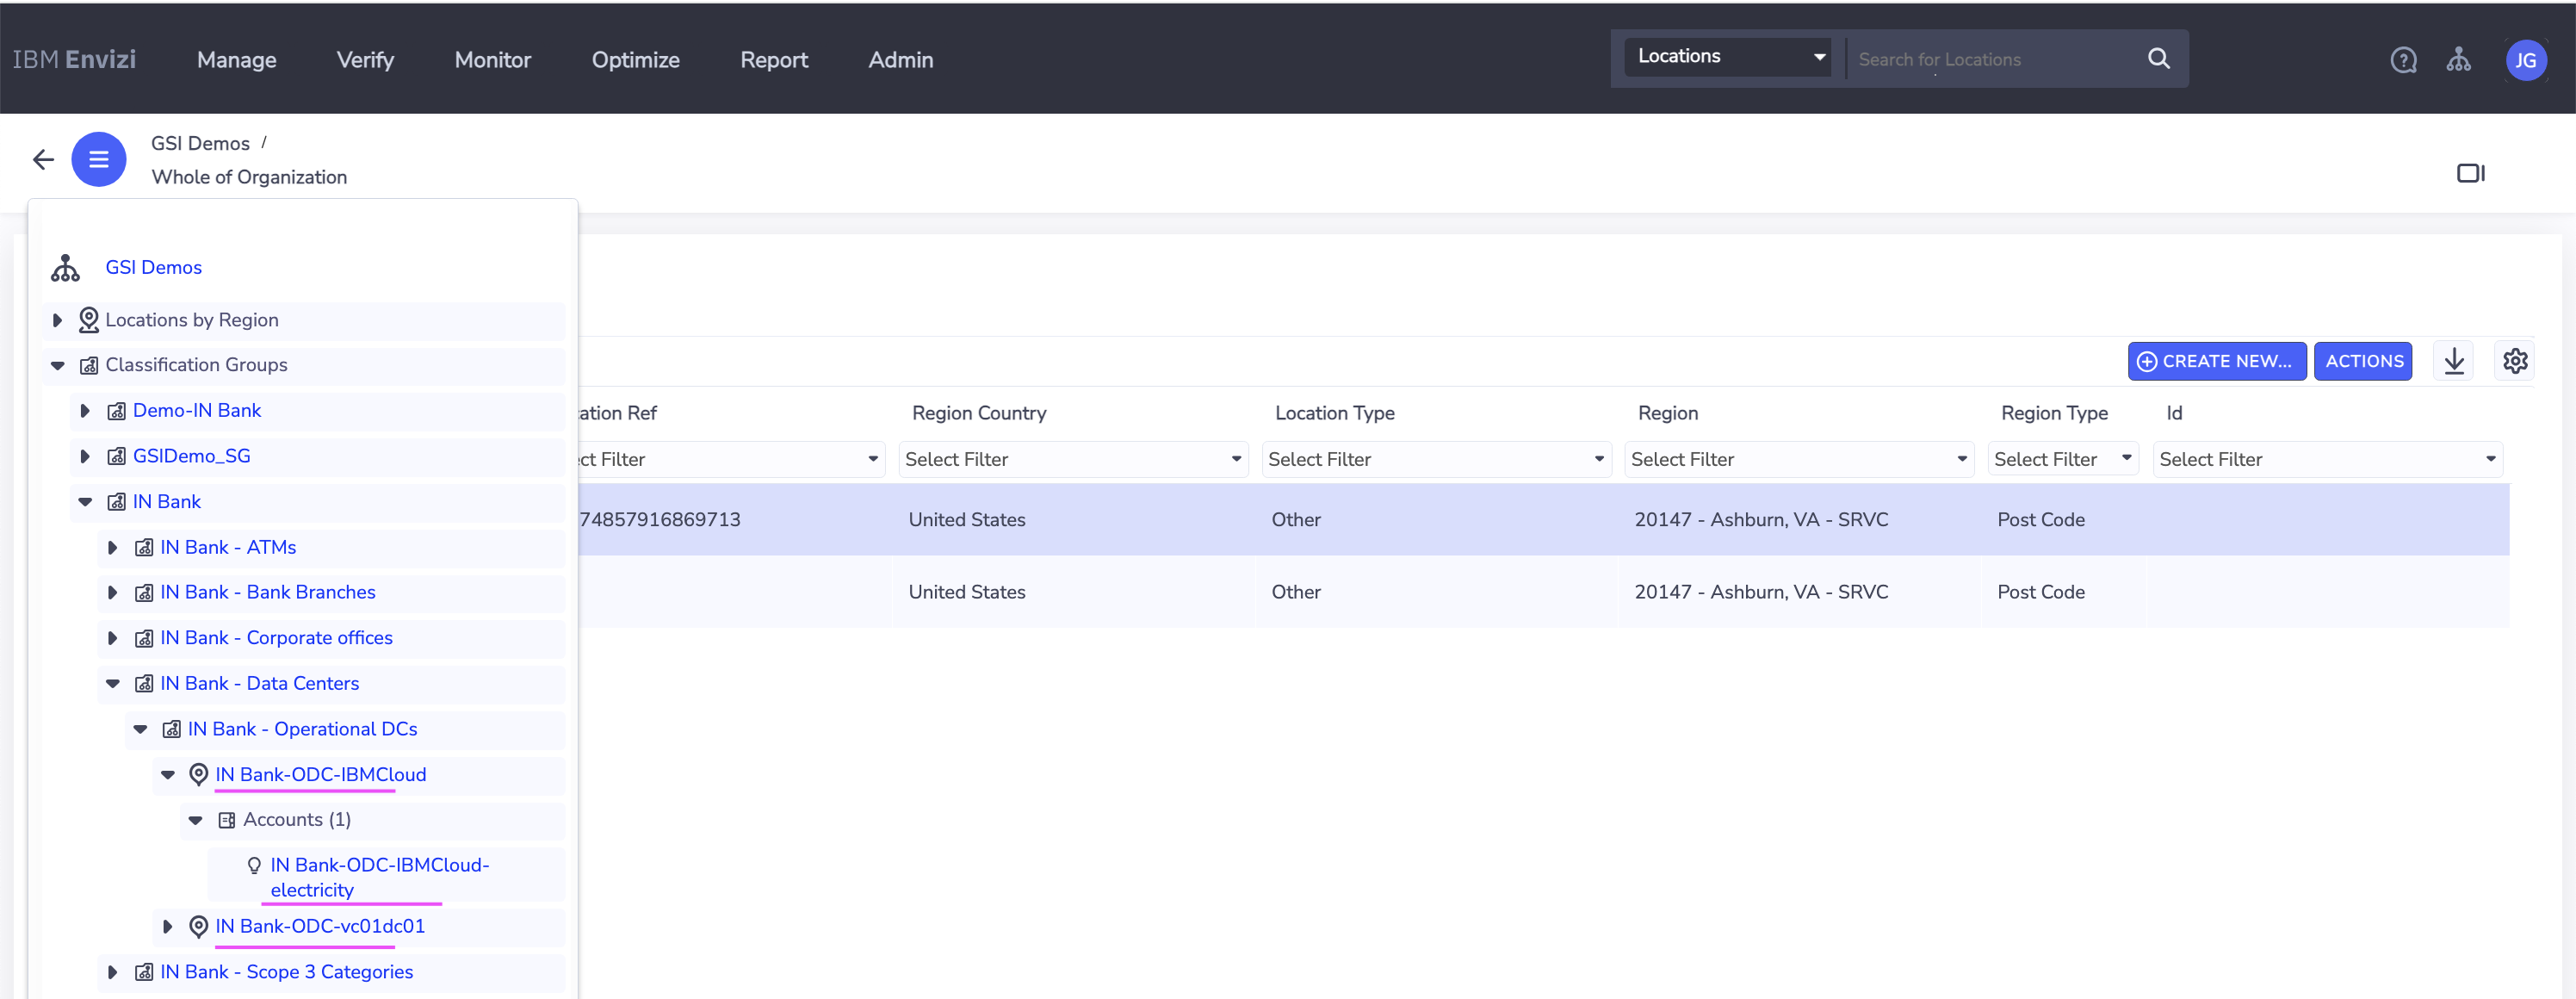
Each of these data center location in Envizi also have a corresponding electricity account that is created to store or hold the electricity consumption data. The details of the locations and accounts that will be used as inputs further in the tutorial follows.
| Location | Account |
|---|---|
| IN Bank-ODC-IBMCloud | IN Bank-ODC-IBMCloud-electricity |
| IN Bank-ODC-vc01dc01 | IN Bank-ODC-vc01dc01-electricity |
Get the values for the following fields from Envizi. You can get these details by downloading the Account Setup and Data Load template in Envizi that is specific to locations and account style.
- Organization (Organization name)
- Organization Link (Organization reference id)
- Account Style Link (Reference id for the account style
S2 - Electricity - kWh) - Locations Names and Accounts Names (The locations names under which the accounts to be created)
Envizi AWS S3 bucket
The integration requires Envizi AWS S3 data service details to place the Envizi templates in the respective s3 folder. If the Envizi S3 data service is not created, complete steps 1 and 2 in the Dataflow automation for sending UDC Excel to AWS S3 bucket in Envizi tutorial on IBM Developer.
From Envizi AWS S3 bucket page, get the values for the following fields:
- Bucket
- Folder
- Username
- Access Key
- Secret Access Key
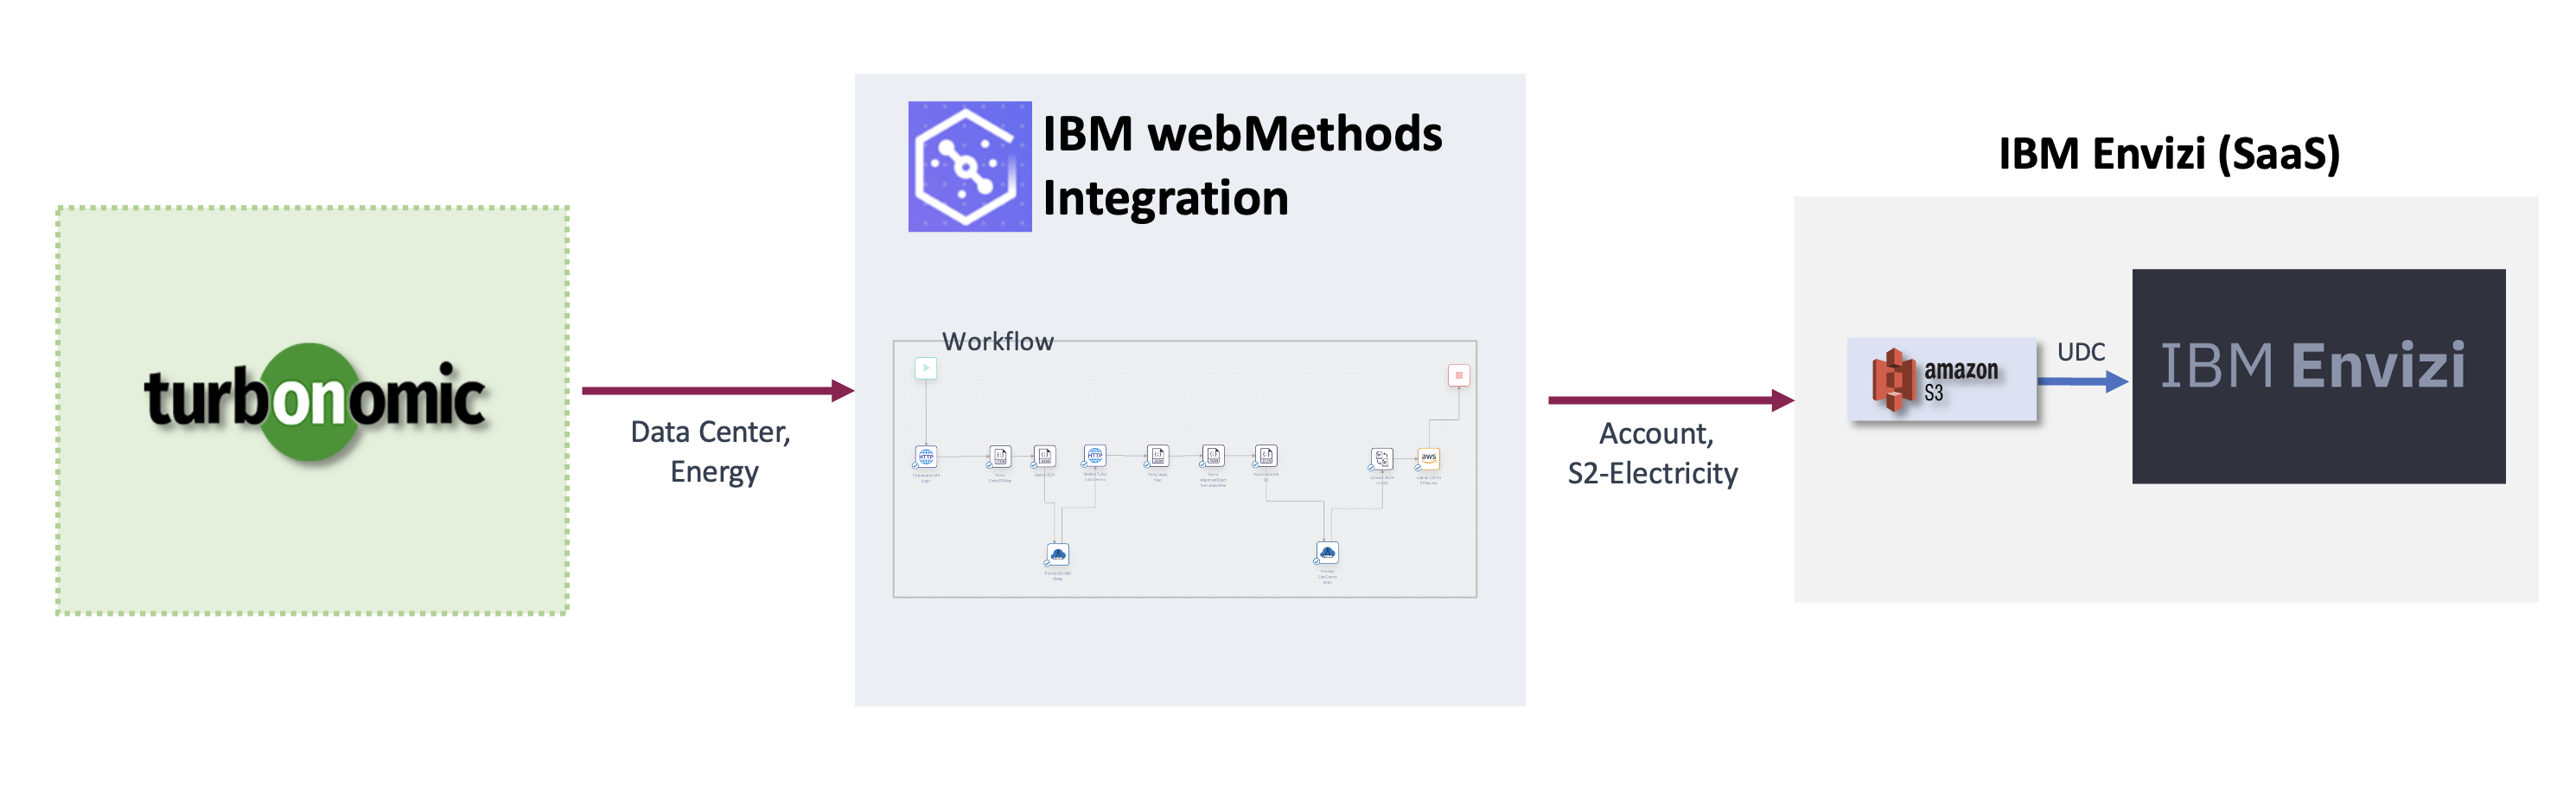
Architecture
Here is the architecture that describes about Turbonomic and Envizi integration via webMethods.
Leveraging the capabilities of webMethods IPaaS integration platform, we have created workflows and flow services that communicates with Turbonomic using APIs and fetch the statistics related to data centres energy consumptions. By using the webMethods flow services, the data retrieved through multiple APIs can be consolidated and transformed into the Envizi specific data format as CSVs and finally placing them into Envizi AWS S3 (data servies) for further processing.
Demonstration video
Watch the following demonstration video about the solution:
Video will open in new tab or window
Create workflow in webMethods
Let's create workflow in webMethods.
In this workflow, we will invoke Turbonomic APIs to fetch Energy consumption data for each data center locations and transform the JSON API response into the CSV template loaded by Envizi.
Create a project
Login to your instance of webMethods integration with the respective credentials.
Click on
+under theProjectstab.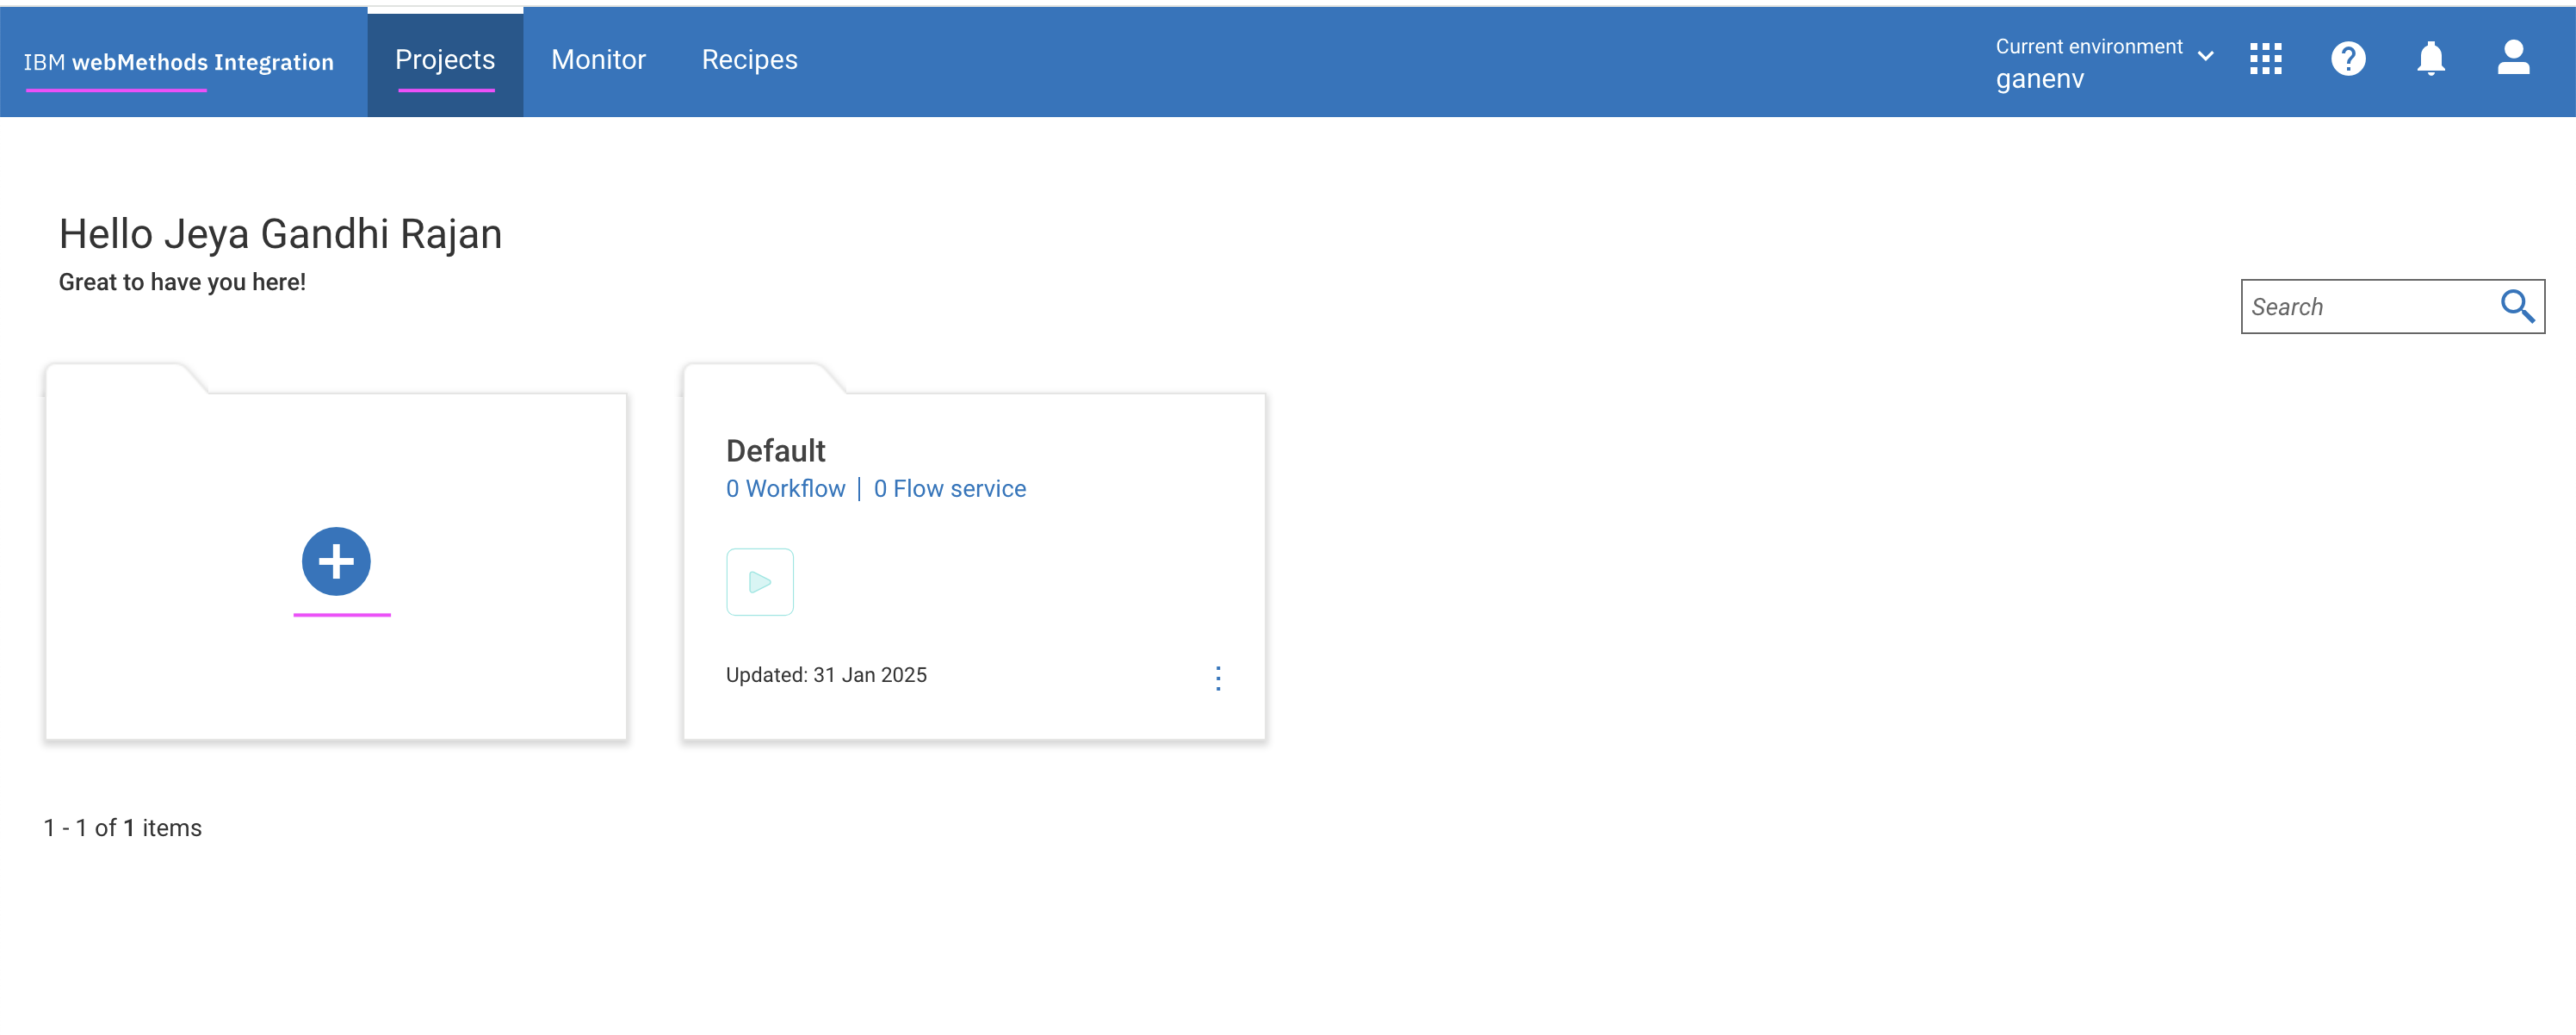
Enter the Project name.
Click on
Create, to create the project.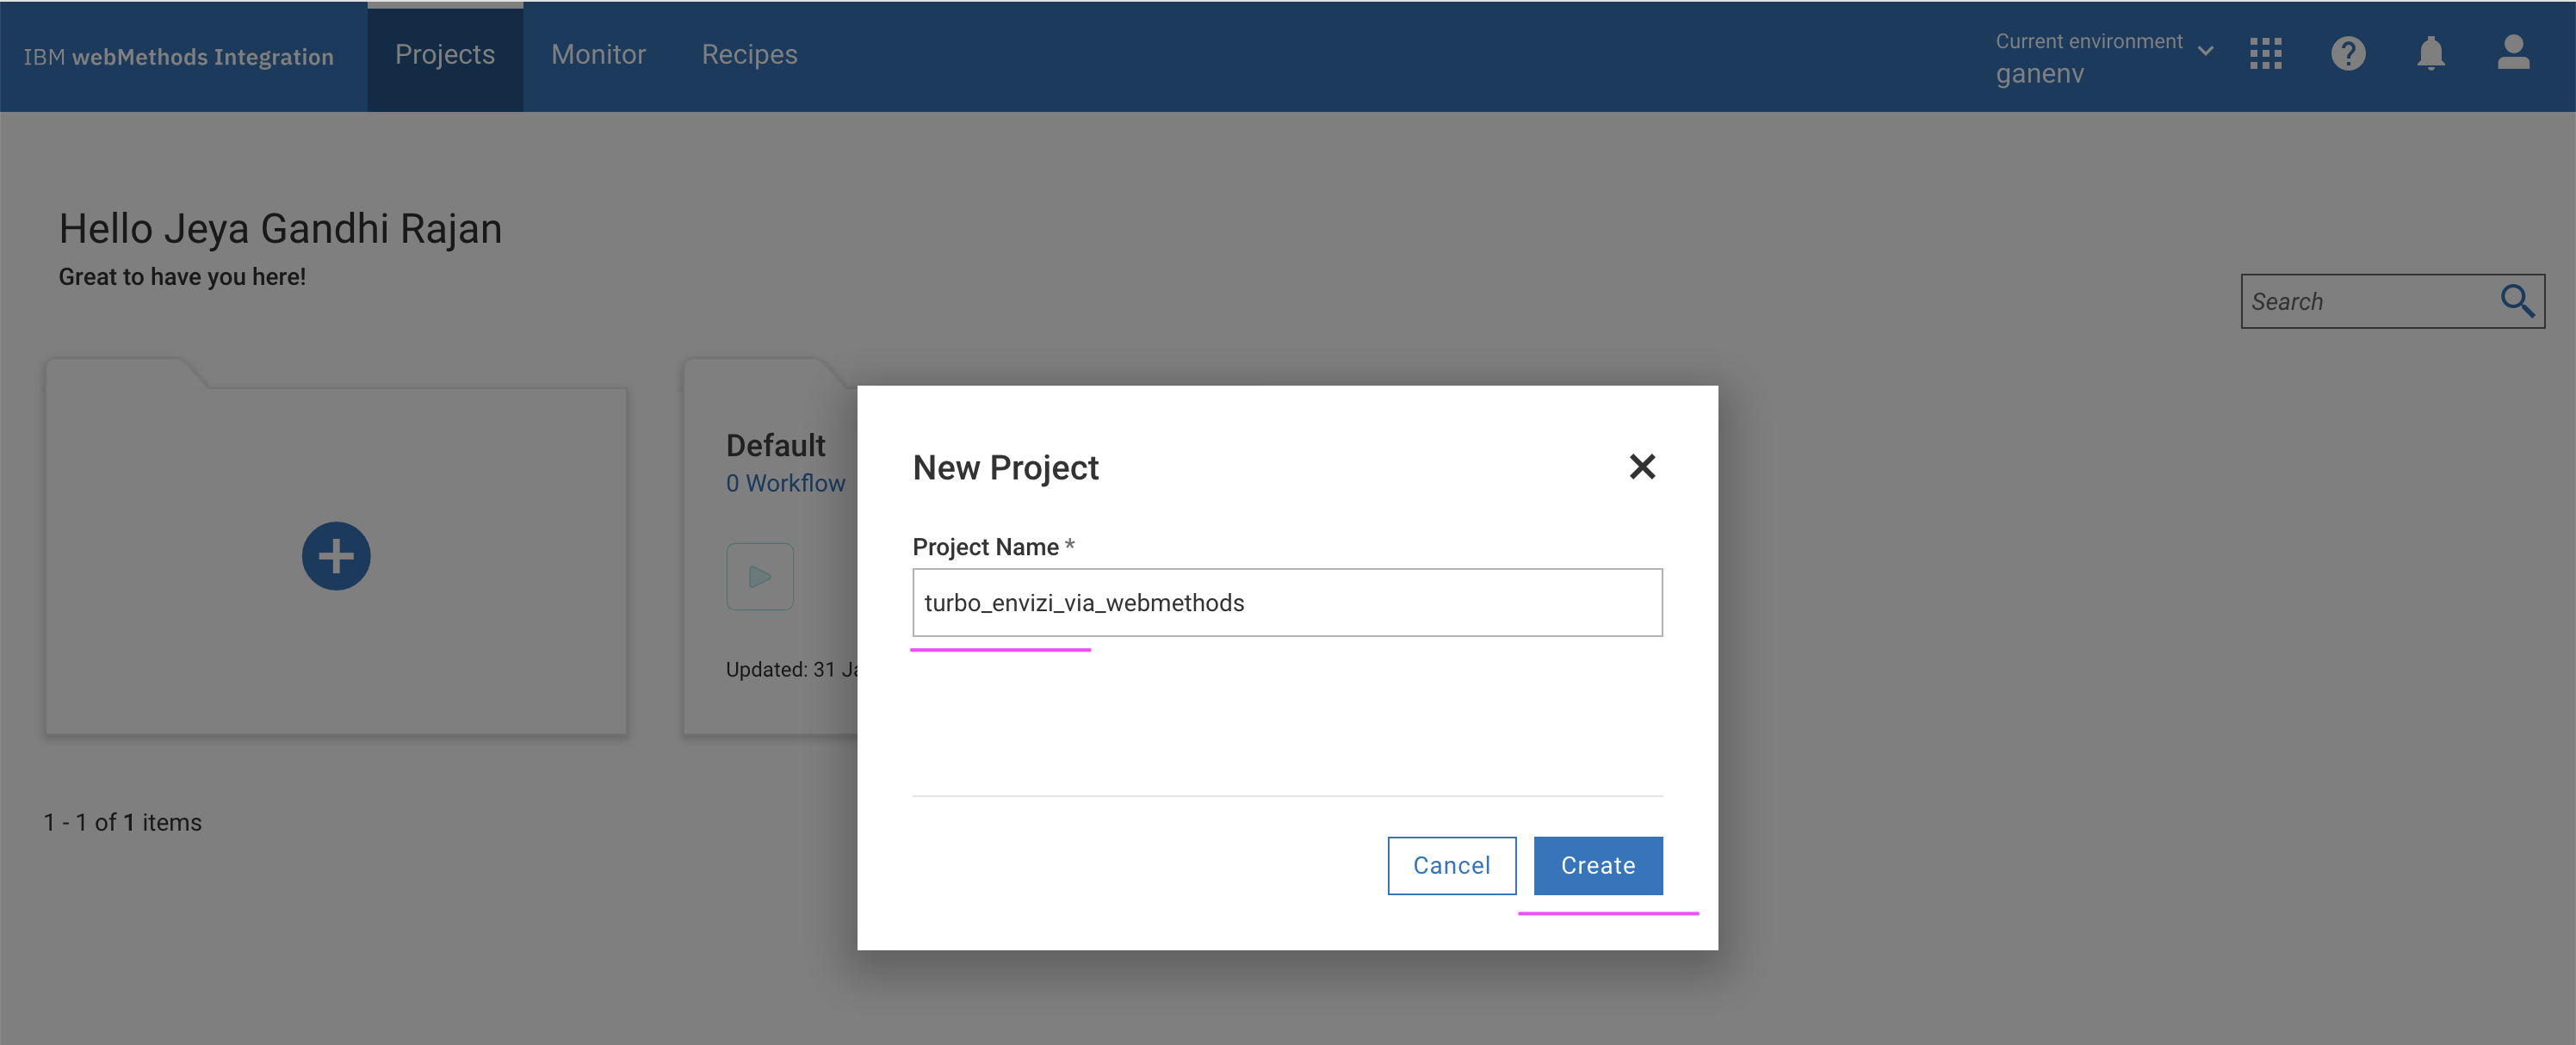
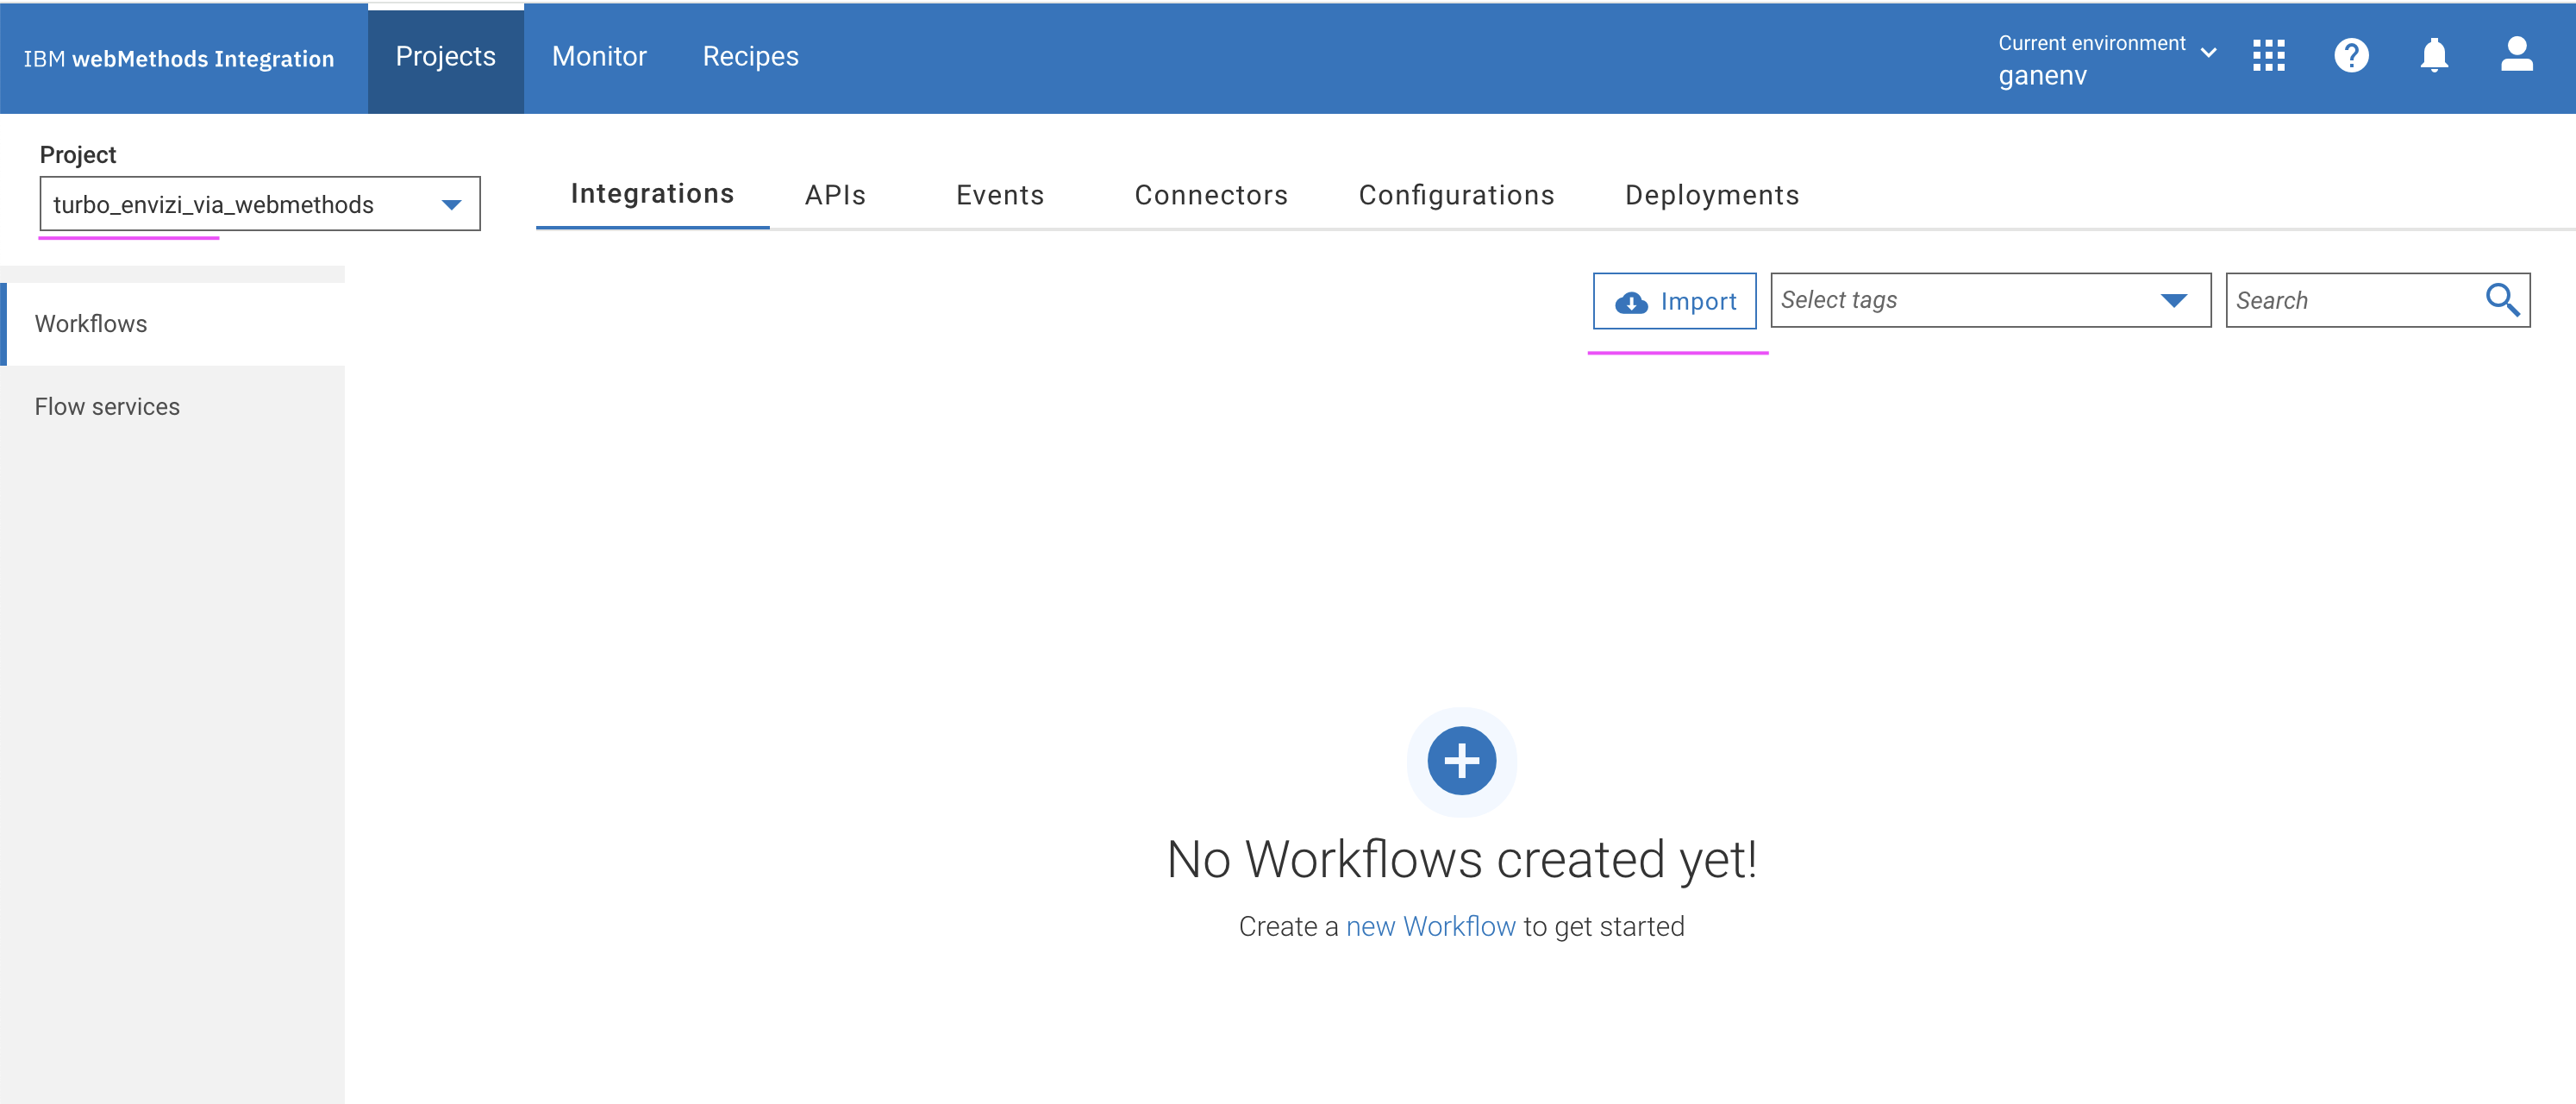
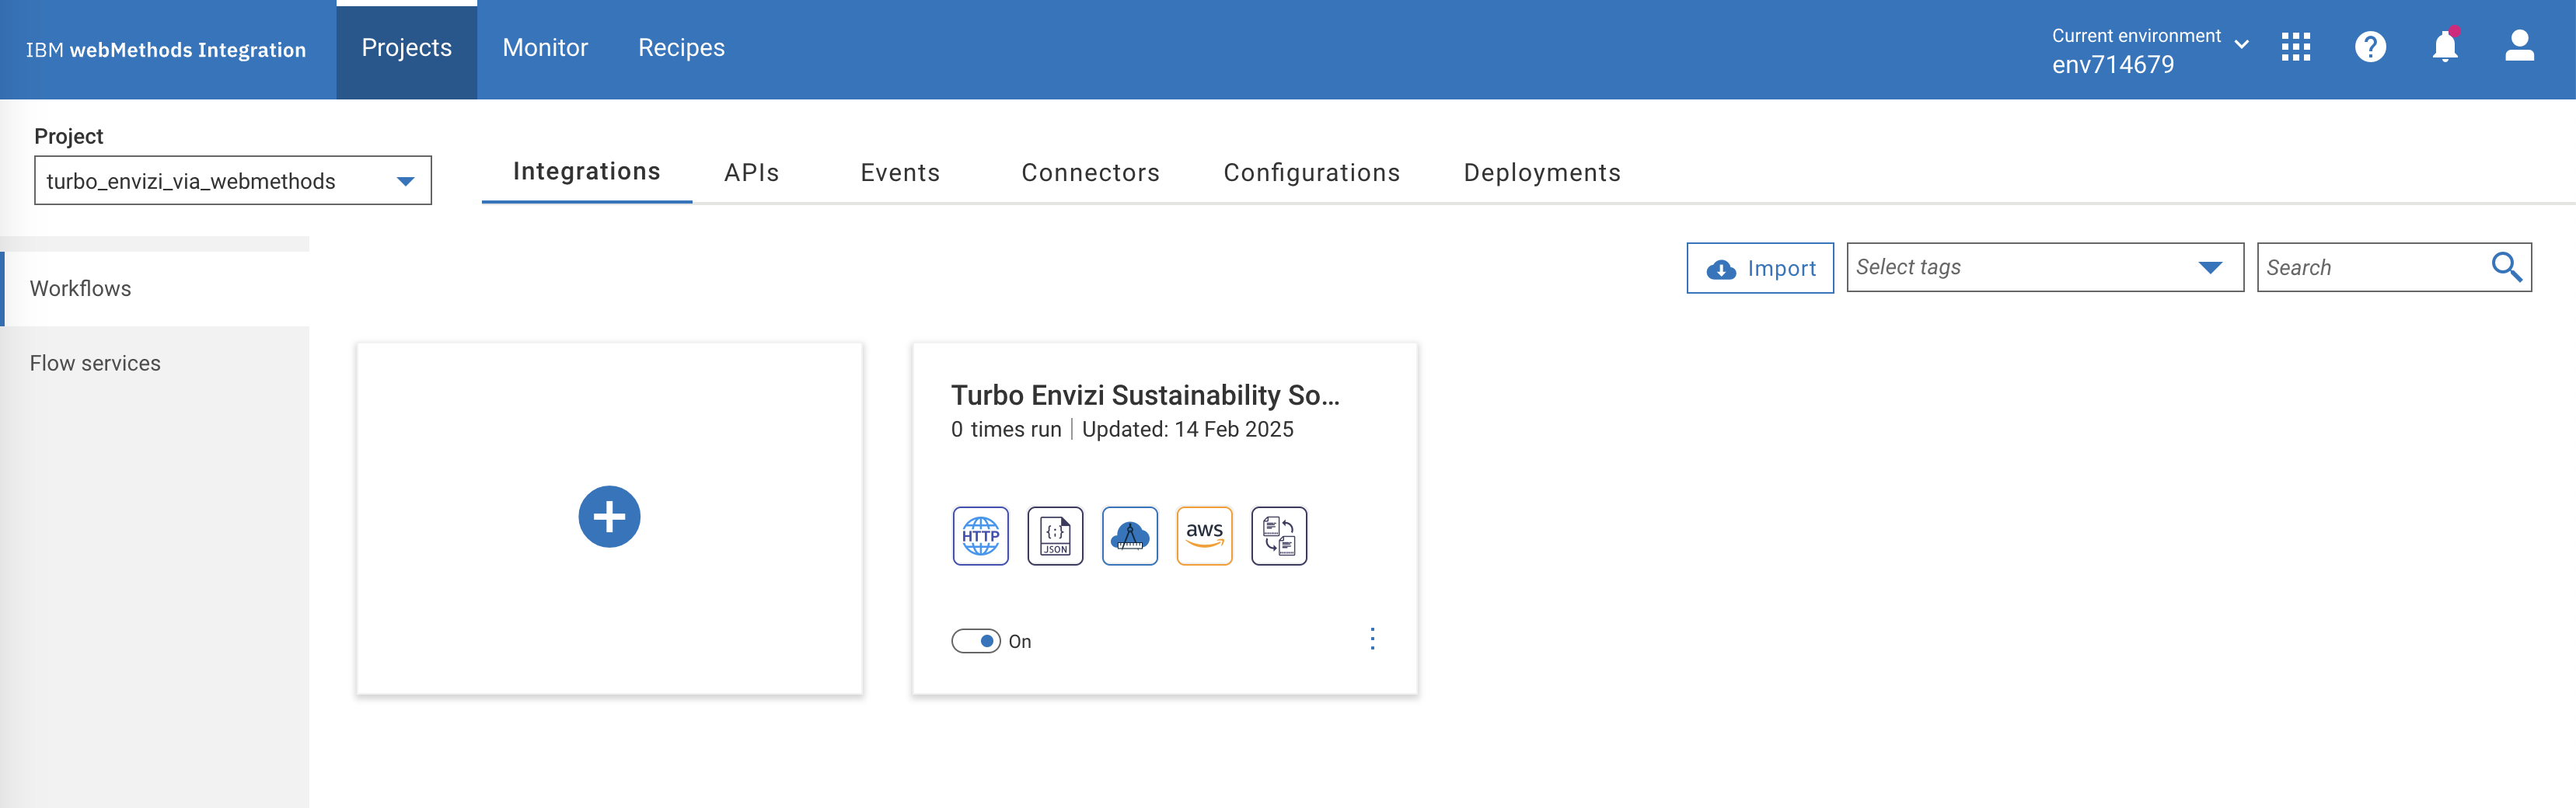
The project gets created as shown in the following image.
Import workflow
Download the webMethods workflow.zip file.
Click on
Importbutton.Select the workflow file that is downloaded in the preceding step.
For the following fields, you can leave the defaults as-is or enter the values that you want.
- Workflow Name
- Workflow Description
Under the
Parameterssection, update the field values based on your Turbonomic and Envizi environments.- TurboLoginAPI: Turbonomic login API, which has a value
https://[Turbonomic-URL]/api/v3/login. Replace the[Turbonomic-URL]with your Turbonomic instance URL. - TurboAccountStatsAPI: Retrieves the Data Centres statistics such as electricity consumption, which has has a value
https://[Turbonomic-URL]/api/v3/entities/. Replace the[Turbonomic-URL]with your Turbonomic instance URL. - TurboDataCentresAPI: Fetches the data centres locations from Turbonomic instance, which has a value
https://[Turbonomic-URL]/api/v3/search. Replace the[Turbonomic-URL]with your Turbonomic instance URL. - TurboUserName: Enter the Turbonomic UserName received as part of prerequisites.
- TurboPassword: Enter the Turbonomic Password received as part of prerequisites.
- S3BucketName: Envizi AWS S3 bucket name received as part of prerequisites.
- EnviziTemplateFileName: Envizi AWS S3 folder name and file name received as part of prerequisites. For example,
client_7e87560fc4e648/Account_Setup_and_Data_Load_DataCenter_electricity.csv. - statsFilter: To retrieve the electricity consumption for a specific period, update
startDateandendDatein the same format as shown in the following sample and keep the remaining default values. - EnviziDCMap: Create mapping of actual data center name and the corresponding location names created in Envizi along with name of the electricity accounts as shown in the following sample.
statsFilter
{ "data": { "startDate": "2025-01-01T00:00:01+00:00", "endDate": "2025-02-28T00:00:01+00:00", "statistics": [ { "name": "Energy", "filters": [ { "type": "relation", "value": "sold" } ] } ] } }EnviziDCMap
{ "data": [ { "turbo_data_center": "IBMCloud", "envizi_location": "IN Bank-ODC-IBMCloud", "envizi_account": "IN Bank-ODC-IBMCloud-electricity" }, { "turbo_data_center": "vc01dc01", "envizi_location": "IN Bank-ODC-vc01dc01", "envizi_account": "IN Bank-ODC-vc01dc01-electricity" } ] }- TurboLoginAPI: Turbonomic login API, which has a value
In the preceding page, click
+symbol in theConnect to Hypertext Transfer Protocol (HTTP)field. TheAdd Accountpage appears.
In the
URLfield, enter the valuehttps://[Turbonomic-URL]/api/v3/entities/. Replace [Turbonomic-URL] with your Turbonomic instance URL.Click
Add. The project page is updated with the created value.Click on
+symbol in theConnect to Amazon Web Servicesfield. TheAdd Accountpage appears.
Enter the following values based on the prerequisites values from Envizi.
- Access Key ID
- Secret Access Key
- Default Region (us-east-1)
Click
Add. The project page is updated with the created value.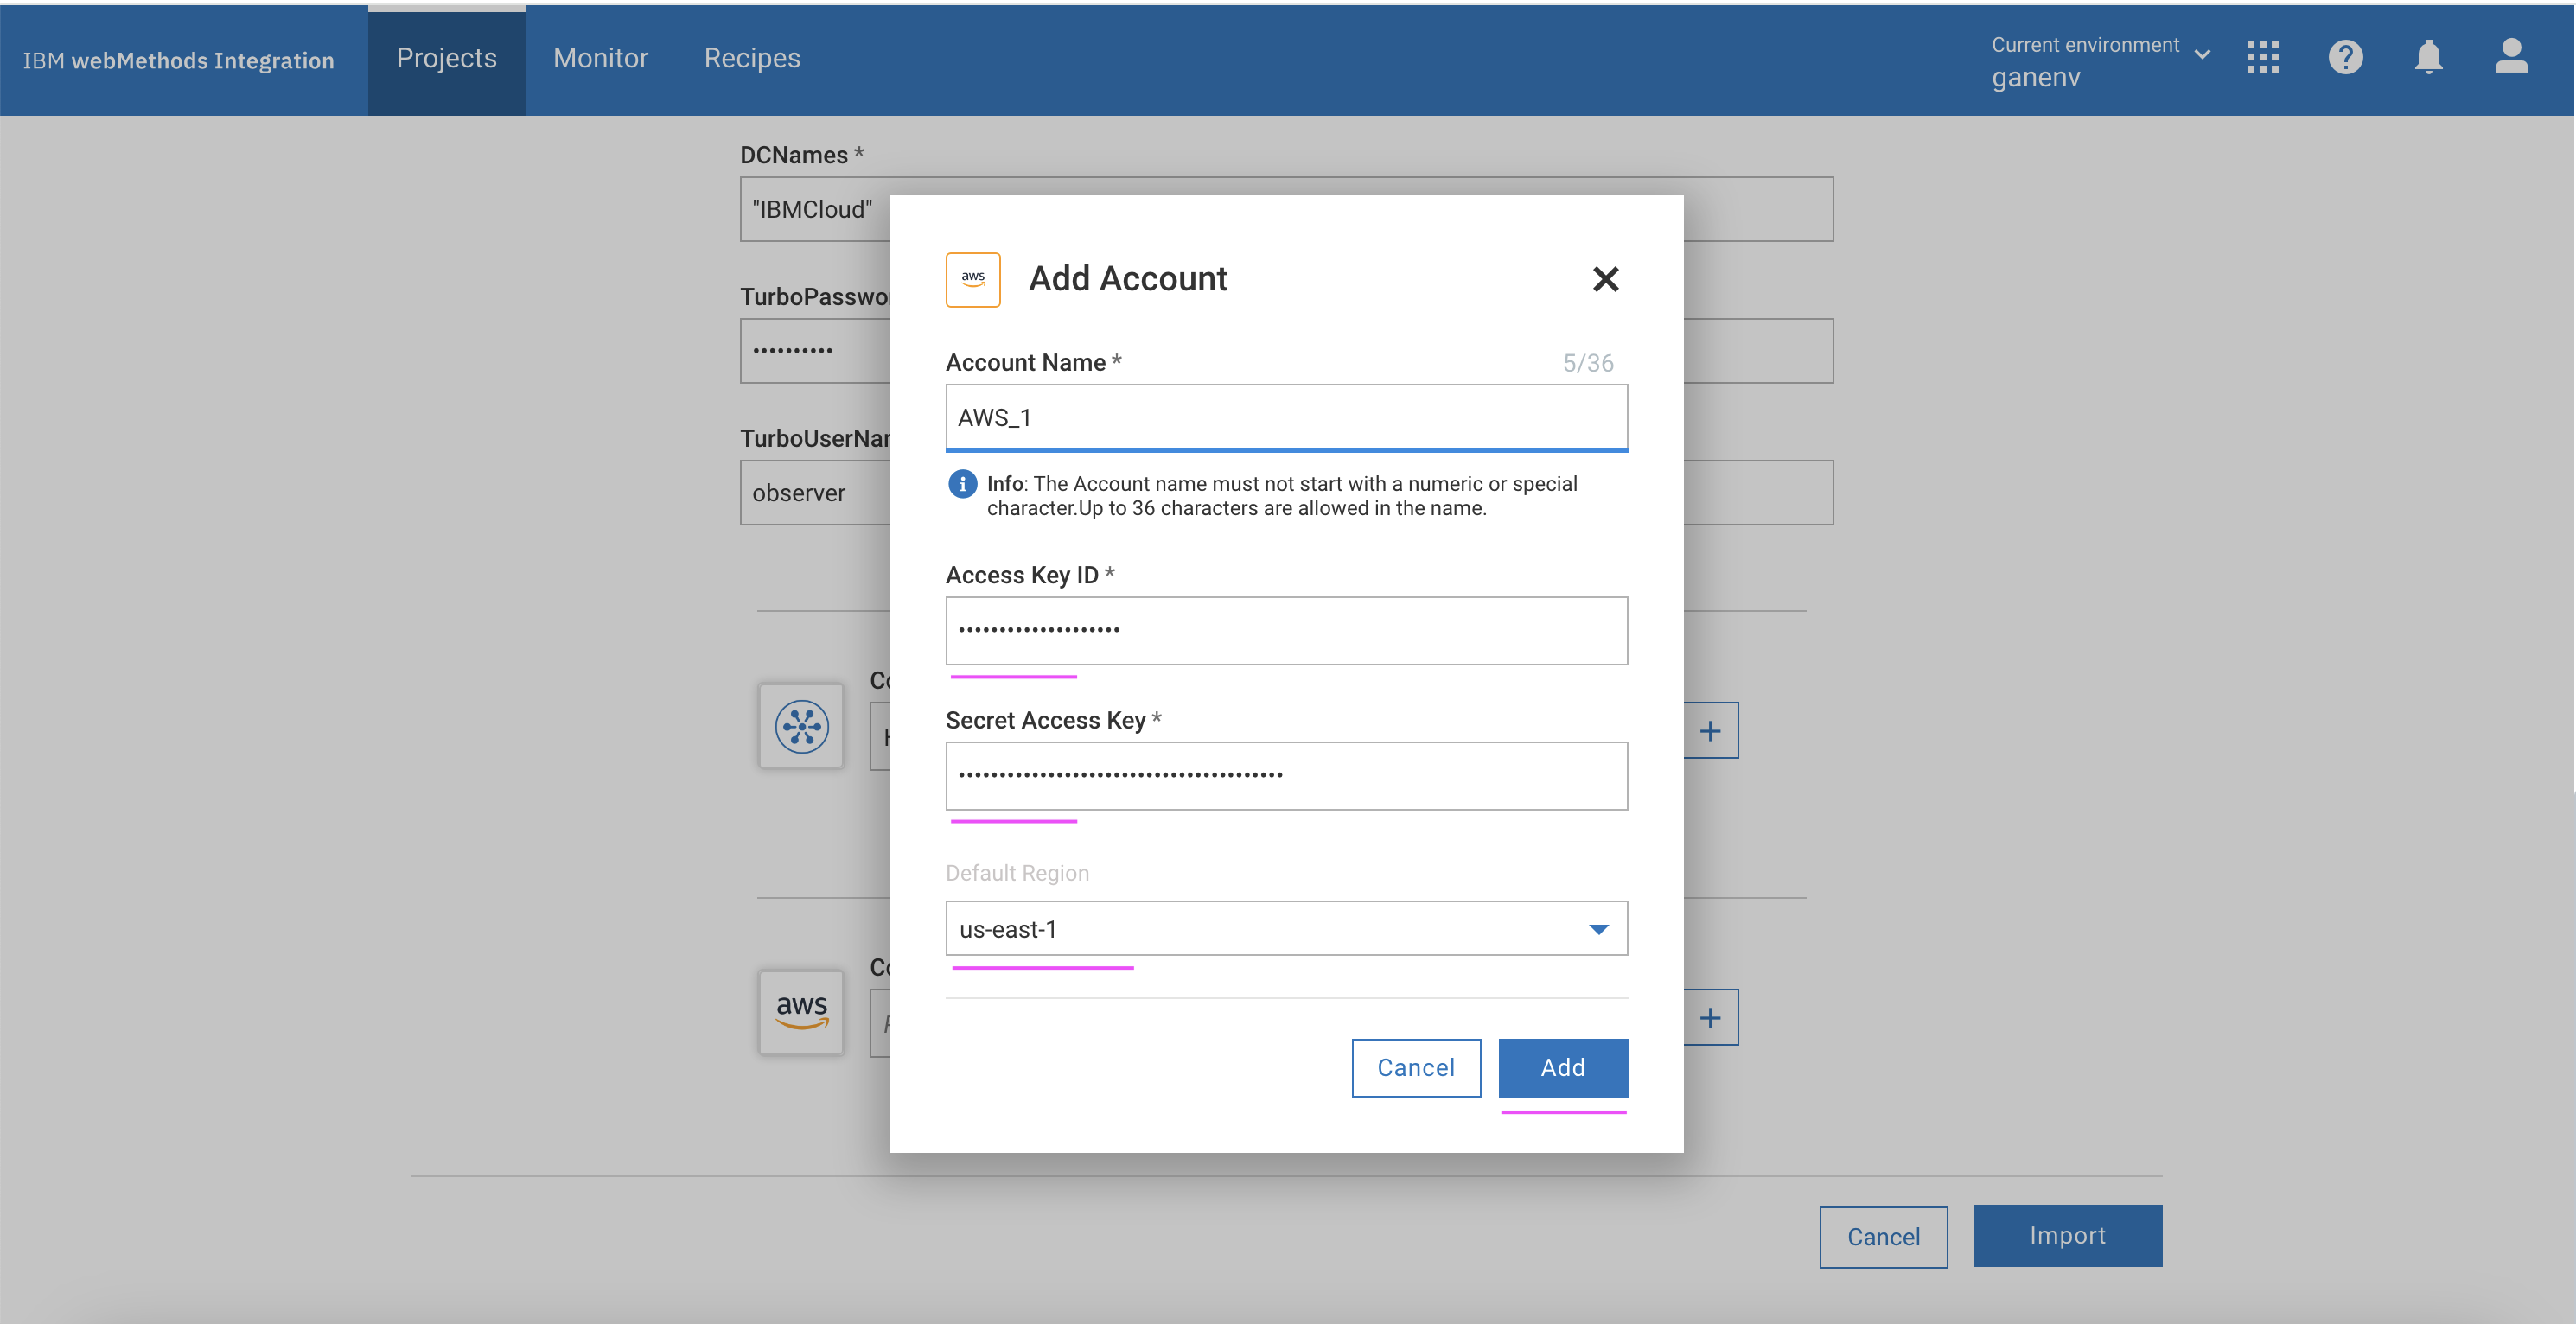
Click
Import.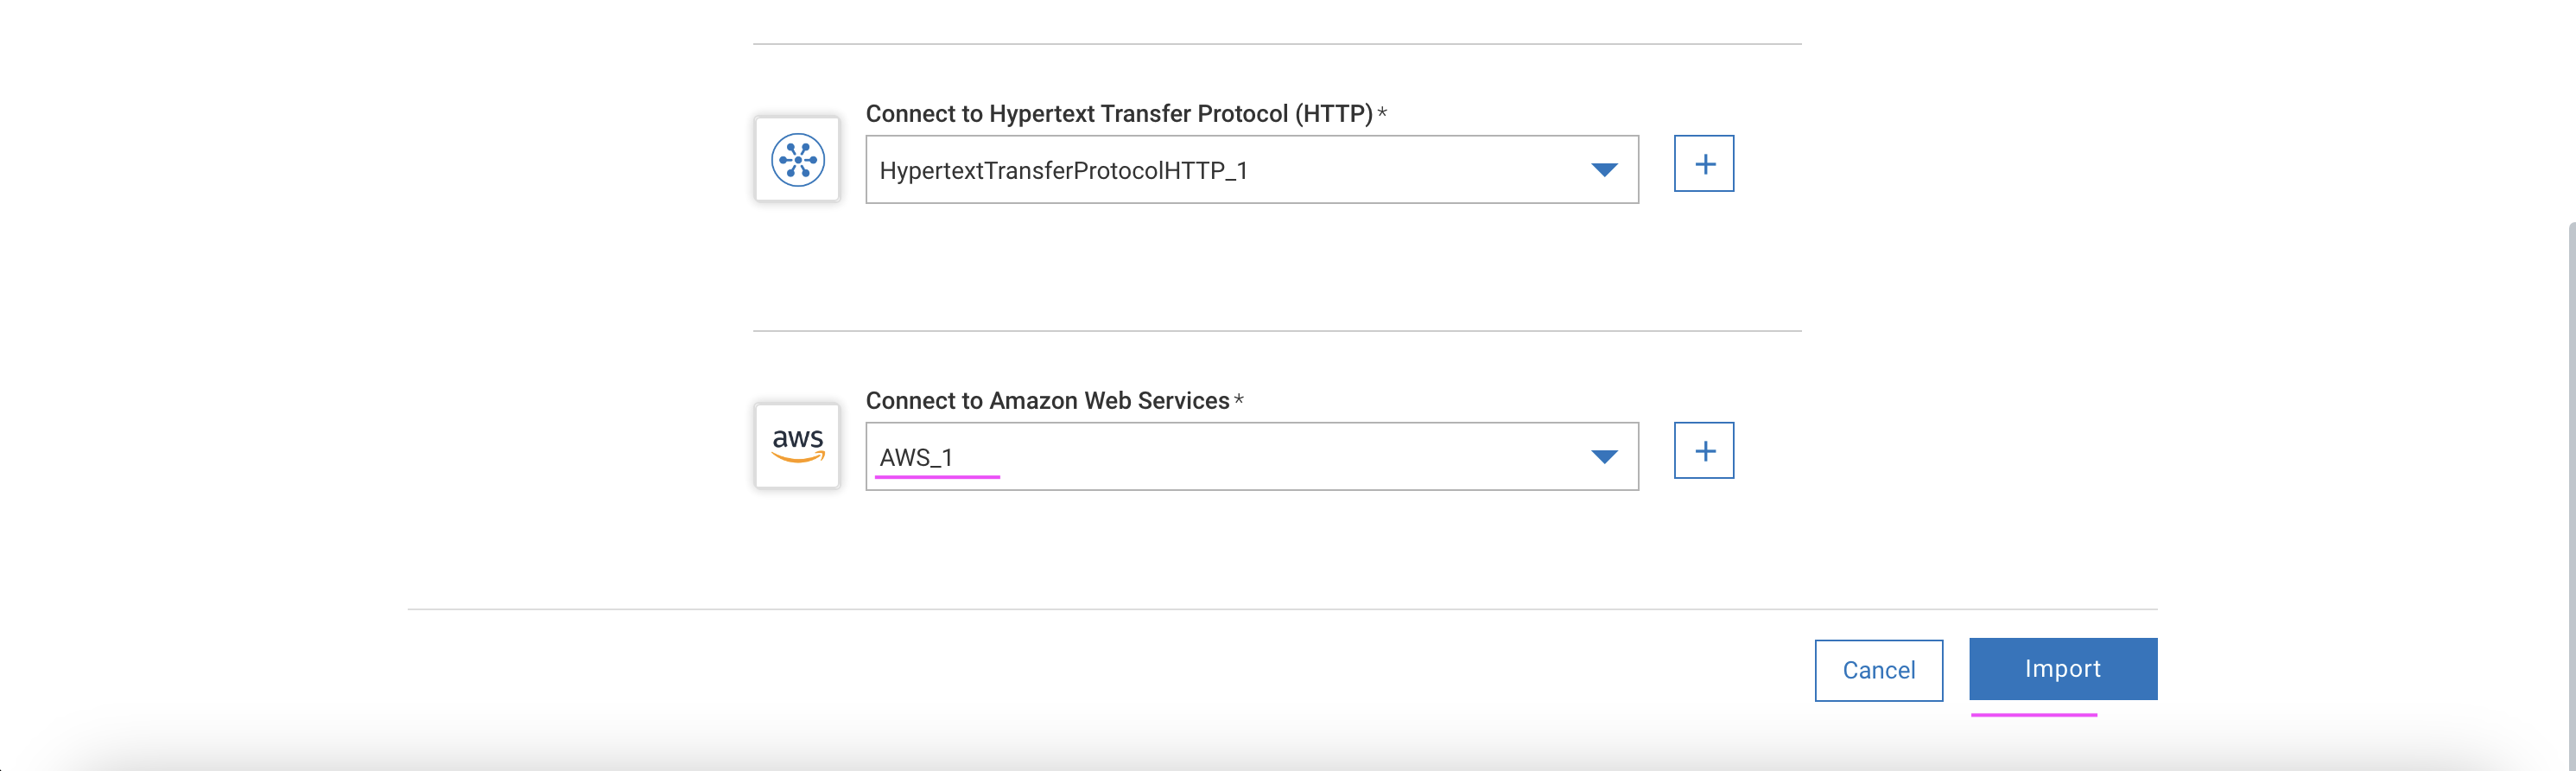
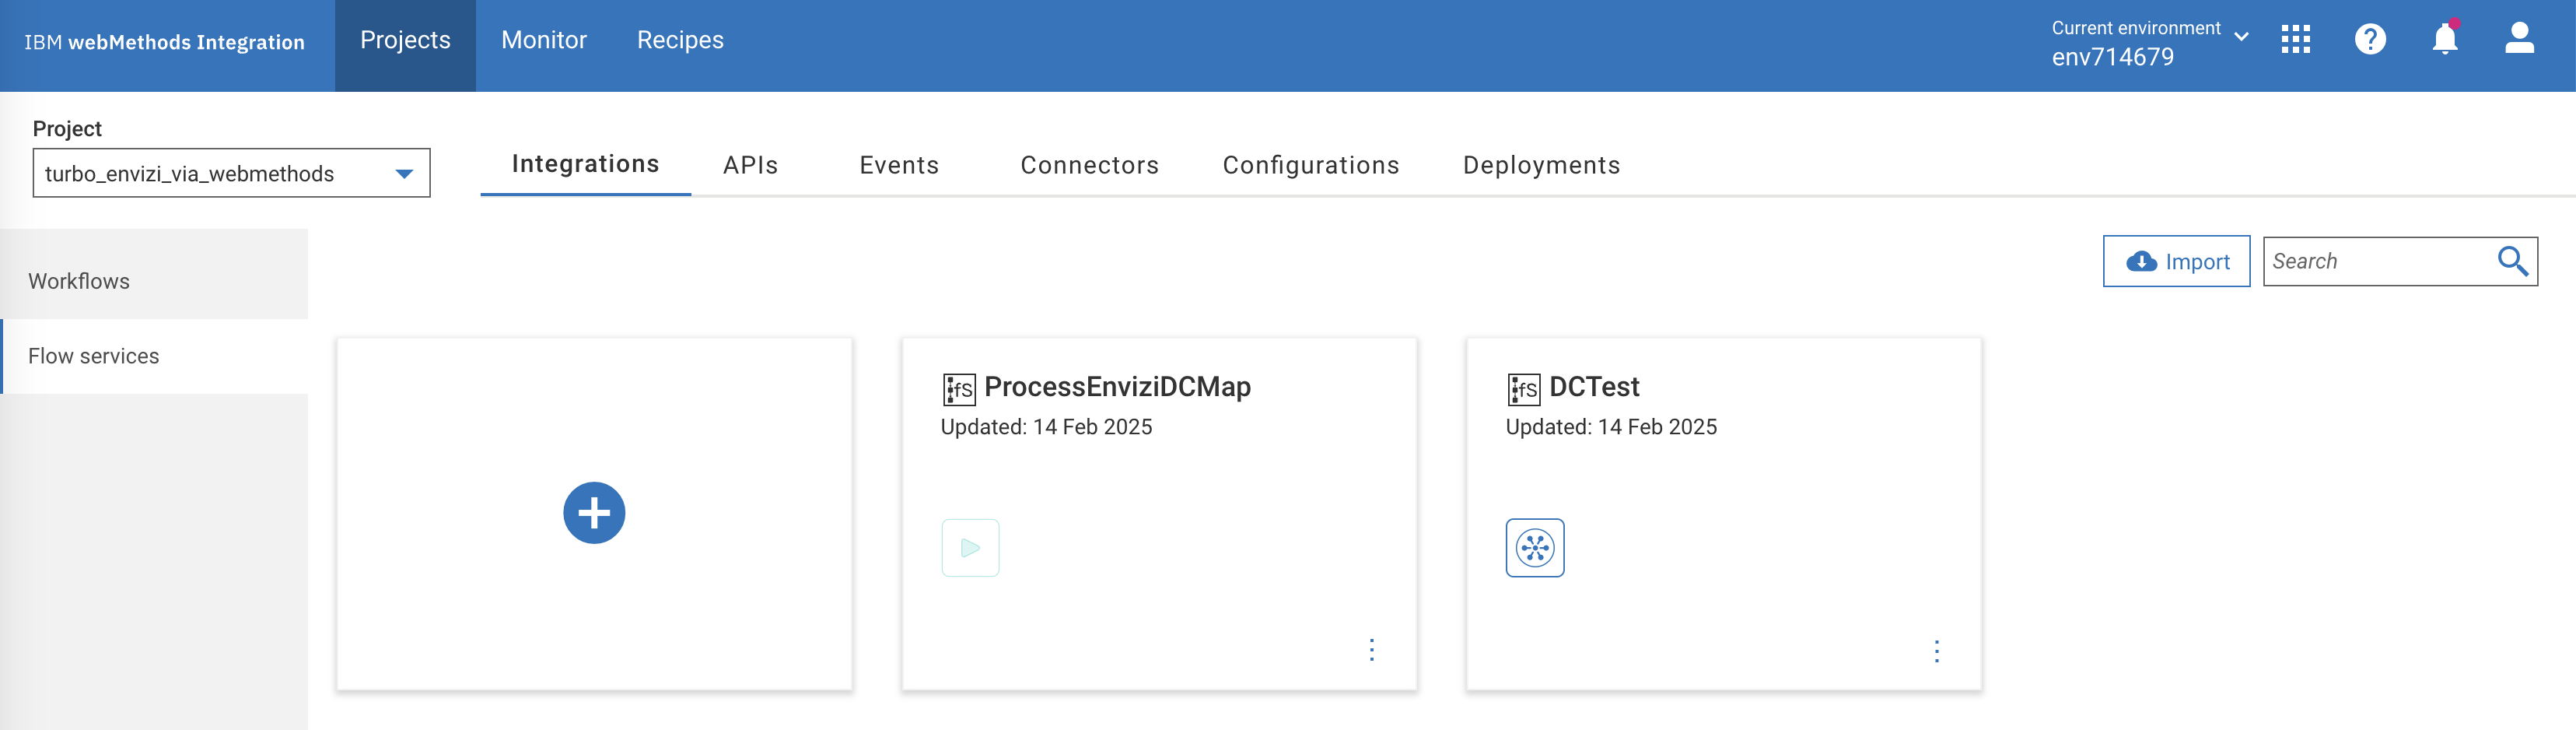
The workflow and the corresponding flow services are created in the integration project as shown.
Create reference data for flow service
Prepare Envizi template file
The Envizi template file to be imported into the workflow as a reference data. Please note that the reference template is based on Account Setup and Data Load template for the account style S2 - Electricity - kWh. Let's prepare that.
Download the envizi reference data file.
Update the file with the values based on the following table. You may also need to update the following columns based on the prerequisites values from Envizi.
- Organization Link
- Organization
- Account Style Link
| Name | Value | Comments | User Action |
|---|---|---|---|
| Organization Link | 17000252 | The refernce id for the Envizi Organization. | Get it from prerequisites |
| Organization | GSI Demos | The name of the Organization. | Get it from prerequisites |
| Location | The name of location mapped to Datacenter in Envizi . Updated by workflow based on project parameters | Make sure to check project parameters | |
| Location Ref | Nil | ||
| Account Style Link | 14445 | The refernce id for the S2 - Electricity - kWh account style. | Get it from prerequisites.Make sure to have Account Style Caption and it's corresponding Account Style Link |
| Account Style Caption | S2 - Electricity - kWh | The account style of this account. It will be updated by workflow based on project parameters | Make sure to have Account Style Caption and it's corresponding Account Style Link |
| Account Subtype | Default | Nil | |
| Account Number | IBMCloud-electricity | The account name. Updated by workflow based on project parameters | Make sure to check project parameters |
| Account Reference | Nil | ||
| Account Supplier | Nil | ||
| Account Reader | Nil | ||
| Record Start YYYY-MM-DD | 2024-01-01 | Updated by workflow based on project parameters | Make sure to check project parameters |
| Record End YYYY-MM-DD | 2024-12-31 | Updated by workflow based on project parameters | Make sure to check project parameters |
| Record Data Quality | Actual | Nil | |
| Record Billing Type | Standard | Nil | |
| Record Subtype | Default | Nil | |
| Record Entry Method | Overwrite | Nil | |
| Record Reference | Nil | ||
| Record Invoice Number | Nil | ||
| Total Electricity (kWh) | 883.799 | Electricity consumption value. Updated by workflow based on turbonomic output | Nil |
| Green Power (kWh) | Nil | ||
| Total Cost | Nil |
Add reference data
Goto the
Reference Datadata page by clicking onConfigurations -> Flow service -> Reference data.Click on
Add Reference data.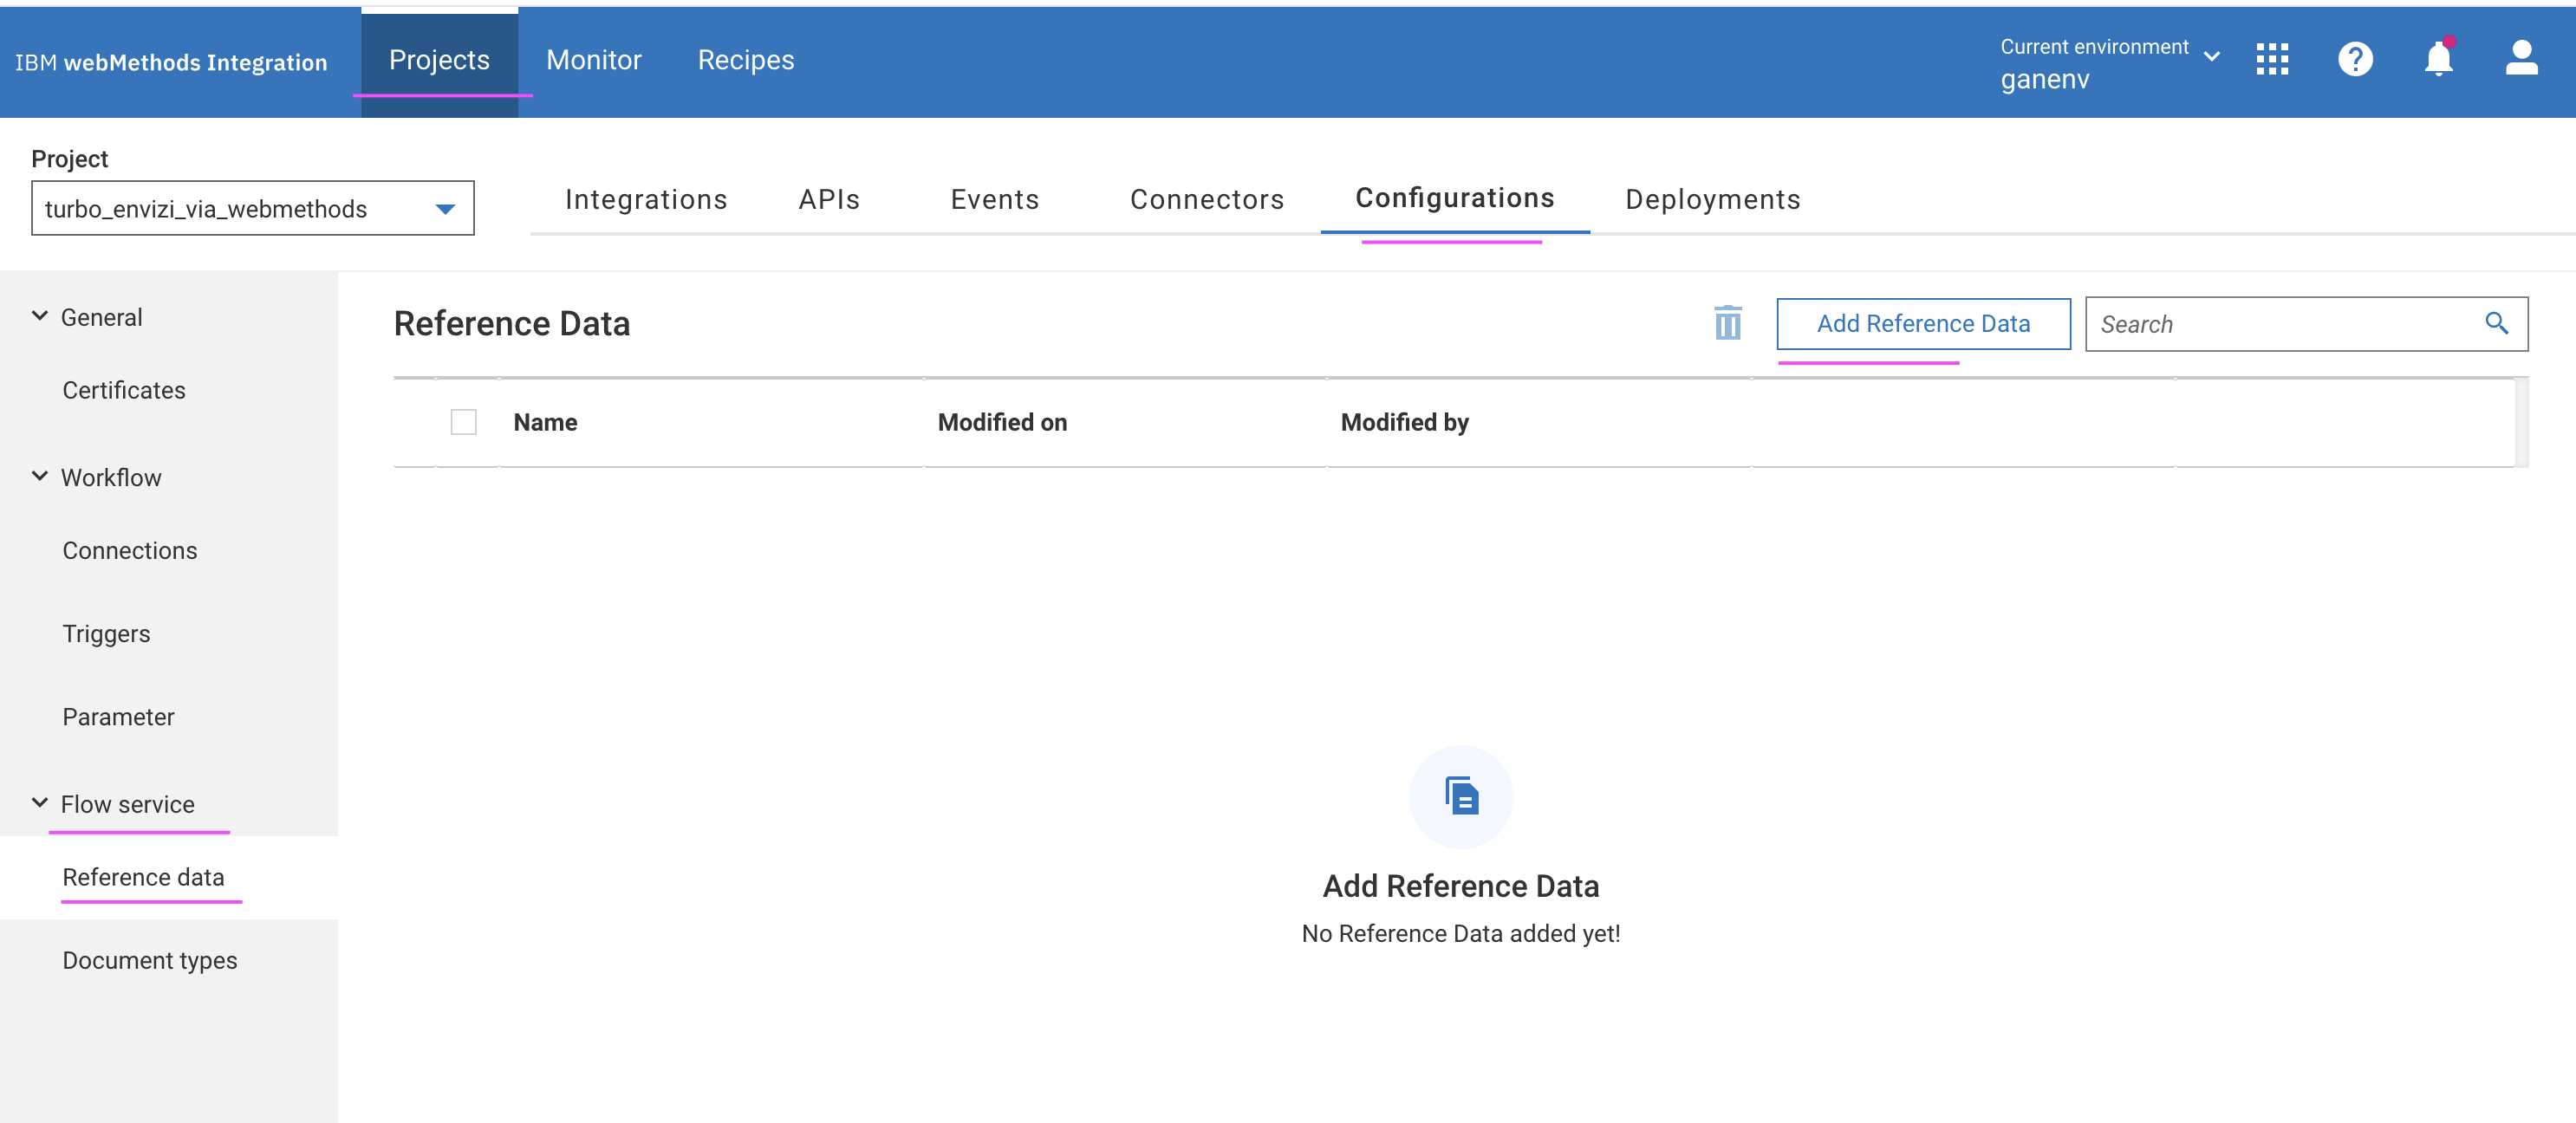
In the
Save Ascolumn, enter the valueEnviziTemplate. TheBrowse filebutton is enabled.Click
Browse file.Choose the prepared
EnviziTemplate.csvfile. The selected file appears as shown.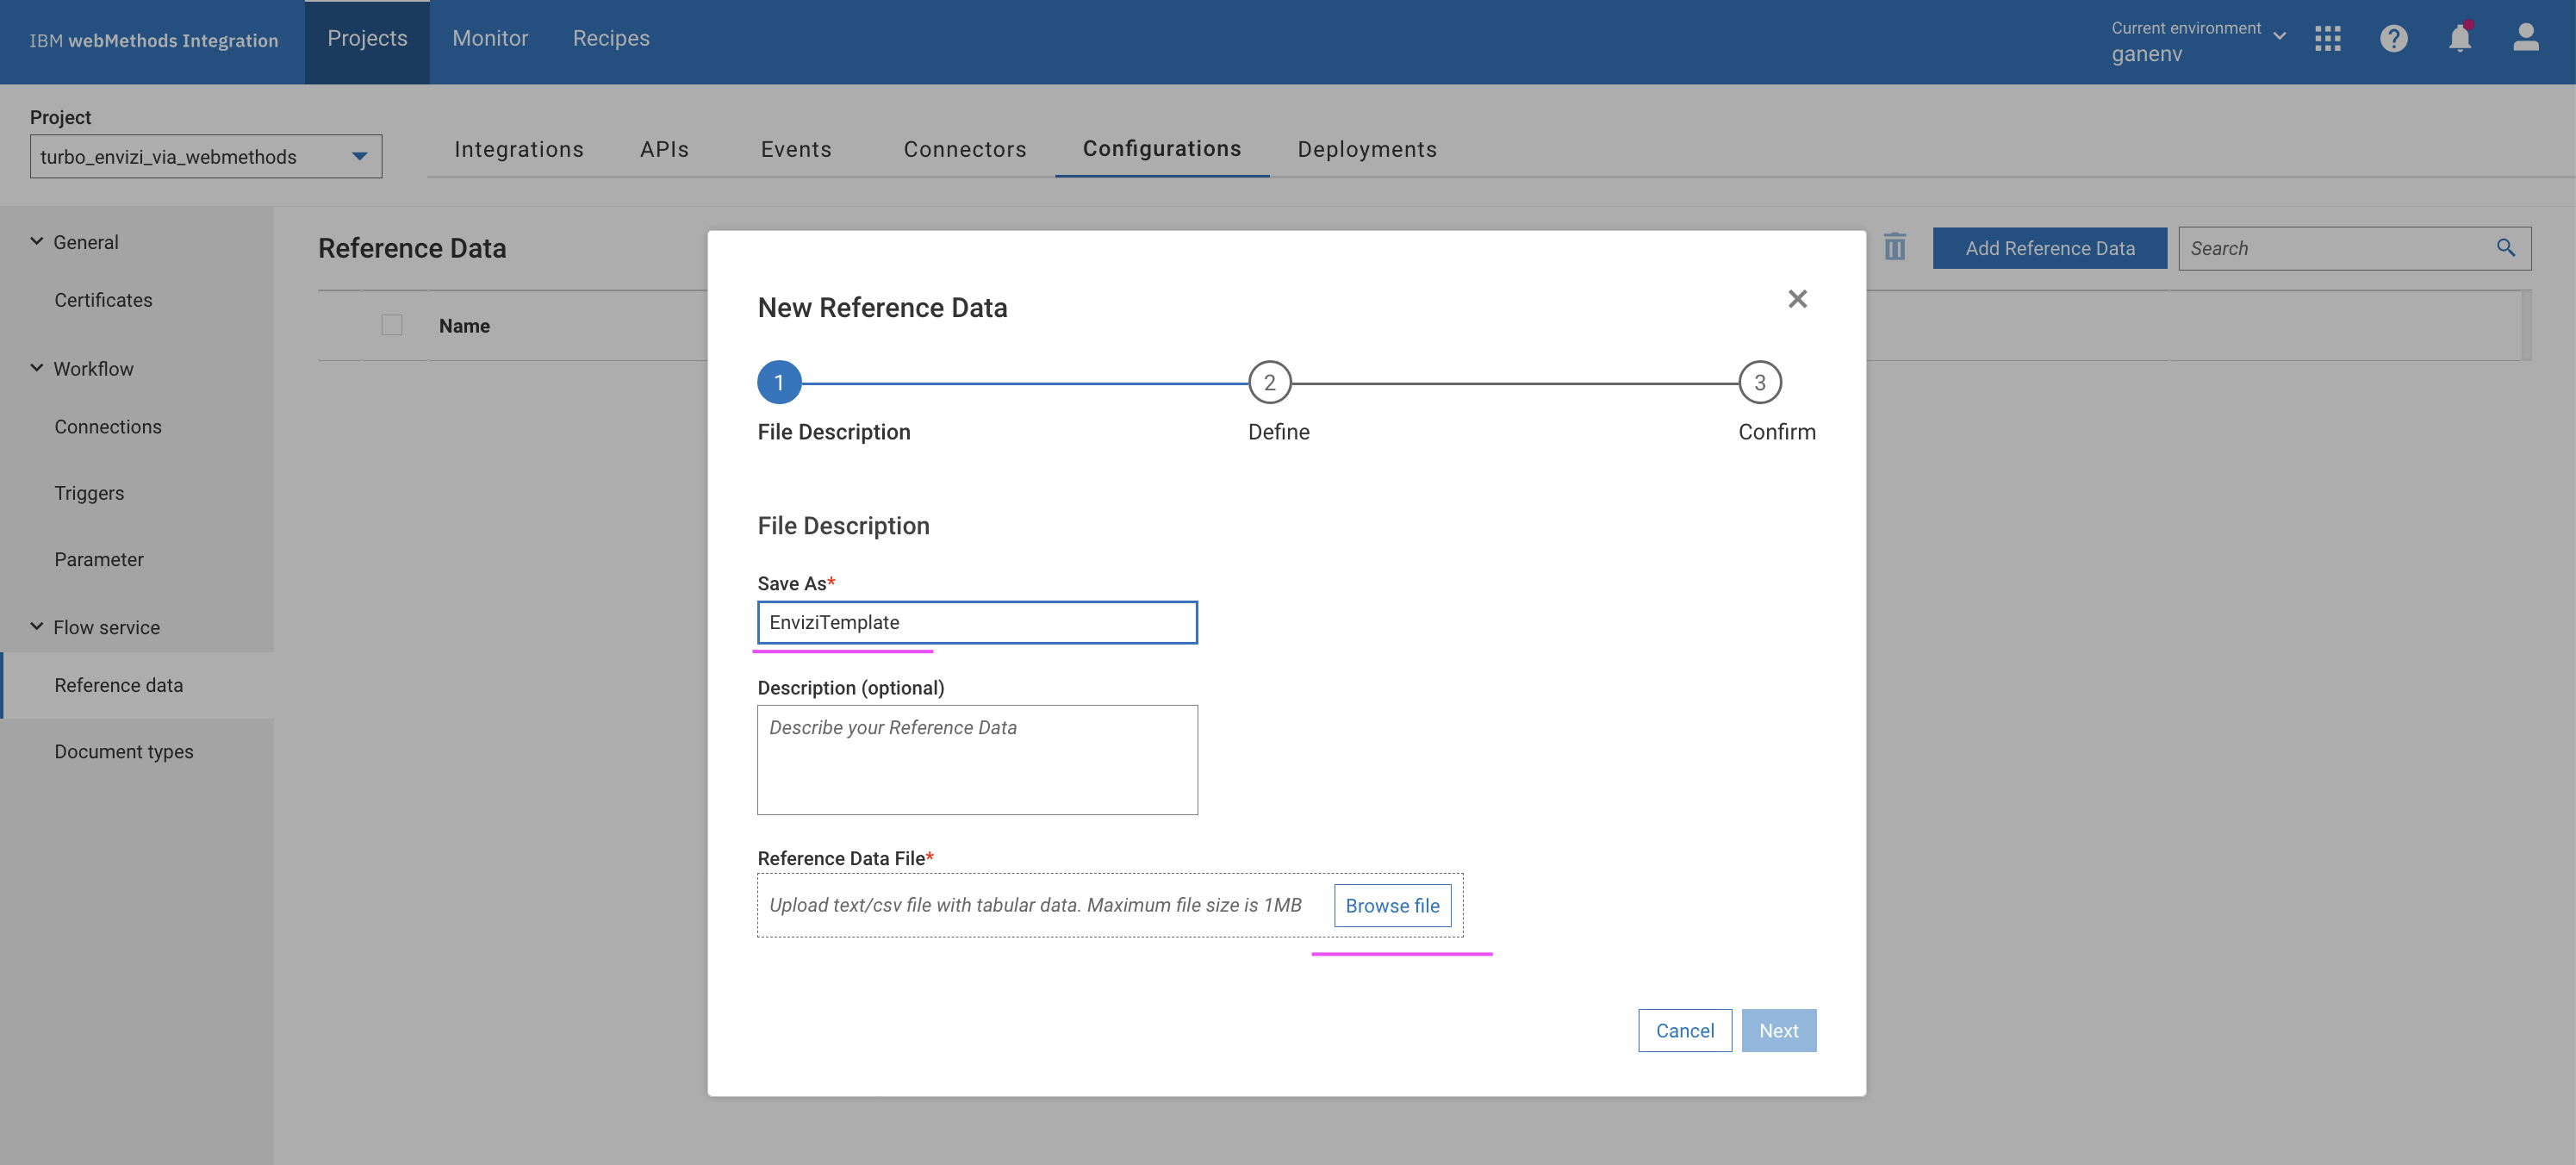
Click
Next.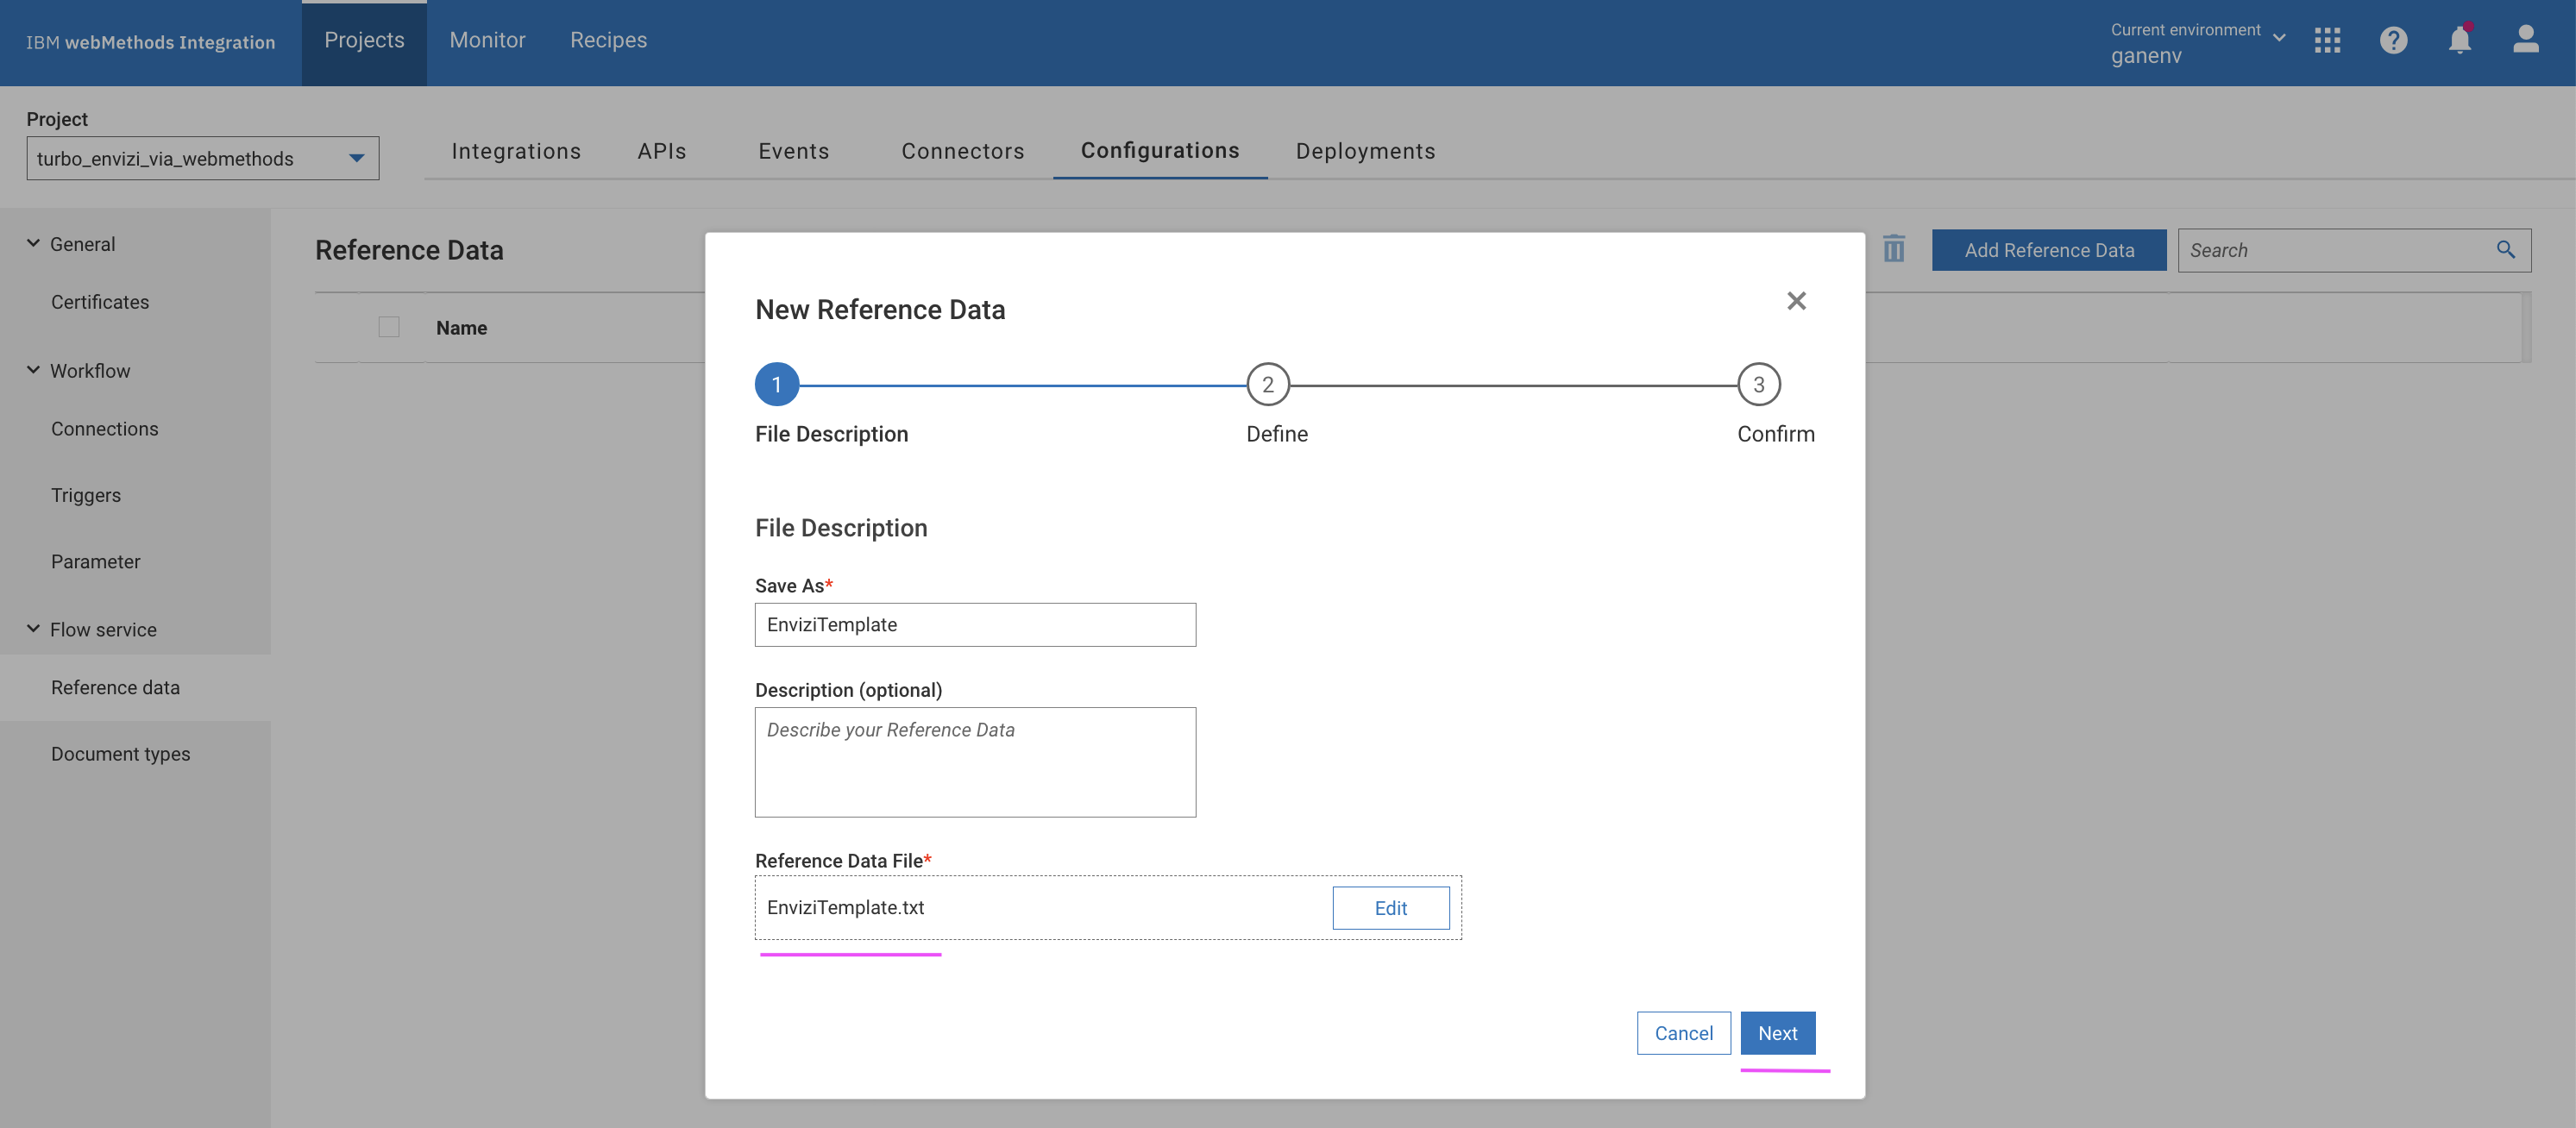
Click
Next.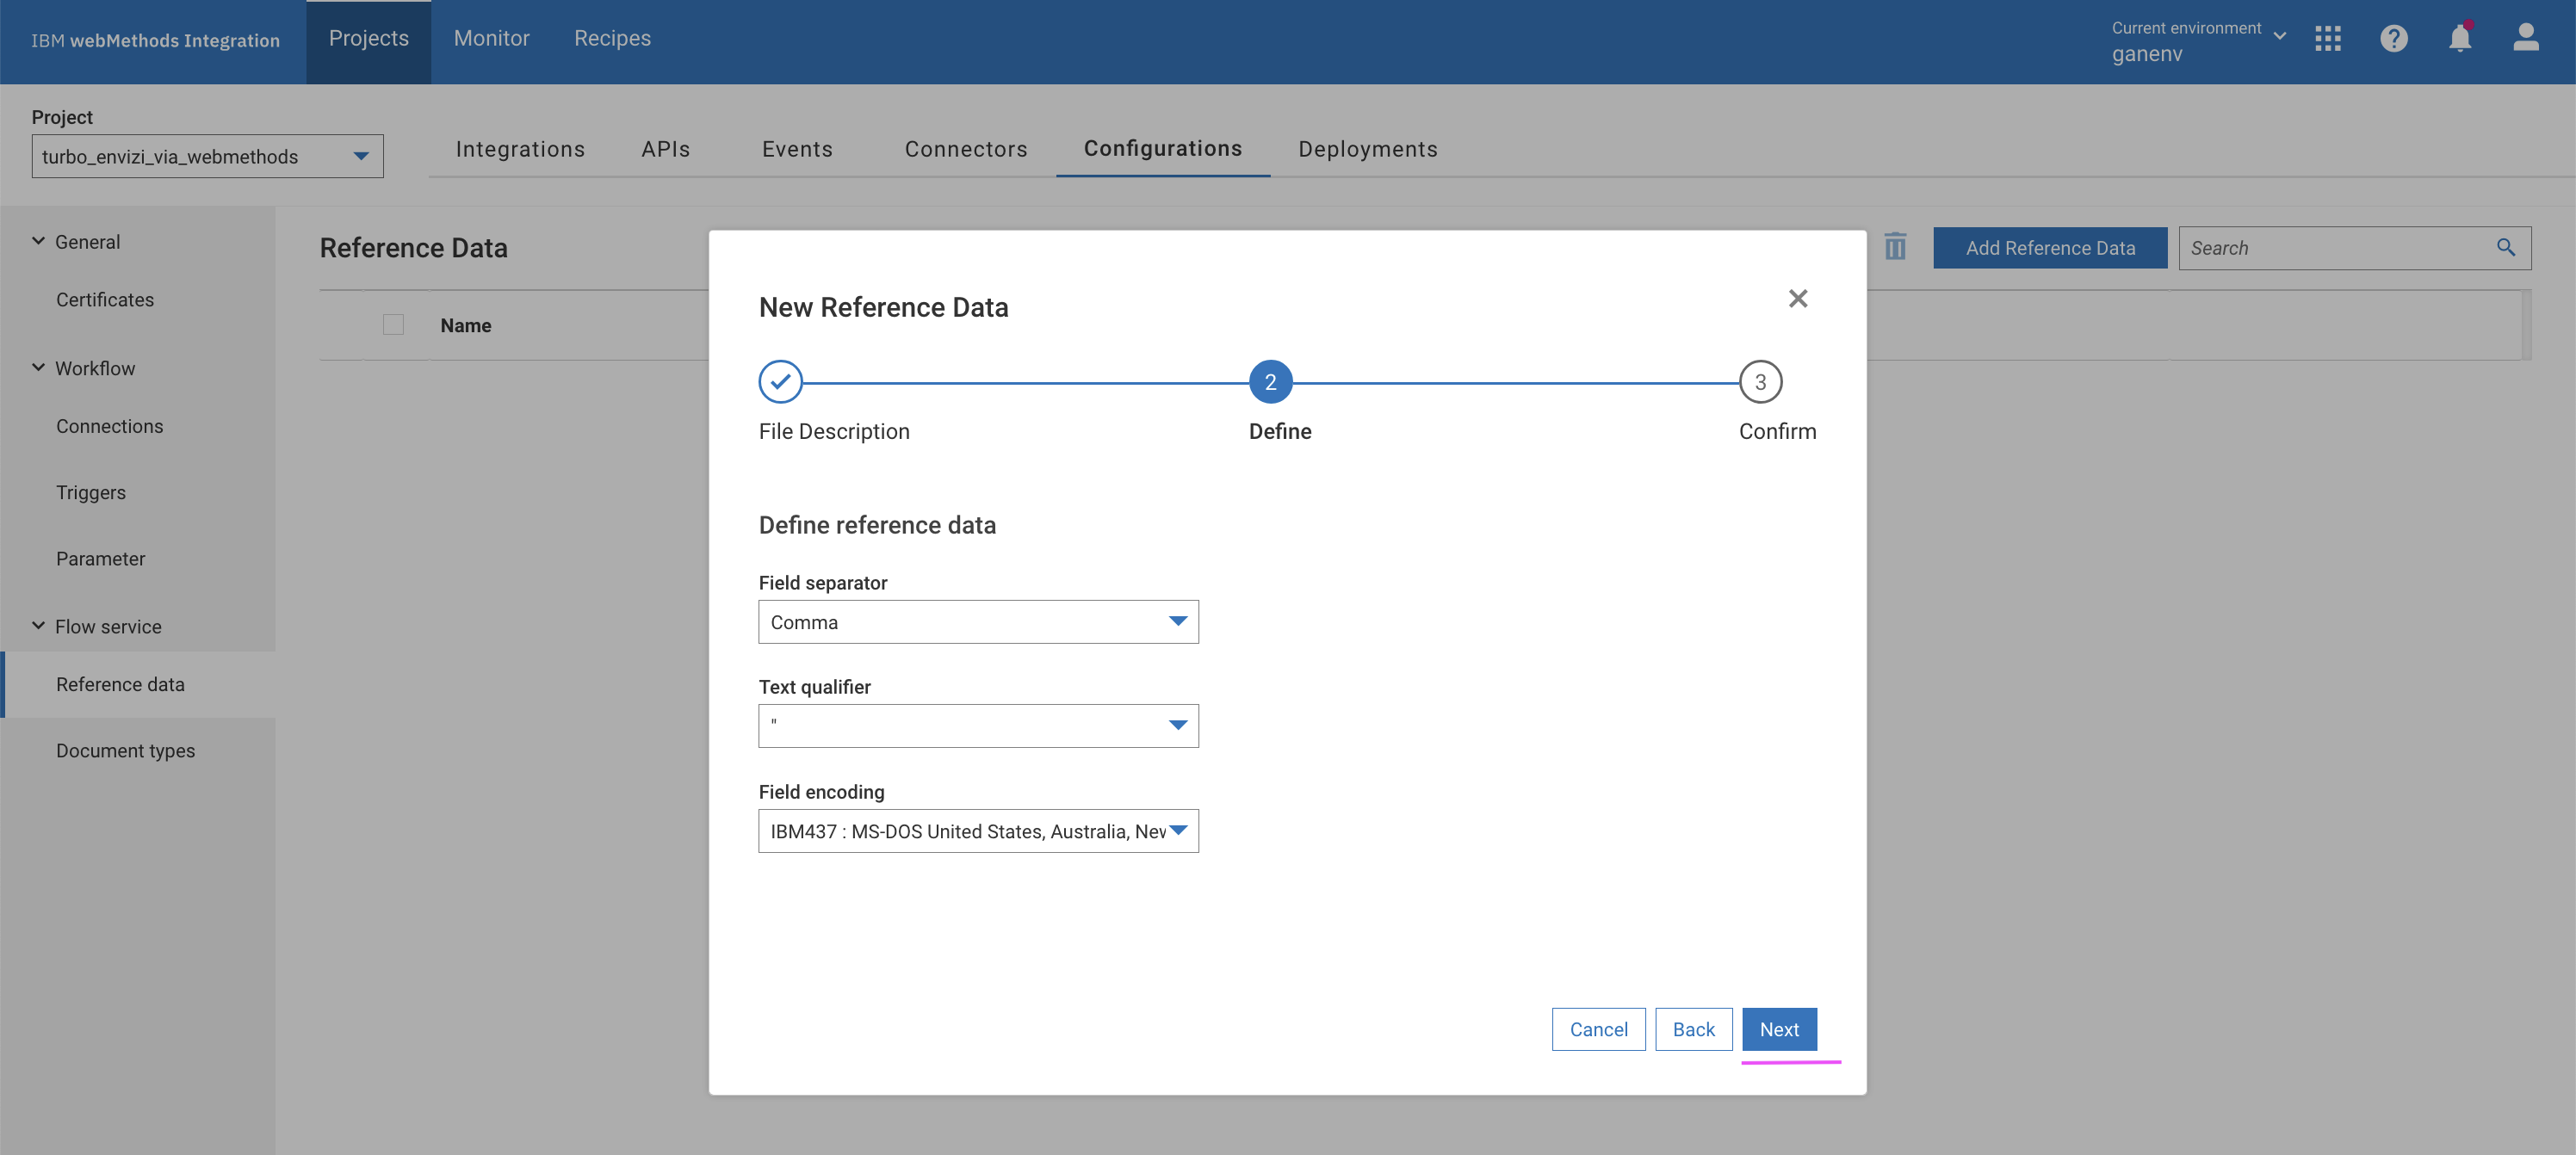
Click
Done.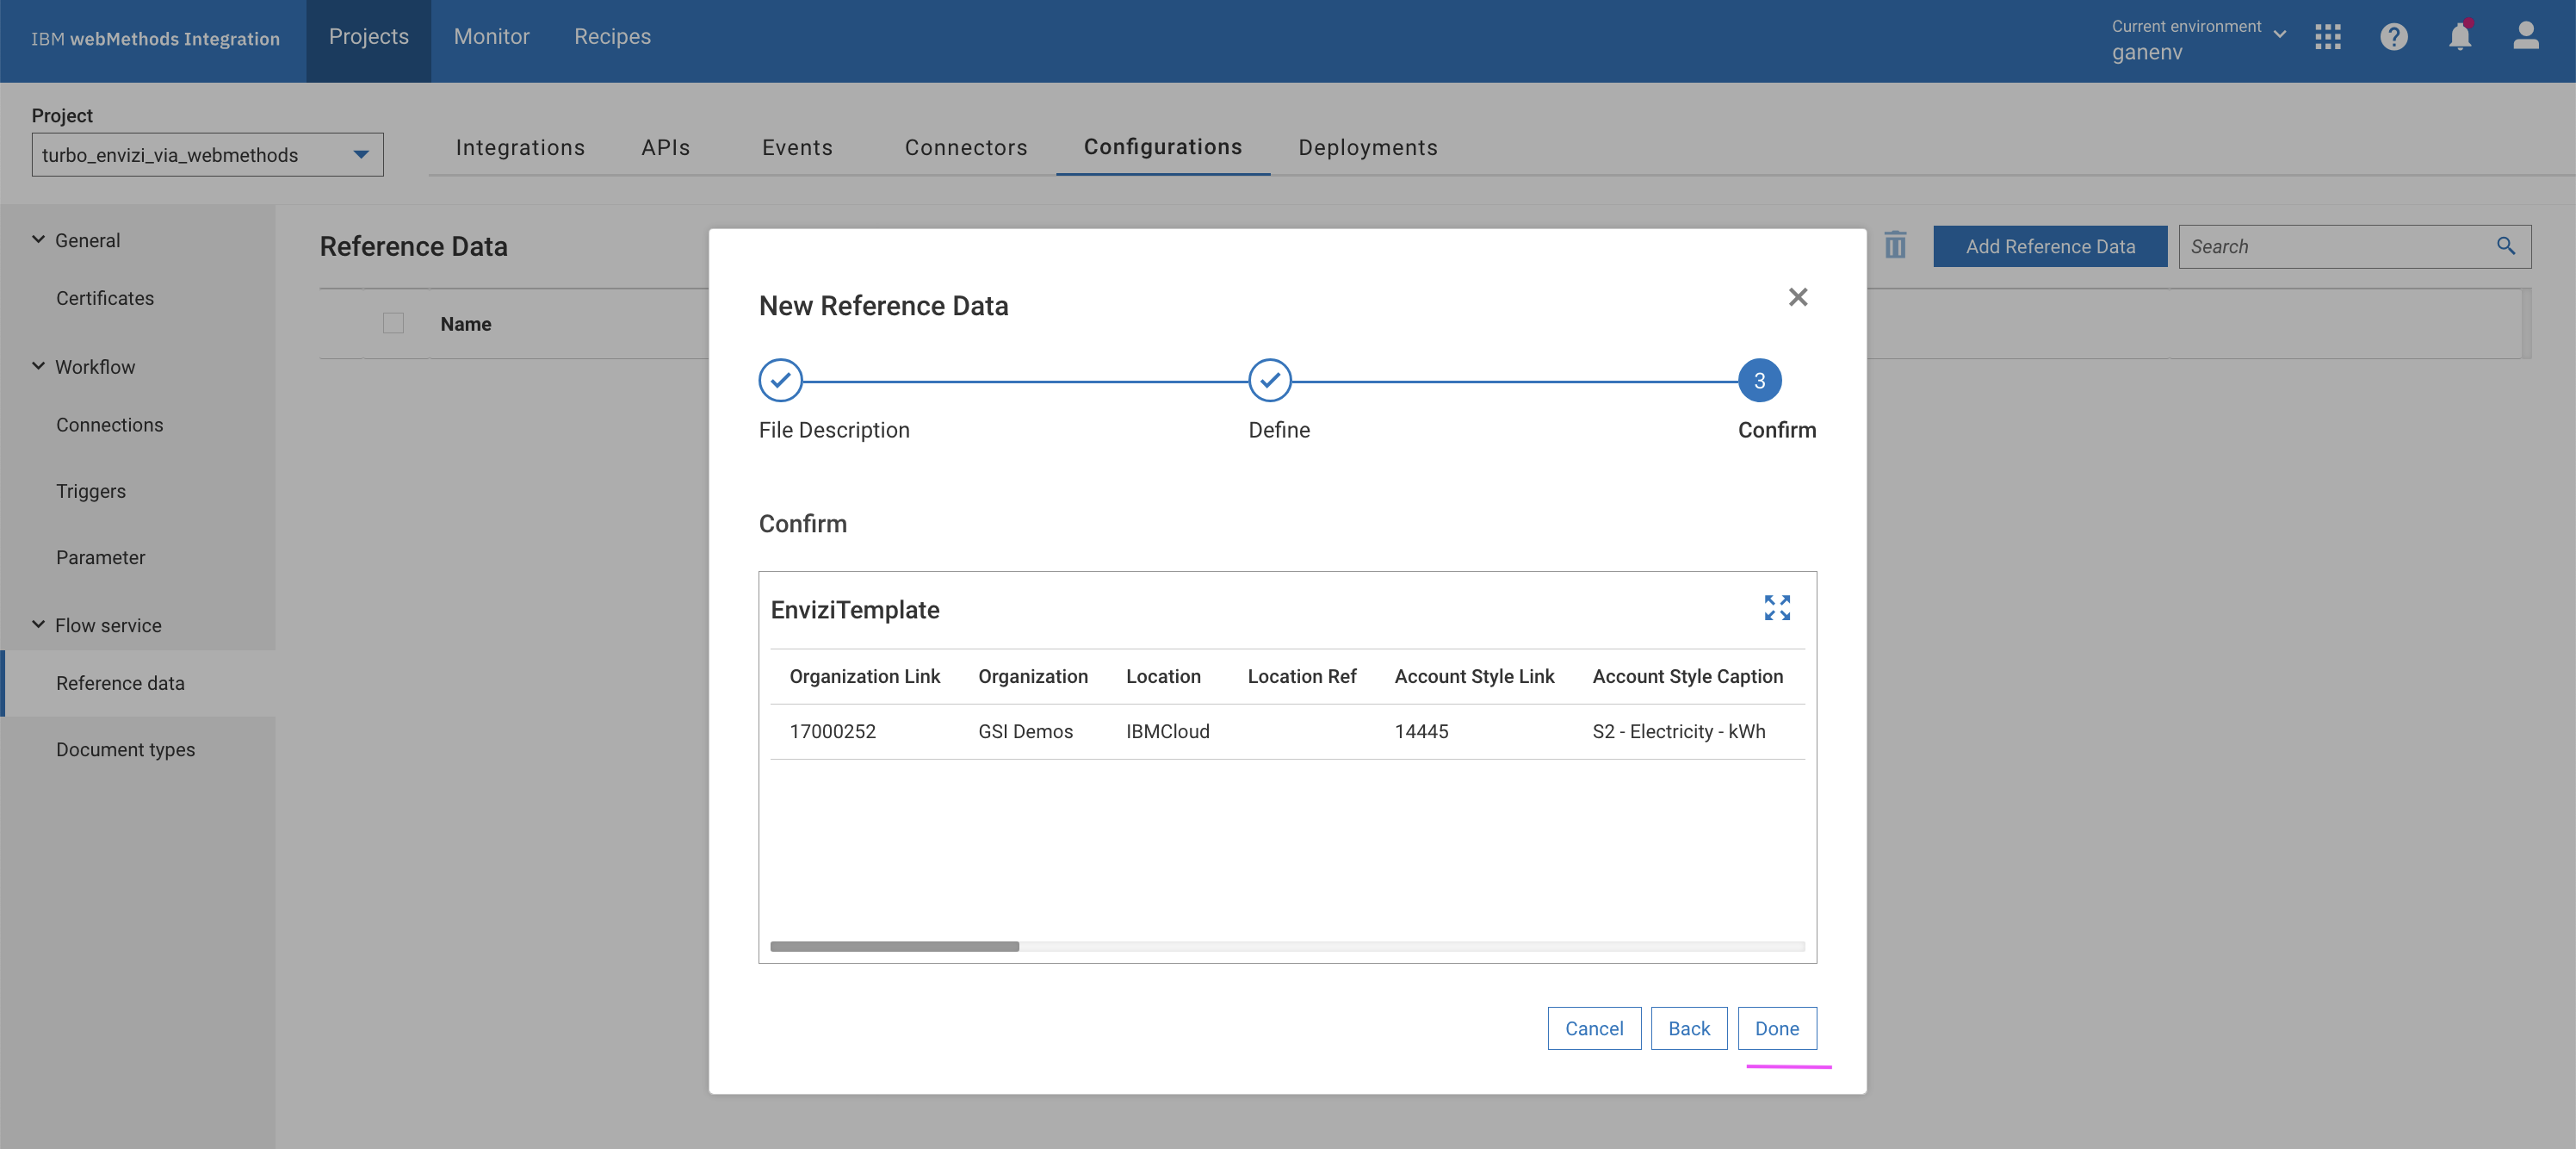
The reference data is created as shown.
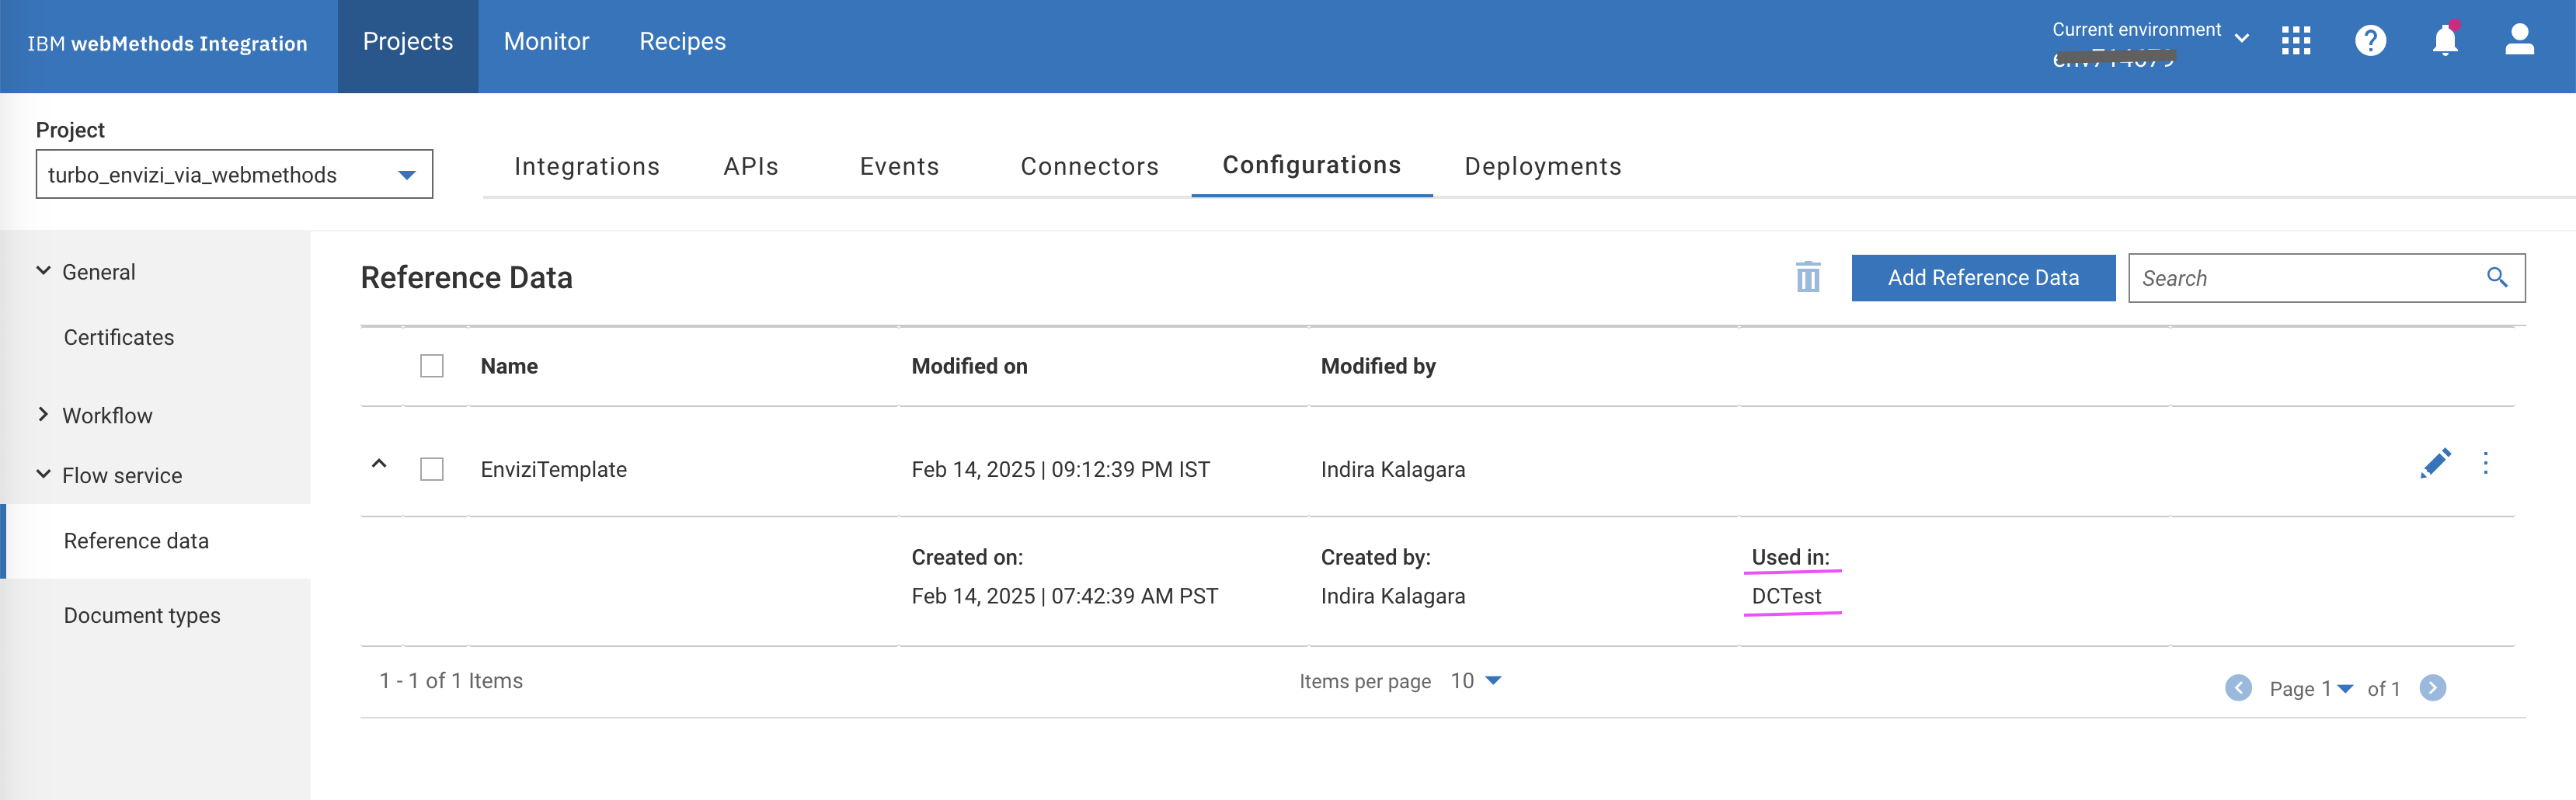
View the workflow and flow-serices
Let's view the imported/created workflow
Click
Viewin theIntegrations -> Workflows -> Turbo Envizi Sustainability Solution.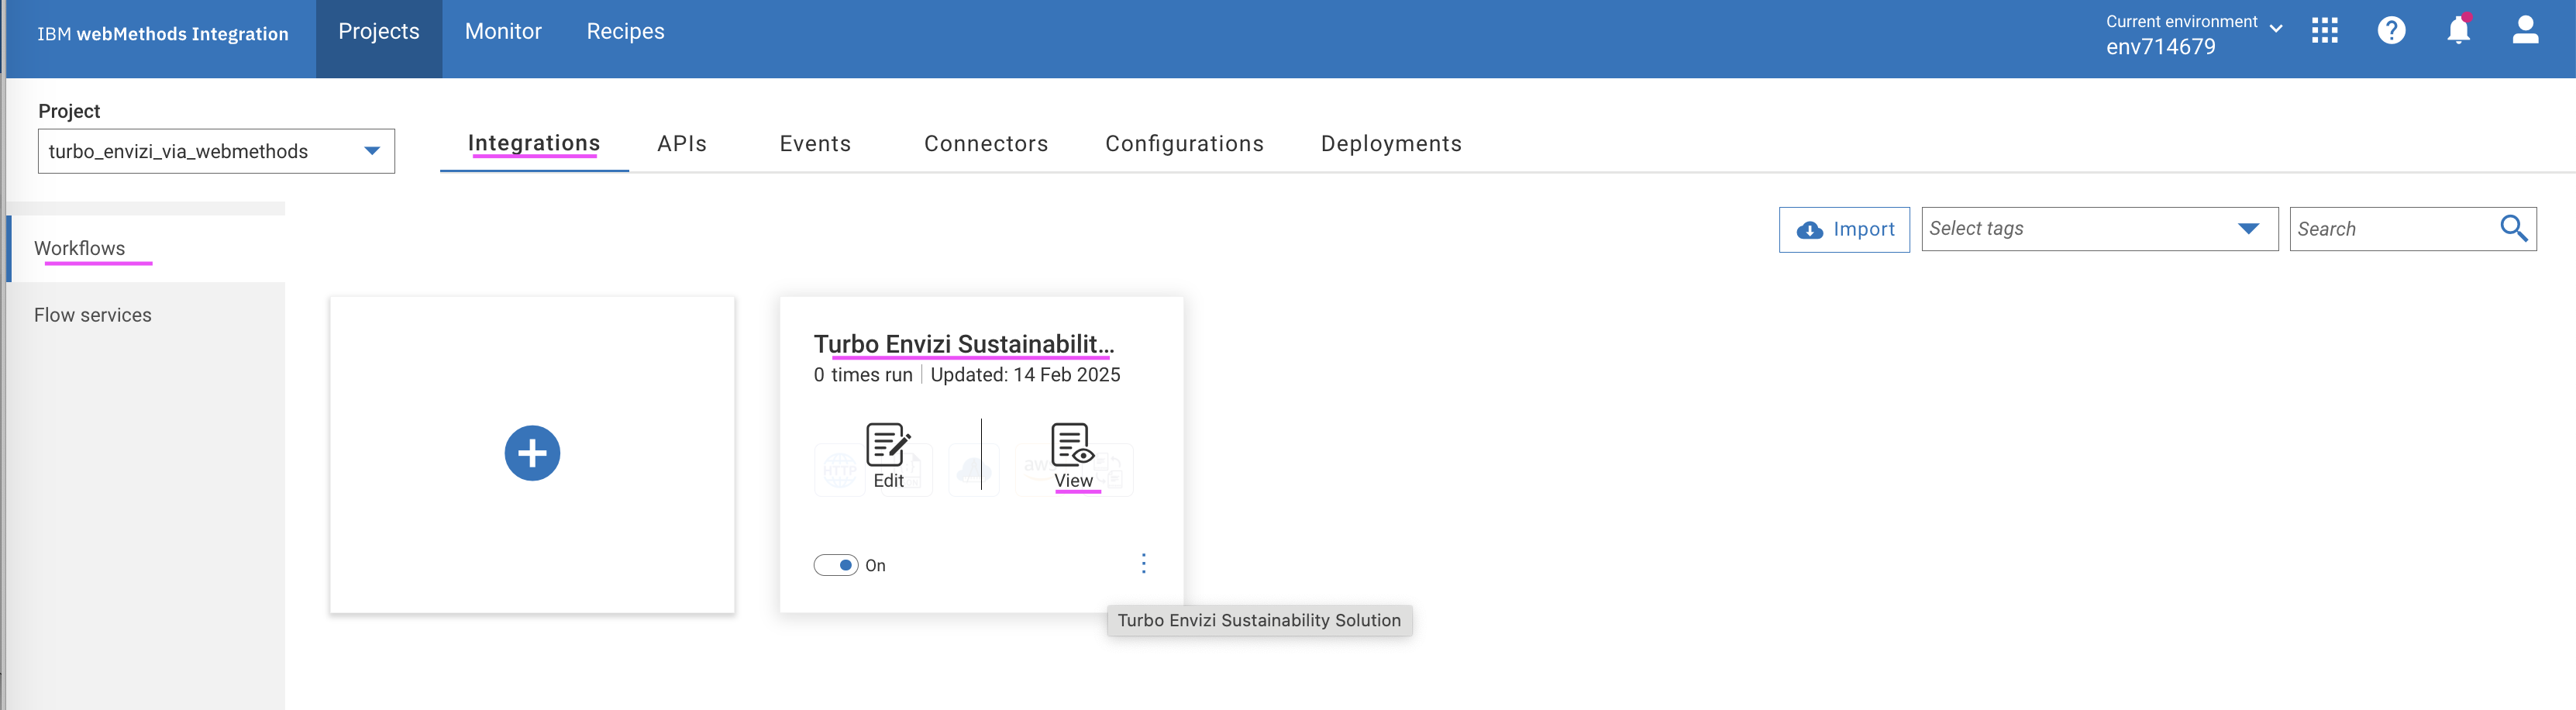
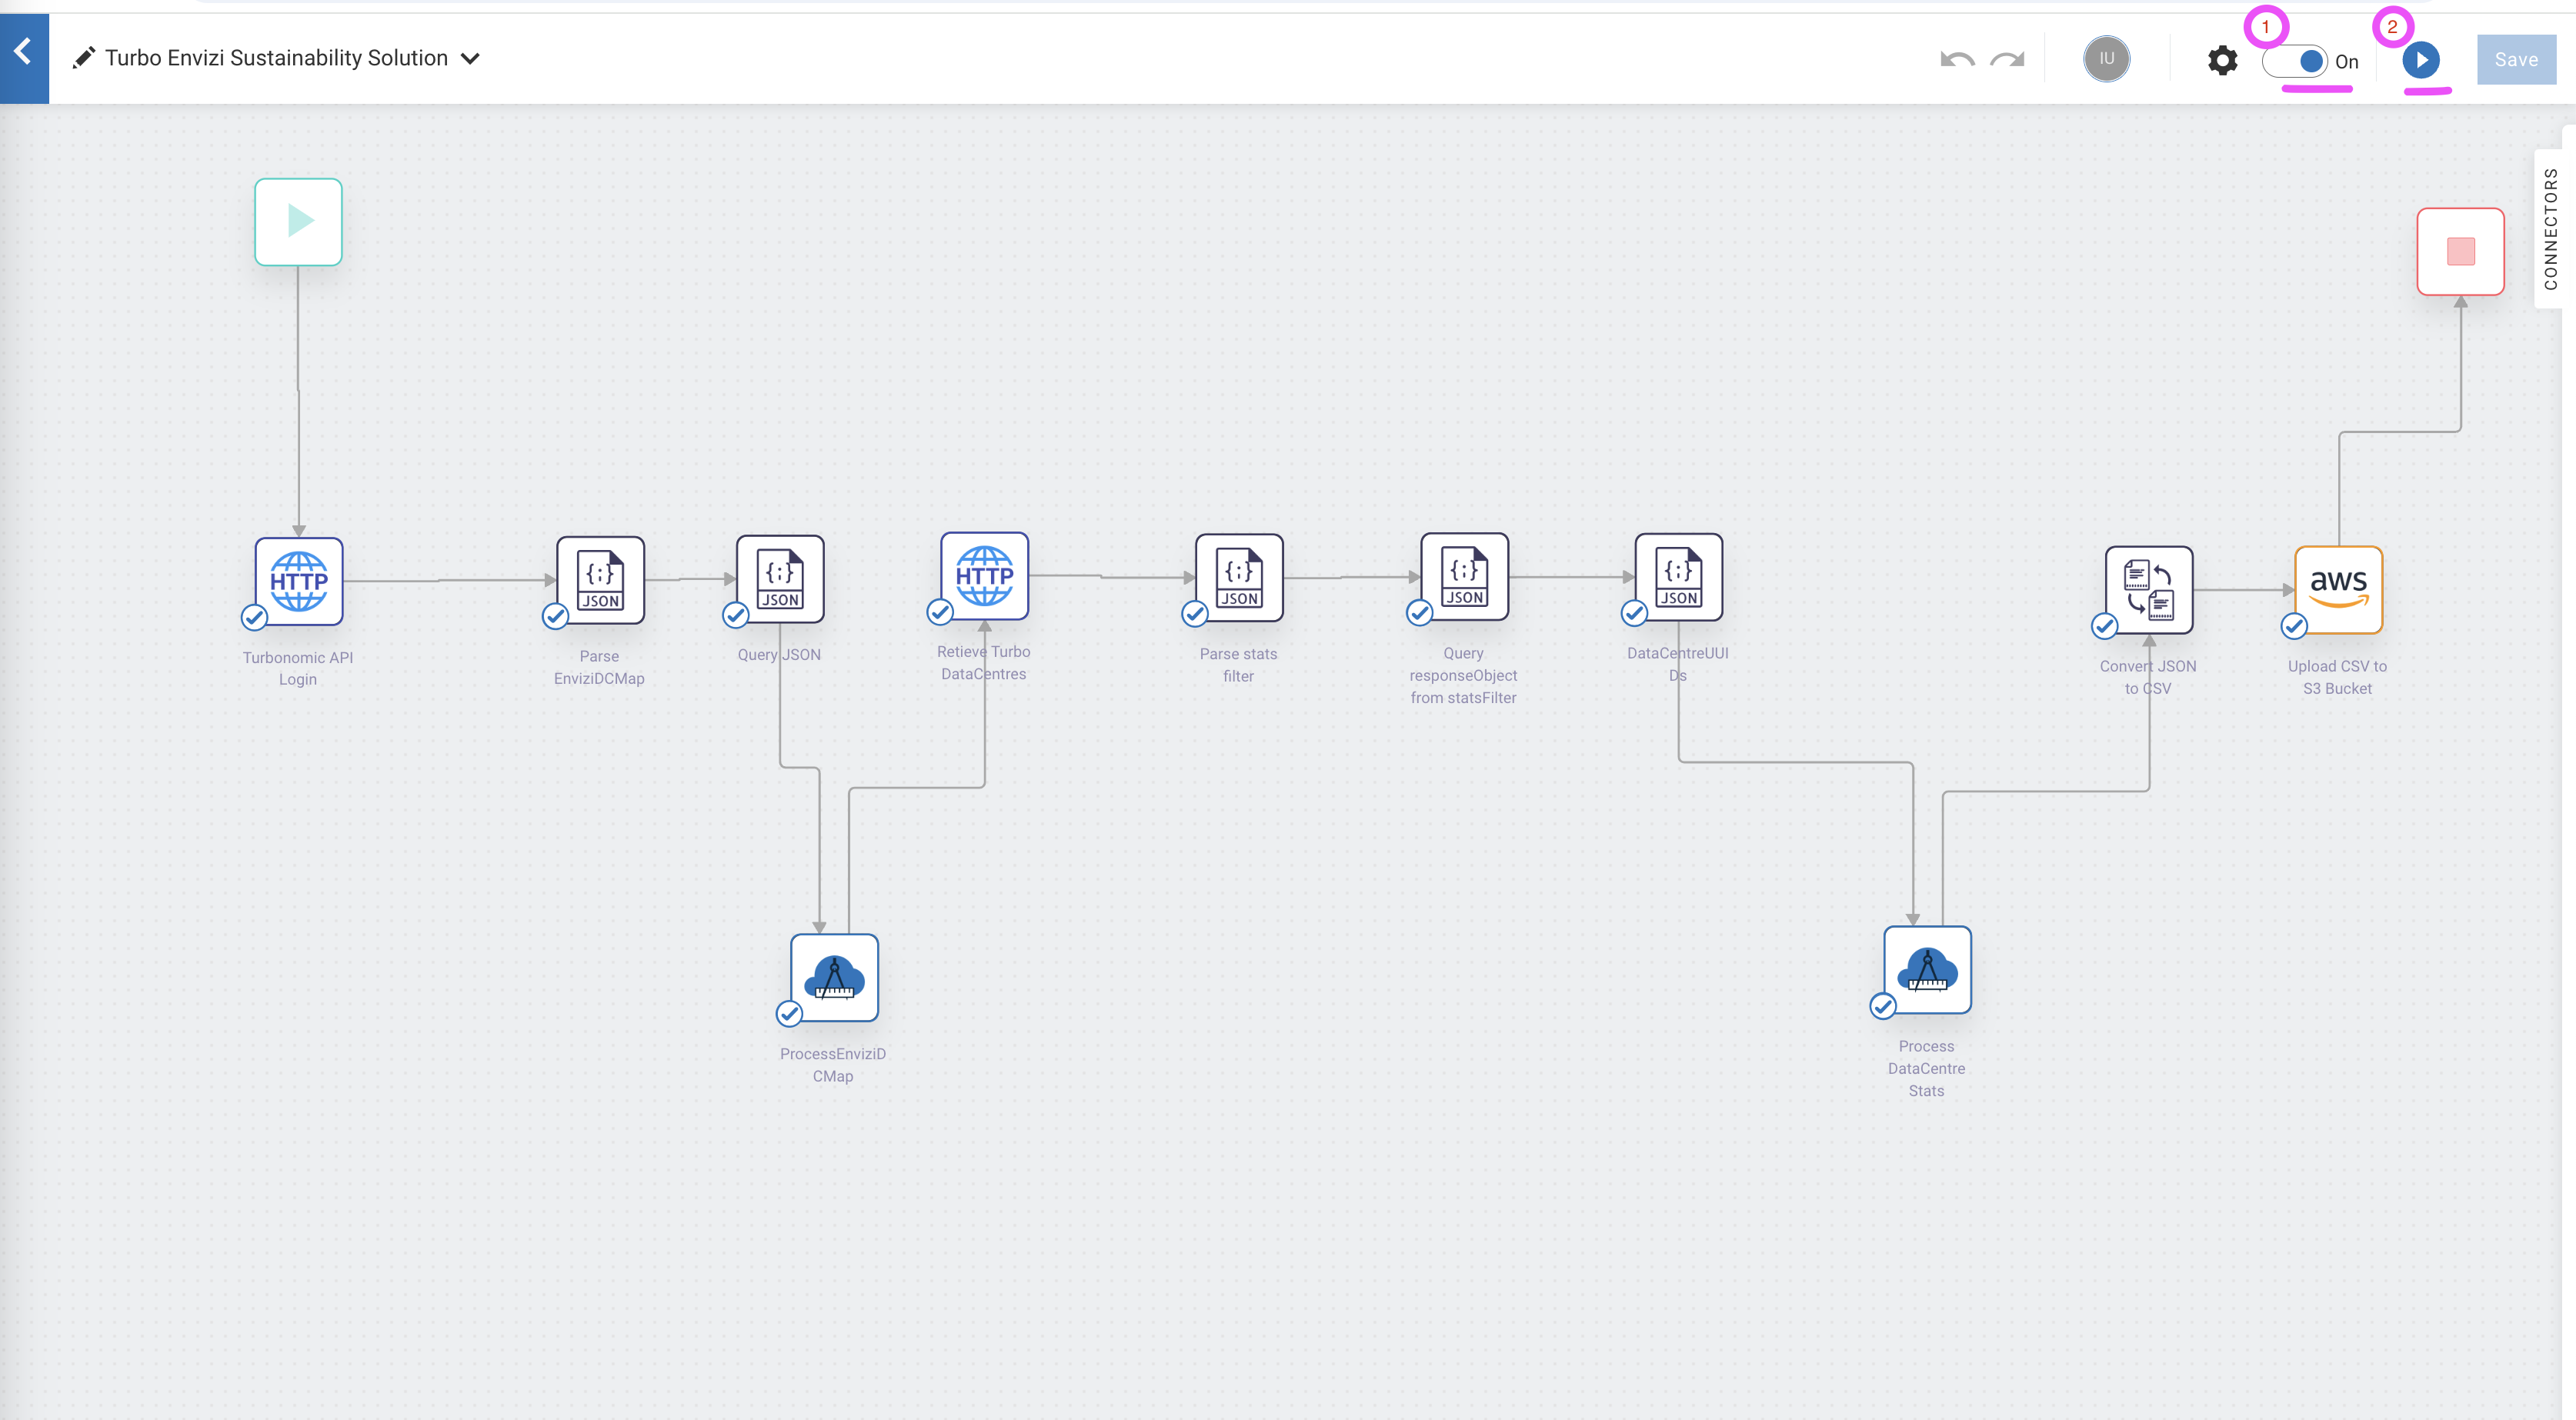
The workflow page is displayed.
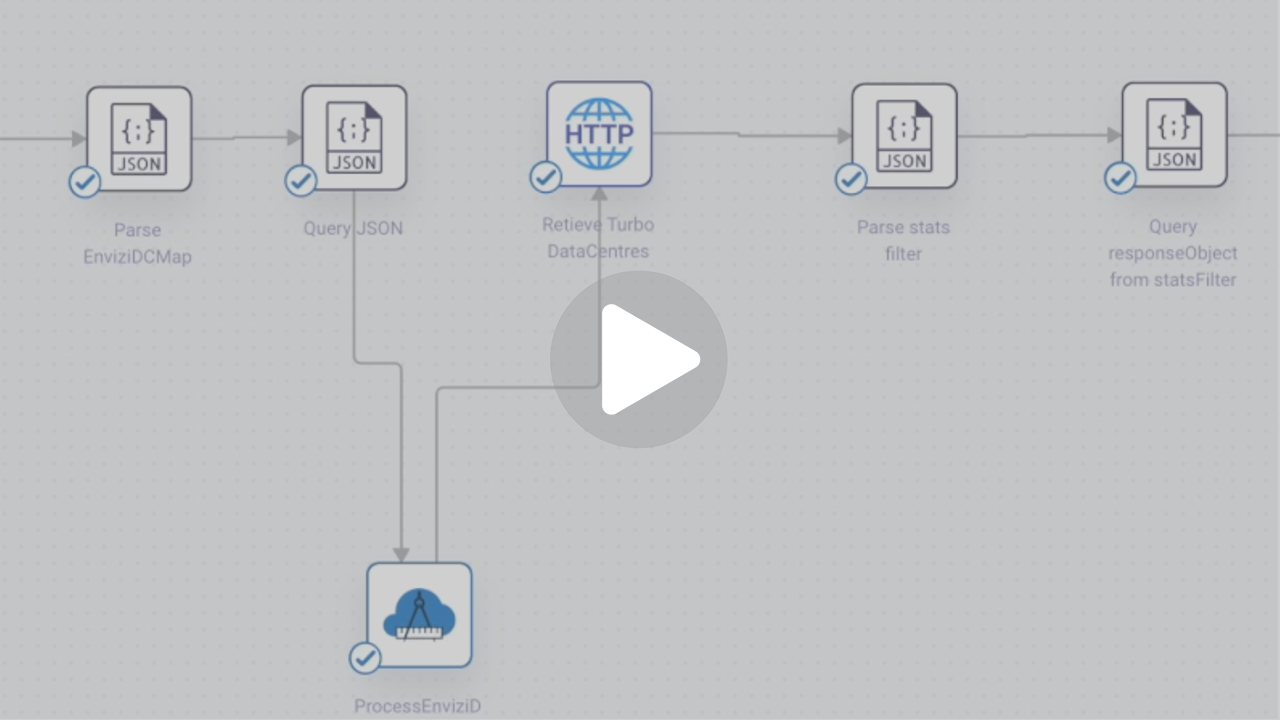
The details about the various nodes follow:
- Turbonomic API Login : This HTTP node makes an authentication request to the turbonomic instance by using login API and returns an authentication cookie as part of response header. The subsequent turbonomic APIs uses this cookie as part of their request header by setting
set-cookieto authenticate and fetch relavant details. - ParseEnviziDCMap : This node parses the input JSON parameter
EnviziDCMapas a JSON object. - Query JSON : Queries specific item from the JSON object.
- ProcessEnviziDCMap : A flow service
ProcessEnviziDCMapthat parses the JSON objectEnviziDCMap, retrieves the data center names and returns the same in string format of "DC1|DC2". - Retrieve Turbo DataCentres : A HTTP node that invokes turbonomic API, which returns a list of data centers with their
uuids. - DataCentreUUIDs : A query JSON node that retrieves the responseObject JSON data containing the
uuidsfromRetieve Turbo DataCentres. - Parse statsFilter : A JSON Parse node that formats input parameter
statsFilteras raw JSON data. - Query responseObject from statsFilter : A query JSON node that retrieve JSON data from
Parse statsFilternode. - Process DataCentre Stats : A flow-service that invokes the Turbonomic API to retrieve the electricity consumption and perform the data transformations to return the data in the format as needed by Envizi.
- Convert JSON to CSV : A
JSON to CSVnode that converts JSON data returned by the flow-service into a CSV file. Upload CSV to S3 Bucket : An AWS S3 node that uploads the CSV file returned by the
Convert JSON to CSVnode into Envizi S3 bucket, which will be further processed by Envizi.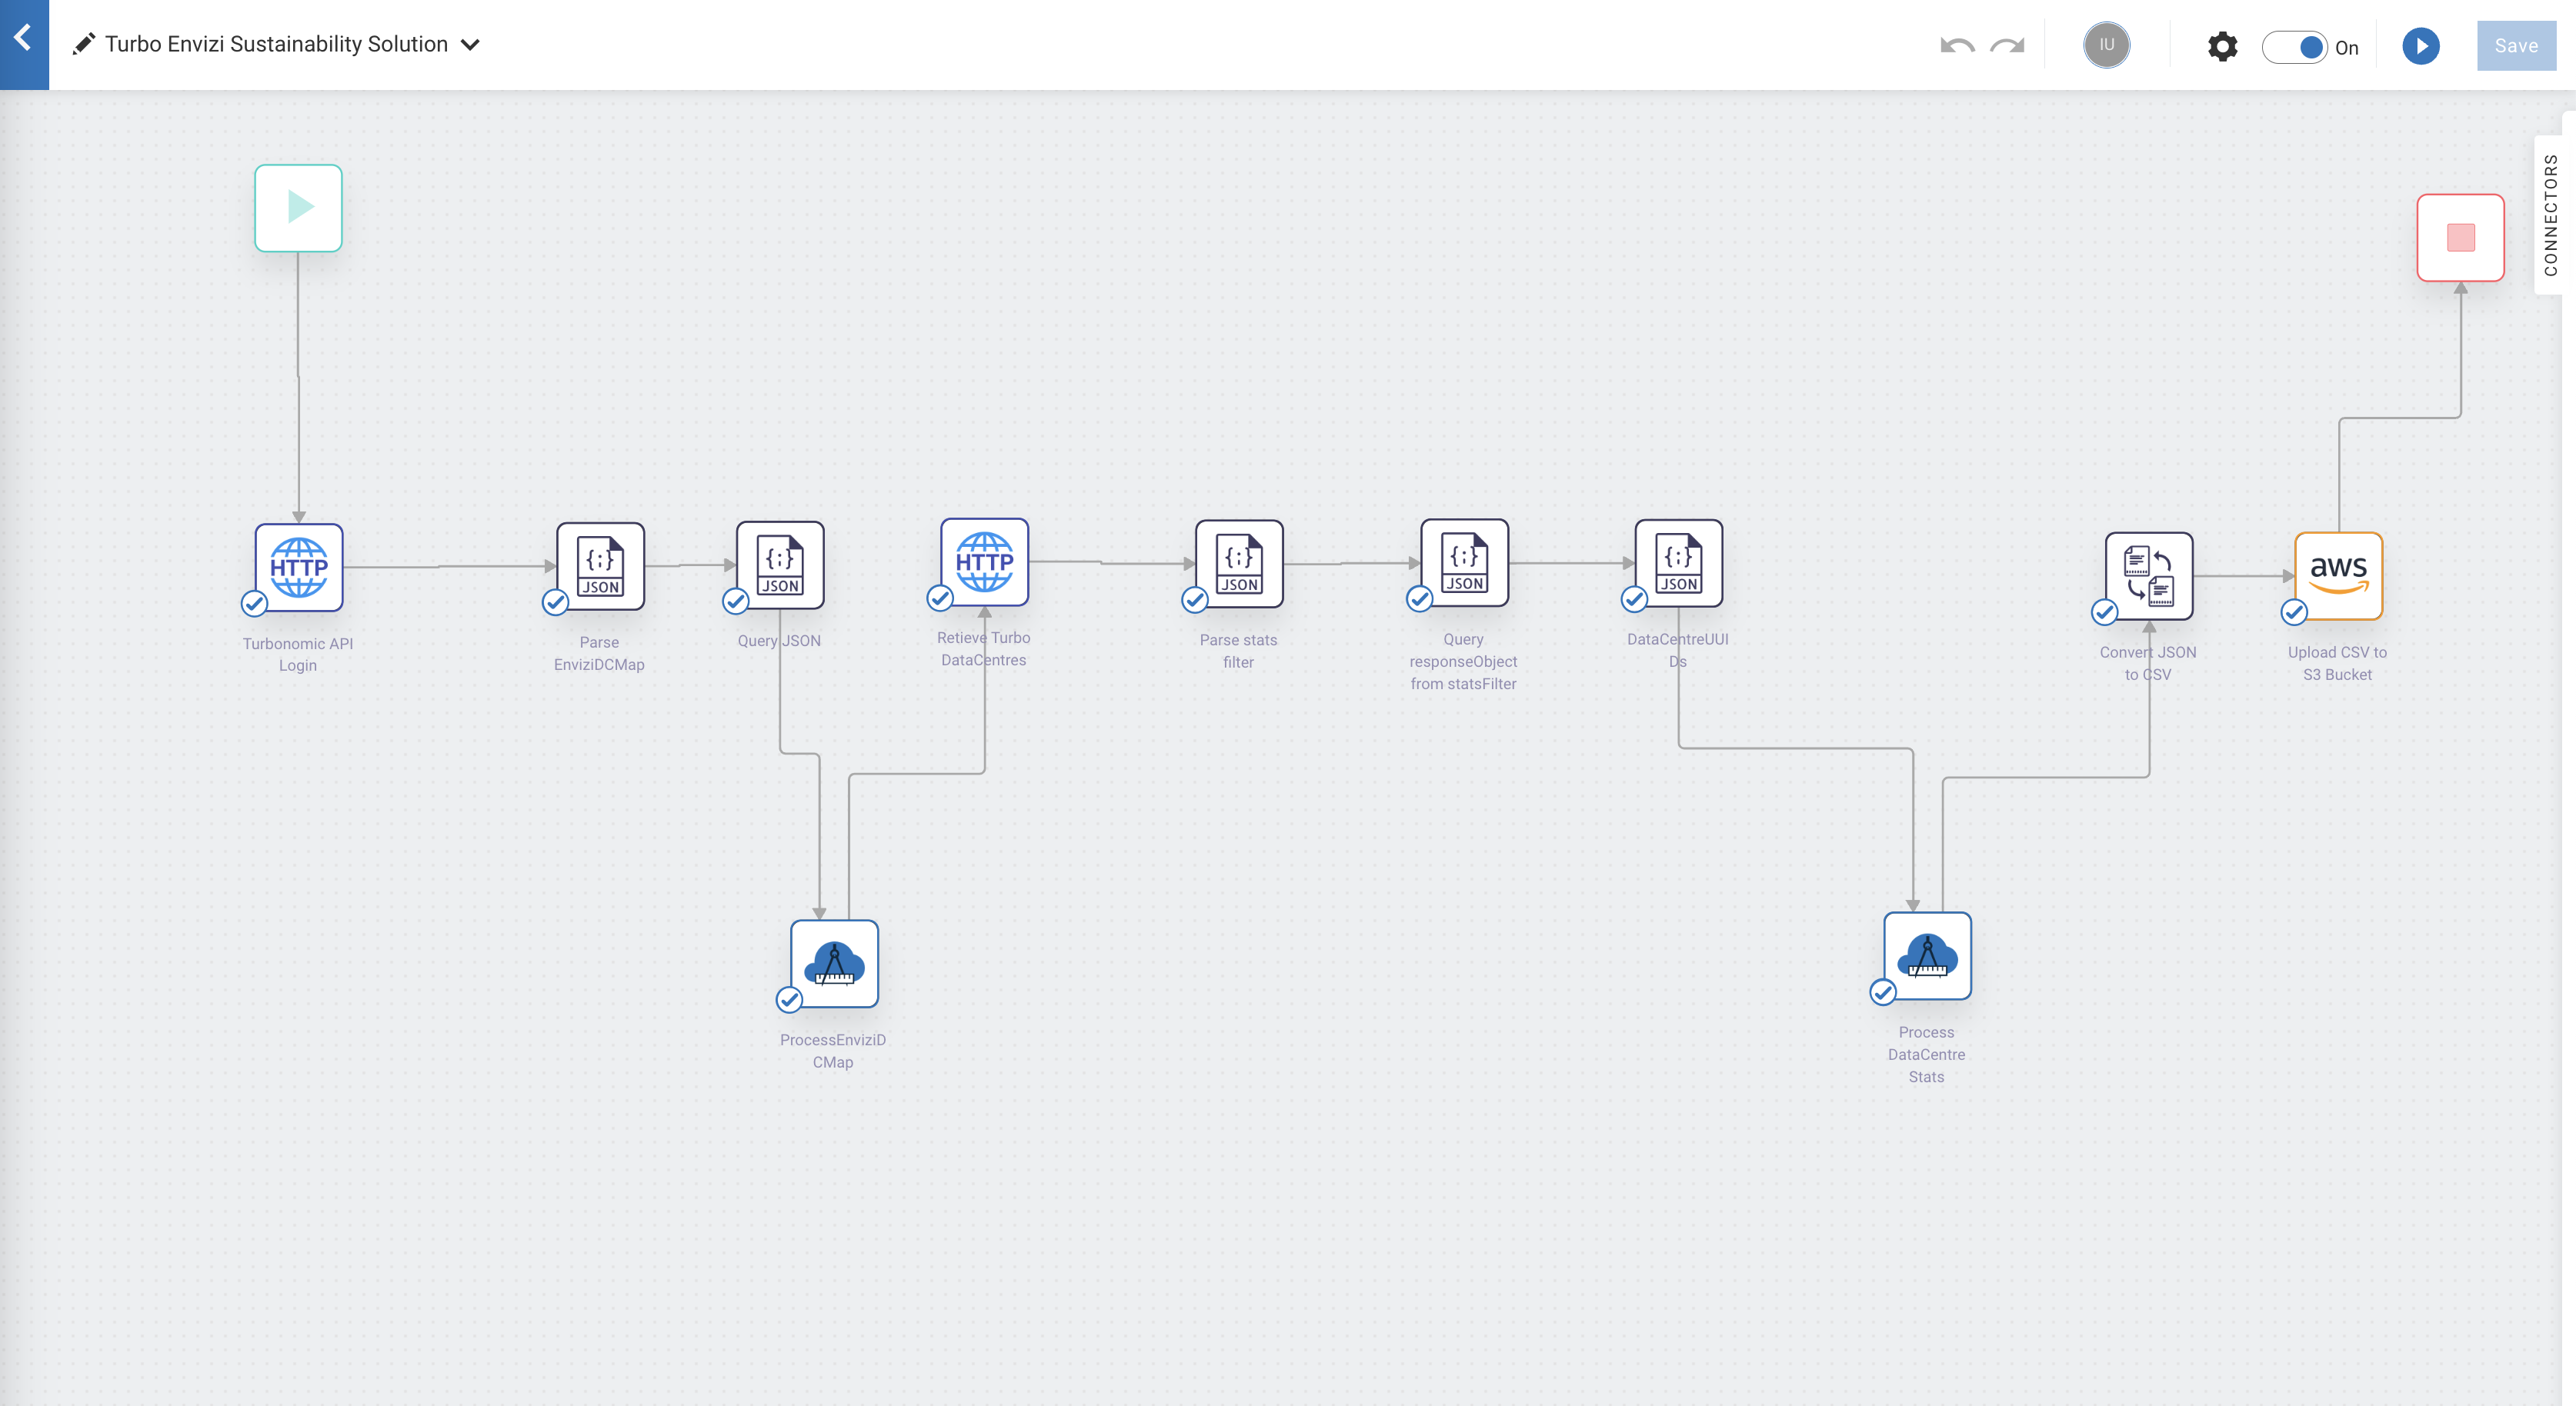
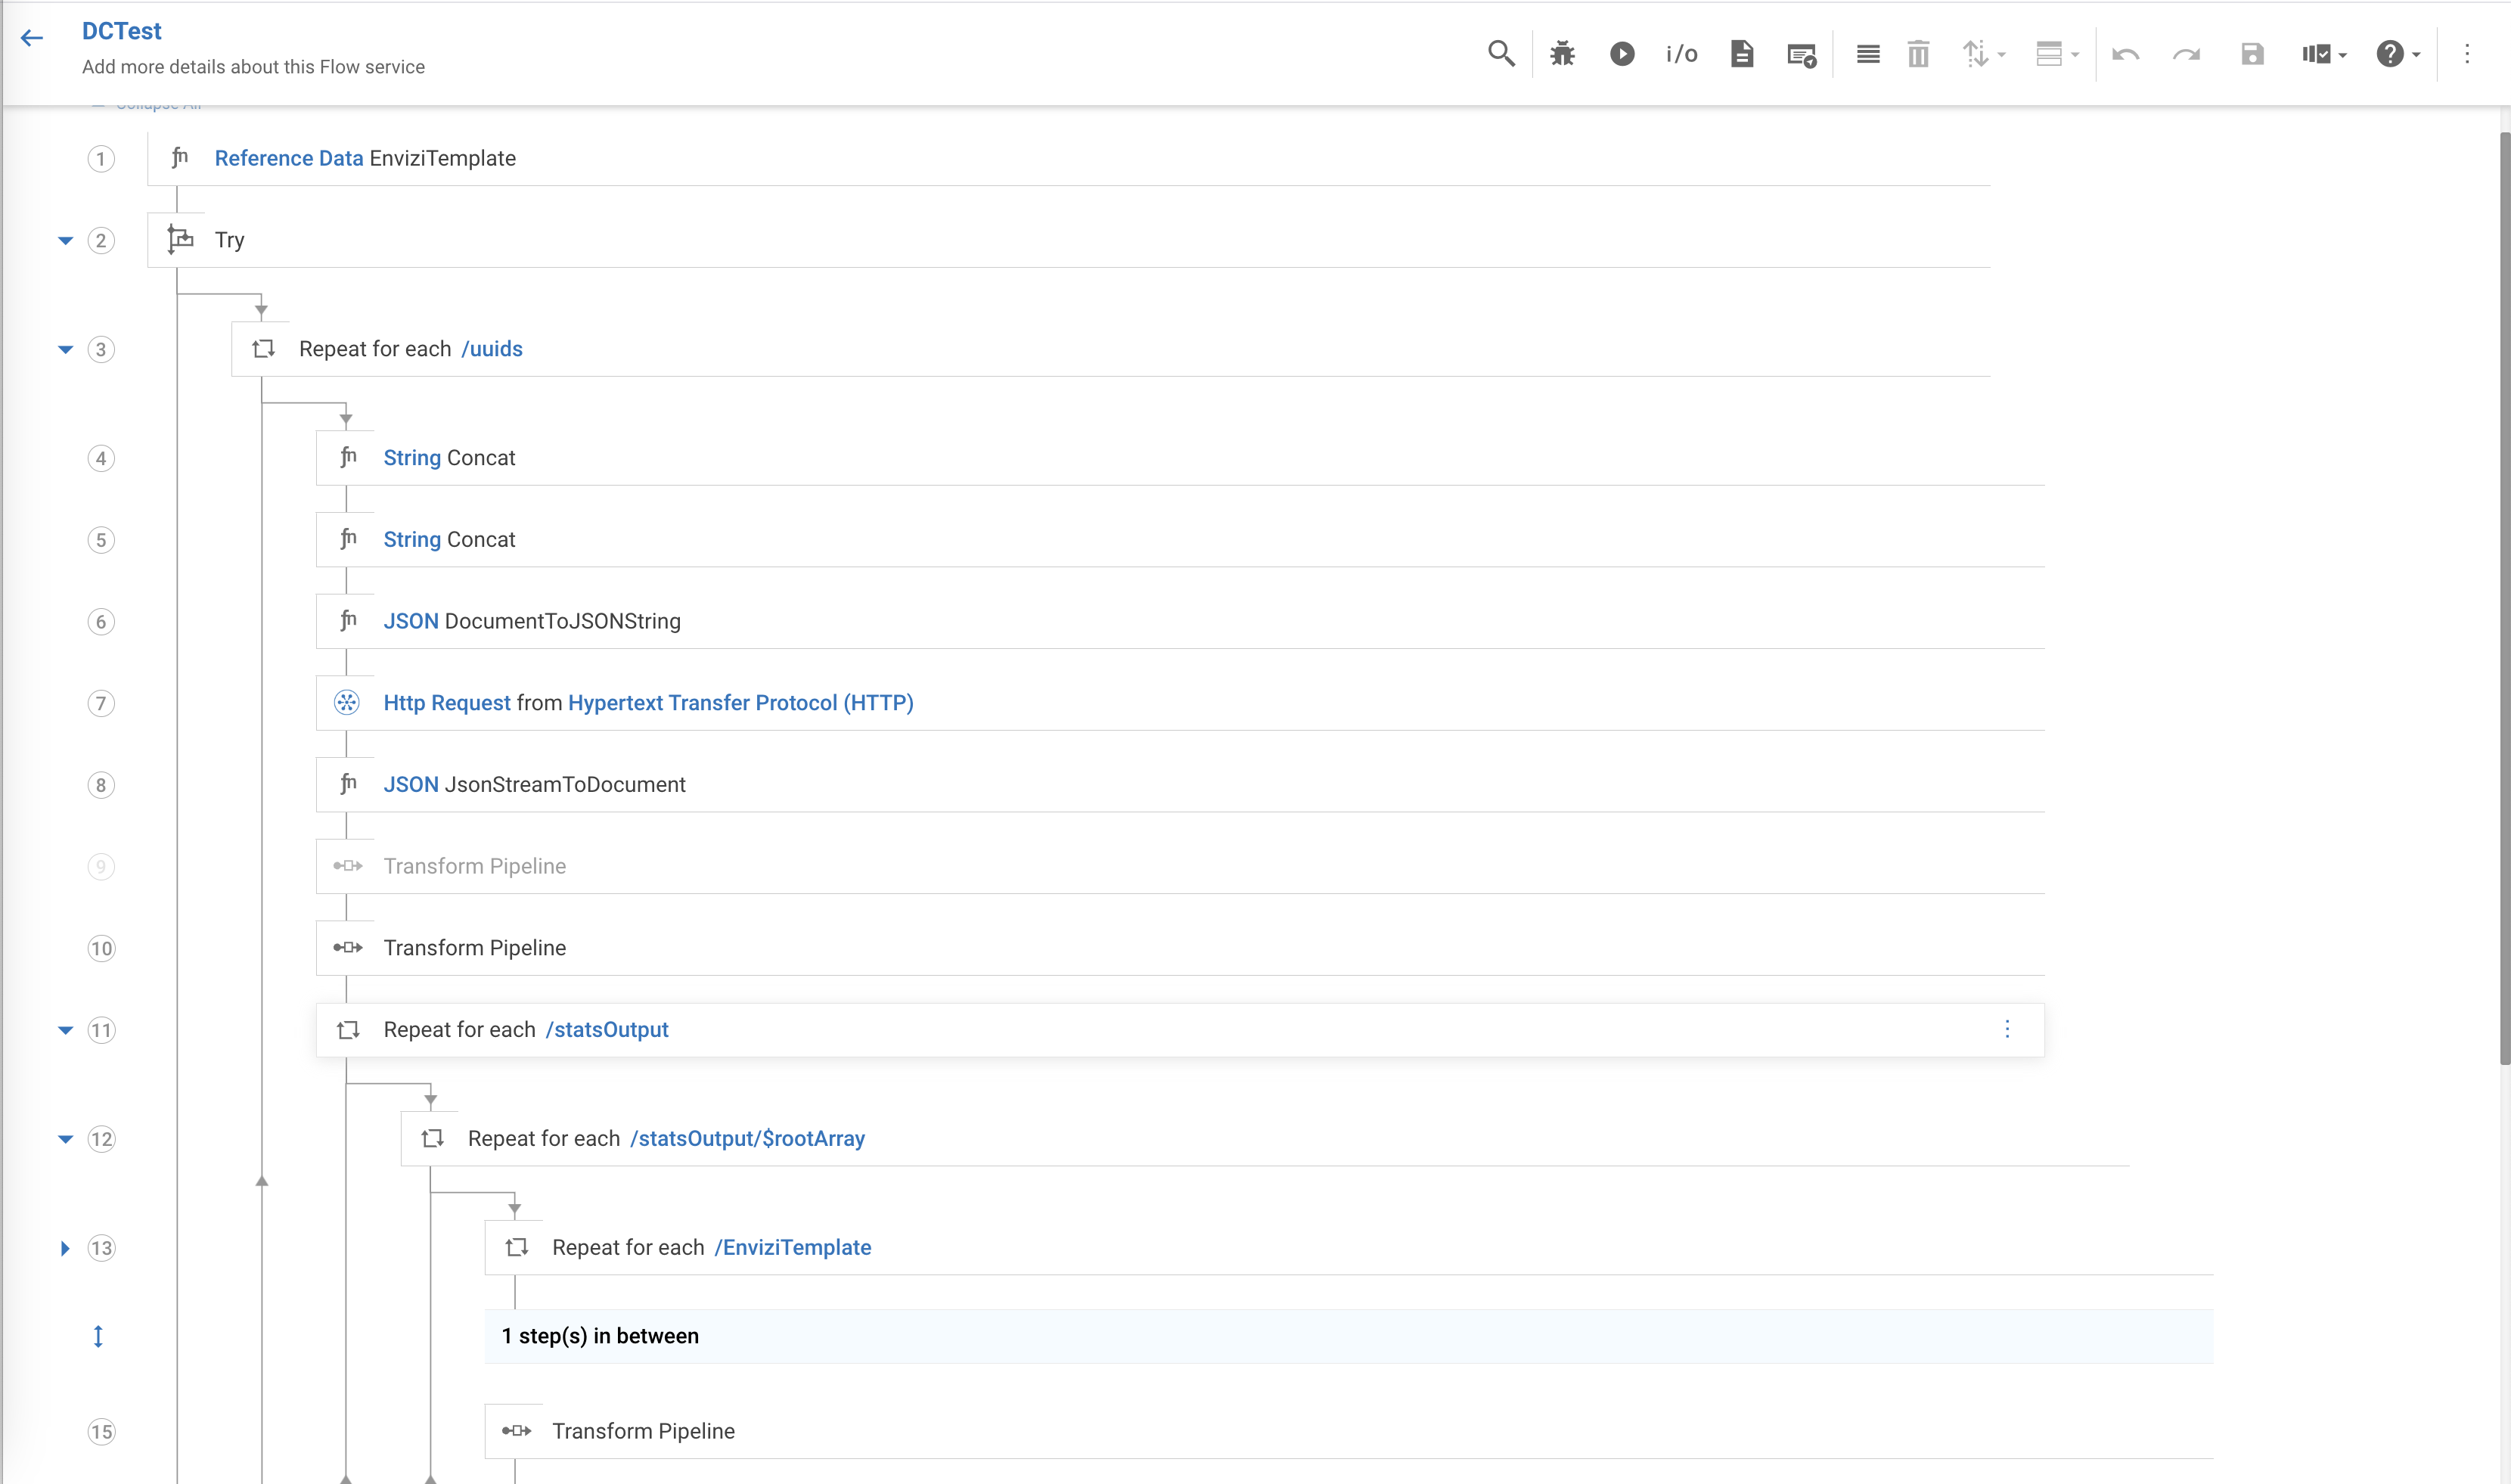
Now, lets view the imported flow-services.
- Turbonomic API Login : This HTTP node makes an authentication request to the turbonomic instance by using login API and returns an authentication cookie as part of response header. The subsequent turbonomic APIs uses this cookie as part of their request header by setting
Click
Integrations -> Flow Services -> DCTest.You can expand and explore the flow-service transformations implemented.
Execute the workflow
Click
Editin theIntegrations -> Workflows -> Turbo Envizi Sustainability Solution.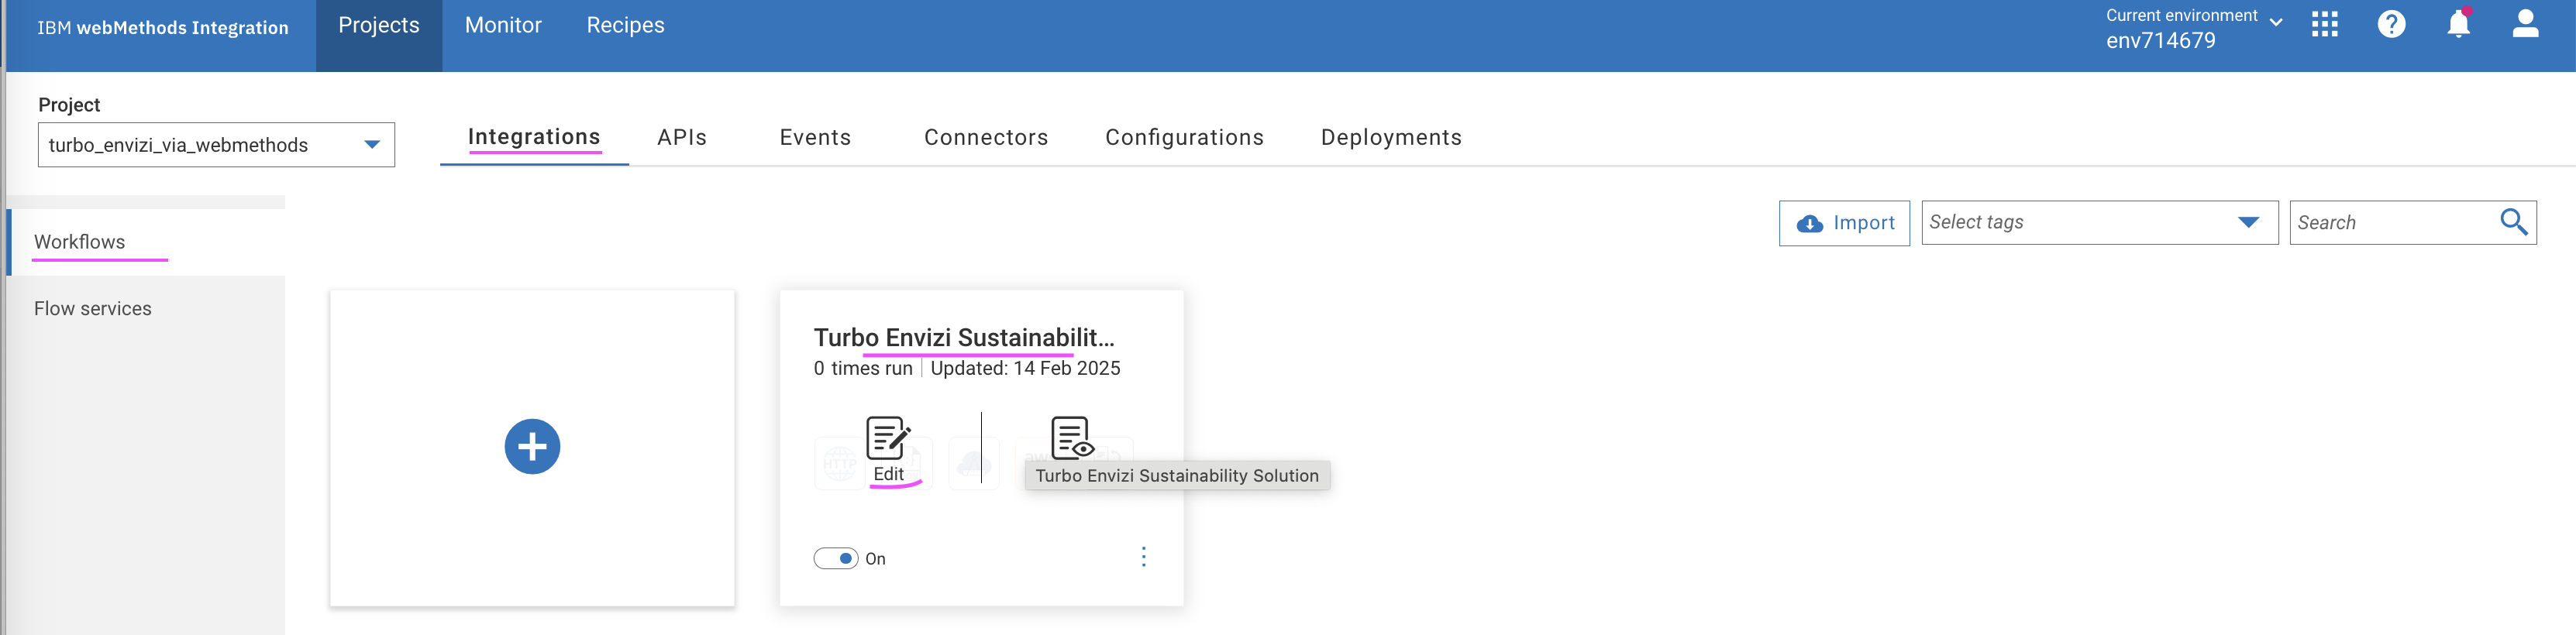
Click
ON(1) to activate the workflow.Click on Run button (2) to start the workflow.
Check the execution logs for the output generated after the flow is executed successfully.
This particular flow here is executed to fetch the electricity data from data centers
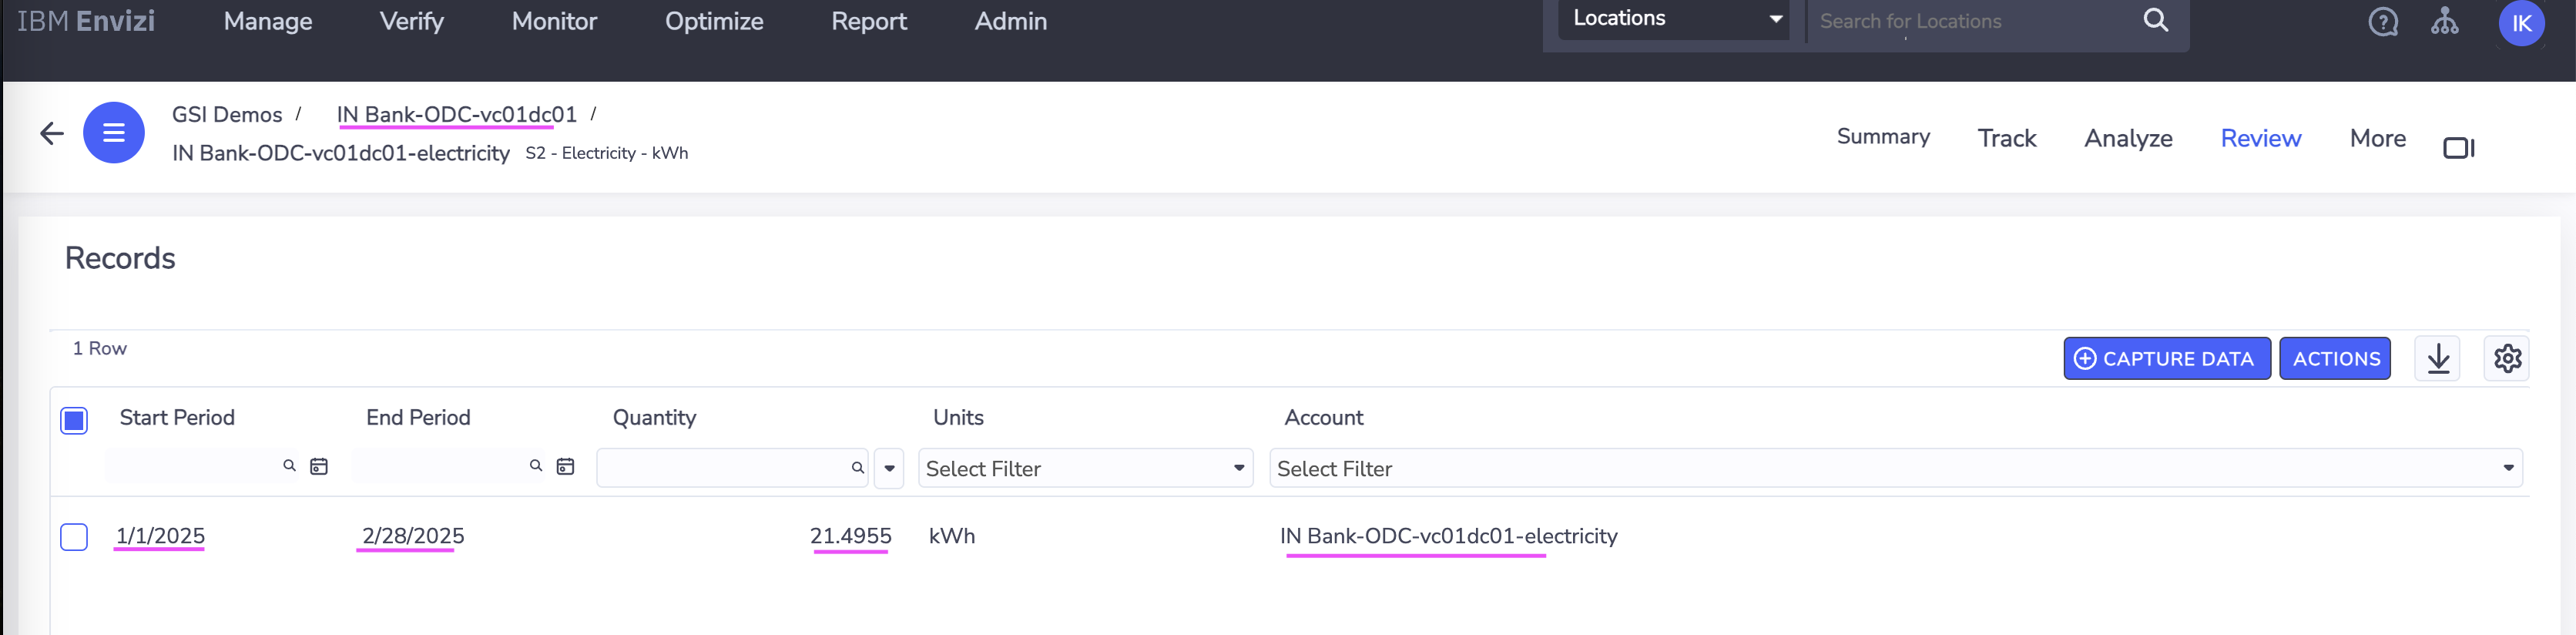
IBMCloud & vc01dc01data centers which are configured in as locationsIN Bank-ODC-IBMCloud,IN Bank-ODC-vc01dc01respectively between the time periodstart date: 2025-01-01,end date : 2025-02-28View the corresponding records in the csv format from the logs in the below screenshot
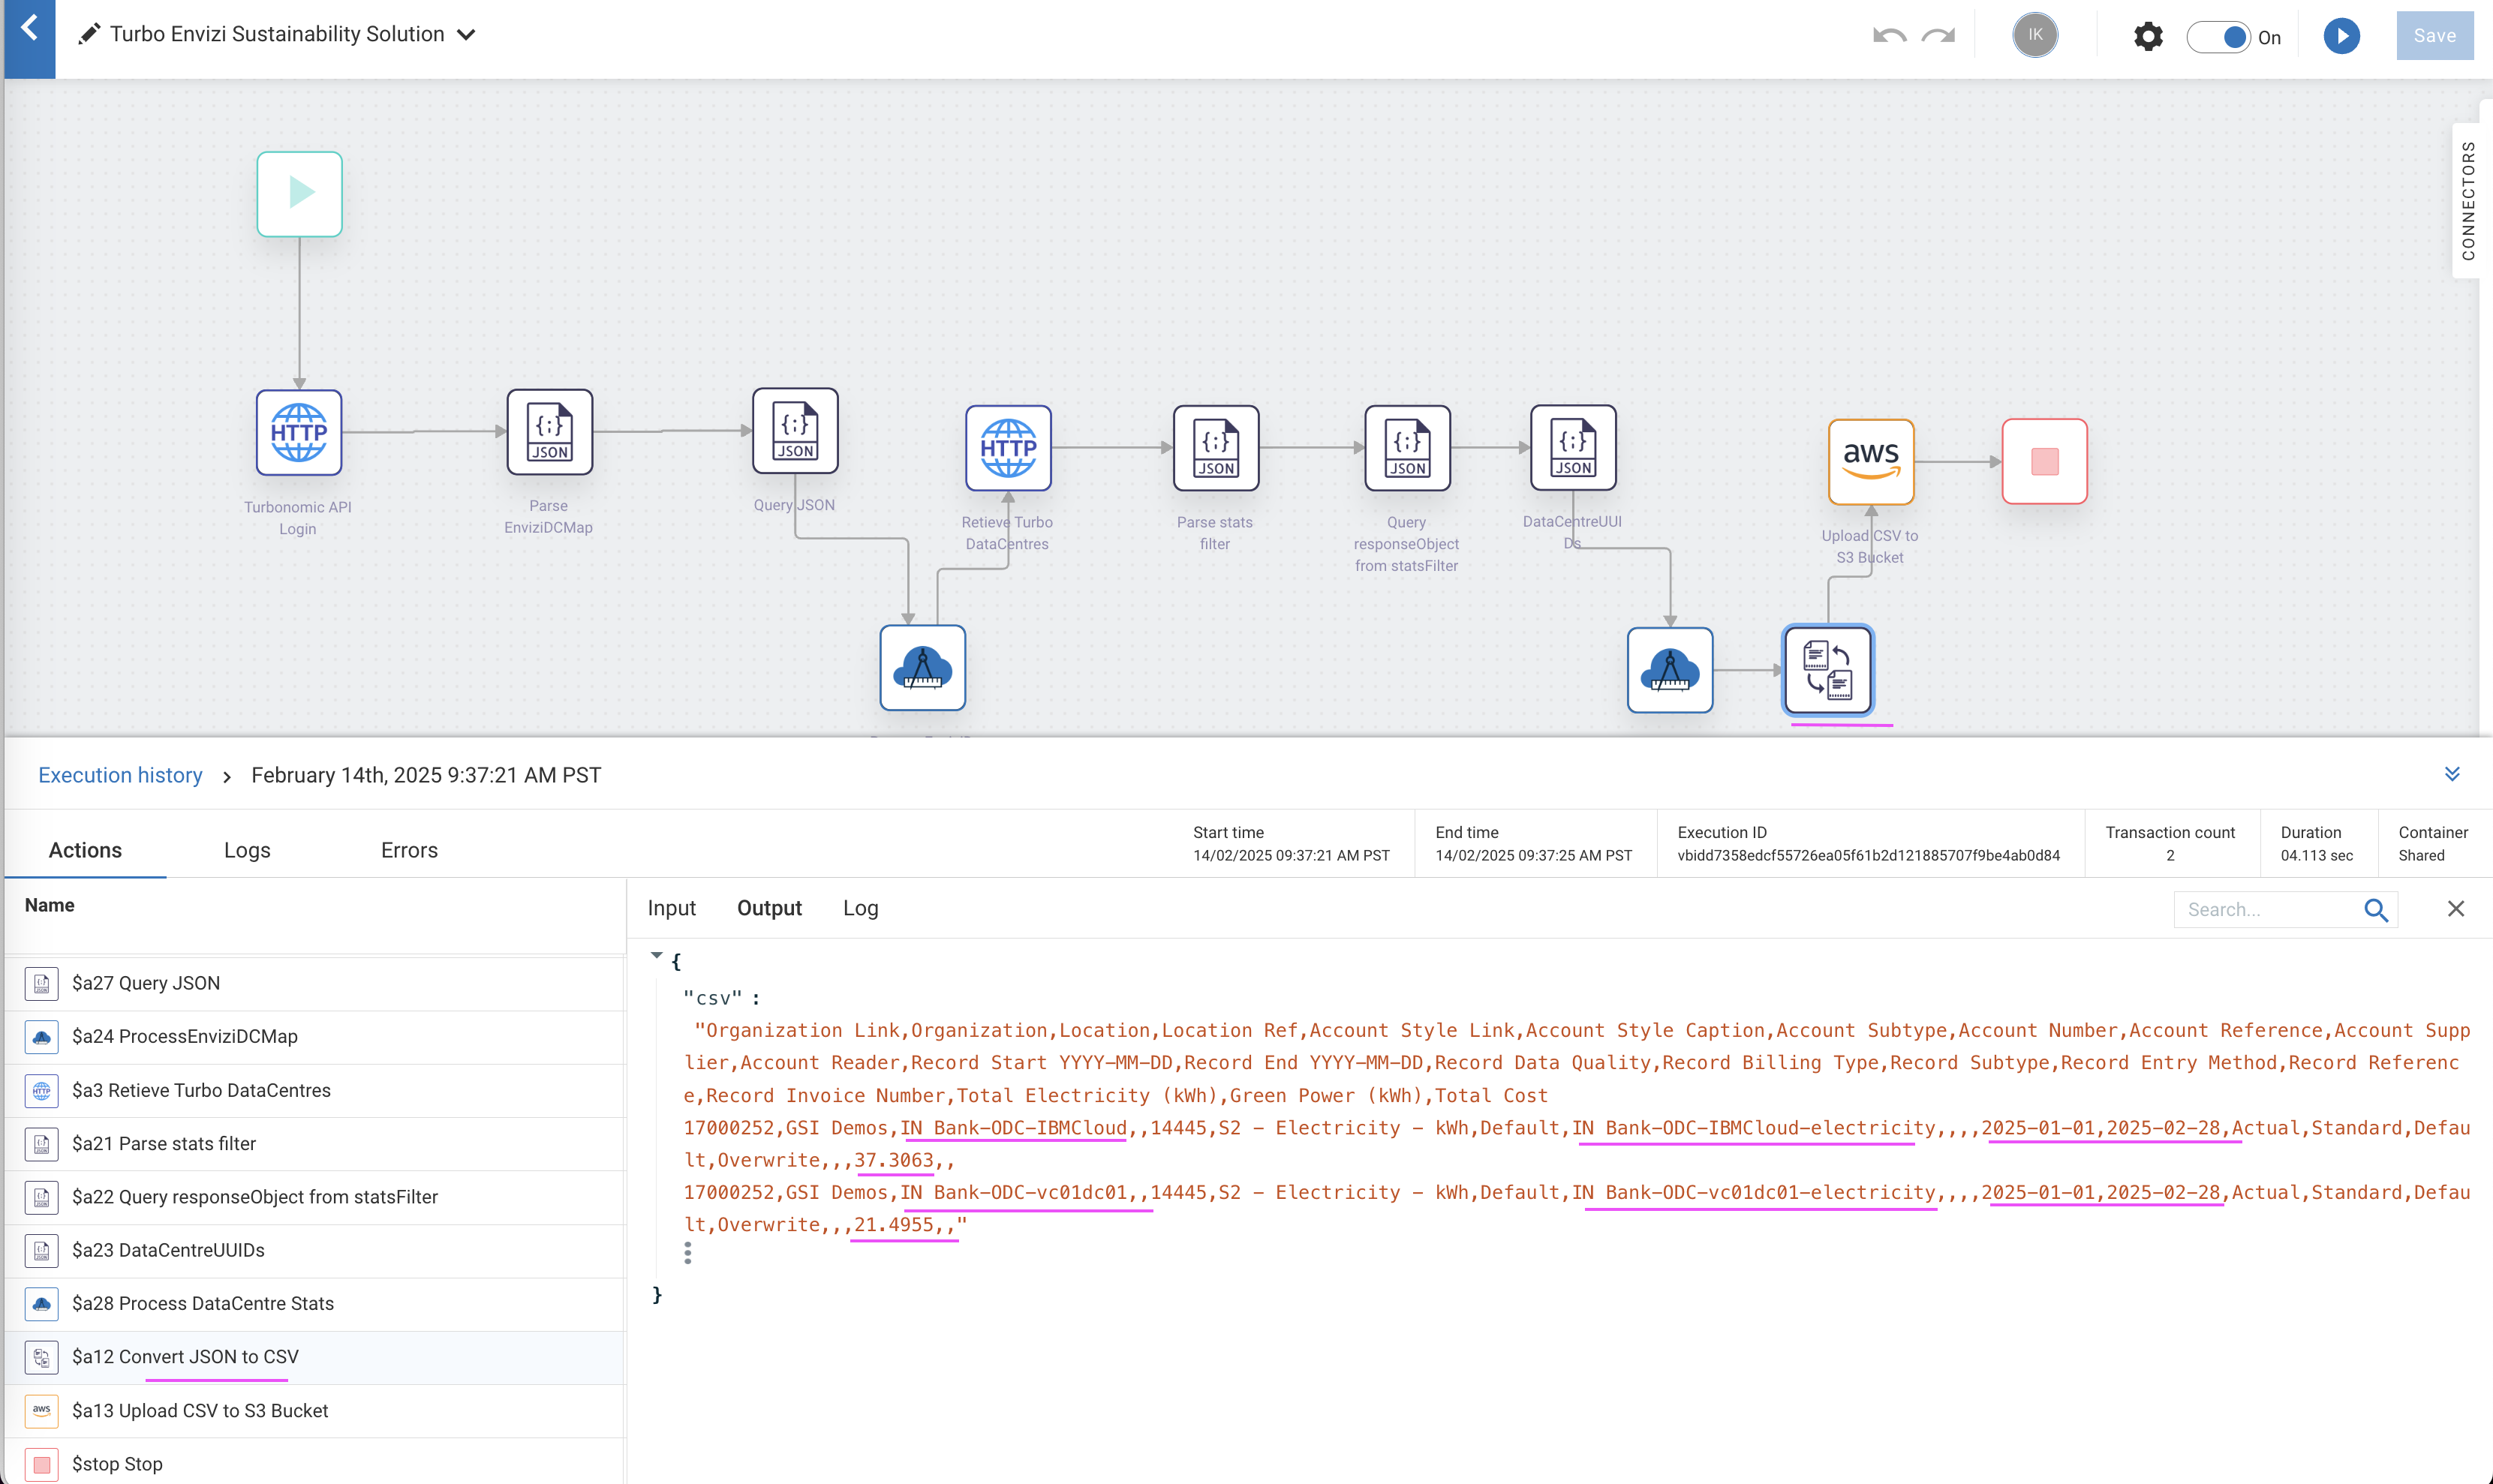
In the next step, verify whether the same output results reached Envizi and loaded into the system.
Check the result in Envizi
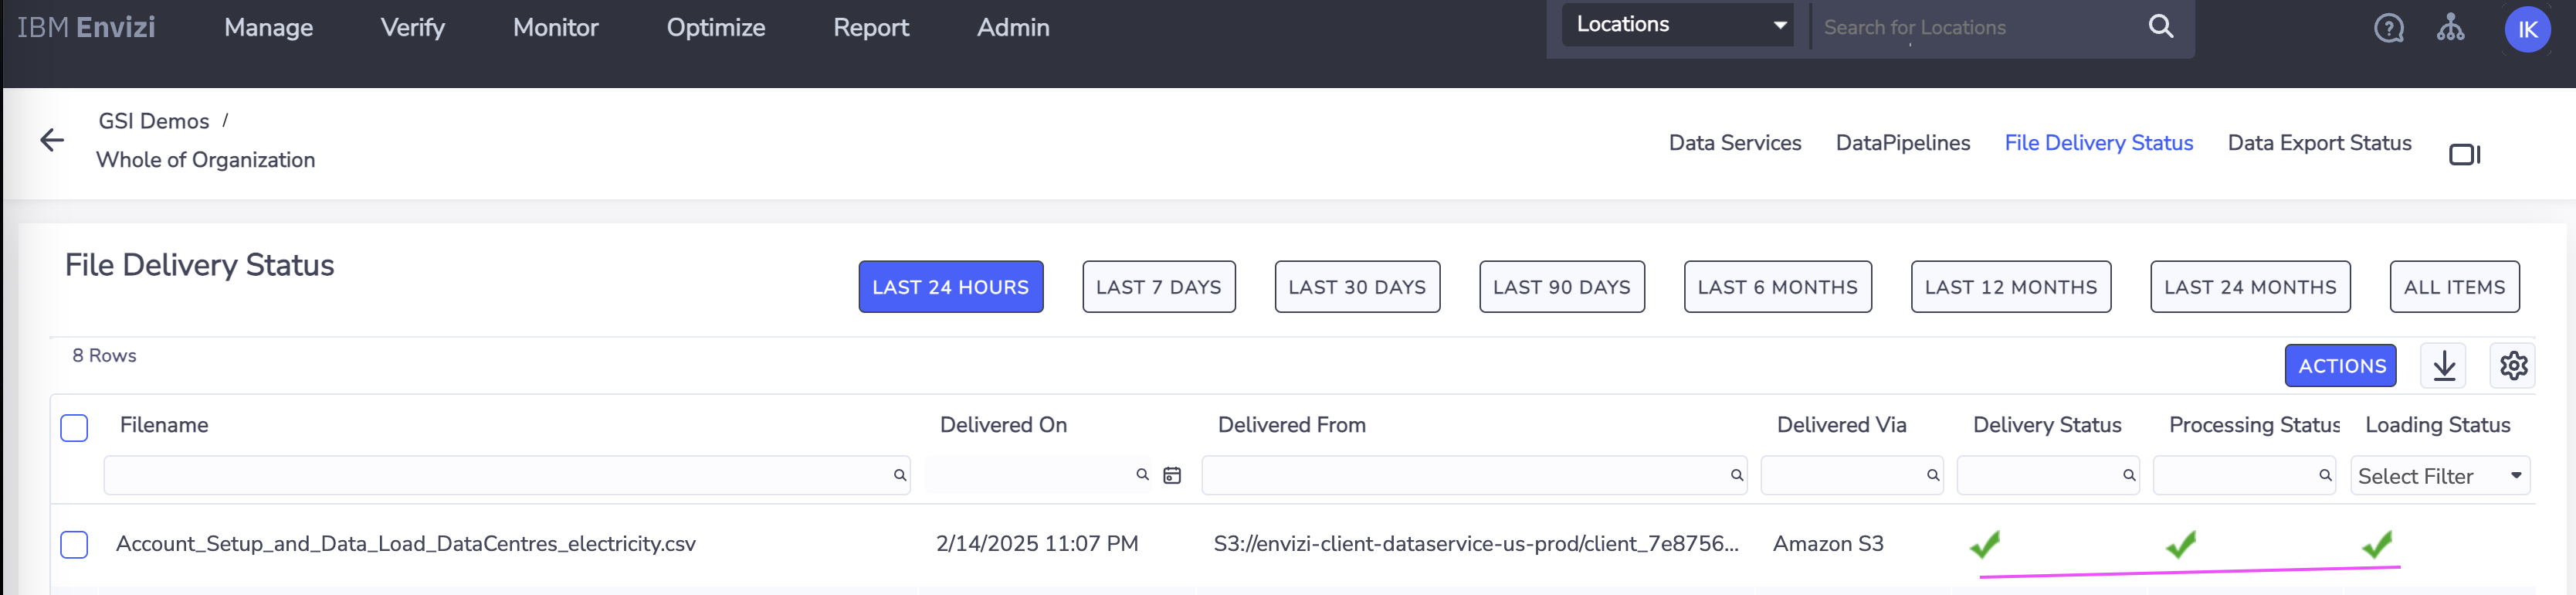
Check the webMethod output CSV file in Envizi AWS S3 data service
The webMethod integration workflow fetches the data from Turbonomic, transforms it into Envizi specific format and pushes the .csv file into Envizi's AWS S3 data service folder.
You can view the status of the file in Envizi -> Admin -> Data Flow Automation -> File Delivery Status.
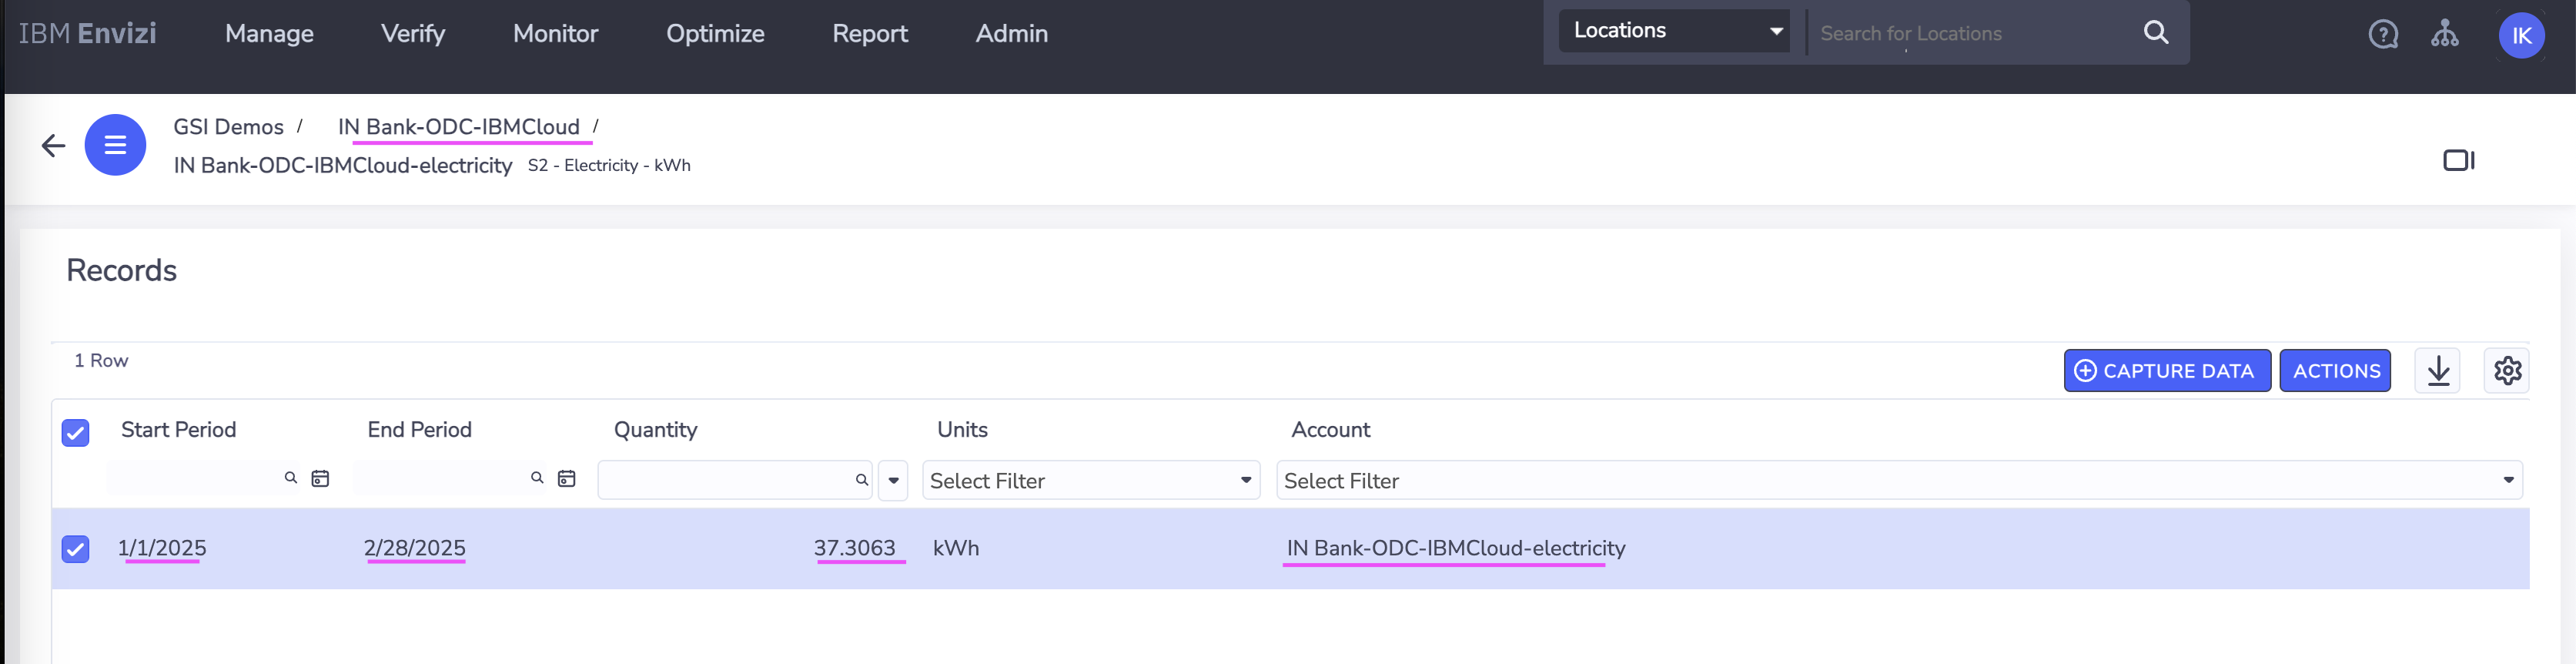
Check the data loaded into respective electricity accounts of Envizi locations (datacenters)
Sample data from Envizi's AWS S3 data service folder
The sample data received in Envizi AWS S3 data service from Turbonomic is available at samples GitHub repository.
(Optional) Schedule workflow execution
If you want to periodically retrieve the energy/electricity consumptions, you can schedule the workflow by following the steps in this section. You might need to tweak the workflow to align the start and end period parameters with the specified schedule.
Mouse over the
Triggernode in the workflow.Click on
Settings
Select the
ClockoptionClick
Next.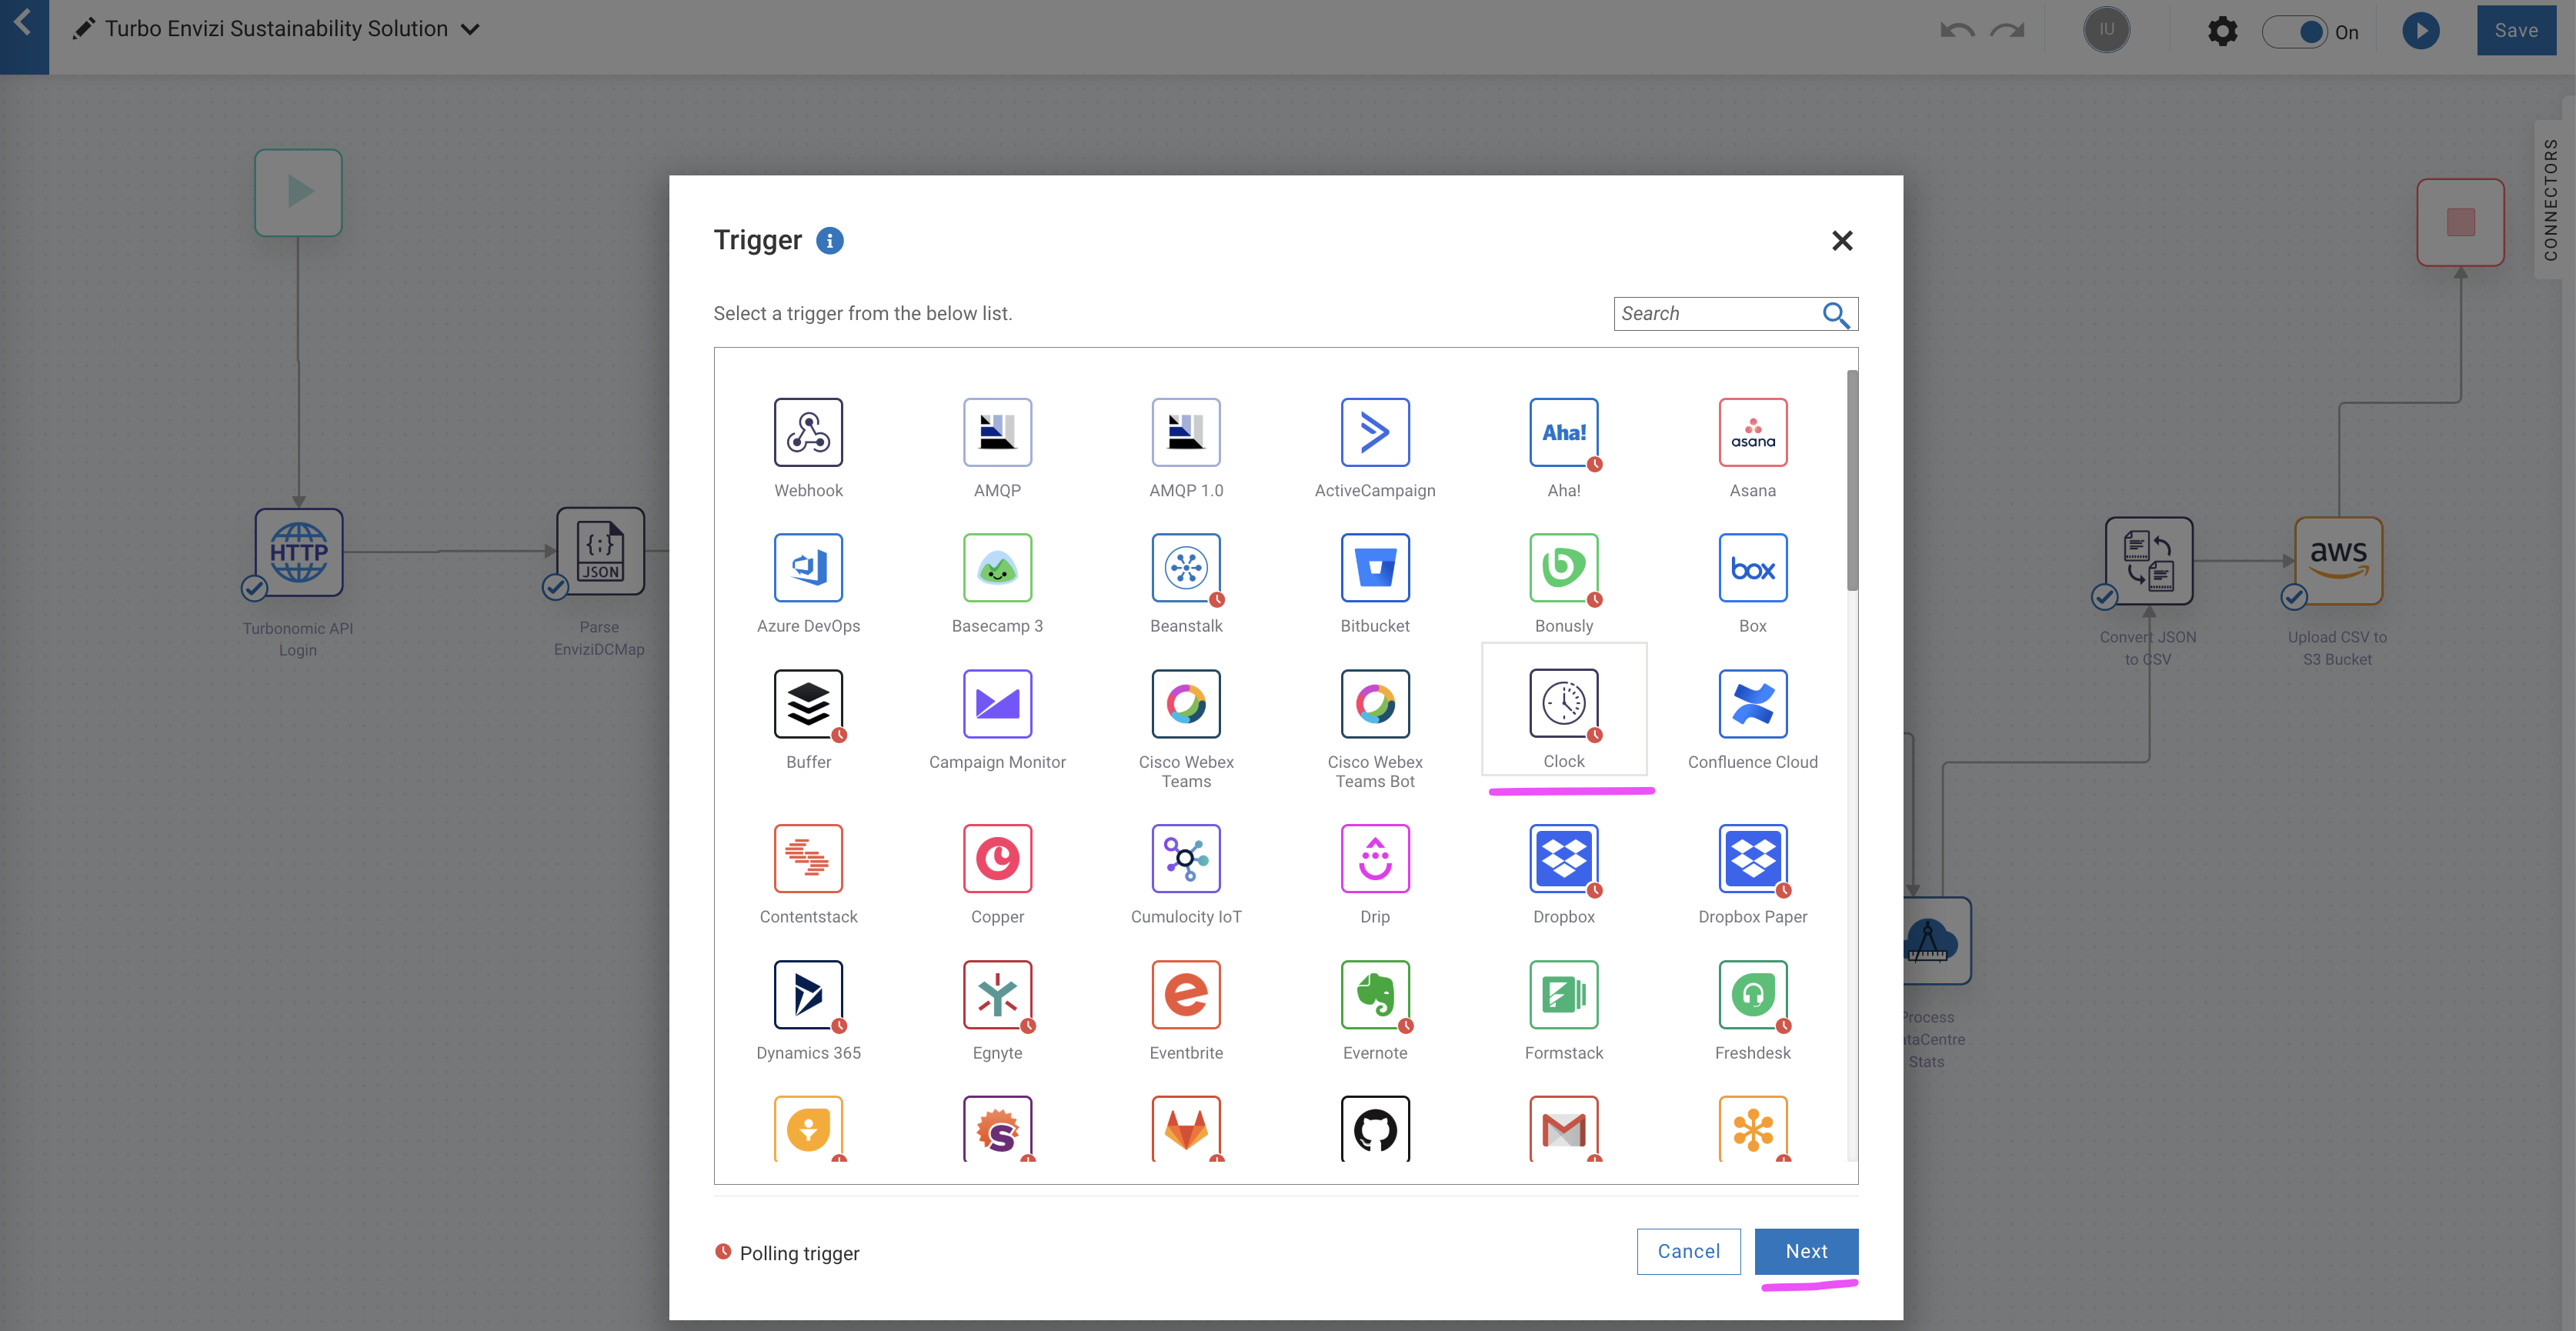
Change the schedule as per your requirements.
Click
Done.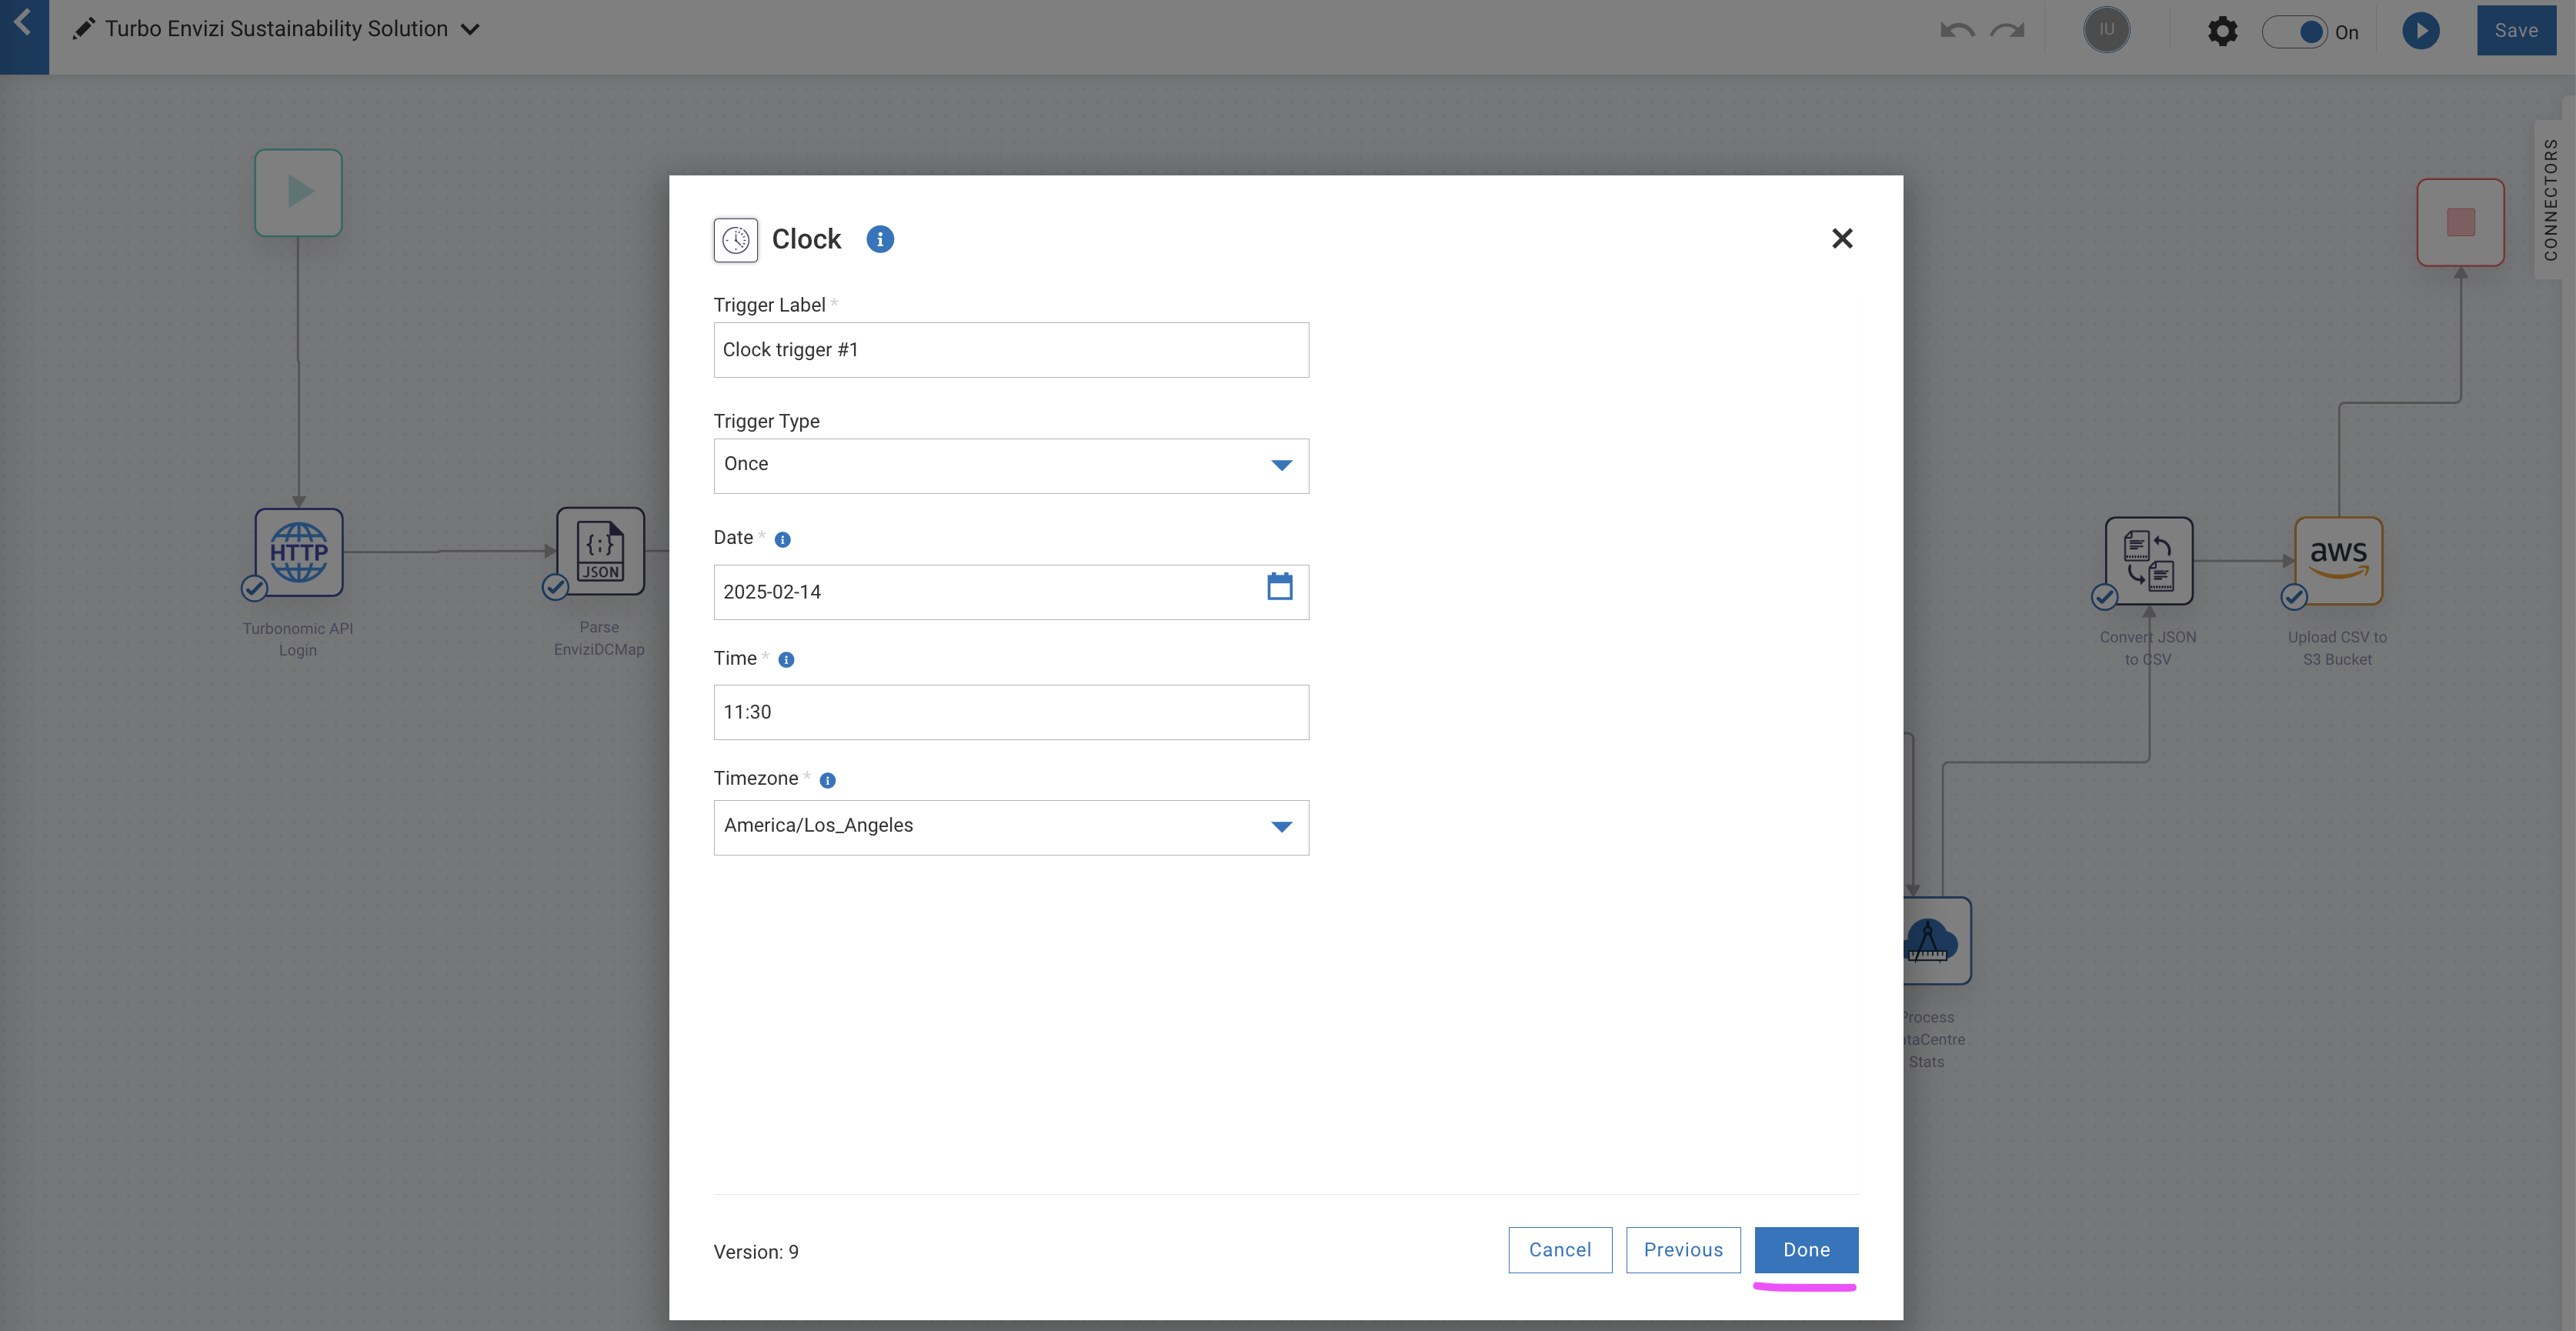
The schduling is complete and the Trigger node shows the clock icon.
Click
Saveto save the workflow.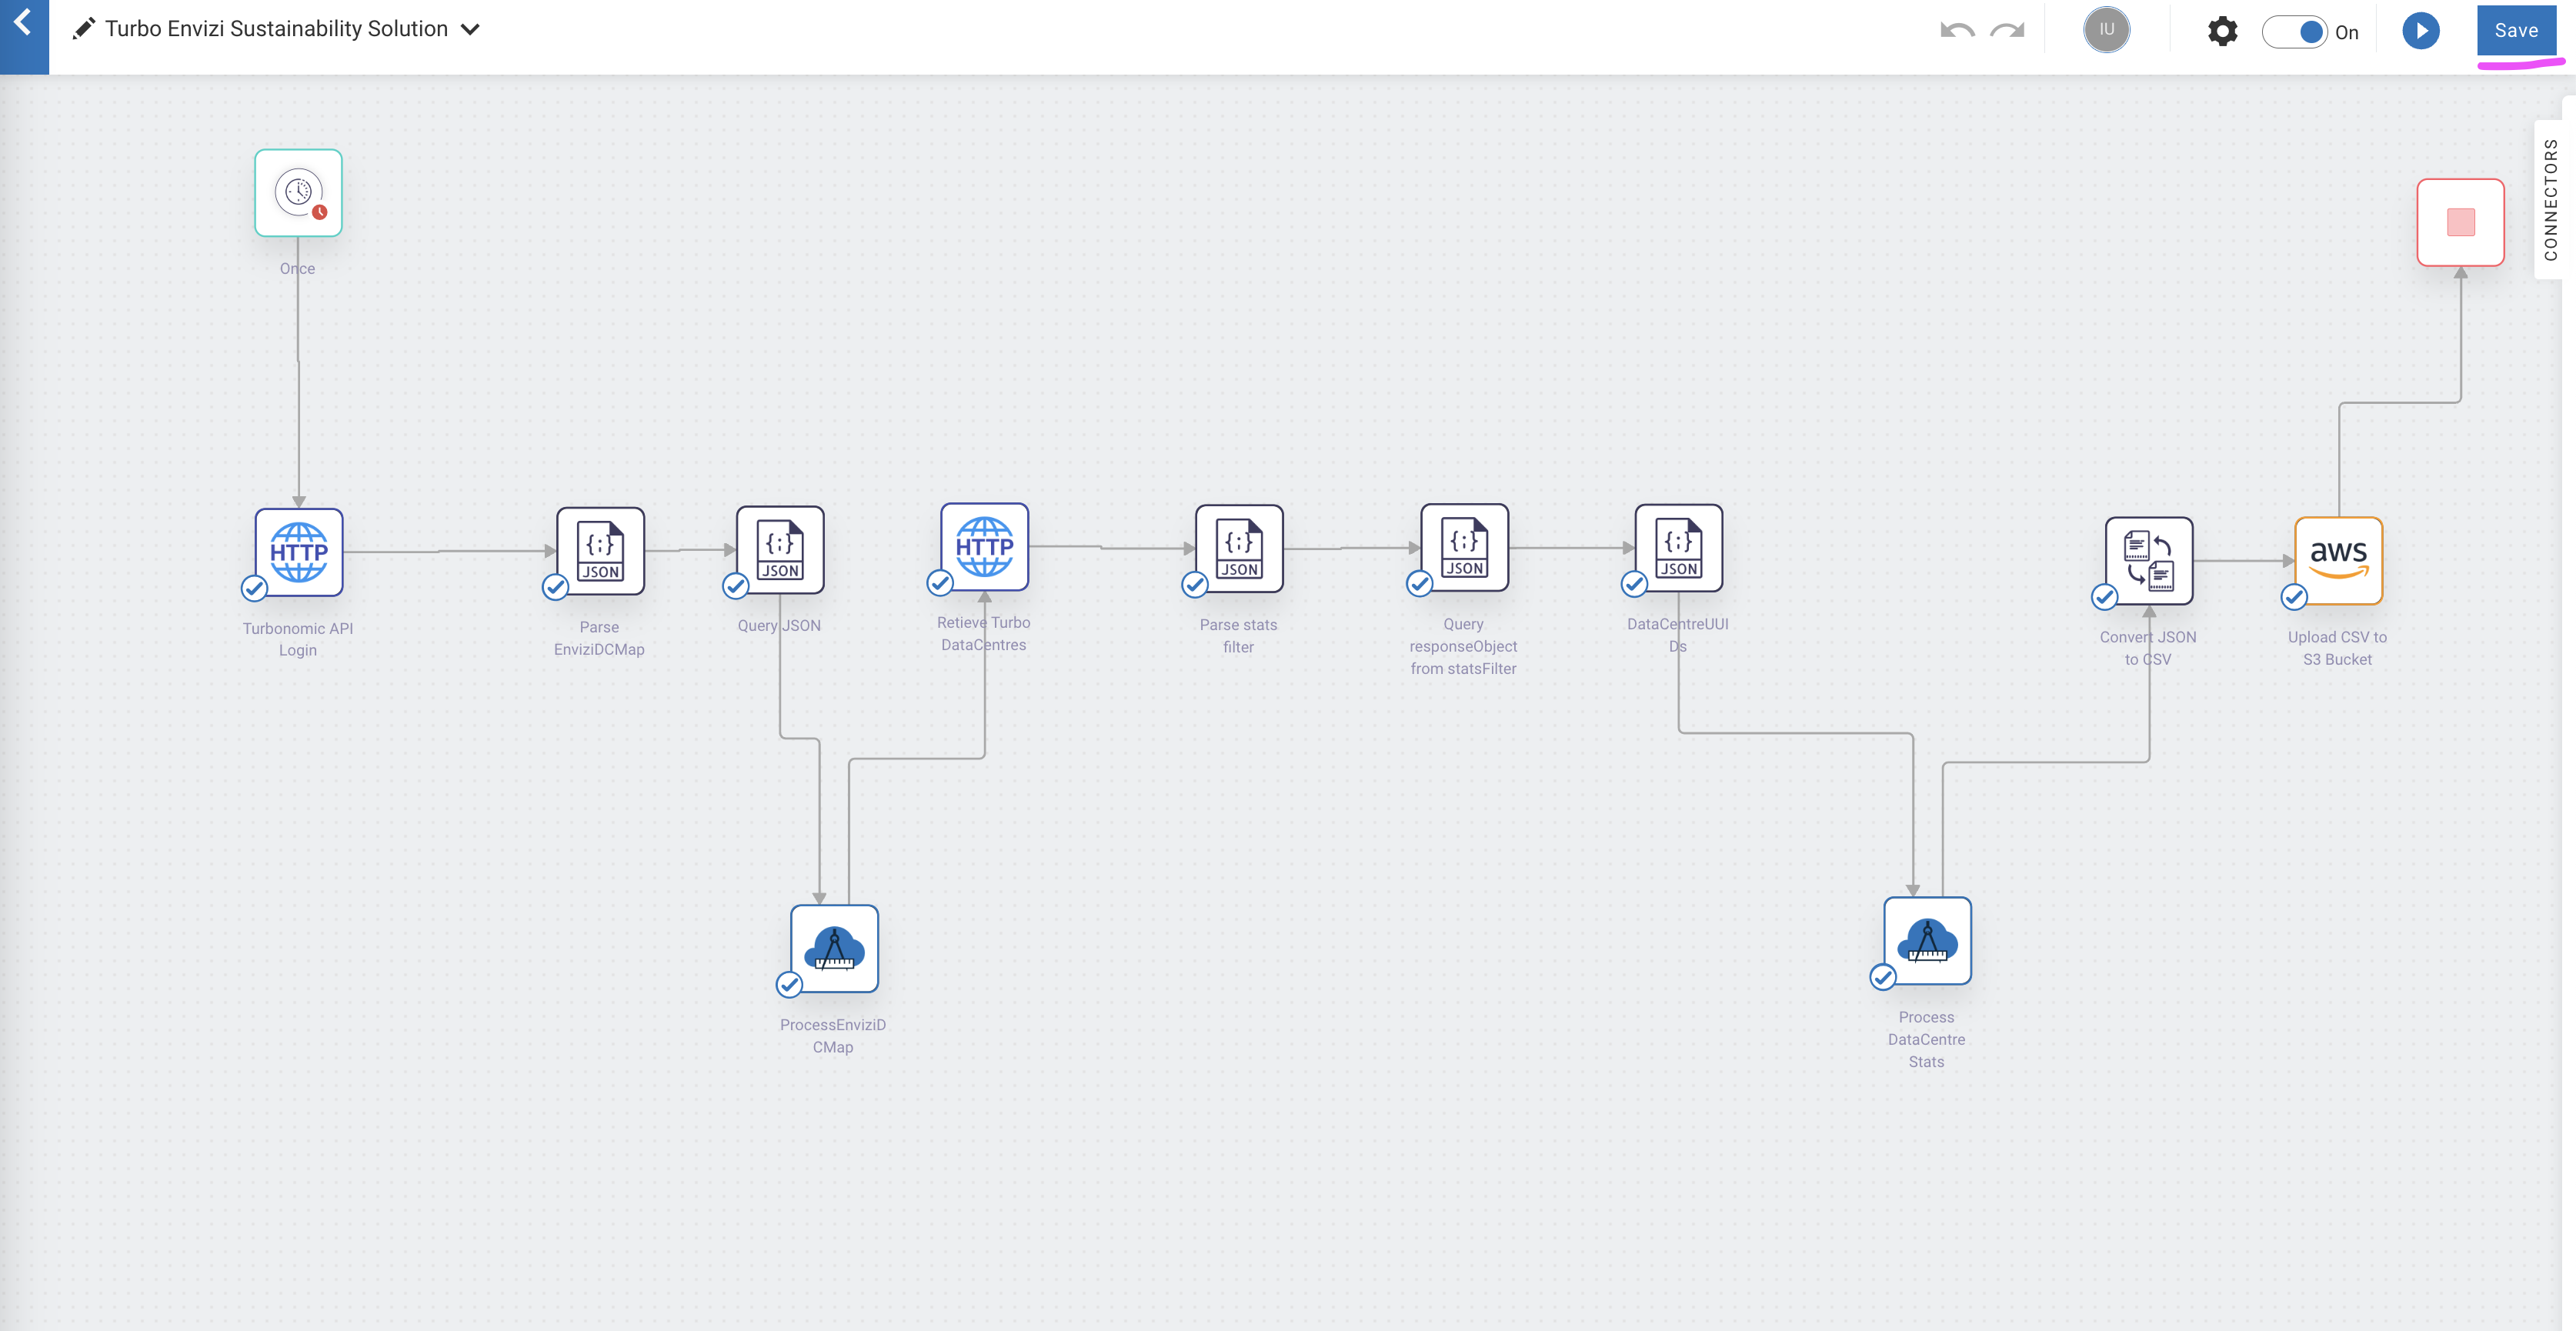
Now the workflow will execute automatically as per the defined schedule.
Appendix
Create user in Turbonomic
Let us create a local user in Turbonomic with the Observer role.
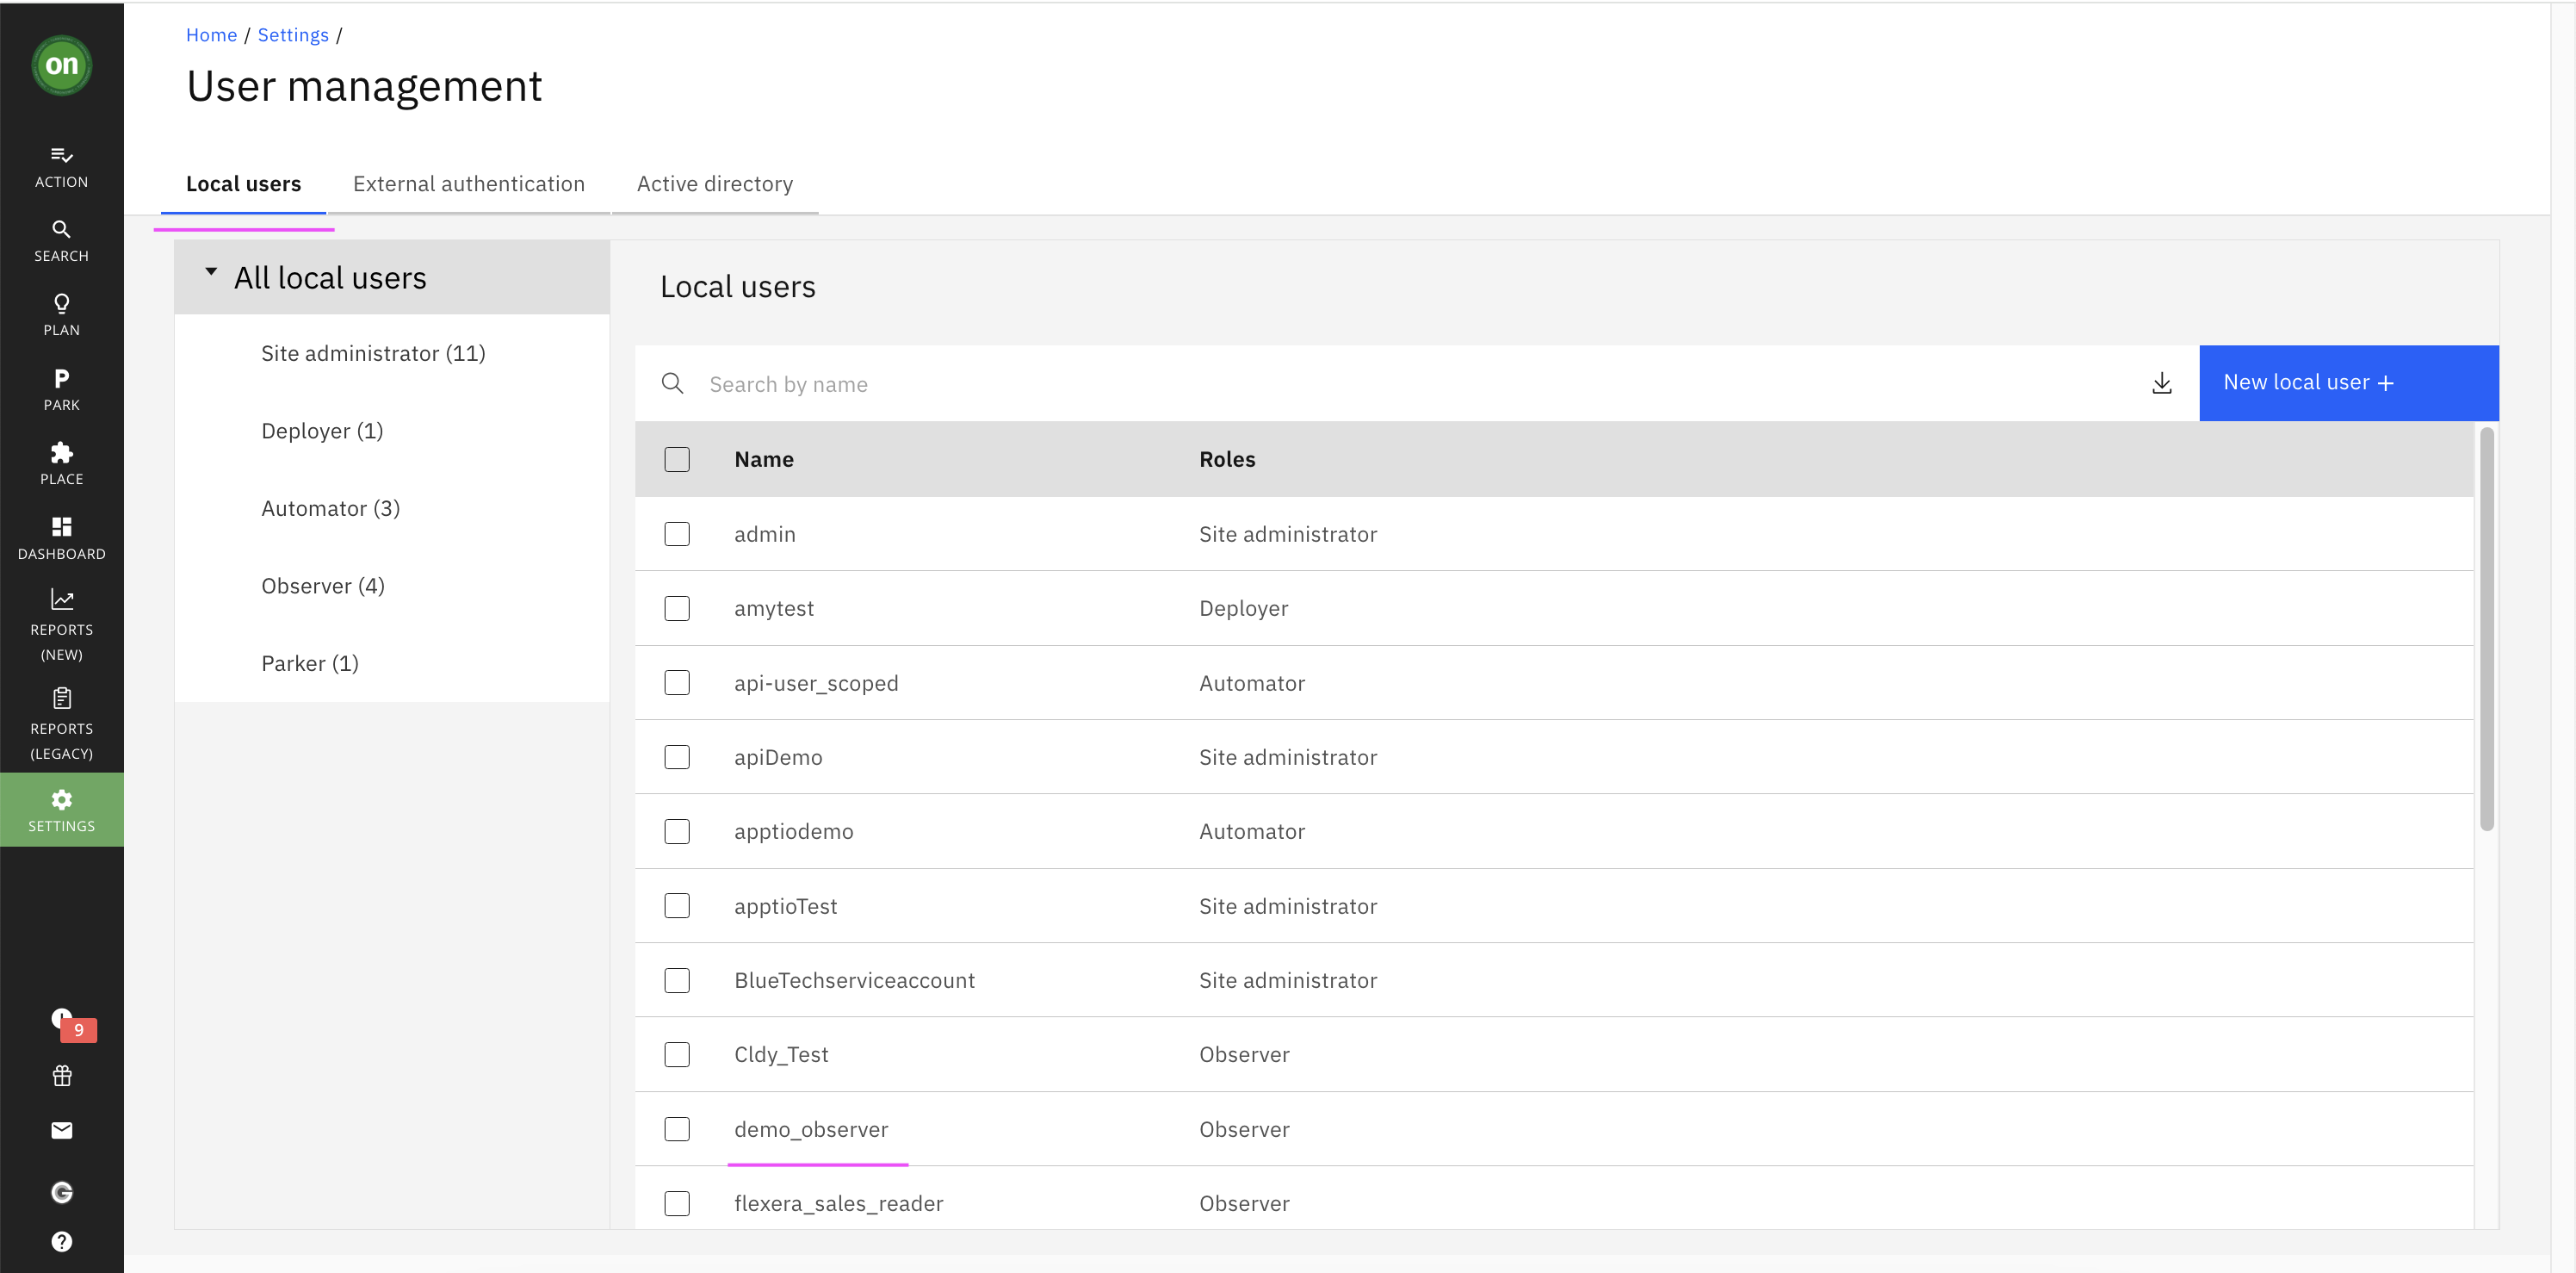
Create a new local user in Turbonomoic by choosing the following menu option.
Home > SETTINGS > Local User > New Local User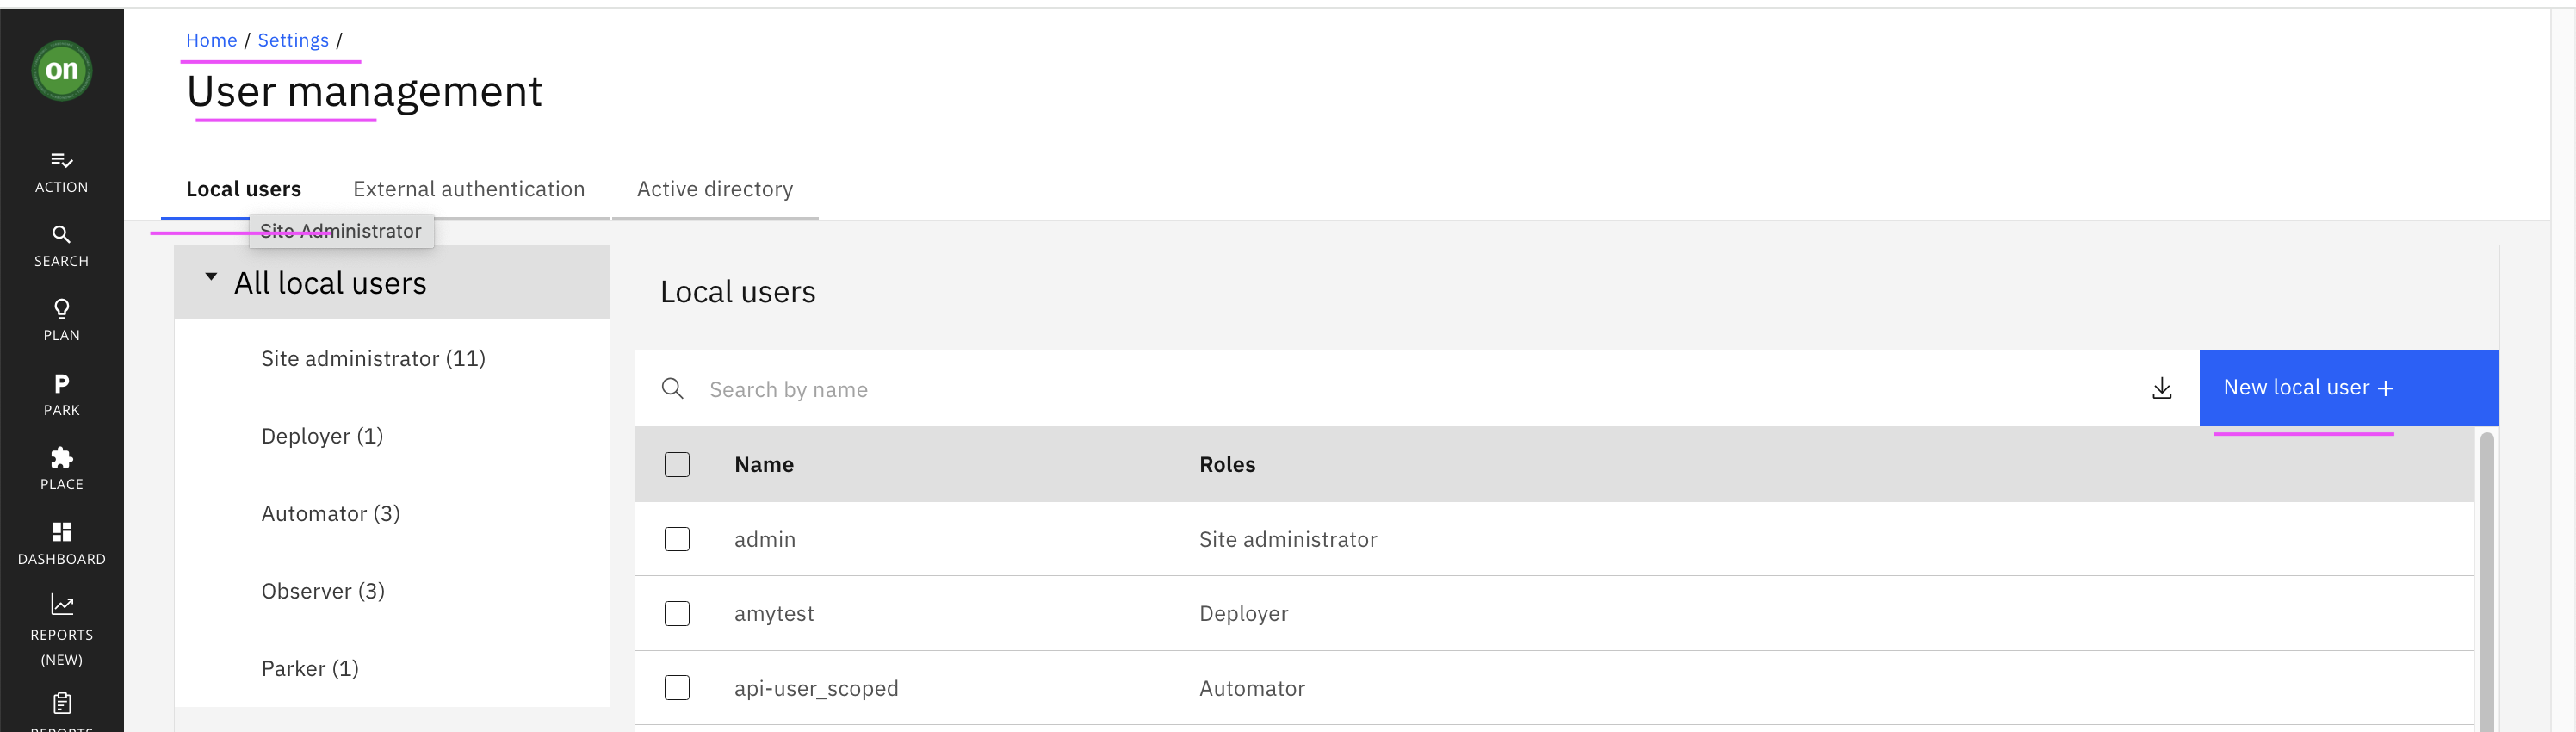
User name could be
demo_observer, specify a password and choose role asObserver.Click
Savebutton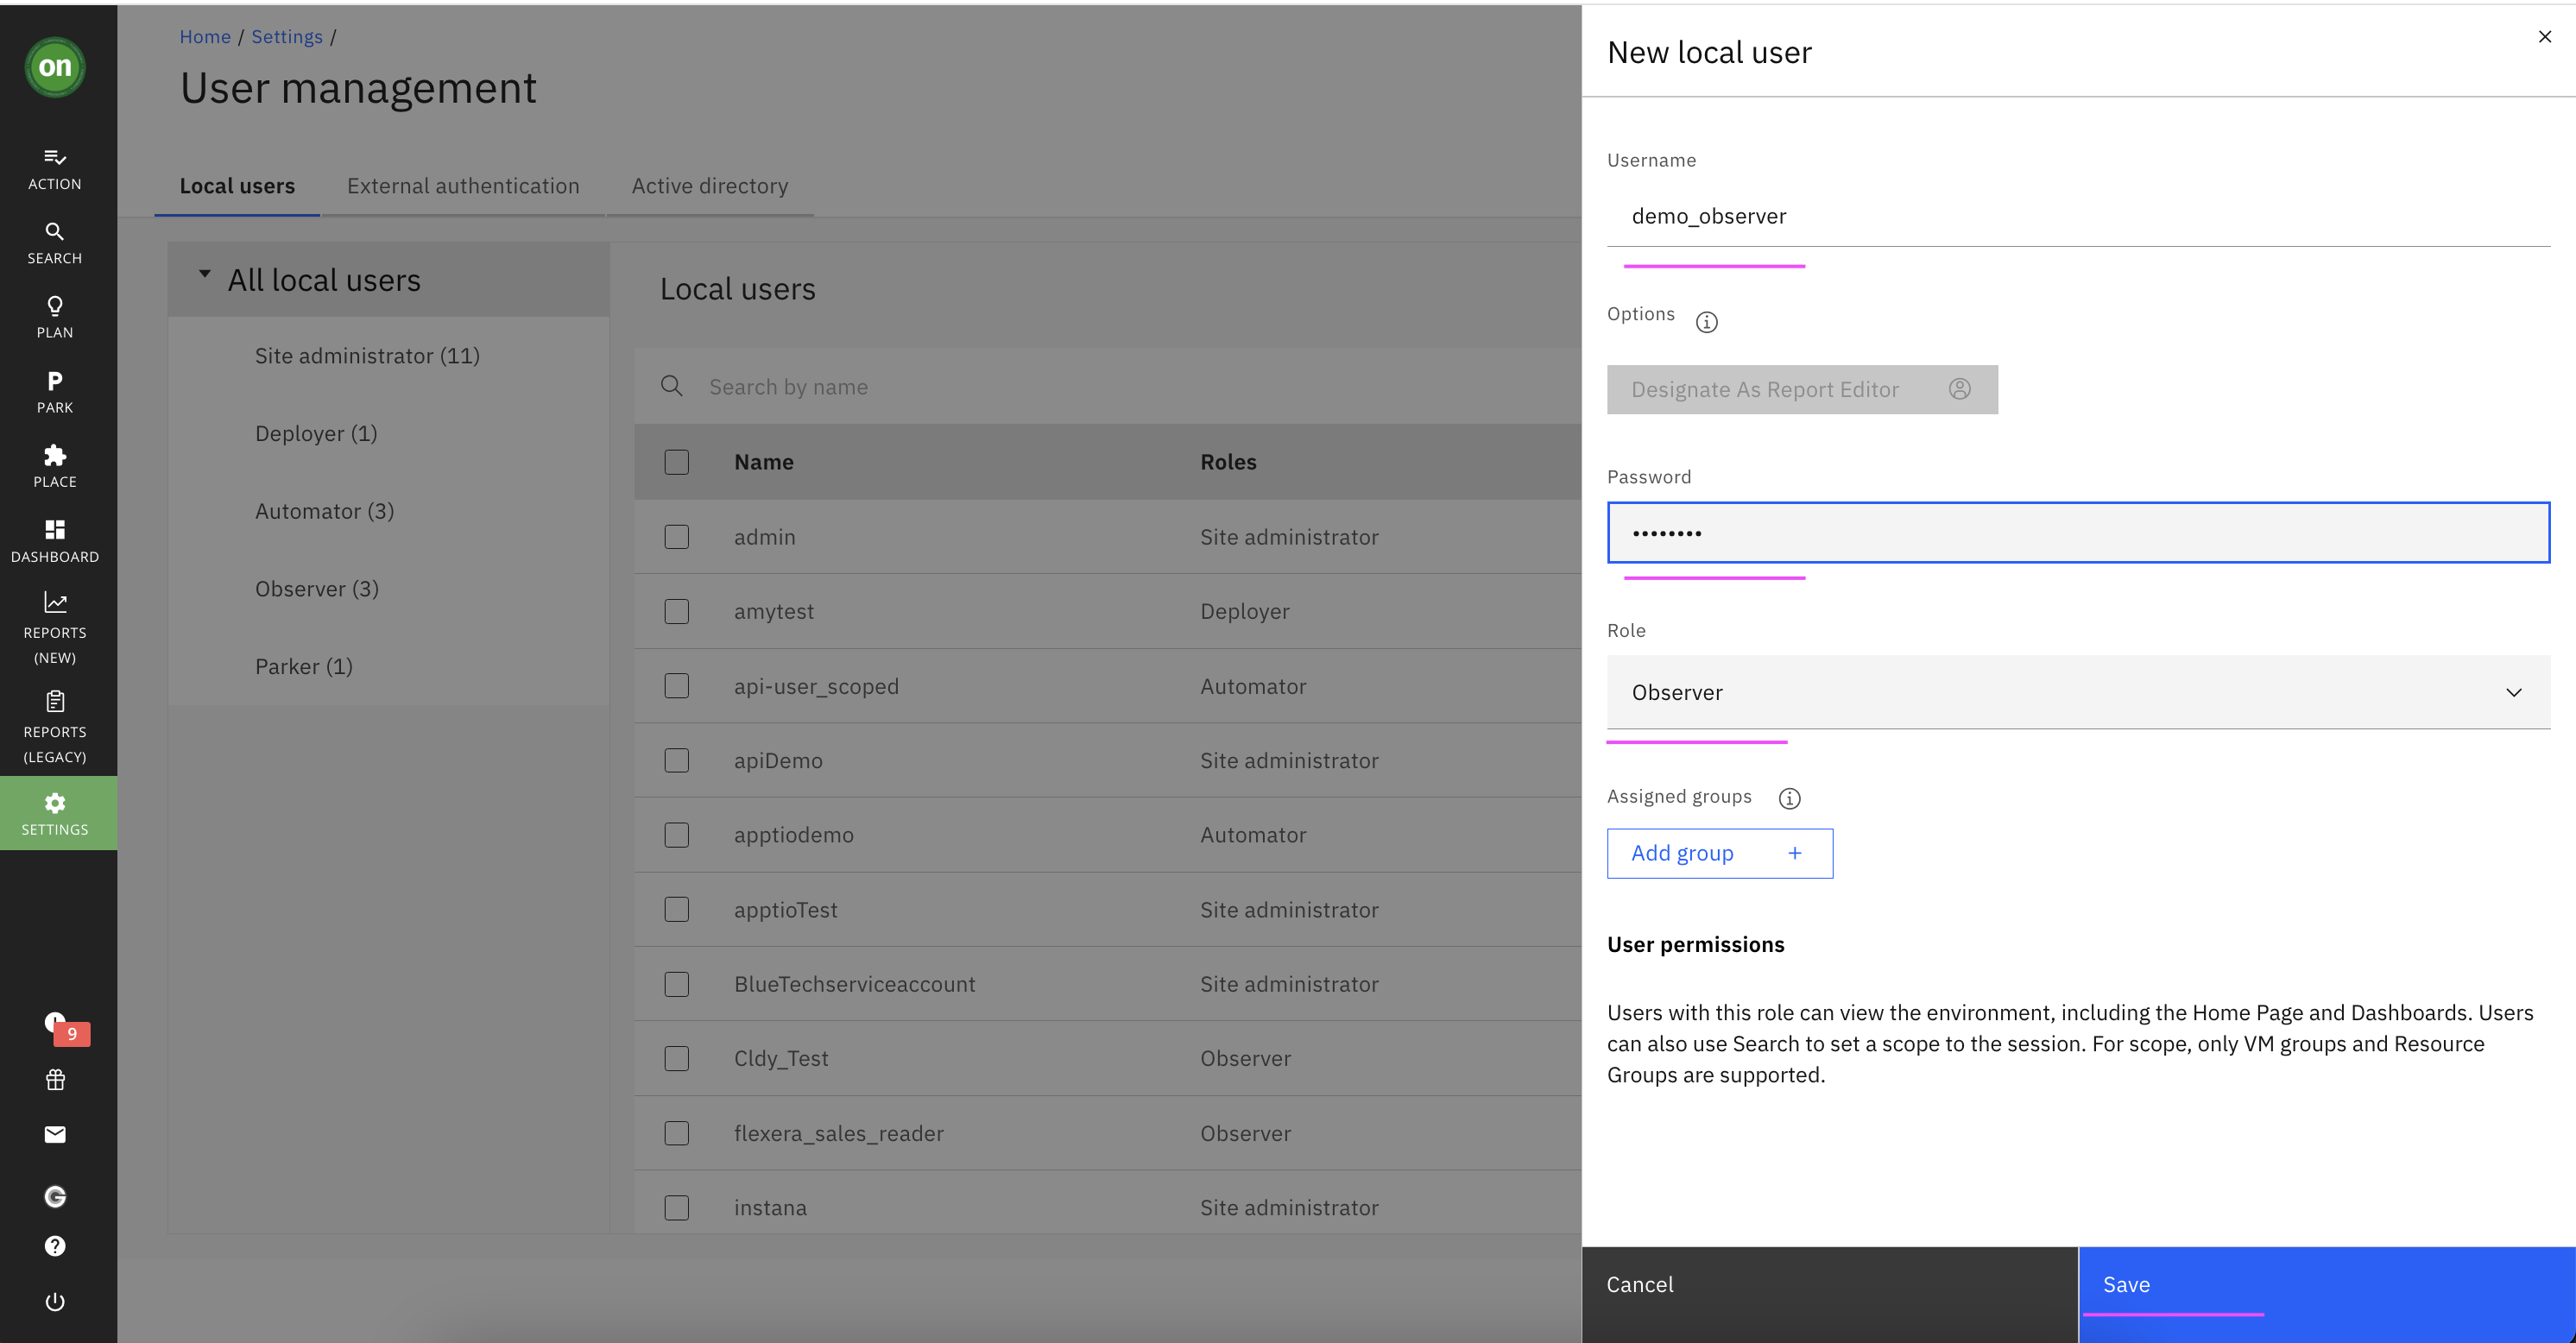
User is created.
Reference
Sign up for webMethods SaaS Trial.
Creating Envizi S3 bucket (Refer Steps 1 and 2 in IBM Developer tutorial.
Getting started with the Turbonomic REST API.
IBM Developer tutorial: Integrate your ESG Data into Envizi using Integration Hub.