About cookies on this site Our websites require some cookies to function properly (required). In addition, other cookies may be used with your consent to analyze site usage, improve the user experience and for advertising. For more information, please review your options. By visiting our website, you agree to our processing of information as described in IBM’sprivacy statement. To provide a smooth navigation, your cookie preferences will be shared across the IBM web domains listed here.
Tutorial
Scaling data preparation workflows in Data Prep Kit (DPK)
Implementing a Ray runtime and adding Kubeflow Pipelines extensions to existing transforms
On this page
In this tutorial, we will continue with the sample digest transform that was created in the previous module as a Python module and implement extensions to that module that will result in the creation of a Ray scalable version of the same transform. This scaled version can run either on a single machine or a Kubernetes cluster of machines. We will also discuss the development of unit tests for our digest transform, integration with CI/CD, and optional integration with KubeFlow Pipeline (KFP).
Prerequisites
Follow the steps in this tutorial to build the digest transform using the Python runtime.
Steps
Step 1. Create a submodule for the Ray implementation
For this tutorial, we will follow the convention of having ray as a submodule of the main transform module, and add the required code to ray/runtime.py* in the digest/dpk_digest/ray directory. While we encourage you to follow this convention, we realize that there are cases where you might need to deviate from it and use a different name for the ray submodule or even implement ray functionality as its own module.
Recall the proposed folder structure in the previous tutorial, which now includes the ray subdirectory.
data-prep-kit
│
└───transforms
│   |
│   └───universal
│       │
│       └───digest
│            |
│            └───dpk_digest
│            |      │
│            |      │ __init__.py
│            |      │ transform.py
│            |      | runtime.py
│            │      |
│            |      └───ray
│            |           │ __init__.py
│            |           | runtime.py
│            |           │
│            └───test
│            │    |
│            │    |test_digest_ray.py
│            │
│            └───test-data
│            │     |
│            |     └───input
│            |     |     │
│            |     |     │ testfile.parquet
│            |     |
│            |     └───expected
│            |          │
│            |          │ testfile.parquet
│            |          │ markdown.json
│            |
│            | requirements.txt
│            | Dockerfile.python
│            | Dockerfile.ray
│            | digest.ipynb
│            | digest-ray.ipynb
│            | README.md
│            | Makefile
Step 2. Implement RayTransformRuntimeConfiguration
The dpk_digest/ray/runtime.py file implements the necessary API for integrating the digest transform with the Ray runtime orchestrator.
import sys

from data_processing.utils import ParamsUtils, get_logger
from data_processing_ray.runtime.ray import RayTransformLauncher
from data_processing_ray.runtime.ray.runtime_configuration import RayTransformRuntimeConfiguration
from dpk_digest.runtime import DigestConfiguration

logger = get_logger(__name__)

class DigestRayRuntime(RayTransformRuntimeConfiguration):

    def __init__(self):
        super().__init__(transform_config=DigestConfiguration())

if __name__ == "__main__":
    launcher = RayTransformLauncher(DigestRayRuntime())
    launcher.launch()
Similarly, we will implement the Digest API for the Ray submodule to define a simplified method for the API, enabling the user to use the runtime while still being able to invoke the transform from a notebook.
class Digest:
    def __init__(self, **kwargs):
        self.params = {}
        for key in kwargs:
            self.params[key] = kwargs[key]
        try:
            local_conf = {k: self.params[k] for k in ("input_folder", "output_folder")}
            self.params["data_local_config"] = ParamsUtils.convert_to_ast(local_conf)
            del self.params["input_folder"], self.params["output_folder"]
        except:
            pass
        try:
            worker_options = {k: self.params[k] for k in ("num_cpus", "memory")}
            self.params["runtime_worker_options"] = ParamsUtils.convert_to_ast(worker_options)
            del self.params["num_cpus"], self.params["memory"]
        except:
            pass

    def transform(self):
        sys.argv = ParamsUtils.dict_to_req(d=(self.params))
        launcher = RayTransformLauncher(DigestRayRuntime())
        return_code = launcher.launch()
        return return_code
Step 3. Run the transform
You can run the transform in a notebook or via the CLI.
The notebook should show how to run the notebook from the current folder. This is a simple notebook for the Ray version of our digest transform.
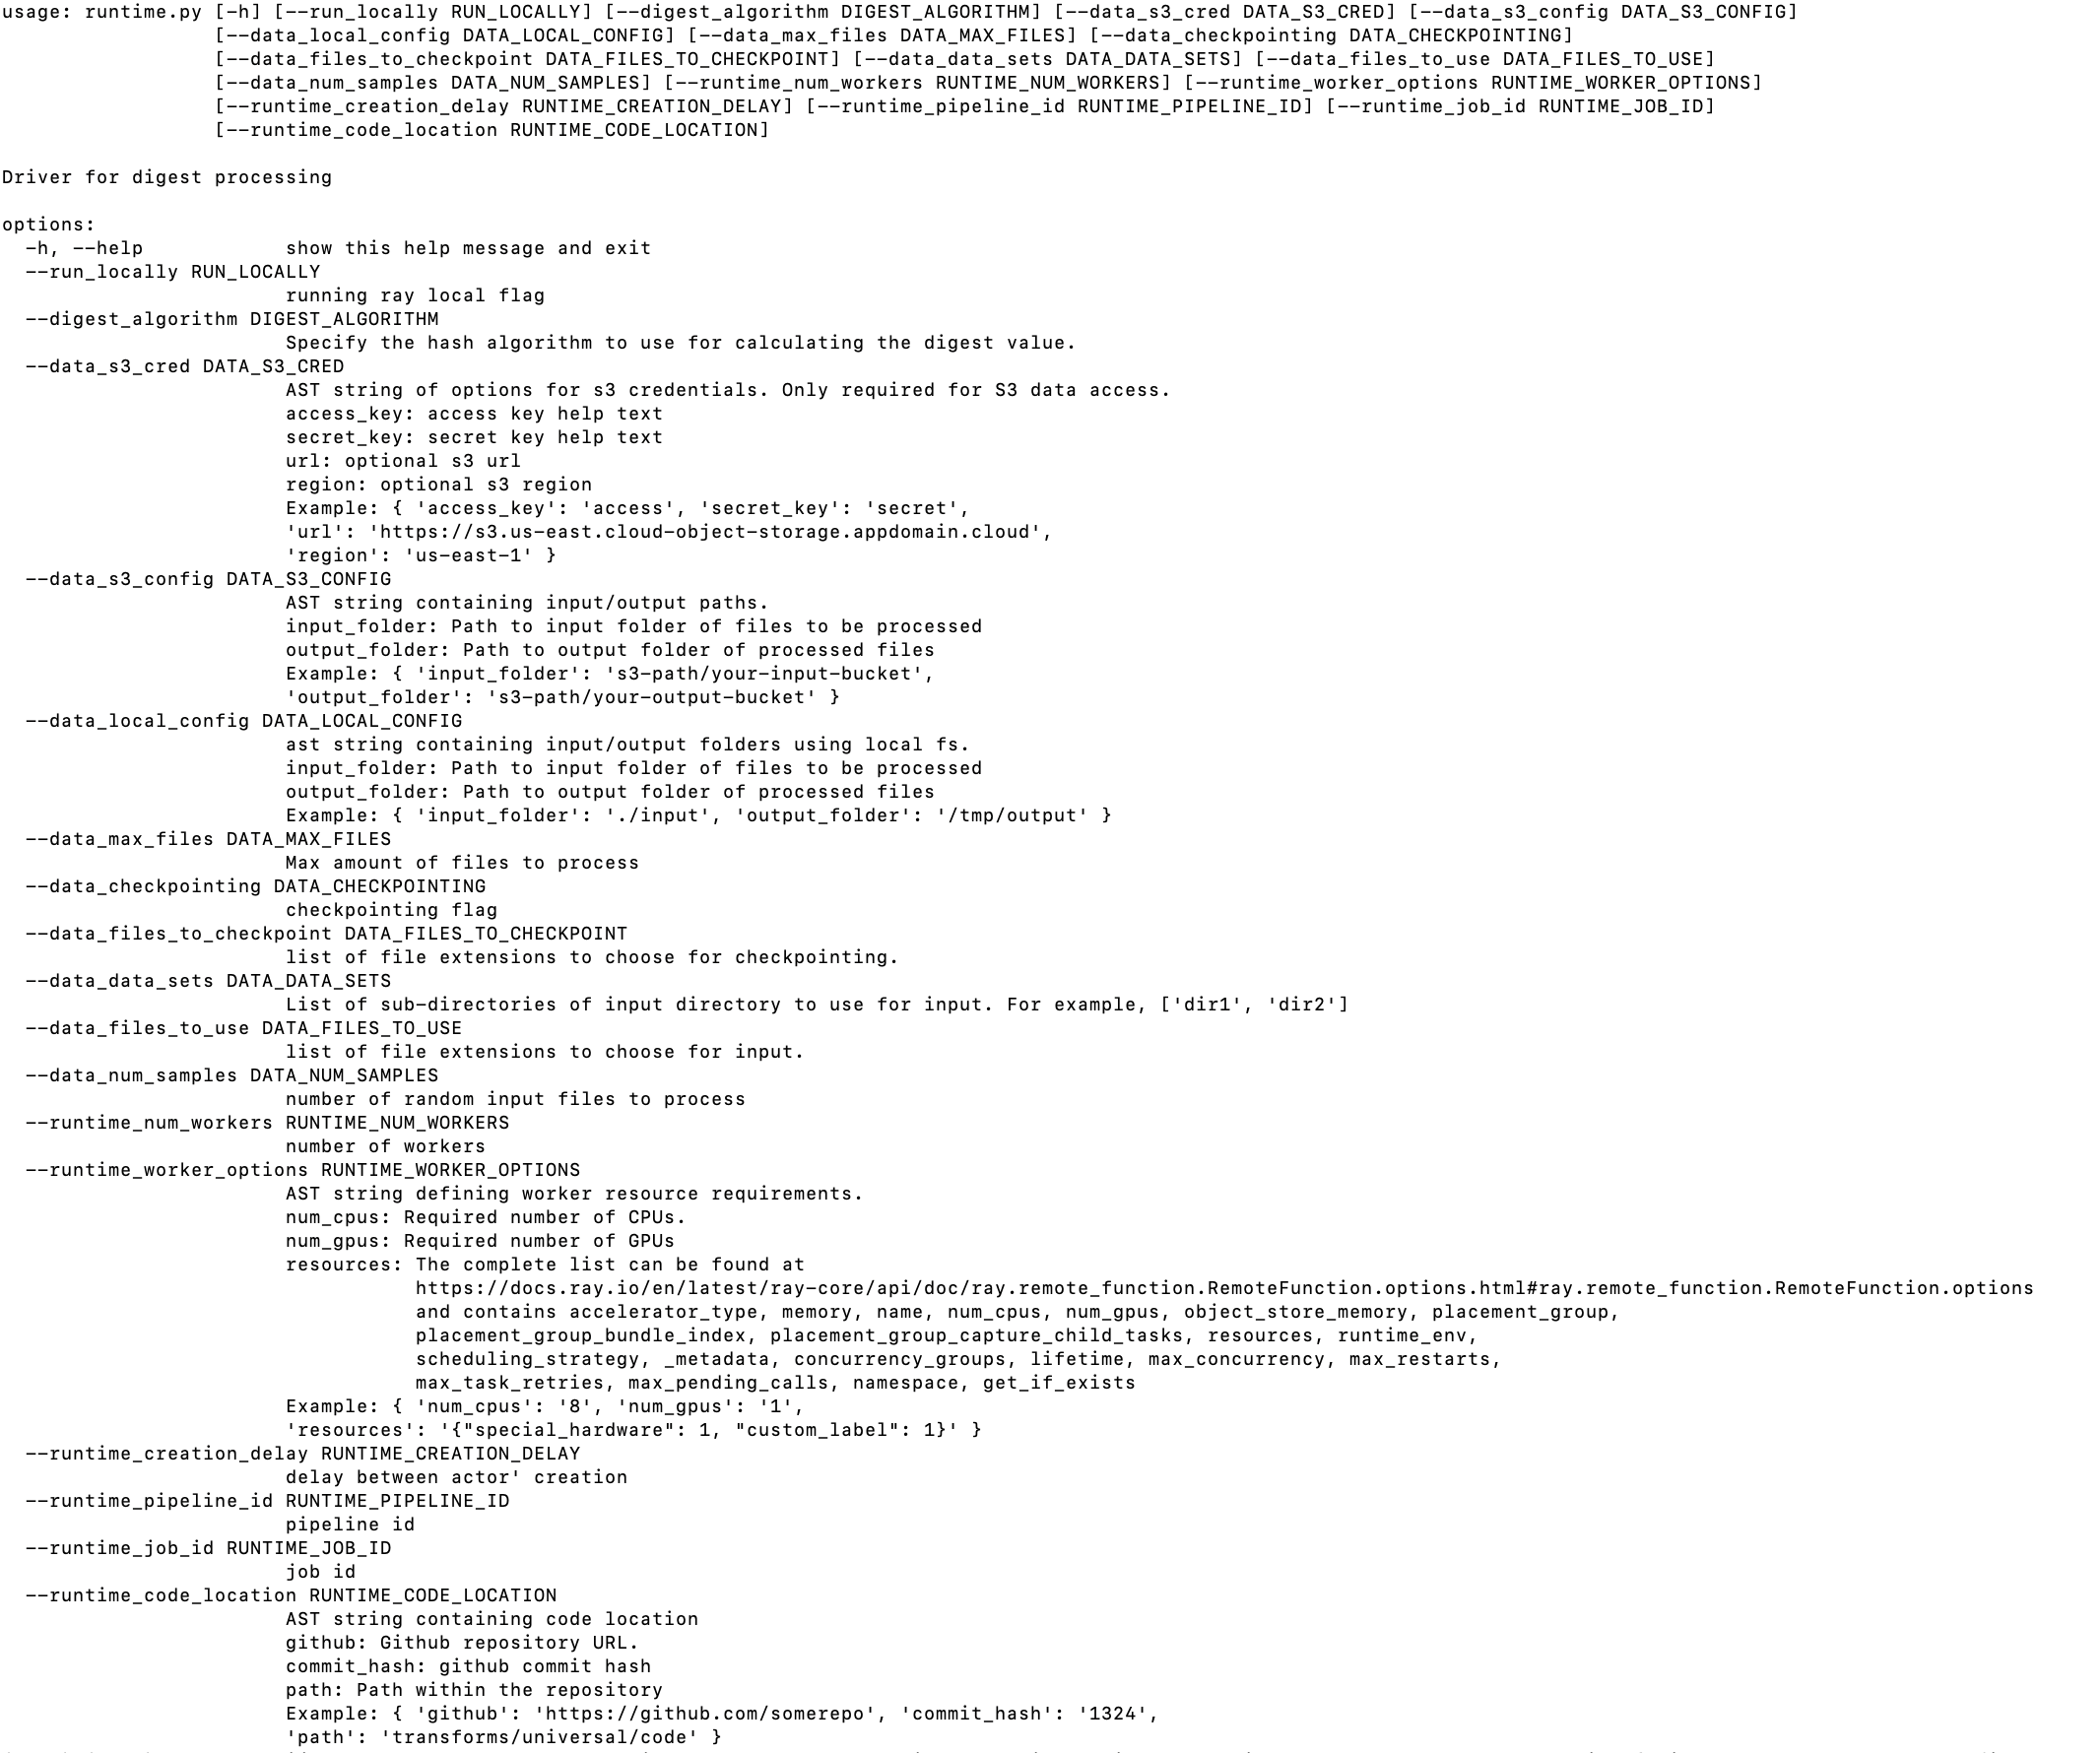
To run the transform from the CLI, you need to set up a virtual environment (we will use venv) with dependencies for testing and then run the transform with –help option:
$ python -m venv venv && source venv/bin/activate
$ pip install "data-prep-toolkit[ray]>=0.2.3" pandas
$ python -m dpk_digest.ray.runtime --help
Let’s run the transform from the CLI, using the same sample parquet file as input that we used in the previous tutorial:
$python -m dpk_digest.runtime \
--digest_algorithm sha256 \
--data_local_config "{ 'input_folder' : 'test-data/input', 'output_folder' : 'output'}"
We should see the result of the run:

And to make sure that the run created the output files:
ls output
metadata.json  test1.parquet
Step 4. Develop the unit tests
In this step, we will develop unit tests for the Python runtime of our transform. This could be extended to developing unit tests for the Ray runtime, but we will skip that for simplicity in this module. For our testing, we will need some initial data as input to the transform. We will copy it from an existing transform test folder.
cd data-prep-kit/transforms/universal/digest
mkdir -p test-data/input
cp ../../language/doc_chunk/test-data/expected/*.parquet test-data/input
Create a virtual environment and run the transform against the input data to produce the expected output data. This will be used by the CI/CD code to verify that the logic of the transform always produces the same output for a given input.
cd data-prep-kit/transforms/universal/digest
python -m venv venv && source venv/bin/activate
pip intall data-prep-toolkit
pip install -r requirements.txt

python -m dpk_digest.runtime \
--digest_algorithm sha256 \
--data_local_config "{ 'input_folder' : 'test-data/input', 'output_folder' : 'expected’}”
If the test code runs properly, we should see 2 new files created in the test-data/expected folder:
test-data/expected/test1.parquet
test-data/expected/metadata.json
Developers have some freedom in designing their unit tests. In this section, we show how developers can use the test fixture defined in the framework to rapidly create unit tests. Here is the code for test/test_digest.py:
import os

from data_processing.test_support.launch.transform_test import (
    AbstractTransformLauncherTest,
)
from data_processing.runtime.pure_python import PythonTransformLauncher
from dpk_digest.runtime import DigestRuntime


class TestDigestTransform(AbstractTransformLauncherTest):

    def get_test_transform_fixtures(self) -> list[tuple]:
        basedir = os.path.abspath(os.path.join(os.path.dirname(__file__),
                                               "../test-data"))
        fixtures = []
        transform_config = {
            "run_locally": True,
            "digest_algorithm": "sha256",
        }
        launcher = TransformLauncher(DigestRuntime())
        fixtures.append((launcher, transform_config,
                         basedir + "/input",
                         basedir + "/expected"))
        return fixtures
Step 5. Integrate with CI/CD
The repo implements a rich set of functionality for setting up the environment, running unit tests, publishing the transforms to pypi, building the transforms as part of a docker image, and running it with Kubeflow. For the purpose of this tutorial, we will explore only a portion of the capabilities that support this initial phase of the implementation.
We will first copy the Makefile template from the parent folder:
cd data-prep-kit/transforms/universal/digest
cp ../../Makefile.transform.template Makefile
cp ../../Dockerfile.python.template Dockerfile.python
The Makefile has a number of predefined targets that will be useful for testing and publishing the transform. To get a list of available targets, run the following command from the digest folder:
make
Below is a small list of available targets that may be useful at this stage:
Target              Description
------              -----------
clean               Clean up the virtual environment.
venv                Create the virtual environment using requirements.txt
test-src            Create the virtual environment using requirements.txt and run the unit tests
image               Build the docker image for the transform
test-image          Build and test the docker image for the transform
publish             Publish the docker image to quay.io container registry
Create virtual environment with all preloaded dependencies:
make clean && make venv
Run unit tests and verify the proper operations of the code:
make test-src
Though not part of the CI/CD, as a last step, if we want to include our transform in the PyPi wheel that has all our transforms, we edit the transforms/pyproject.toml project and add the requirements.txt for the module and the name of the module and its package location:
digest = {file = ["universal/digest/requirements.txt"]}
...
[tool.setuptools.package-dir]
...
dpk_digest = "universal/digest/dpk_digest"
...
Step 6. Optionally, integrate the transform with KubeFlow Pipelines (KFP)
You might choose to build a KubeFlow Pipeline (KFP) that chains multiple transforms together. In this step, we will show the steps you need to take so that the ops team can create a pipeline tailored to their specific use case. We will only cover the artifact that you need to produce to enable the integration of the digest transform in a KFP pipeline.
Create a folder to host KFP-related artifacts, in particular a makefile.
cd data-prep-kit/transforms/universal/digest mkdir -p kfp_ray cp ../../Makefile.kfp.template kfp_ray/MakefileCreate a KFP definition file,
kfp-ray/digest_wf.py. This file will be used to produce the KFP workflow yaml definition file. The full content of this file is available here. We only highlight some of the key elements.This file defines the reference to the docker image for the transform (
task_image) and entry point (EXEC_SCRIPT_NAME).import os import kfp.compiler as compiler import kfp.components as comp import kfp.dsl as dsl from workflow_support.compile_utils import ONE_HOUR_SEC, ONE_WEEK_SEC, ComponentUtils task_image = "quay.io/dataprep1/data-prep-kit/digest-ray:latest" # the name of the job script EXEC_SCRIPT_NAME: str = "-m dpk_digest.ray.runtime" # components base_kfp_image = "quay.io/dataprep1/data-prep-kit/kfp-data-processing:latest" # path to kfp component specifications files component_spec_path = "../../../../kfp/kfp_ray_components/"Then, it defines the list of configuration parameters that are required by the framework return as a dictionary structure (
digest_algorithm):def compute_exec_params_func( ... ... digest_algorithm: str, ) -> dict: return { ... ... "digest_algorithm": digest_algorithm, }It assigns a name to this workflow task (
TASK_NAME):# Task name is part of the pipeline name, the ray cluster name and the job name in DMF. TASK_NAME: str = "digest"Pipeline definition method and default values:
@dsl.pipeline( name=TASK_NAME + "-ray-pipeline", description="Pipeline for digest", ) def digest( ### ... ### ):It defines the main entry point for compiling the yaml file required for running kfp.
if __name__ == "__main__":
     # Compiling the pipeline
     compiler.Compiler().compile(digest, __file__.replace(".py", ".yaml"))
Summary
In this tutorial you learned how to build a Ray runtime, create unit tests, integrate with CI/CD, and add KFP extensions to existing transforms. The source code used for this tutorial can be found in my forked data-prep-kit repo.
For more detailed information about DPK scalability using KFP, check out this AI Alliance blog. And, to see a demo of scaling data preparation workflows with DPK and KFP, watch this recorded presentation at the Open Source Summit.