About cookies on this site Our websites require some cookies to function properly (required). In addition, other cookies may be used with your consent to analyze site usage, improve the user experience and for advertising. For more information, please review your options. By visiting our website, you agree to our processing of information as described in IBM’sprivacy statement. To provide a smooth navigation, your cookie preferences will be shared across the IBM web domains listed here.
Tutorial
Set up and run the BeeAI Agent Framework
Use data to make better decisions and enhance your customer experience
The BeeAI Agent Framework is an open source platform developed by IBM Research to facilitate the creation, deployment, and management of advanced AI agent workflows at scale. Designed with flexibility in mind, it enables developers to integrate various large language models (LLMs), including IBM Granite and Meta's Llama series, ensuring adaptability to diverse AI needs.
The framework has robust observability and traceability capabilities, providing developers with comprehensive insights into agent operations, which can streamline debugging and optimization processes. Primarily built using TypeScript/JavaScript, the framework also supports tool development in Python, offering versatility for developers.
Whether you're aiming to automate complex tasks or build AI-driven applications, the BeeAI Agent Framework offers a comprehensive solution to harness the potential of AI agents.
To effectively implement AI agent workflows using the BeeAI Agent Framework, focus on the following primary components:
- Agents: Define the core behaviour and decision-making processes of AI entities, ensuring consistent interactions across various implementations.
- Backend: Manages interactions with AI models, encompassing functionalities such as chat, embeddings, image processing, and tool invocation.
- Template: Utilizes an enhanced Mustache-based system for prompt templating, streamlining the creation and management of dynamic prompts.
- Memory: Provides mechanisms to maintain context and state within agent interactions, enabling more coherent and contextually aware responses.
- Tools: Offers extensible components that agents can employ to perform specific tasks or access external services, thereby expanding their capabilities.
Prerequisites
Explore and familiarize yourself with the BeeAI Agent repositories on GitHub: https://github.com/i-am-bee
Steps
Step 1: Install and configure Podman
Podman is a daemonless container engine that enables you to manage containers and pods. An alternative to Docker, Podman offers a similar command-line interface.
To install Podman, complete the following steps for macOS users (Windows users must use Windows-specific download and commands):
- On the Podman website, click the Downloads button and select Podman Desktop for macOS.
- Follow the installation instructions and when you have completed the installation, open Podman Desktop.
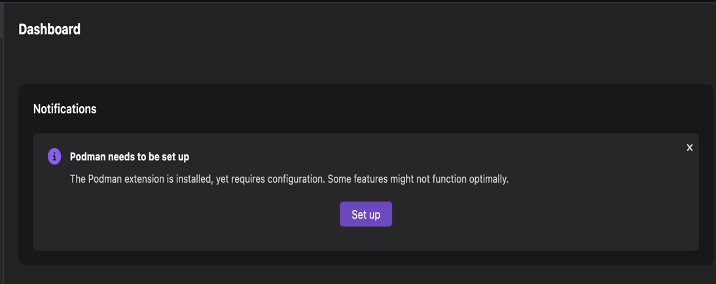
- Go to Settings > Resources > Podman.
- Click Set up.
Step 2: Install Docker Compose
Docker Compose is a tool that helps you manage multi-container applications using Podman.
To install Docker Compose:
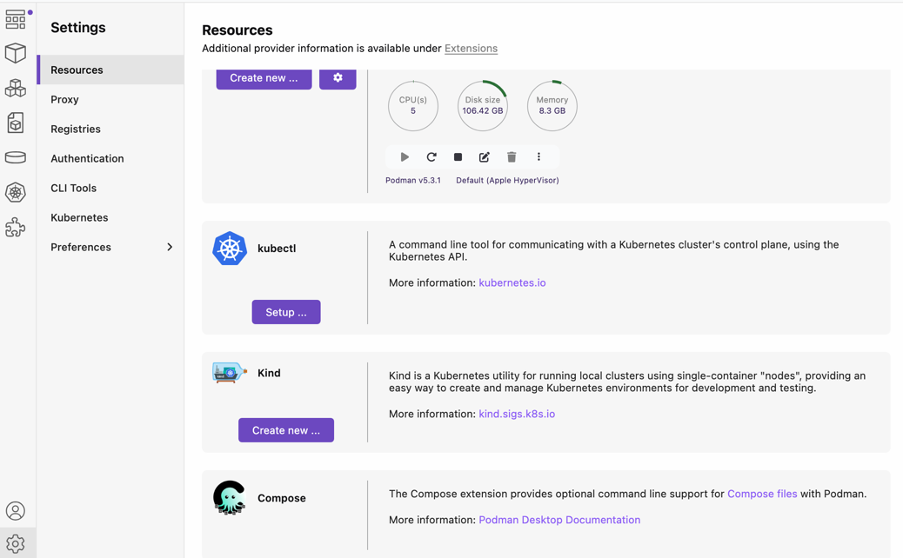
- Open Podman Desktop.
- Go to Settings > Resources > Compose.
- Click Setup.
Note: In some cases, conflicts with existing Docker installations can cause issues. If these conflicts prevent you from installing Docker Compose, complete the following steps:
Remove Docker binaries:
sudo rm -rf /usr/local/bin/docker sudo rm -rf /usr/local/bin/docker-compose sudo rm -rf /usr/local/bin/docker-credential-*Remove Docker-related directories:
sudo rm -rf ~/.docker sudo rm -rf /var/lib/docker sudo rm -rf /usr/local/bin/docker-machineRemove the Docker daemon configuration:
sudo rm -rf /etc/docker sudo rm -rf /etc/apt/sources.list.d/docker.listRemove Docker desktop settings:
sudo rm -rf ~/Library/Containers/com.docker.docker sudo rm -rf ~/Library/Application\ Support/Docker sudo rm -rf ~/Library/Group\ Containers/group.com.docker sudo rm -rf ~/Library/Preferences/com.docker.docker.plist sudo rm -rf ~/Library/Preferences/com.electron.docker-frontend.plist sudo rm -rf ~/Library/Saved\ Application\ State/com.electron.docker-frontend.savedState sudo launchctl unload /Library/LaunchDaemons/com.docker.vmnetd.plist sudo rm -f /Library/LaunchDaemons/com.docker.vmnetd.plist sudo rm -rf ~/Library/Containers/com.docker.helper sudo rm -rf ~/Library/Containers/com.docker.docker sudo rm -rf /var/run/docker.sockRemove the Podman network, if necessary. (Note: This step might be necessary if you have followed the steps to the end and then want to update the Compose version or reinstall it. In that case, you need to remove the networks that will be installed in subsequent steps.)
podman network rm bee-stack_defaultRun the setup for Compose again (see Step 2: Install Docker Compose). Note: Set the path for docker compose.
export PATH="/usr/local/bin/docker-compose:$PATH" in terminal.Check the versions to verify your installation:
docker-compose --version podman --versionYou should see output similar to the following:
docker-compose version 1.3.0
 podman version 5.3.1
Step 3: Review Podman CLI commands
To use Podman to manage your environment, you will need to use some essential commands. Be sure to familiarize yourself with the following CLI commands:
Initialize a new machine (note that
ssl-beeis the name of the podman machine):
podman machine init ssl-bee --cpus 5 --memory 8192 --disk-size 100Set the machine configuration:
podman machine set --memory 8192 --rootful ssl-beeStart the machine:
podman machine start ssl-beeList machines:
podman machine list
Reference: Run the following commands to stop and remove the machine.
Stop the machine:
podman machine stop ssl-beeRemove the machine:
podman machine rm ssl-bee
Step 4: Configuring the BeeAI Stack
The BeeAI Stack is a collection of components that enable you to build and deploy AI agents. To configure the BeeAI Stack, complete the following steps:
- Clone the BeeAI Stack repository to your local machine:
git clone https://github.com/i-am-bee/bee-stack.git - Next, clone the BeeAI Agent Framework Starter repository:
git clone https://github.com/i-am-bee/bee-agent-framework-starter.git Go to the bee-stack directory and run the setup script:
cd bee-stack ./bee-stack.sh setupUse the following commands to start and stop the BeeAI Stack:
- Start the BeeAI Stack:
./bee-stack.sh start - Stop the BeeAI Stack:
./bee-stack.sh stop
- Start the BeeAI Stack:
Step 5: Set up the SSL project
To set up the SSL project for application deployment and certificate renewal, complete the following steps:
- Clone the SSL Certification Project repository:
- Open your terminal.
- Go to your desired directory where you want to clone the project.
- Run the following command to clone the repository:
git clone https://github.com/IBM/SSLCertificationPython.git
- Optional: If you encounter any issues with the
git clonecommand, you can use GitHub Desktop as an alternative:- Download and install GitHub Desktop.
- Open GitHub Desktop and sign in with your GitHub credentials.
- Click File > Clone Repository.
- Enter the repository URL:
https://github.com/IBM/SSLCertificationPython.git - Select the local path where you want to clone the repository and click Clone. The repository is cloned to your local machine.
- In the terminal, change to the project directory:
cd SSLCertificationPython - Ensure that Python 3.11 is installed on your system. (You can download it from the official Python website.) You can verify the installation by checking the version:
python3.11 --version - Install any dependencies the project might have. Typically, projects include a
requirements.txtfile listing necessary packages. You can install dependencies usingpip:python3.11 -m pip install -r requirements.txt
Note: If there is no requirements.txt file, refer to the project's documentation or README for guidance on the required packages. - In the terminal, run the certificate renewal script:
python3.11 renew_app.pyThe script outputs a URL. Copy and store this URL because you will need it for the next step. - Update the application utilities:
- in the project’s
applicationutilitiesdirectory, open theapi_callings.pyfile. - Locate the section where the API endpoint is defined.
- For each function, replace the URL with the one you copied in the previous step.
- in the project’s
Step 6: Create the Agent using the UI
The api_callings.py script provides several functions to assist you with application deployment and certificate management. To run the tools, complete the following steps:
- Launch the BeeAI Agent UI:
http://localhost:3000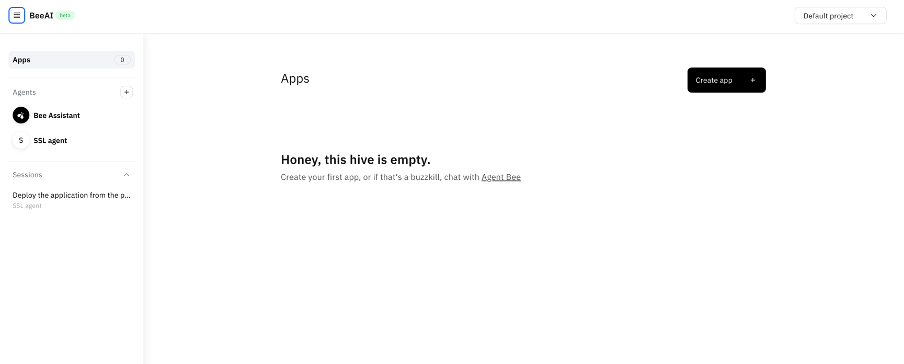
- To create a new agent, in the Agents menu, click the “+” icon and then click SSL agent.
- In the Agent builder, click the Start from scratch card and then click Start building.

Create tools on the BeeAI Agent UI using the following python functions:
Tool 1: Deploy application
Call this function with the appropriate
app_nameandapp_pathto deploy your application.import requests def ping_deploy(app_name: str, app_path: str): """Function to deploy the application by pinging the /deploy route with dynamic parameters.""" try: url = "http://9.109.198.20:8081/deploy" payload = { "application_name": app_name, "application_path": app_path } headers = { "Content-Type": "application/json" } response = requests.post(url, json=payload, headers=headers) if response.status_code == 200: print("Deployment completed successfully!") return "Deployment completed successfully!" else: print(f"Failed to trigger deployment: {response.status_code} - {response.text}") return f"Failed to trigger deployment: {response.status_code} - {response.text}" except Exception as e: print(f"Error while pinging /deploy: {e}") return f"Error while pinging /deploy: {e}"Tool 2: Renew certificate
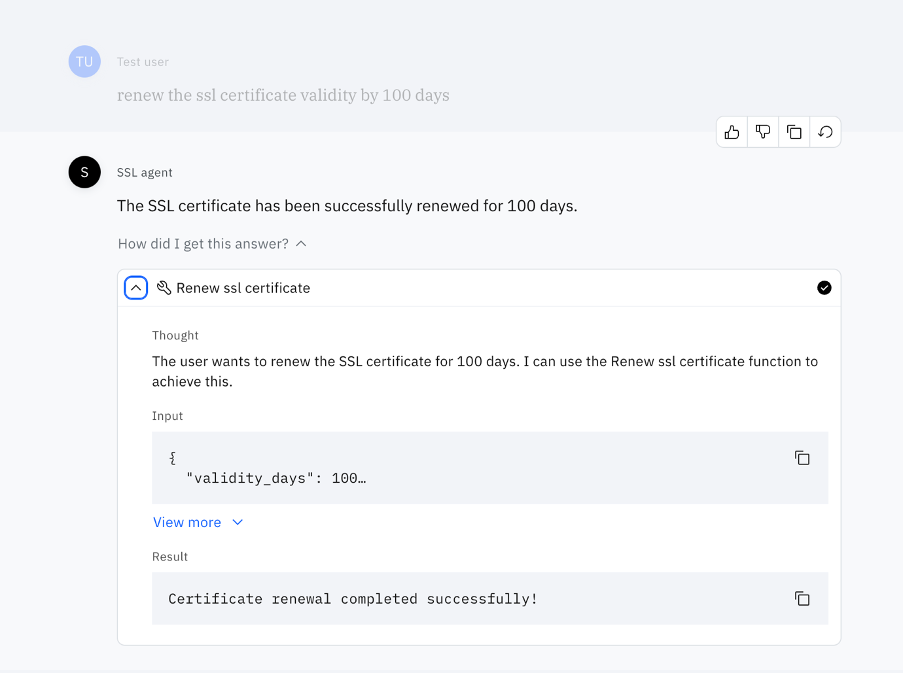
Invoke this function with the desired number of
validity_daysto renew your SSL certificate.def ping_renew_cert(application_name: str, project_dir: str, validity_days: int = 5) -> str: """ Function to renew the SSL certificate and redeploy the application via the `/renew_cert_1` endpoint. This function sends a POST request to the `/renew_cert_1` API endpoint to trigger the certificate renewal process. The `application_name`, `validity_days`, and `project_dir` parameters are sent as JSON in the request body. Args: application_name (str): The name of the application. project_dir (str): The path to the project directory. validity_days (int, optional): The number of days the renewed certificate should be valid (default: 5). Returns: str: A message indicating the success or failure of the certificate renewal process. - On success: "Certificate renewal completed successfully!" - On failure: An error message containing the HTTP status code and response text or exception details. """ try: # Define the request payload payload = { "application_name": application_name, "validity_days": validity_days, "project_dir": project_dir } # Send a POST request with JSON data response = requests.post( "http://9.109.198.20:8081/renew_cert", json=payload ) if response.status_code == 200: print("Certificate renewal completed successfully!") return "Certificate renewal completed successfully!" else: print(f"Failed to trigger certificate renewal: {response.status_code} - {response.text}") return f"Failed to trigger certificate renewal: {response.status_code} - {response.text}" except Exception as e: print(f"Error while pinging /renew_cert_1: {e}") return f"Error while pinging /renew_cert_1: {e}"Tool 3: Check certificate status
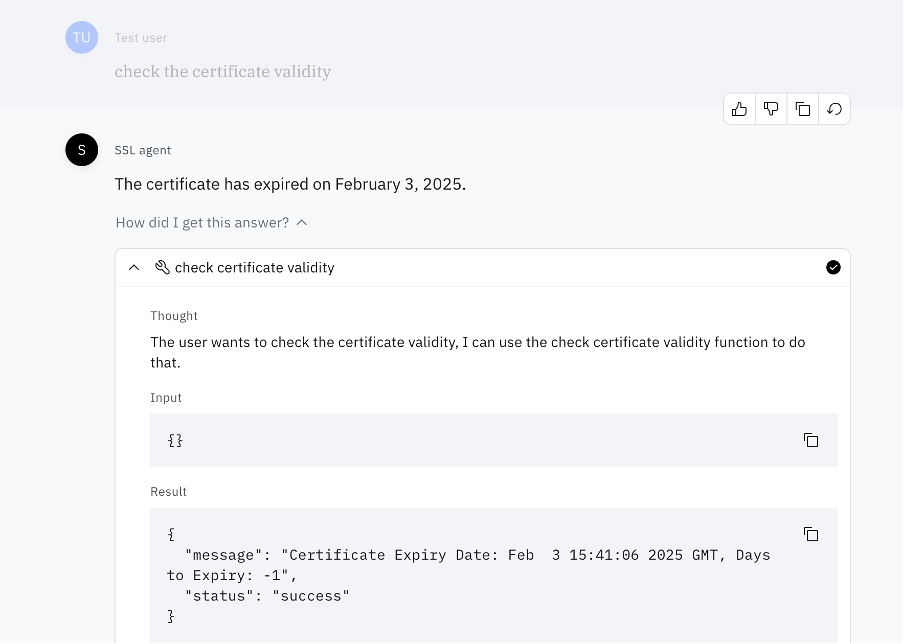
Use the following function to verify the current status of your SSL certificate:
def ping_check_cert():def ping_check_cert(project_dir: str): """ Sends a POST request to the /check_cert_expiry API endpoint to check the SSL certificate's expiry date. This function sends a JSON payload instead of query parameters. Args: project_dir (str): The directory path of the project. Returns: dict: A dictionary containing the response JSON if the request is successful. None: If the request fails due to a non-200 status code or an exception. """ url = "http://9.109.198.20:8081/check_cert_expiry" headers = {"Content-Type": "application/json"} data = {"project_dir": project_dir} try: response = requests.post(url, json=data, headers=headers) if response.status_code == 200: print("Certificate expiry check completed successfully!") print("Response:", response.json()["message"]) return response.json() else: print(f"Failed to check certificate expiry: {response.status_code} - {response.text}") return None except Exception as e: print(f"Error while pinging /check_cert_expiry: {e}") return None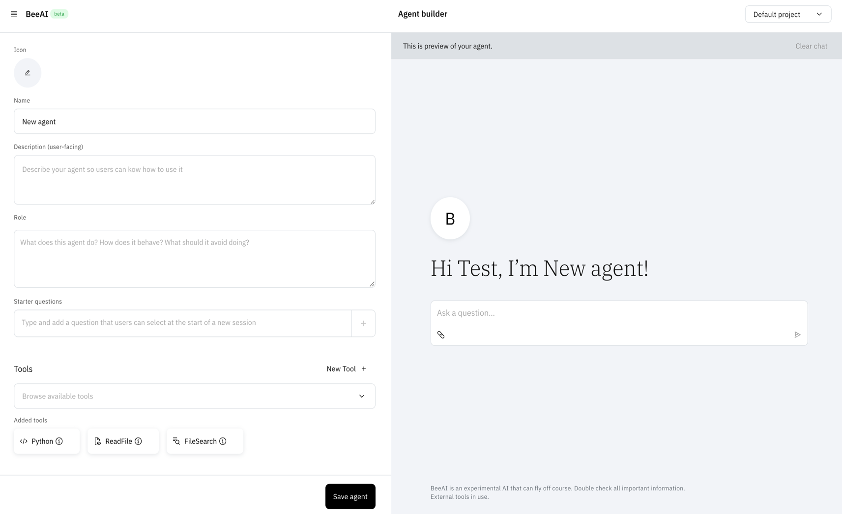
Step 7: Test the setup
After you have configured the utilities, you must test the setup to ensure everything functions as you expect.
- Check the UI at
http://localhost:3000to ensure it is displaying as intended. - Run the following queries to deploy your application and manage SSL certificates.
- "Deploy the application from the path
/Users/diwakarkumar/Documents/BeeAgentTutorial/SSLCertificationPython/ApplicationDemoand the application name asssl-app - "check the certificate validity"
- "renew the ssl certificate validity by 100 days"
- "Deploy the application from the path
You have now set up the SSL project, enabling efficient application deployment and a streamlined certificate renewal processes.

Summary and next steps
You have now completed a comprehensive, step-by-step tutorial to install and configure both Podman, a prerequisite for the BeeAI Agent Framework, and BeeAI Agent itself. You have created a functional environment for deploying AI-driven applications using BeeAI Agent. You have seen a practical use case that demonstrates how to deploy an application and automate SSL certificate renewals, ensuring secure and efficient management of deployments. You are now ready to use BeeAI Agent to streamline AI workflows while leveraging containerized environments for enhanced scalability and security.
Now that you understand how to install and set up BeeAI Agent Framework, continue to expand your knowledge and skills by checking out the following resources: