About cookies on this site Our websites require some cookies to function properly (required). In addition, other cookies may be used with your consent to analyze site usage, improve the user experience and for advertising. For more information, please review your options. By visiting our website, you agree to our processing of information as described in IBM’sprivacy statement. To provide a smooth navigation, your cookie preferences will be shared across the IBM web domains listed here.
Tutorial
Use Watson Pipelines to build model pipelines
Build sample pipelines that automate the creation and running of an AutoAI experiment, and deploy the experiment through the IBM Cloud Pak for Data platform as a web service
On this page
Archived content
Archive date: 2024-12-10
This content is no longer being updated or maintained. The content is provided “as is.” Given the rapid evolution of technology, some content, steps, or illustrations may have changed.With the aim of automating the creation and running of machine learning experiments, IBM introduced a service on Watson Studio called Pipelines. Watson Pipelines helps you orchestrate the flow of assets from creation through deployment on IBM Cloud. Watson Pipelines is part of the IBM Data Fabric collection of tools and capabilities for managing and automating your data and AI lifecycle. For details on how Data Fabric can support your machine learning goals and operations in practical ways, see the Data Fabric use cases.
Learning objectives
This tutorial uses an AutoAI use case to demonstrate the benefits of Watson Pipelines, giving you a better understanding of how to orchestrate an AutoAI experiment. The tutorial includes details about building sample pipelines that show how to automate the creation and running of an AutoAI experiment as well as how to deploy the experiment through the IBM Cloud Pak for Data platform as a web service.
Prerequisites
To follow this tutorial, you need:
- Access to IBM Cloud Pak for Data
- An IBMid
Estimated time
It should take you approximately 45-60 minutes to complete the tutorial, including the training in Watson Pipelines.
Steps
Step 1. Register your IBM Cloud account
Create an IBMid.
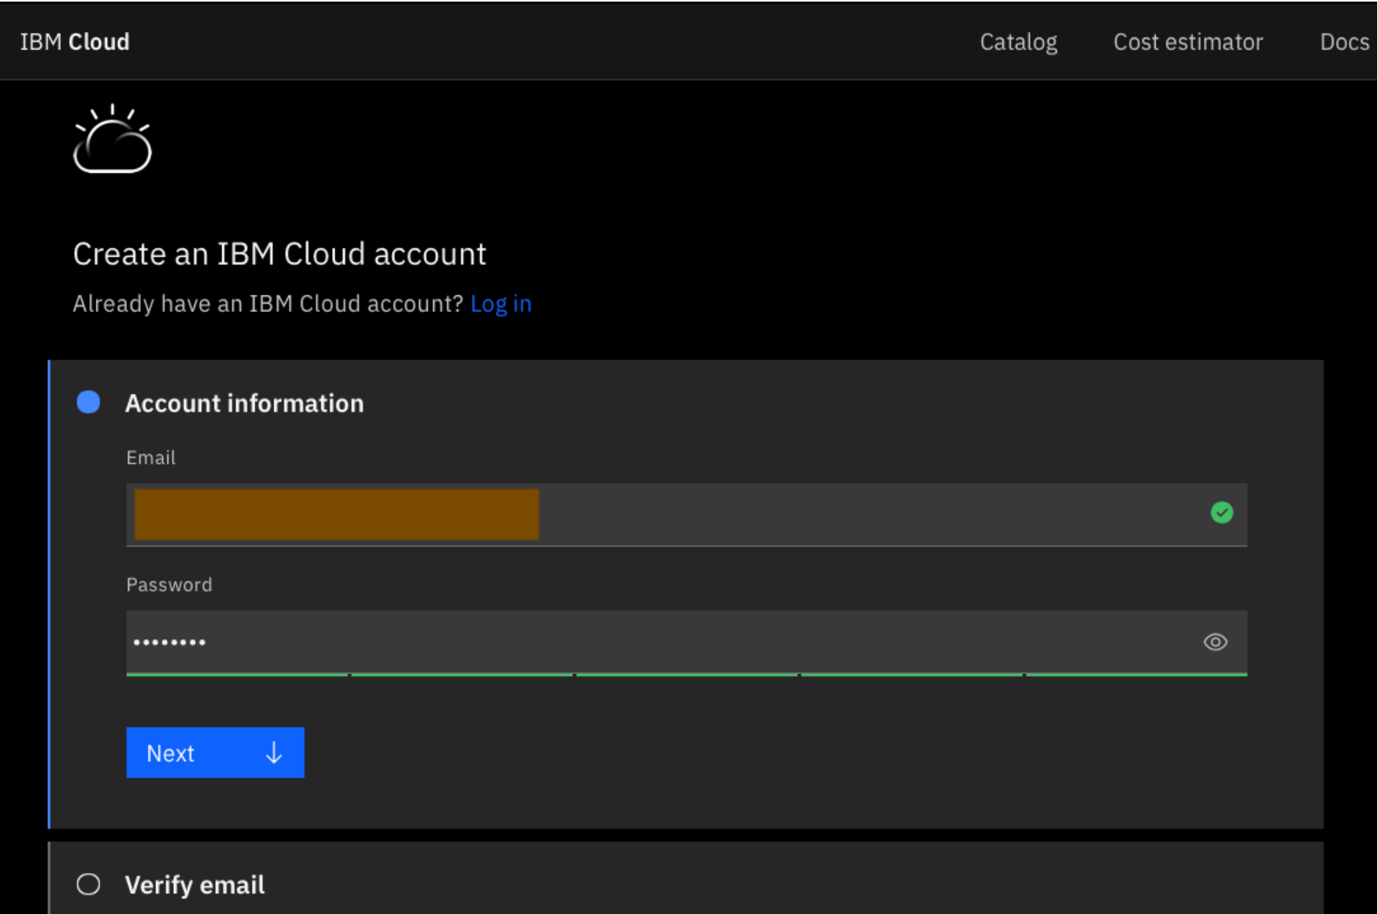
Enter all of the required information and accept the privacy notice. After you've entered the information, you see that your dashboard is ready.

Step 2. Start Cloud Pak for Data
Navigate to IBM Cloud Pak for Data. Choose the region (Dallas), then choose Log in with your IBMid.
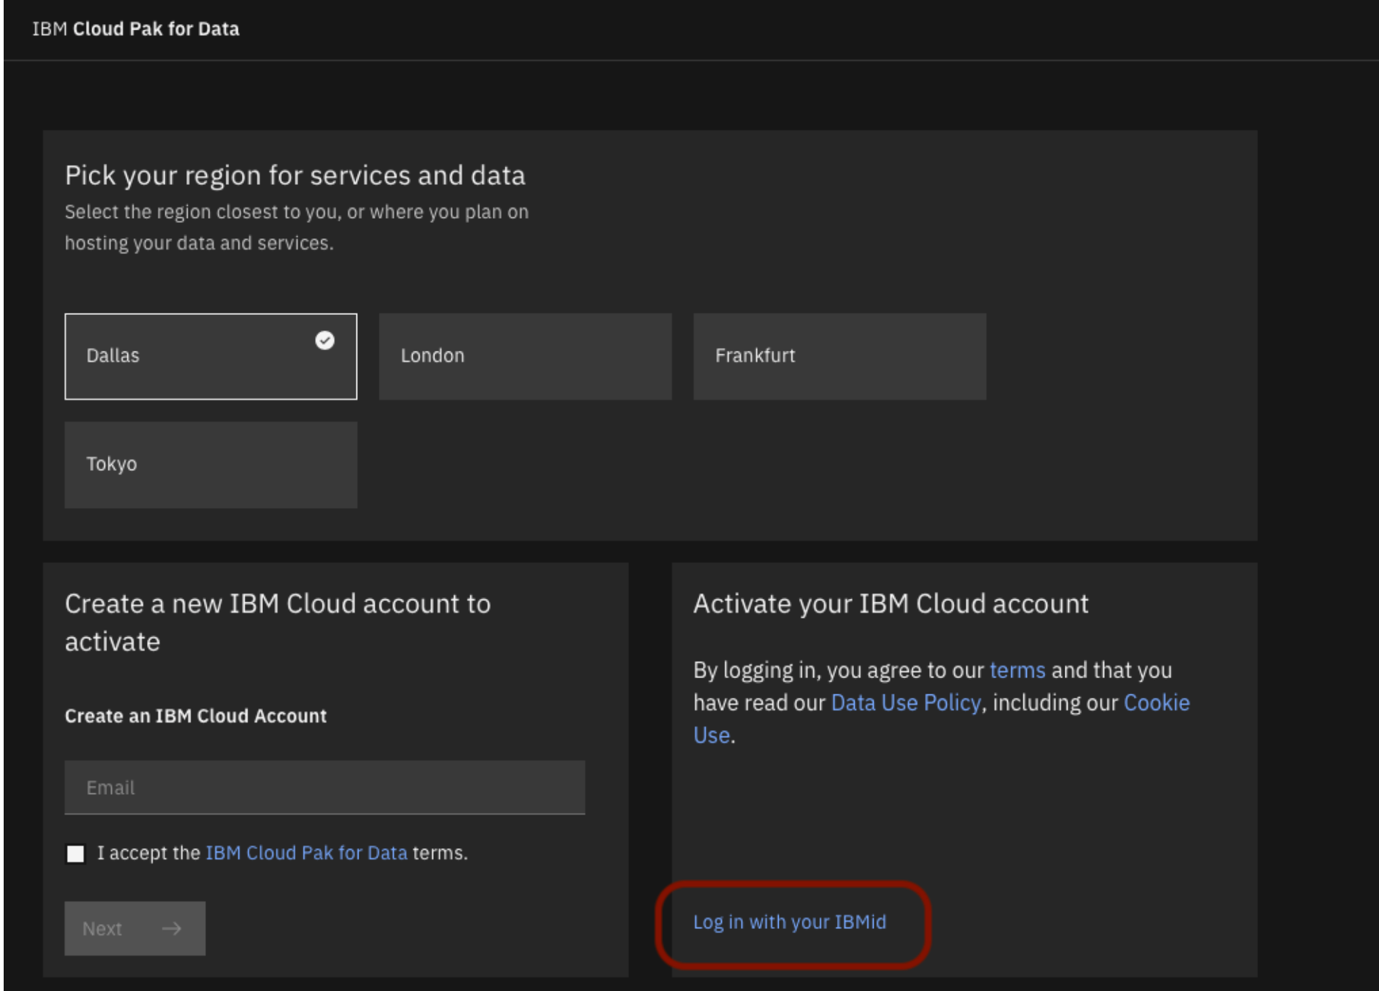
If already have an instance of IBM Cloud Pak for Data, select Launch in Cloud Pak for Data.
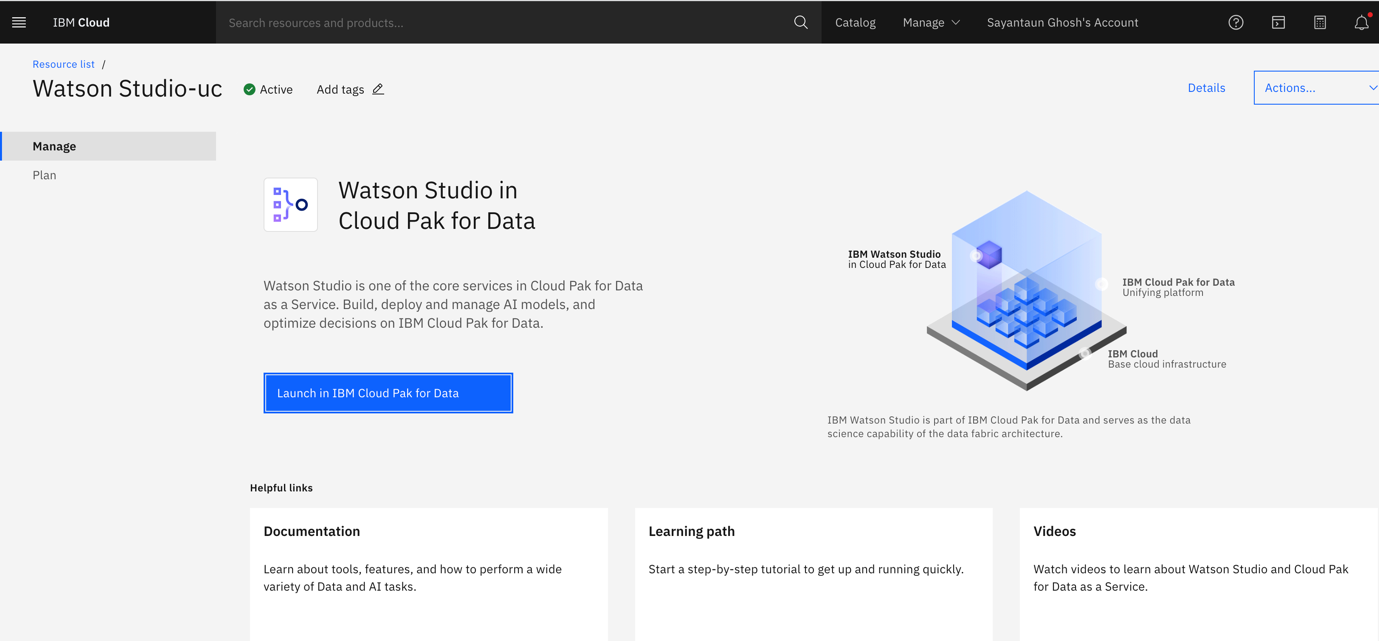
Wait for IBM Cloud Pak for Data to start.
When you see the Go to IBM Cloud Pak for Data button, click it, and go directly to your dashboard.

Optionally, you see a window for an in-platform tour. You can take it before continuing, or simply close the window.
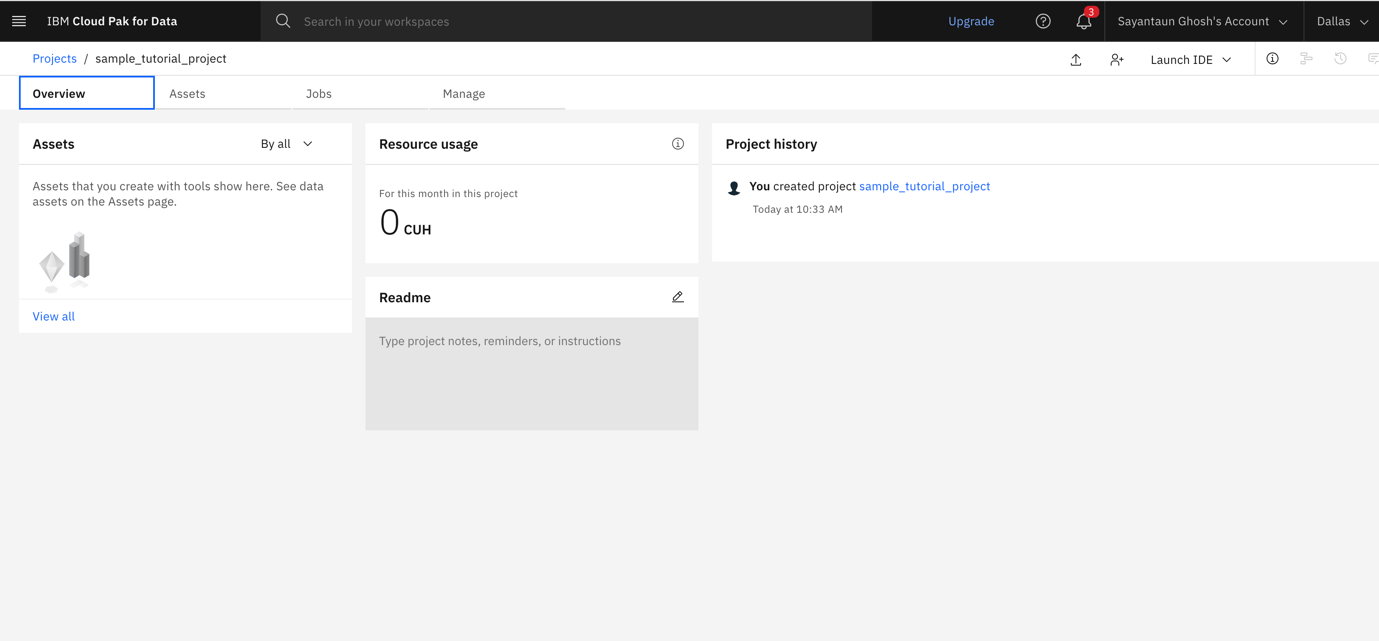
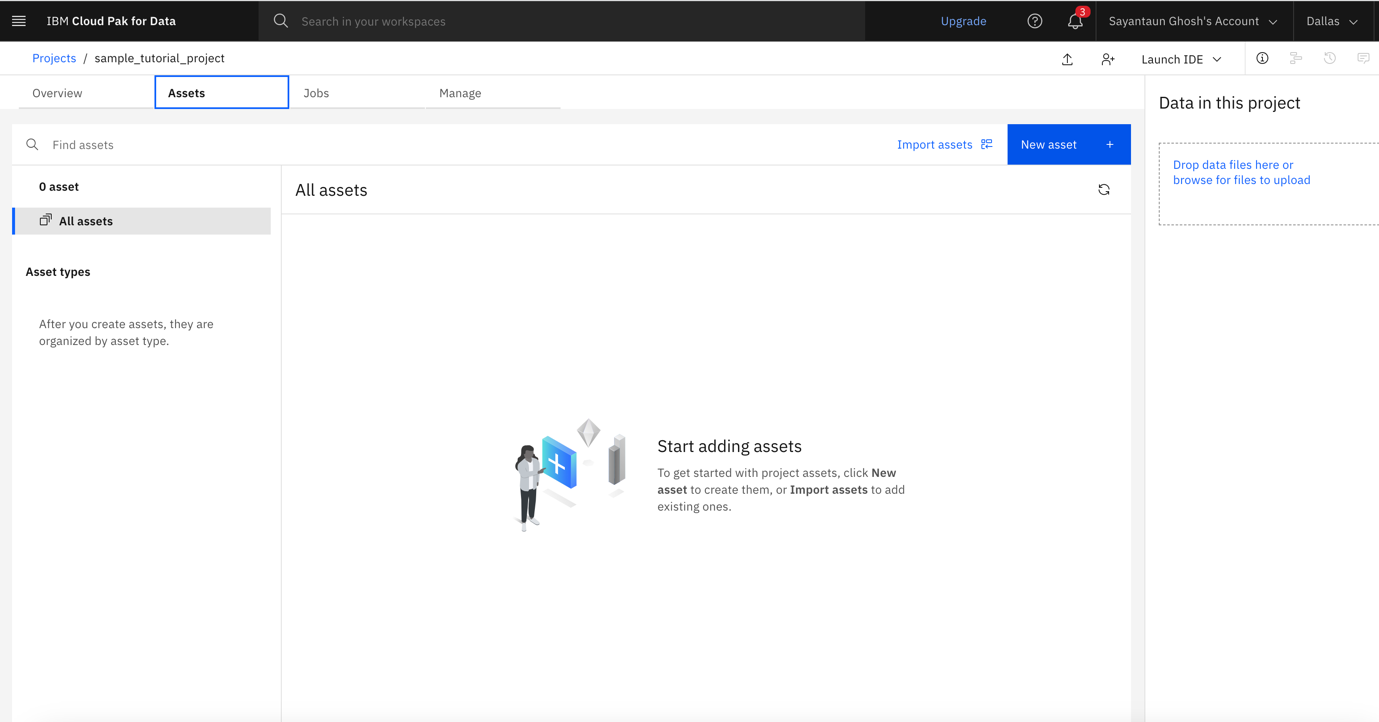
Step 3. Create project
Click Create New Project.

Choose Create an empty project, and enter a name.
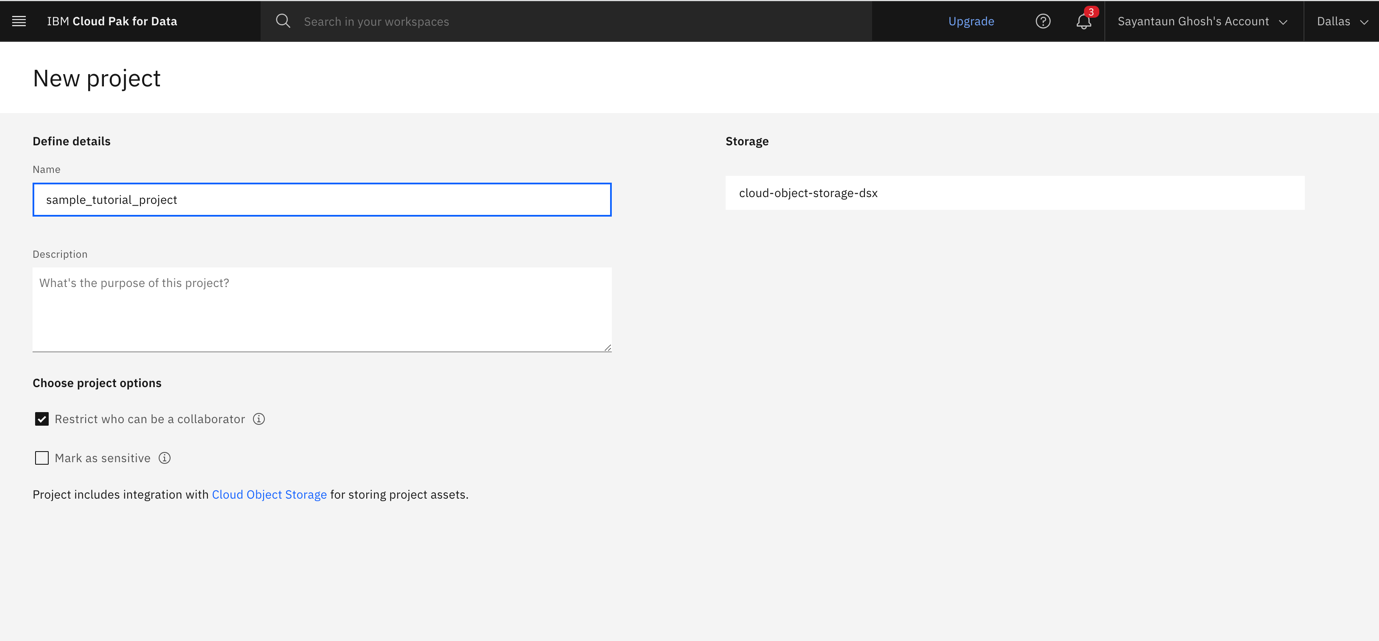
After your project initializes, you see your project Overview and Assets pages.
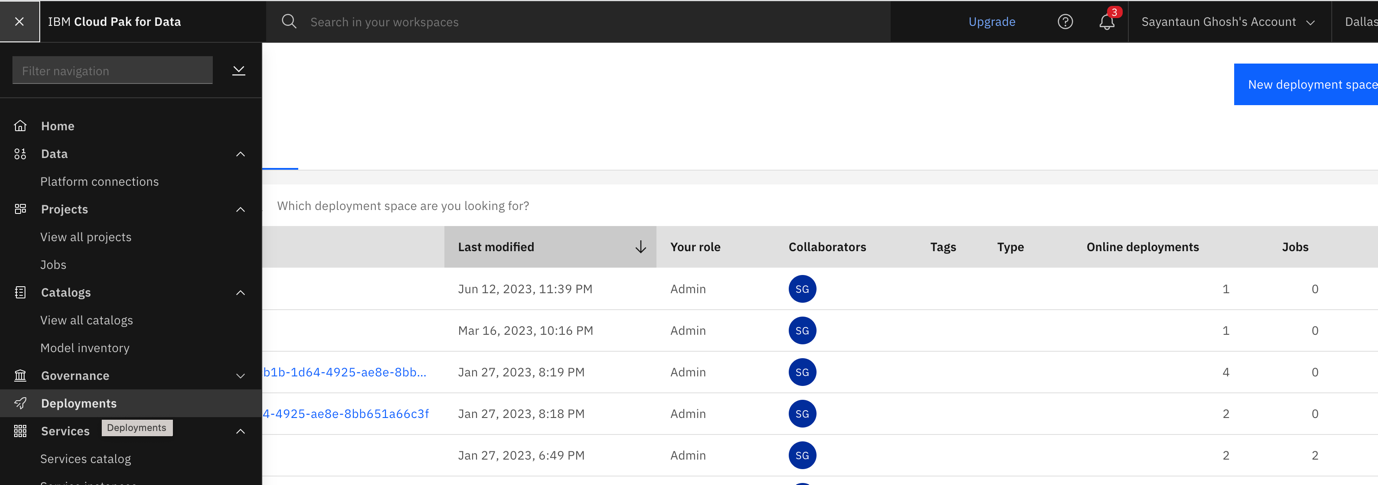
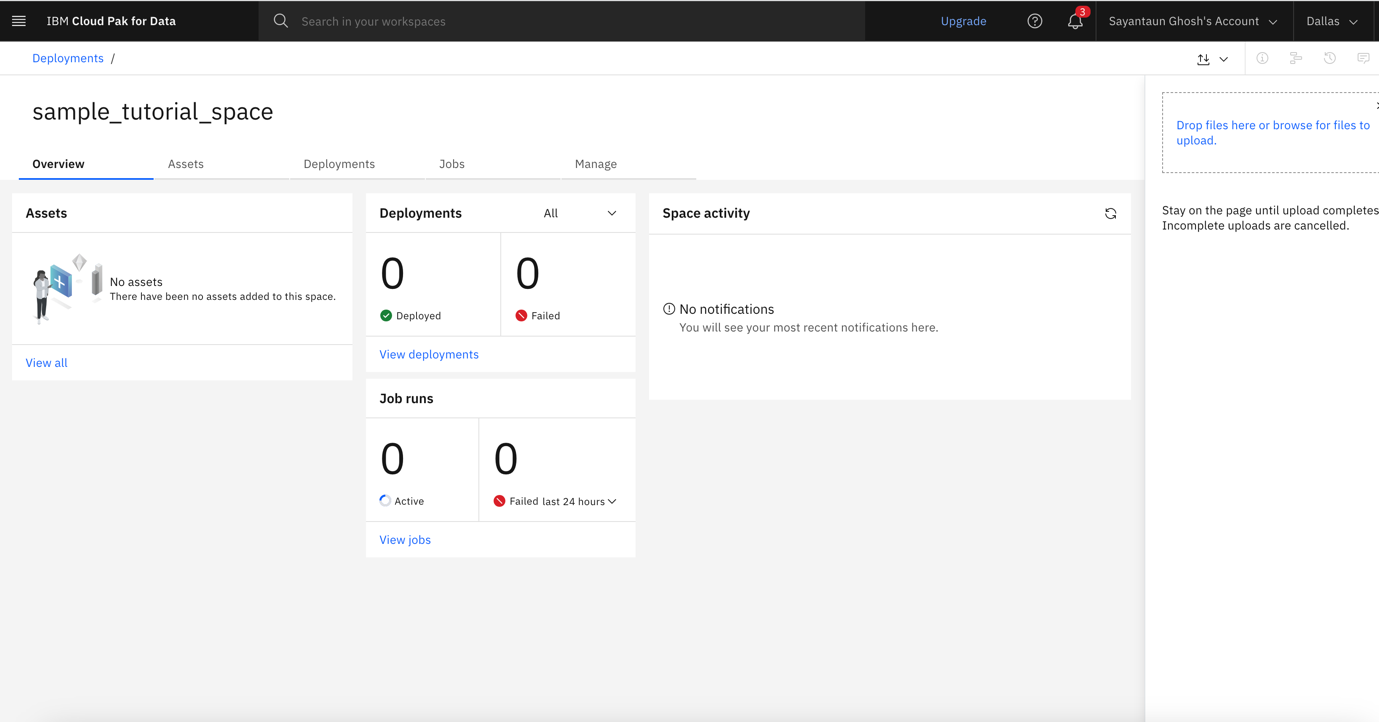
Step 4. Create a deployment space
Choose Deployments in the left navigation menu, then click New Deployment spaces.
Name the space, select your cloud storage, and, optionally, select the Watson Machine Learning Service. Click Create.

Wait for your deployment space to be created, then click View new space when it's ready.
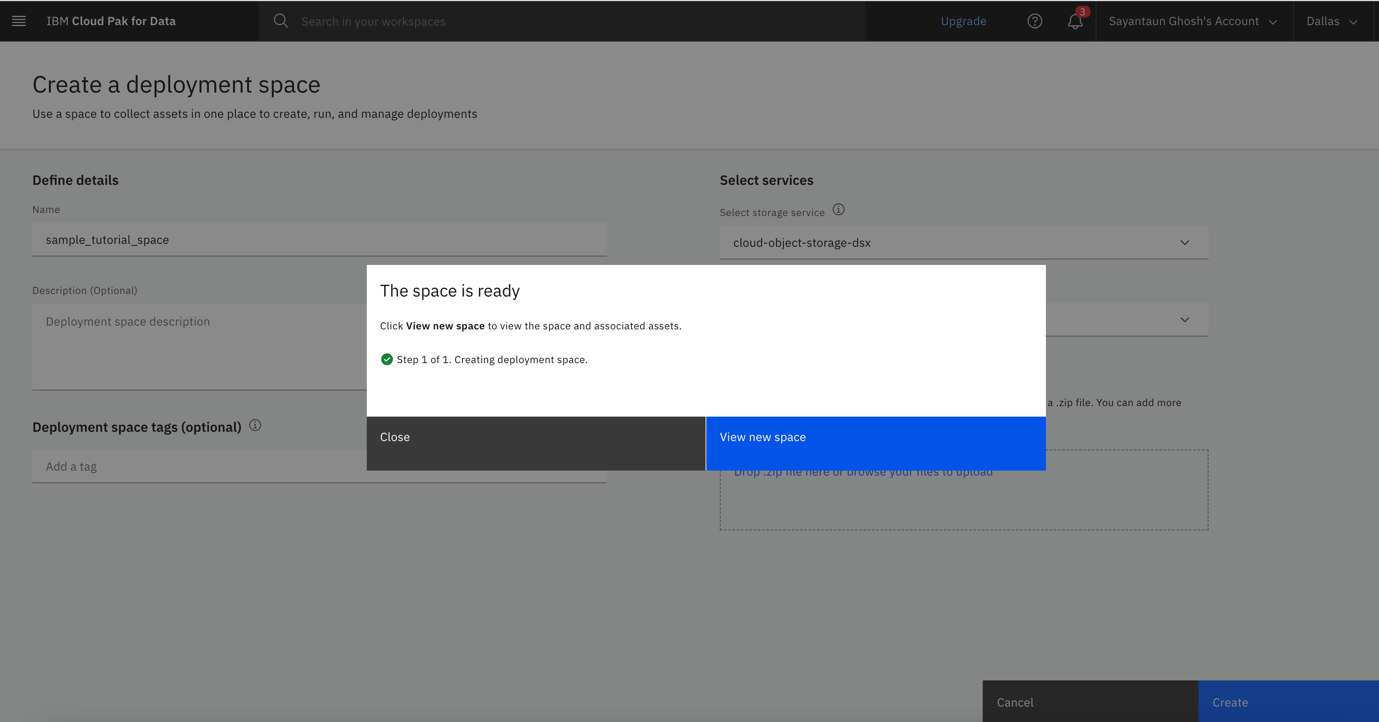
You see your deployment space dashboard.
Step 5. Create Watson Pipeline
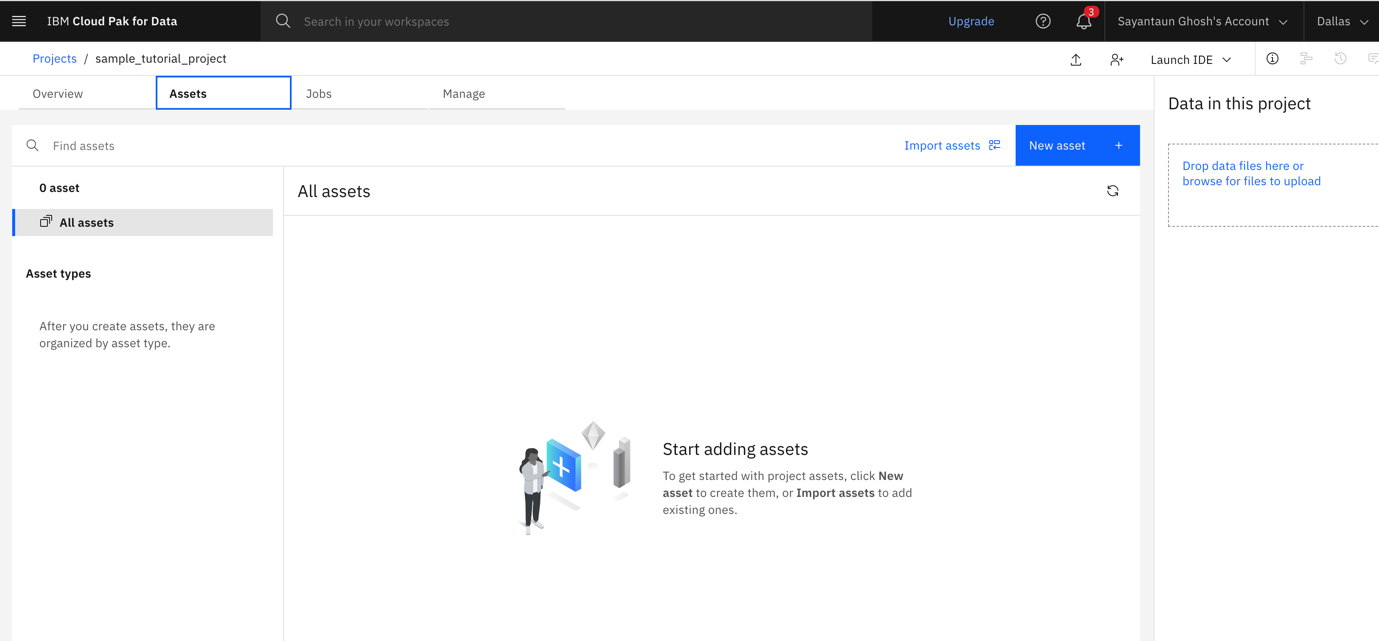
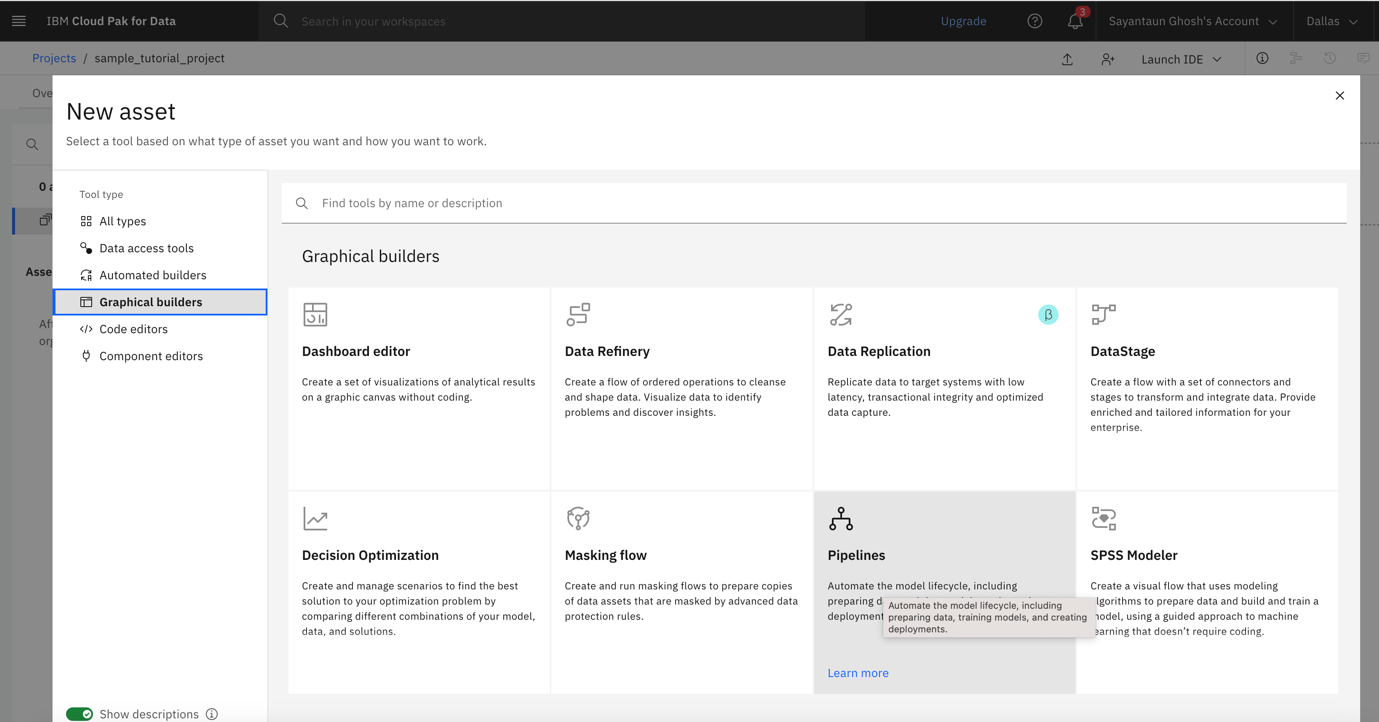
Open the project's Assets tab, and click New asset.
You see the list of assets that you can add to your project. Click Pipelines, which stands for Watson Pipelines.
Choose Gallery sample, then select the Orchestrate an AutoAI experiment sample.
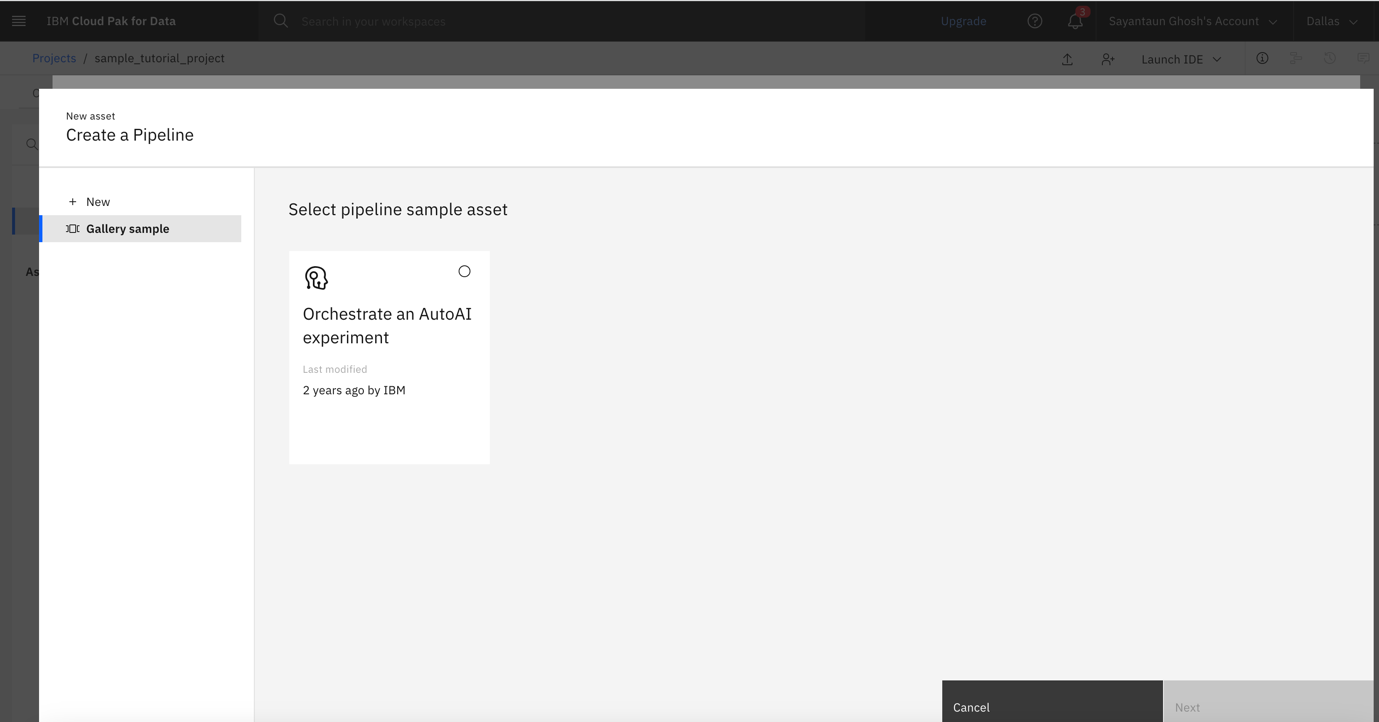
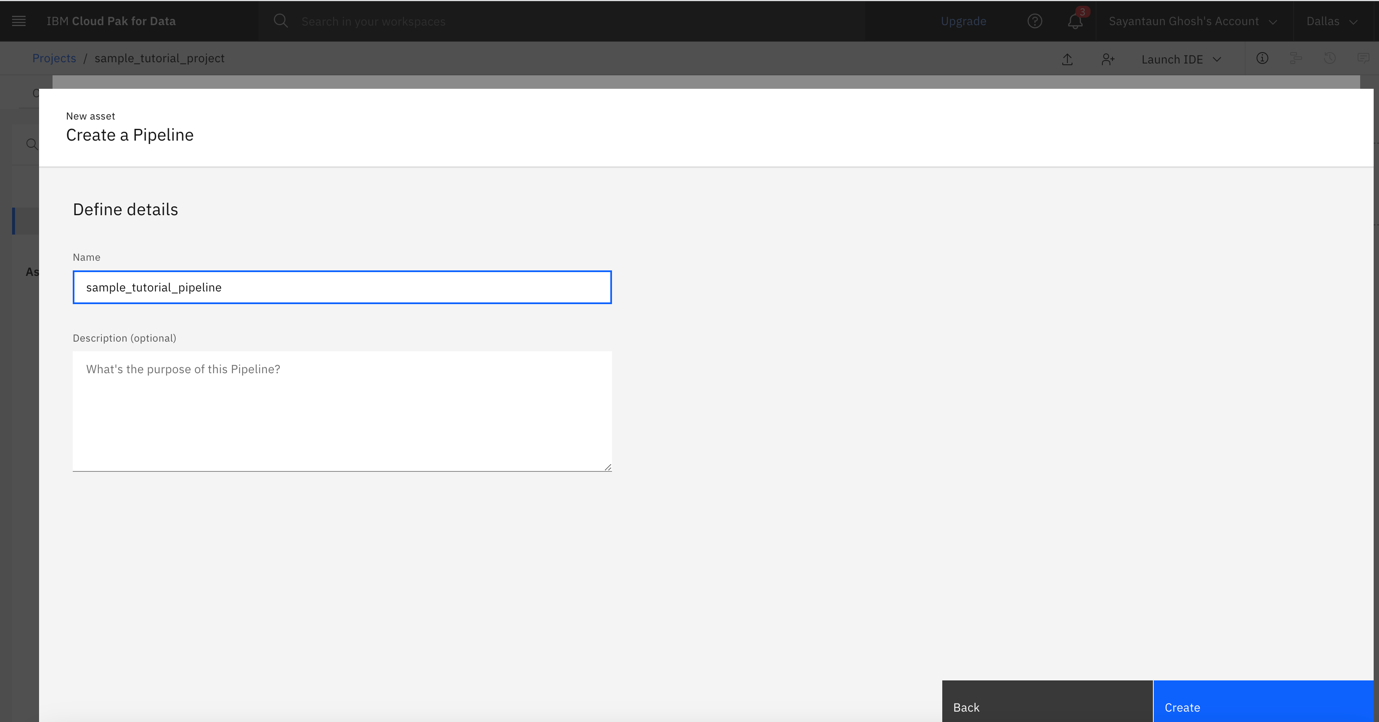
Enter your pipeline name, and click Create.
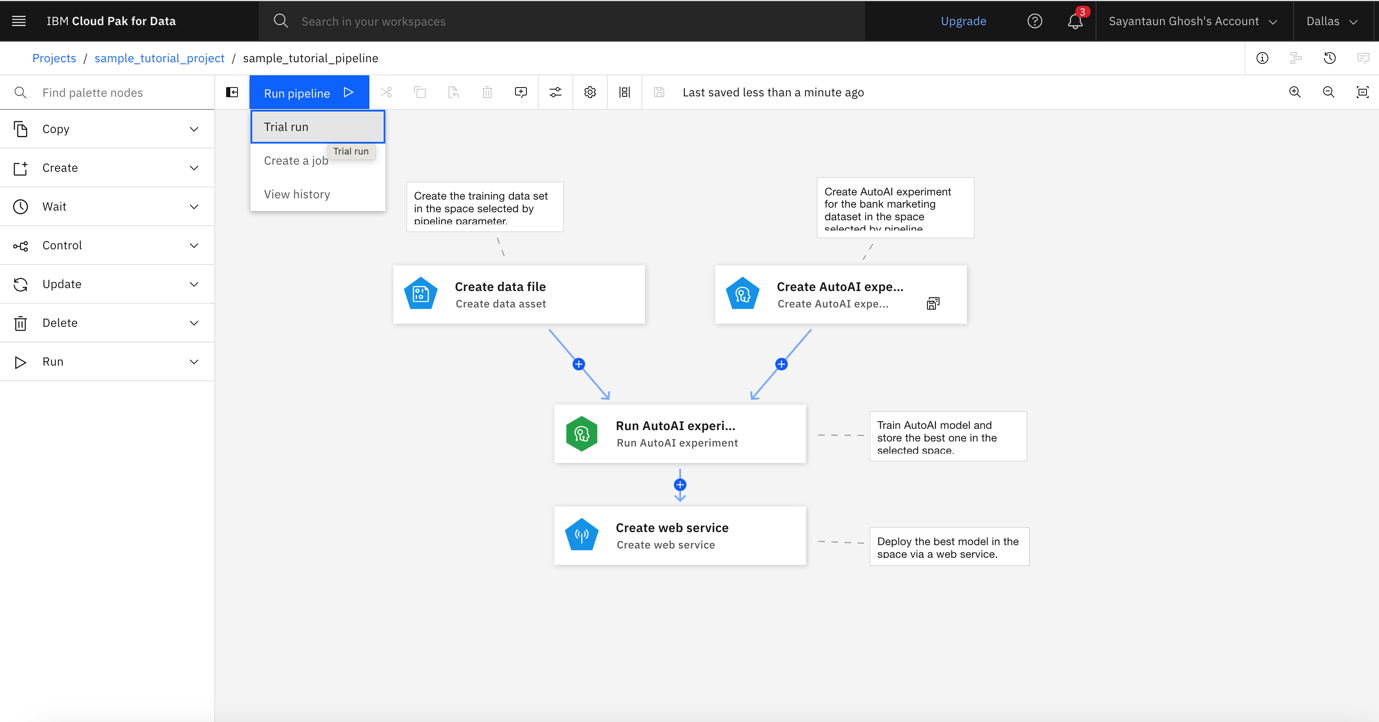
After your pipeline is created, you see the Watson Pipelines user interface with your sample pipeline opened in it.

Step 6. Trigger trial run
Click Run pipeline, and select Trial Run. This creates a one-time run, as opposed to runs scheduled to execute periodically.
In the Define Pipeline Parameters window, click Select Space under the deployment_space parameter.
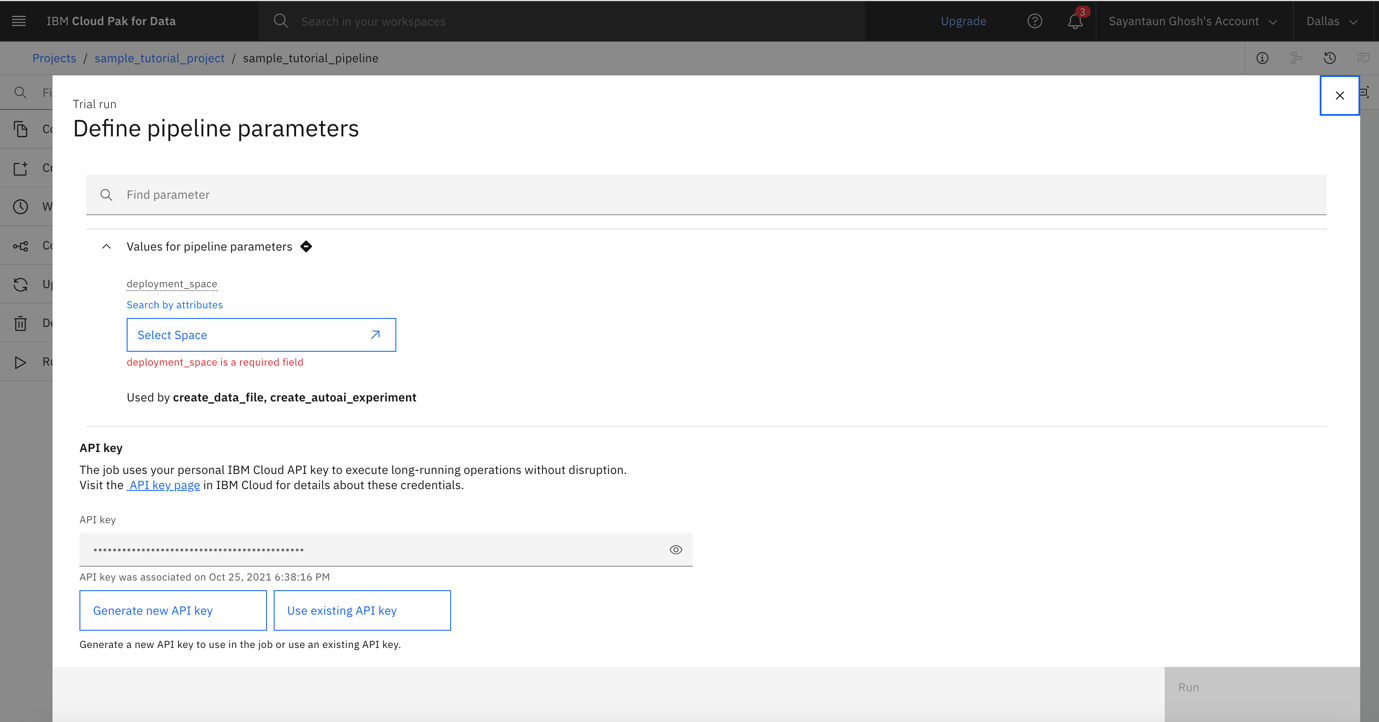
Select your space, then click Choose.

You return to the pipeline parameters window. Note that your deployment space is now visible instead of the Select space button.
Generate the API key by clicking Generate new API key.
Enter a name for your API key, and click Save. Now your API key is created, and you are able to reuse it in future runs.
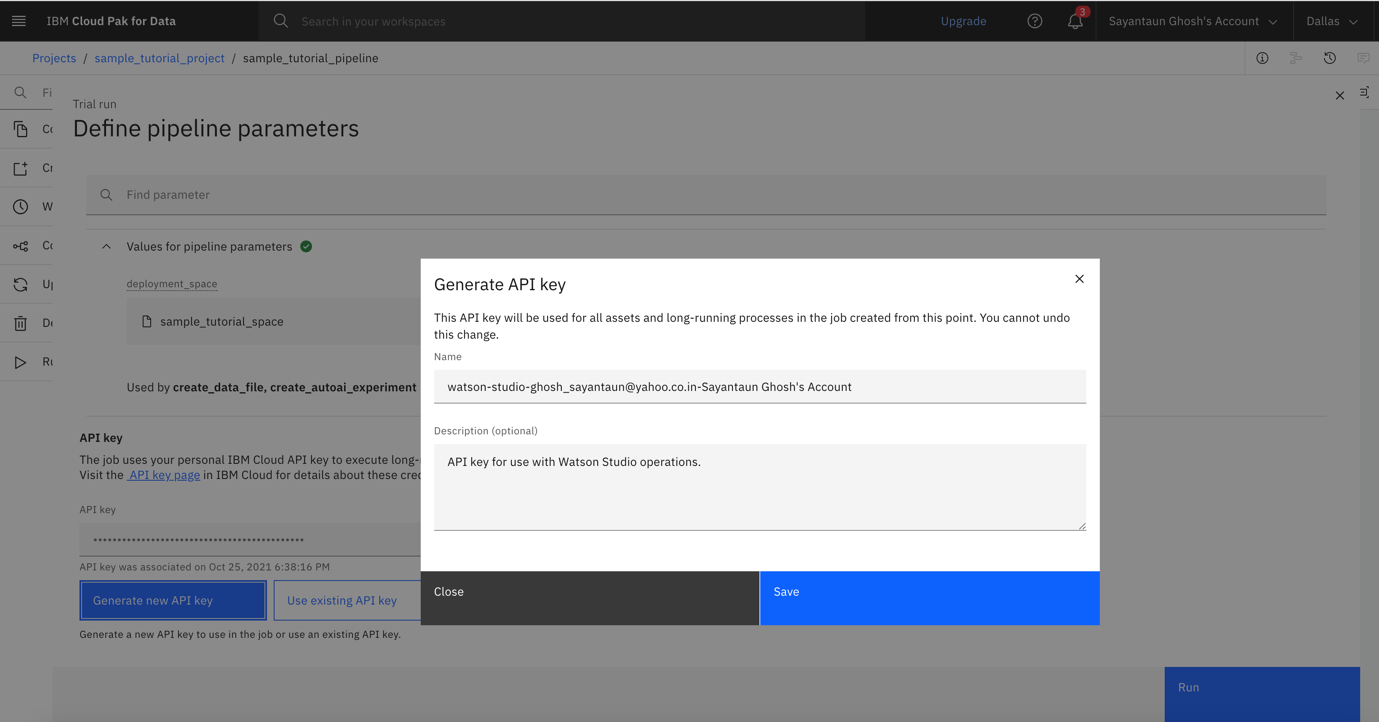
Click the eye icon to show your API key. Copy and paste it to a safe location so that you won't lose it. It is not shown later, but you can generate a new API key if you lose it.
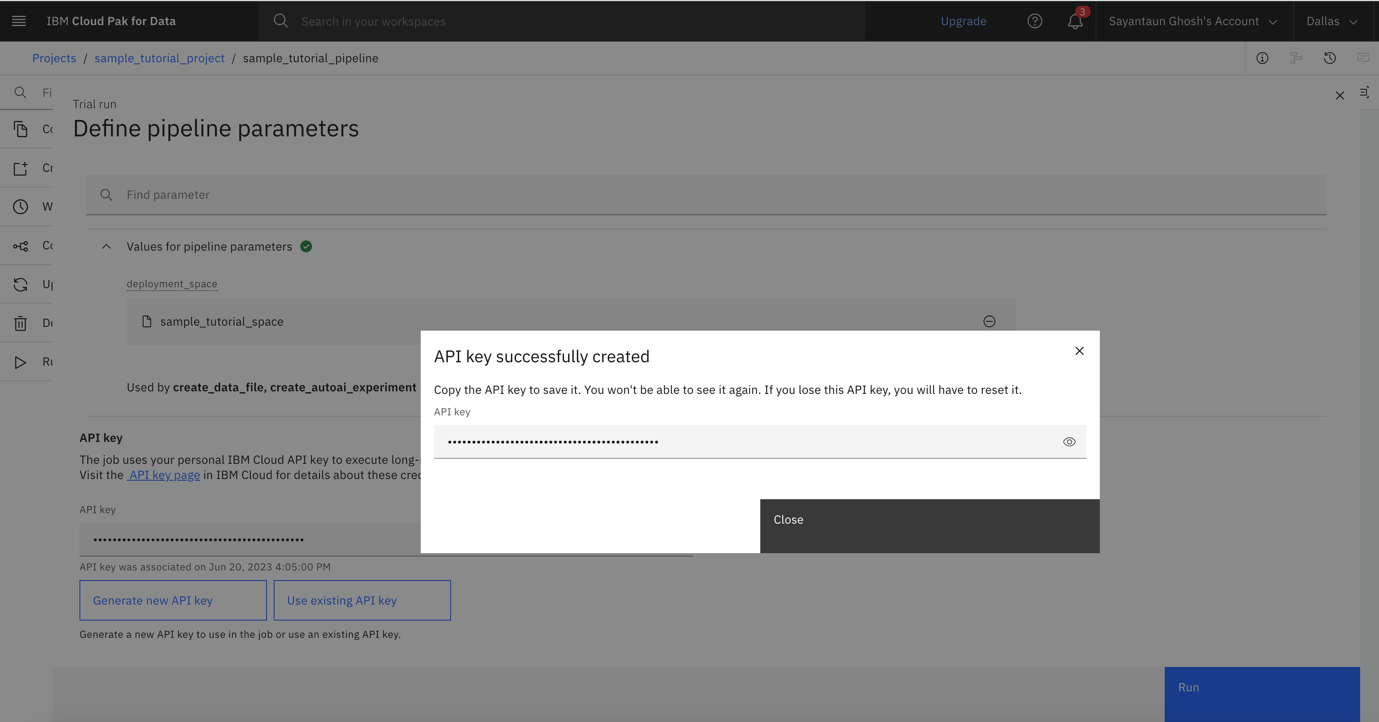
You return to the pipeline parameters window. Note how the API key is now chosen, and the Run button in the lower-right corner is no longer gray.
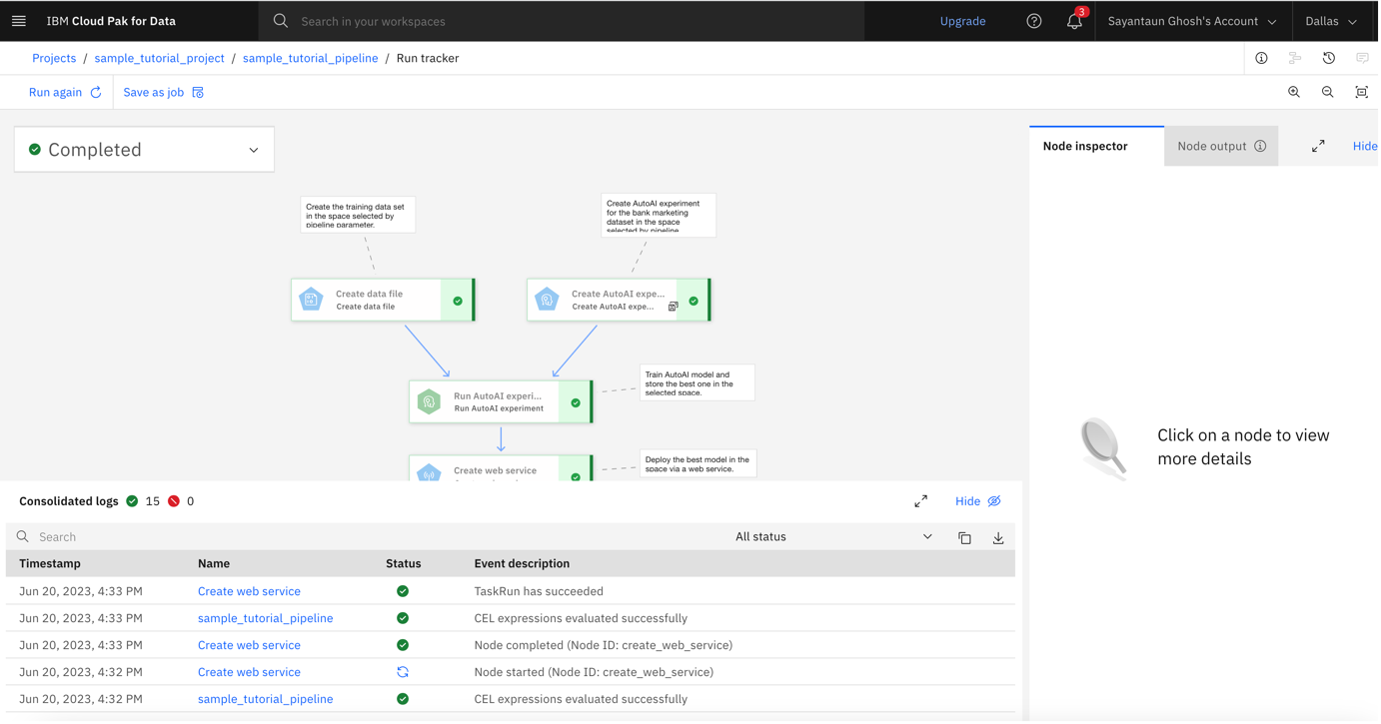
Click Run to execute your run. After your run is created, you see the execution tracking user interface, where you can observe your pipeline run being executed.
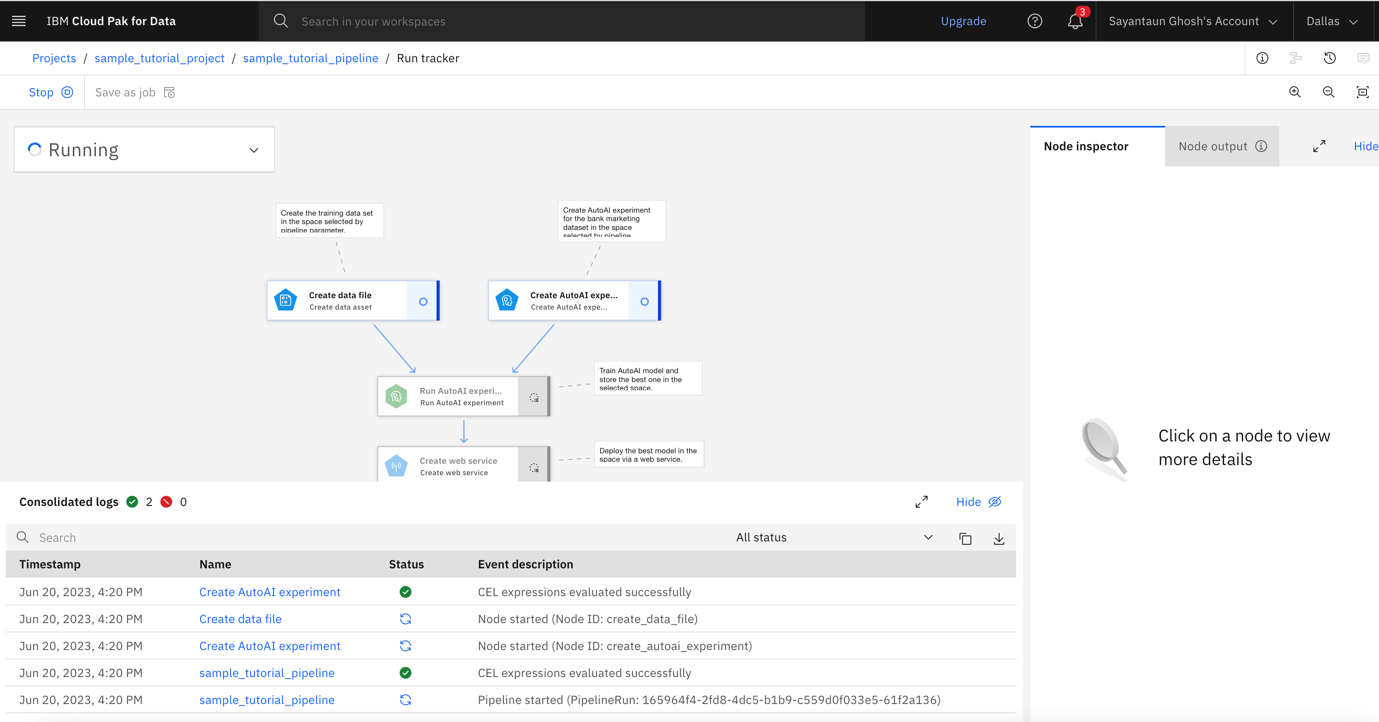
Wait for your run to complete. It should finish successfully and produce a deployment in your deployment space

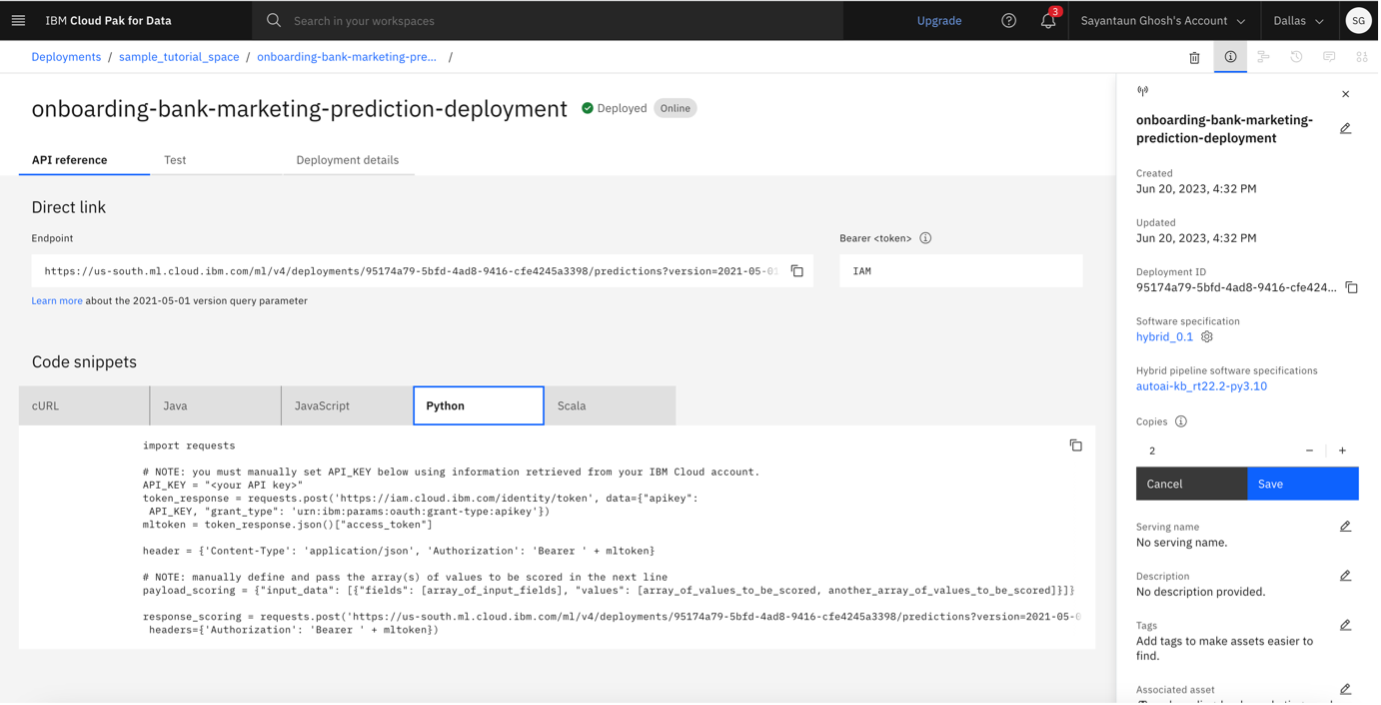
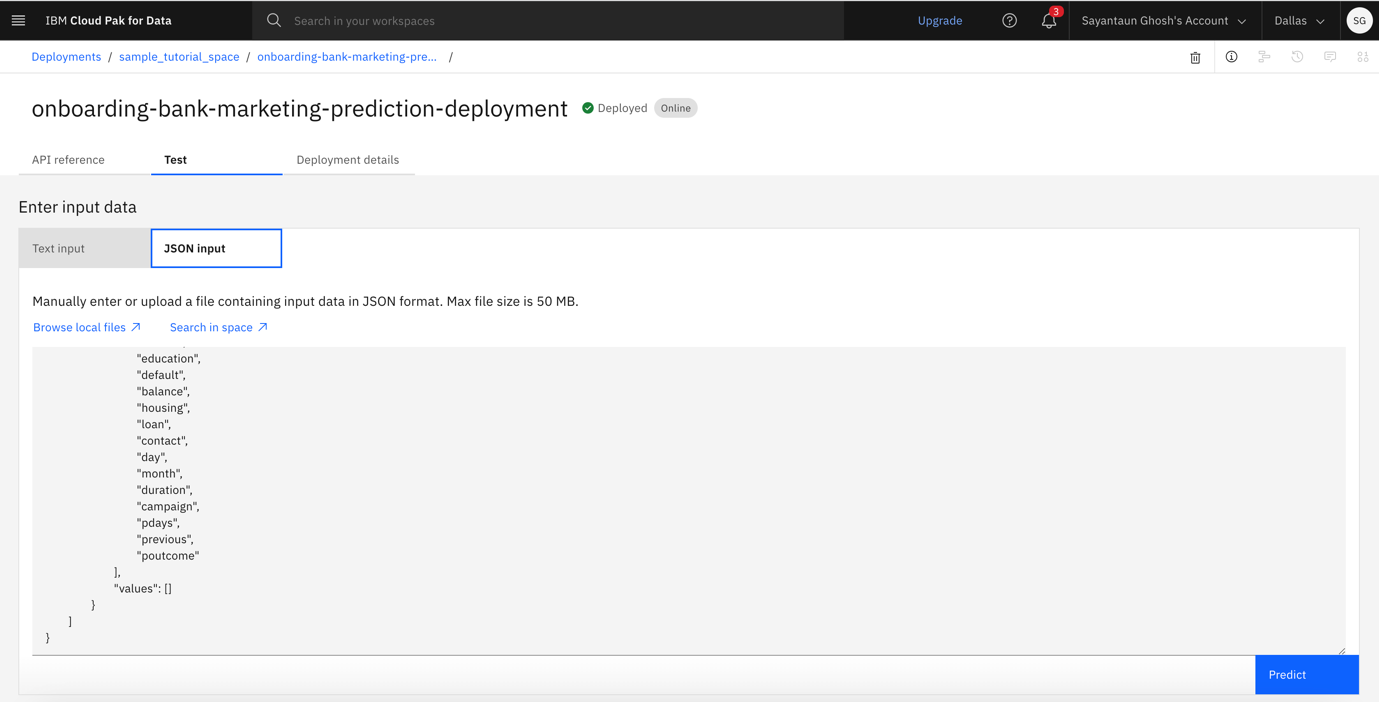
Step 7. Validate deployment
Go to your Deployment space.
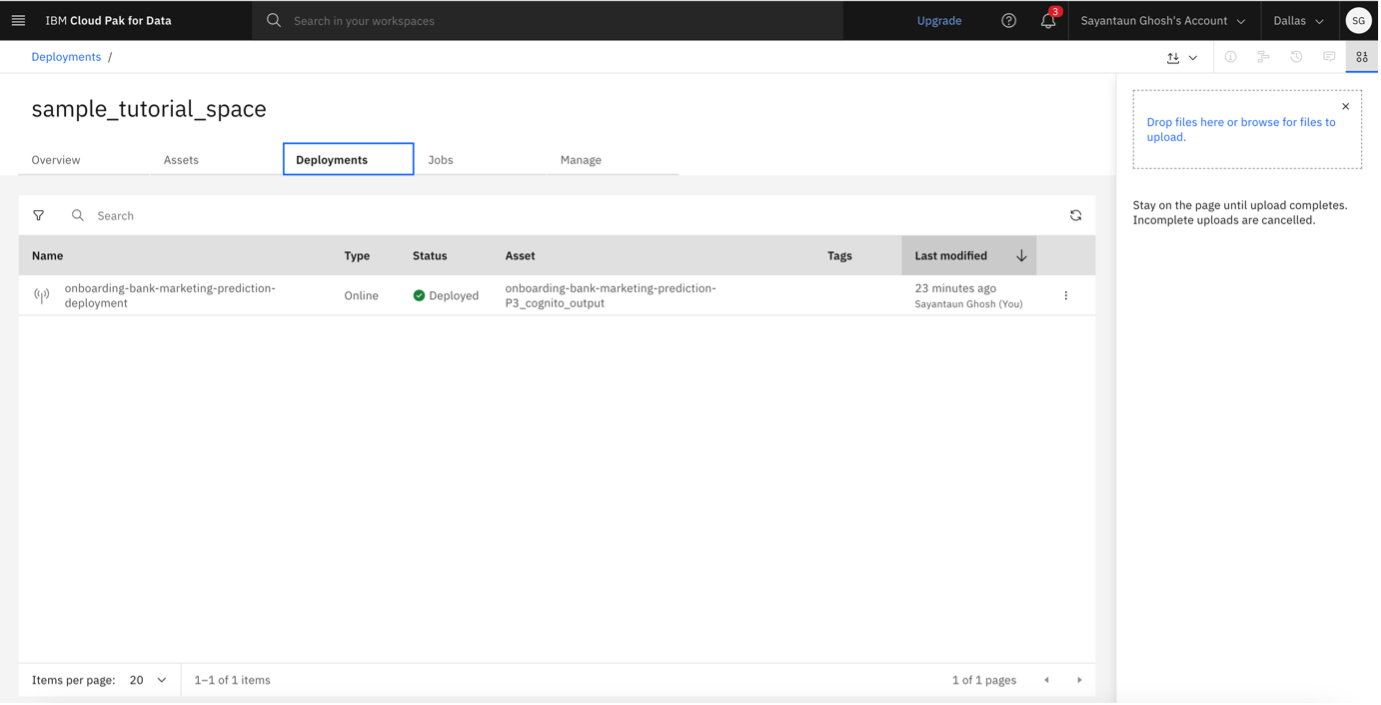
Validate and test the online deployment.
Summary
This tutorial explained one approach to building machine learning pipelines on IBM Cloud Pak for Data using Watson Pipelines. For more information on Watson Pipelines, see the product documentation.