About cookies on this site Our websites require some cookies to function properly (required). In addition, other cookies may be used with your consent to analyze site usage, improve the user experience and for advertising. For more information, please review your options. By visiting our website, you agree to our processing of information as described in IBM’sprivacy statement. To provide a smooth navigation, your cookie preferences will be shared across the IBM web domains listed here.
Tutorial
Configure IBM Vault KMIP as a key server for IBM FlashSystem
Enhance the process of storing and exposing secrets to applications and users
On this page
Storage systems are data repositories that hold the key to data-at-rest security. Whether in the cloud or an enterprise's on-premise infrastructure, storage systems have in-built data-protection.
With cybersecurity incidents increasing exponentially, new regulations now call for compliance with enhanced data protection standards. These standards require storage systems to obtain data encryption keys (DEKs) from a key server. A key server, in the context of a storage system, is a key management system (KMS) that is accessible with the Key Management Interoperability Protocol (KMIP).
IBM has announced the availability of IBM Vault self-managed on IBM Z and LinuxONE. IBM Vault provides a centralized approach to secrets management across every element of the application delivery lifecycle. It also provides a highly available and secure way of storing and exposing secrets to applications and users. IBM Vault's capabilities can be enhanced by adding a KMIP-plugin, which enables Vault to become a key server for storage systems.
This tutorial walks you through the steps to configure a Vault installation with a KMIP plugin, and associate this key server with a storage system such as IBM FlashSystem.
Prerequisites
Before completing this tutorial, ensure that you have:
- Access to s390x server | VM. If Vault needs to be configured in a confidential computing environment, see Deploying Vault securely in a confidential environment
- An IBM Vault Enterprise Vault License
- Administrator access to an IBM Flash Subsystem
Steps
Step 1: Install IBM Vault
- Login to the s390x server.
Prepare the environment
export VAULT_HOME=/etc/vault.d export VAULT_RAFT=/opt/vault/data mkdir -p $VAULT_HOME mkdir -p $VAULT_RAFT cd $VAULT_HOMEDownload the latest version of IBM Vault Self Managed on IBM Z and LinuxONE from Passport Advantage - PID 5900BP2.
Create the Vault License file by copying the following into a file:
$VAULT_HOME/vault-ent-license.hclicApply the Vault license:
export VAULT_LICENSE=$VAULT_HOME/vault-ent-license.hclicCopy vault-sample-config.hcl to
$VAULT_HOME/vault-config.hcl. Note: Ensure thelicense_pathstatement points to$VAULT_LICENSE.Start the Vault server:
./vault server -config=$VAULT_HOME/vault-config.hclExpect a sample output like this vault-startup-sample-output
Check the Vault status:
export VAULT_ADDR=http://127.0.0.1:8205 ./vault statusThe output should look like the following:
root@vault-cluster1:~/vault_1# ./vault status Key Value --- ----- Seal Type shamir Initialized false Sealed true Total Shares 5 Threshold 3 Version 1.19.1+ent Build Date 2025-03-04T09:00:50Z Storage Type raft Cluster Name vault-cluster-72b2023c Cluster ID 8abeaf0a-a5fc-aeda-92e8-8f0e42313d97 HA Enabled true HA Cluster https://127.0.0.1:8206 HA Mode active Active Since 2025-03-28T11:05:36.809998915Z Raft Committed Index 861411 Raft Applied Index 861411 Last WAL 330202Check the Vault License status:
./vault license inspect $VAULT_LICENSE_PATHThe output should look similar to the following:
Source: /etc/vault.d/license.hclic Product: vault License ID: 07cd369b-bb50-e993-d6bb-e0f54d4f4be6 Customer ID: e99ff6f3-b823-dfb3-c514-06f16668de76 Installation ID: * Issue Time: 2025-01-28 14:50:58.185093991 +0000 UTC Start Time: 2025-01-28 00:00:00 +0000 UTC Expiration Time: 2025-04-30 00:00:00 +0000 UTC Termination Time: 2025-05-31 00:00:00 +0000 UTC {"license_id":"07cd369b-bb50-e993-d6bb-e0f54d4f4be6","customer_id":"e99ff6f3-b823-dfb3-c514-06f16668de76","installation_id":"*","issue_time":"2025-01 28T14:50:58.185093991Z","start_time":"2025-01-28T00:00:00Z","expiration_time":"2025-04-30T00:00:00Z","termination_time":"2025-05-31T00:00:00Z","flags":{"modules":["multi-dc scale","governance-policy","advanced-data-protection-key-management","advanced-data-protection-transform"]},"features":["HSM","Performance Replication","DR Replication","MFA","Sentinel","Seal Wrapping","Control Groups","Performance Standby","Namespaces","KMIP","Entropy Augmentation","Transform Secrets Engine","Lease Count Quotas","Key Management Secrets Engine","Automated Snapshots","Key Management Transparent Data Encryption","Secrets Sync"],"performance_standby_count":9999} License is validInitialize Vault and unseal:
./vault operator initThe output should look similar to the following:
Recovery Key 1: hy1i97i1PP9tCWX**uoyTrqAzhHs*u61JE5sNwVFdUHQ+ Recovery Key 2: iQcyiI14+55ooBsNo**+ECPk83PtaC/4qJQkU2hJgGG7 Recovery Key 3: 9Tru************Io/mT7HoKI0mwpl Recovery Key 4: yKWRklqRM/wNsmftNOR3TK**uIdK2Z/Kx7L4Ww/ORVU1 Recovery Key 5: fRD03kNS8sICfdOb**9DioS9PY6K6yRweLWGVxiUTmVx Initial Root Token: hvs.7ta2pMiIpLXki**ZCkpzskHX Success! Vault is initialized Recovery key initialized with 5 key shares and a key threshold of 3. Please securely distribute the key shares printed above.Note: Make a note of the Initial Root Token and unseal Vault with any three of the recovery keys with the following command:
./vault unseal <unseal-key>Make sure Vault is now unsealed:
./vault statusThe output should look something like this:
Key                     Value
---                     -----
Seal Type               shamir
Initialized             true
Sealed                  false
Total Shares            5
Threshold               3
Version                 1.19.1+ent
Build Date              2025-01-29T14:07:00Z
Storage Type            raft
Cluster Name            vault-cluster-18d5d356
Cluster ID              d2f3c181-08ab-3168-ae83-0e89a1d02129
HA Enabled              true
HA Cluster              https://127.0.0.1:8206
HA Mode                 active
Active Since            2025-03-19T10:32:50.727057924Z
Raft Committed Index    96
Raft Applied Index      96
Last WAL                33
Step 2: Log in to IBM Vault and enable KMIP
Log in to Vault with the Initial Root Token:
./vault login <initial root token>Enable the KMIP Secrets Engine:
./vault secrets enable kmip Success! Enabled the kmip secrets engine at: kmip/vault write kmip/config listen_addrs=0.0.0.0:5696 tls_ca_key_type=rsa tls_ca_key_bits=2048 default_tls_client_key_type=rsa default_tls_client_key_bits=2048 Success! Data written to: kmip/config./vault read kmip/configThe output should look similar to the following:
Key Value --- ----- default_tls_client_key_bits 2048 default_tls_client_key_type rsa default_tls_client_ttl 336h listen_addrs [0.0.0.0:5696] server_hostnames [localhost] server_ips [127.0.0.1 ::1] tls_ca_key_bits 2048 tls_ca_key_type rsa tls_min_version tls12Extract the
root-caof the KMIP secrets engine into thevault-ca.pemfile:./vault read kmip/ca -format=json | jq -r '.data | .ca_pem' >> vault-ca.pem && cat vault-ca.pemCreate the KMIP Scope and Roles:
vault write -f kmip/scope/finance Success! Data written to: kmip/scope/finance vault write kmip/scope/finance/role/accounting operation_all=true Success! Data written to: kmip/scope/finance/role/accountingList out KMIP Scope and Roles
./vault read kmip/scope/finance/role/accountingKey Value --- ----- operation_all true tls_client_key_bits 0 tls_client_key_type n/a tls_client_ttl 0sGenerate the client certificate for IBM FlashSystem:
./vault write -format=json kmip/scope/finance/role/accounting/credential/generate format=pem > credential.json && cat credential.json
jq -r .data.certificate < credential.json > cert.pem
jq -r .data.private_key < credential.json > key.pem
Step 3: Configure an externel key server for IBM FlashSystem
- Log in to the IBM FlashSystem UI:
- To create a certificate signing request (CSR) on IBM FlashSystem, click Security > System Certificates. Click the ellipsis in the corner, click Update certificate, select the externally signed certificate and enter the details. This creates a certificate signing request by the Flash system.
Copy the
fs9200_cert_new.csrCSR file to the Vault server and sign it with the following command:./vault write -f kmip/scope/finance/role/accounting/credential/sign csr=@/etc/vault.d/fs9200_cert_new.csr- Copy the ca-chain to the
vault-kmip-ca-chain.pemfile. - Copy the certificate to the
fs9200-vault-certificate.pemfile.
- Copy the ca-chain to the
On the IBM FlashSystem UI, click Settings > Security > System Certificate and then click Install Signed Certificate. Click Add Certificate and provide the
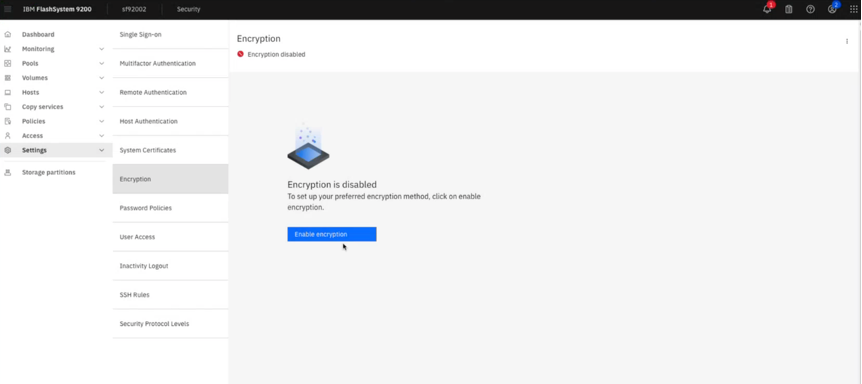
fs9200-vault-certificate.pemthat you created earlier.- On the IBM FlashSystem UI, click Settings > Encryption and click Enable Encryption.
- In the menu, click Key server types. Select Thales CipherTrust Manager.
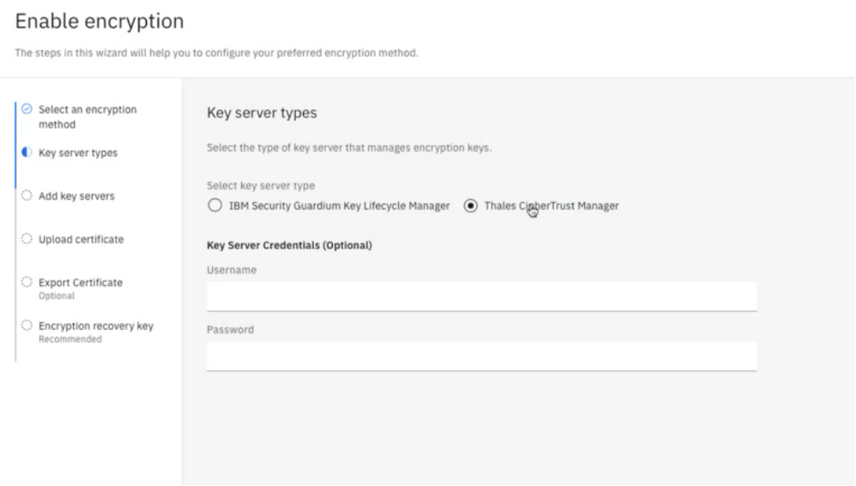 Note: There is no need to provide a userid / password on this screen. You can proceed to the next step.
 - In the menu, click Add key servers and add the following:
- Enter the external IP address of the KMIP server.
- Enter the port number of the KMIP server.

- In the menu, click Upload certificate and upload the certificate from the KMIP server:
- vault-kmip-ca-chain.pem
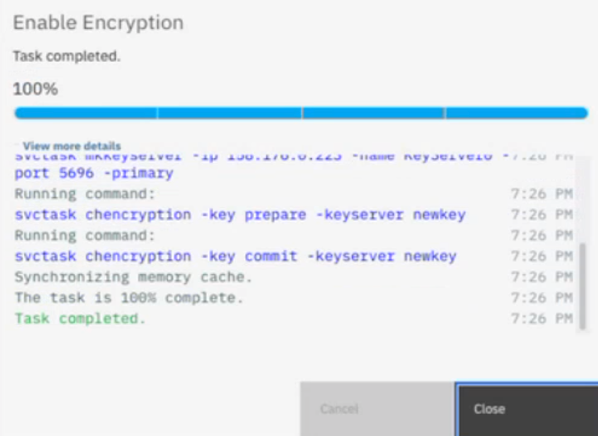
- If all configuration elements are in place, FlashSystem will establish connection with the Vault-KMIP key server.
Step 4: Configure volume encryption on IBM FlashSystem
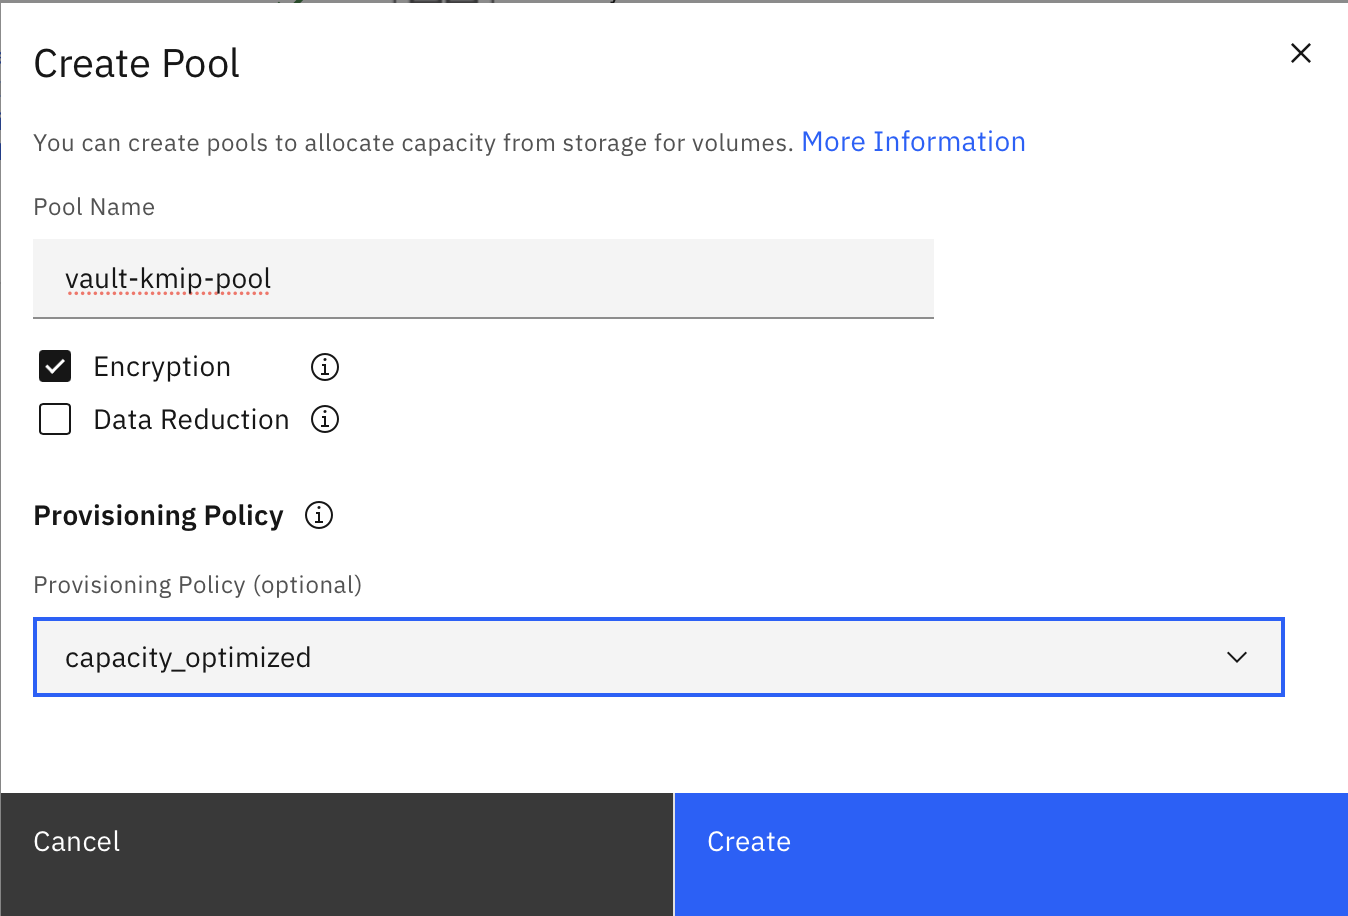
- To create an encrypted volume pool for encrypted volumes, go to the IBM FlashSystem UI and click Volumes > Volumes by pool > Create Pool. Select Encryption and a provisioning policy.
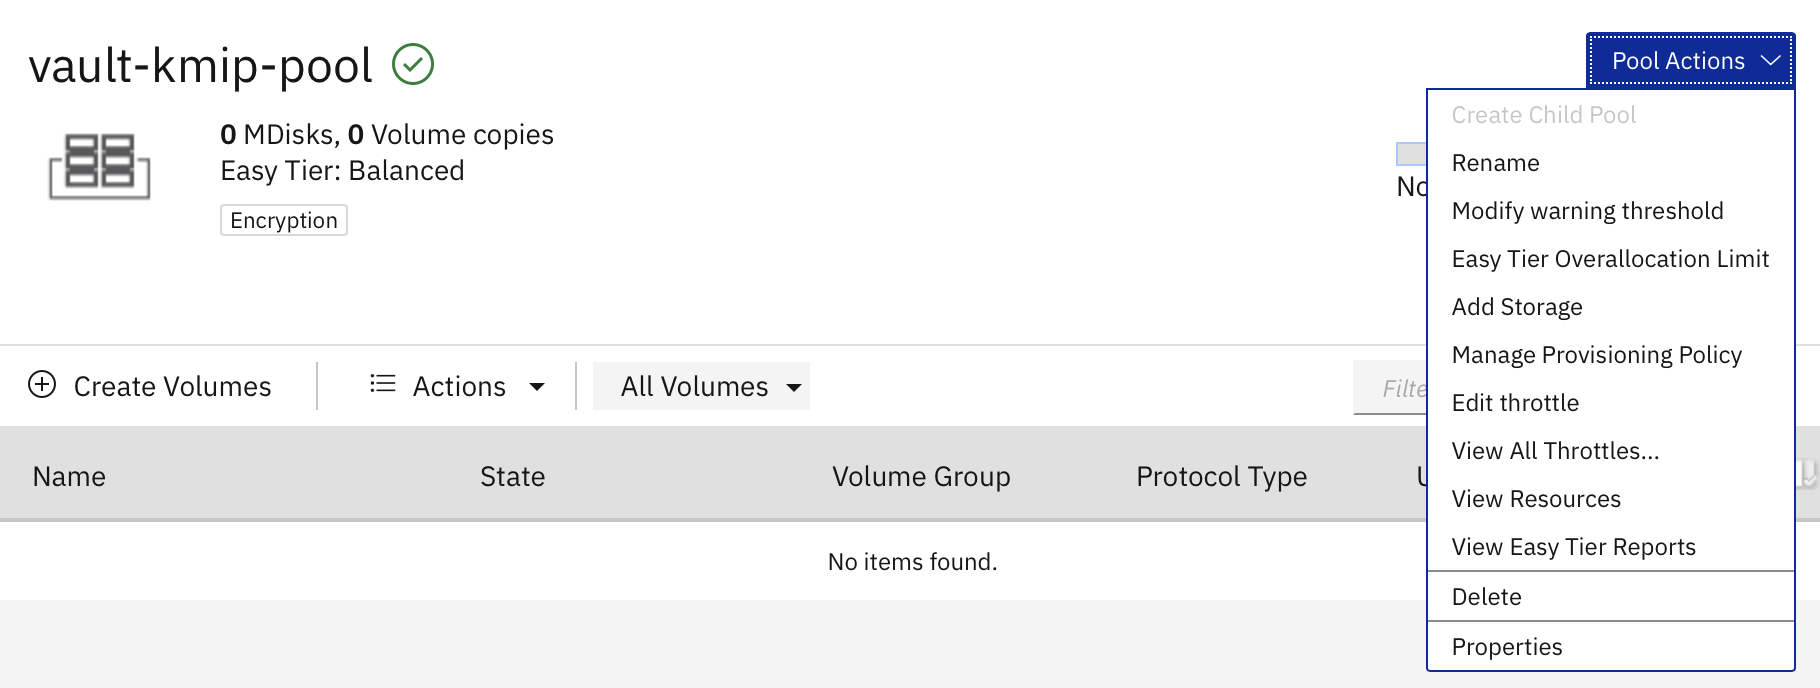
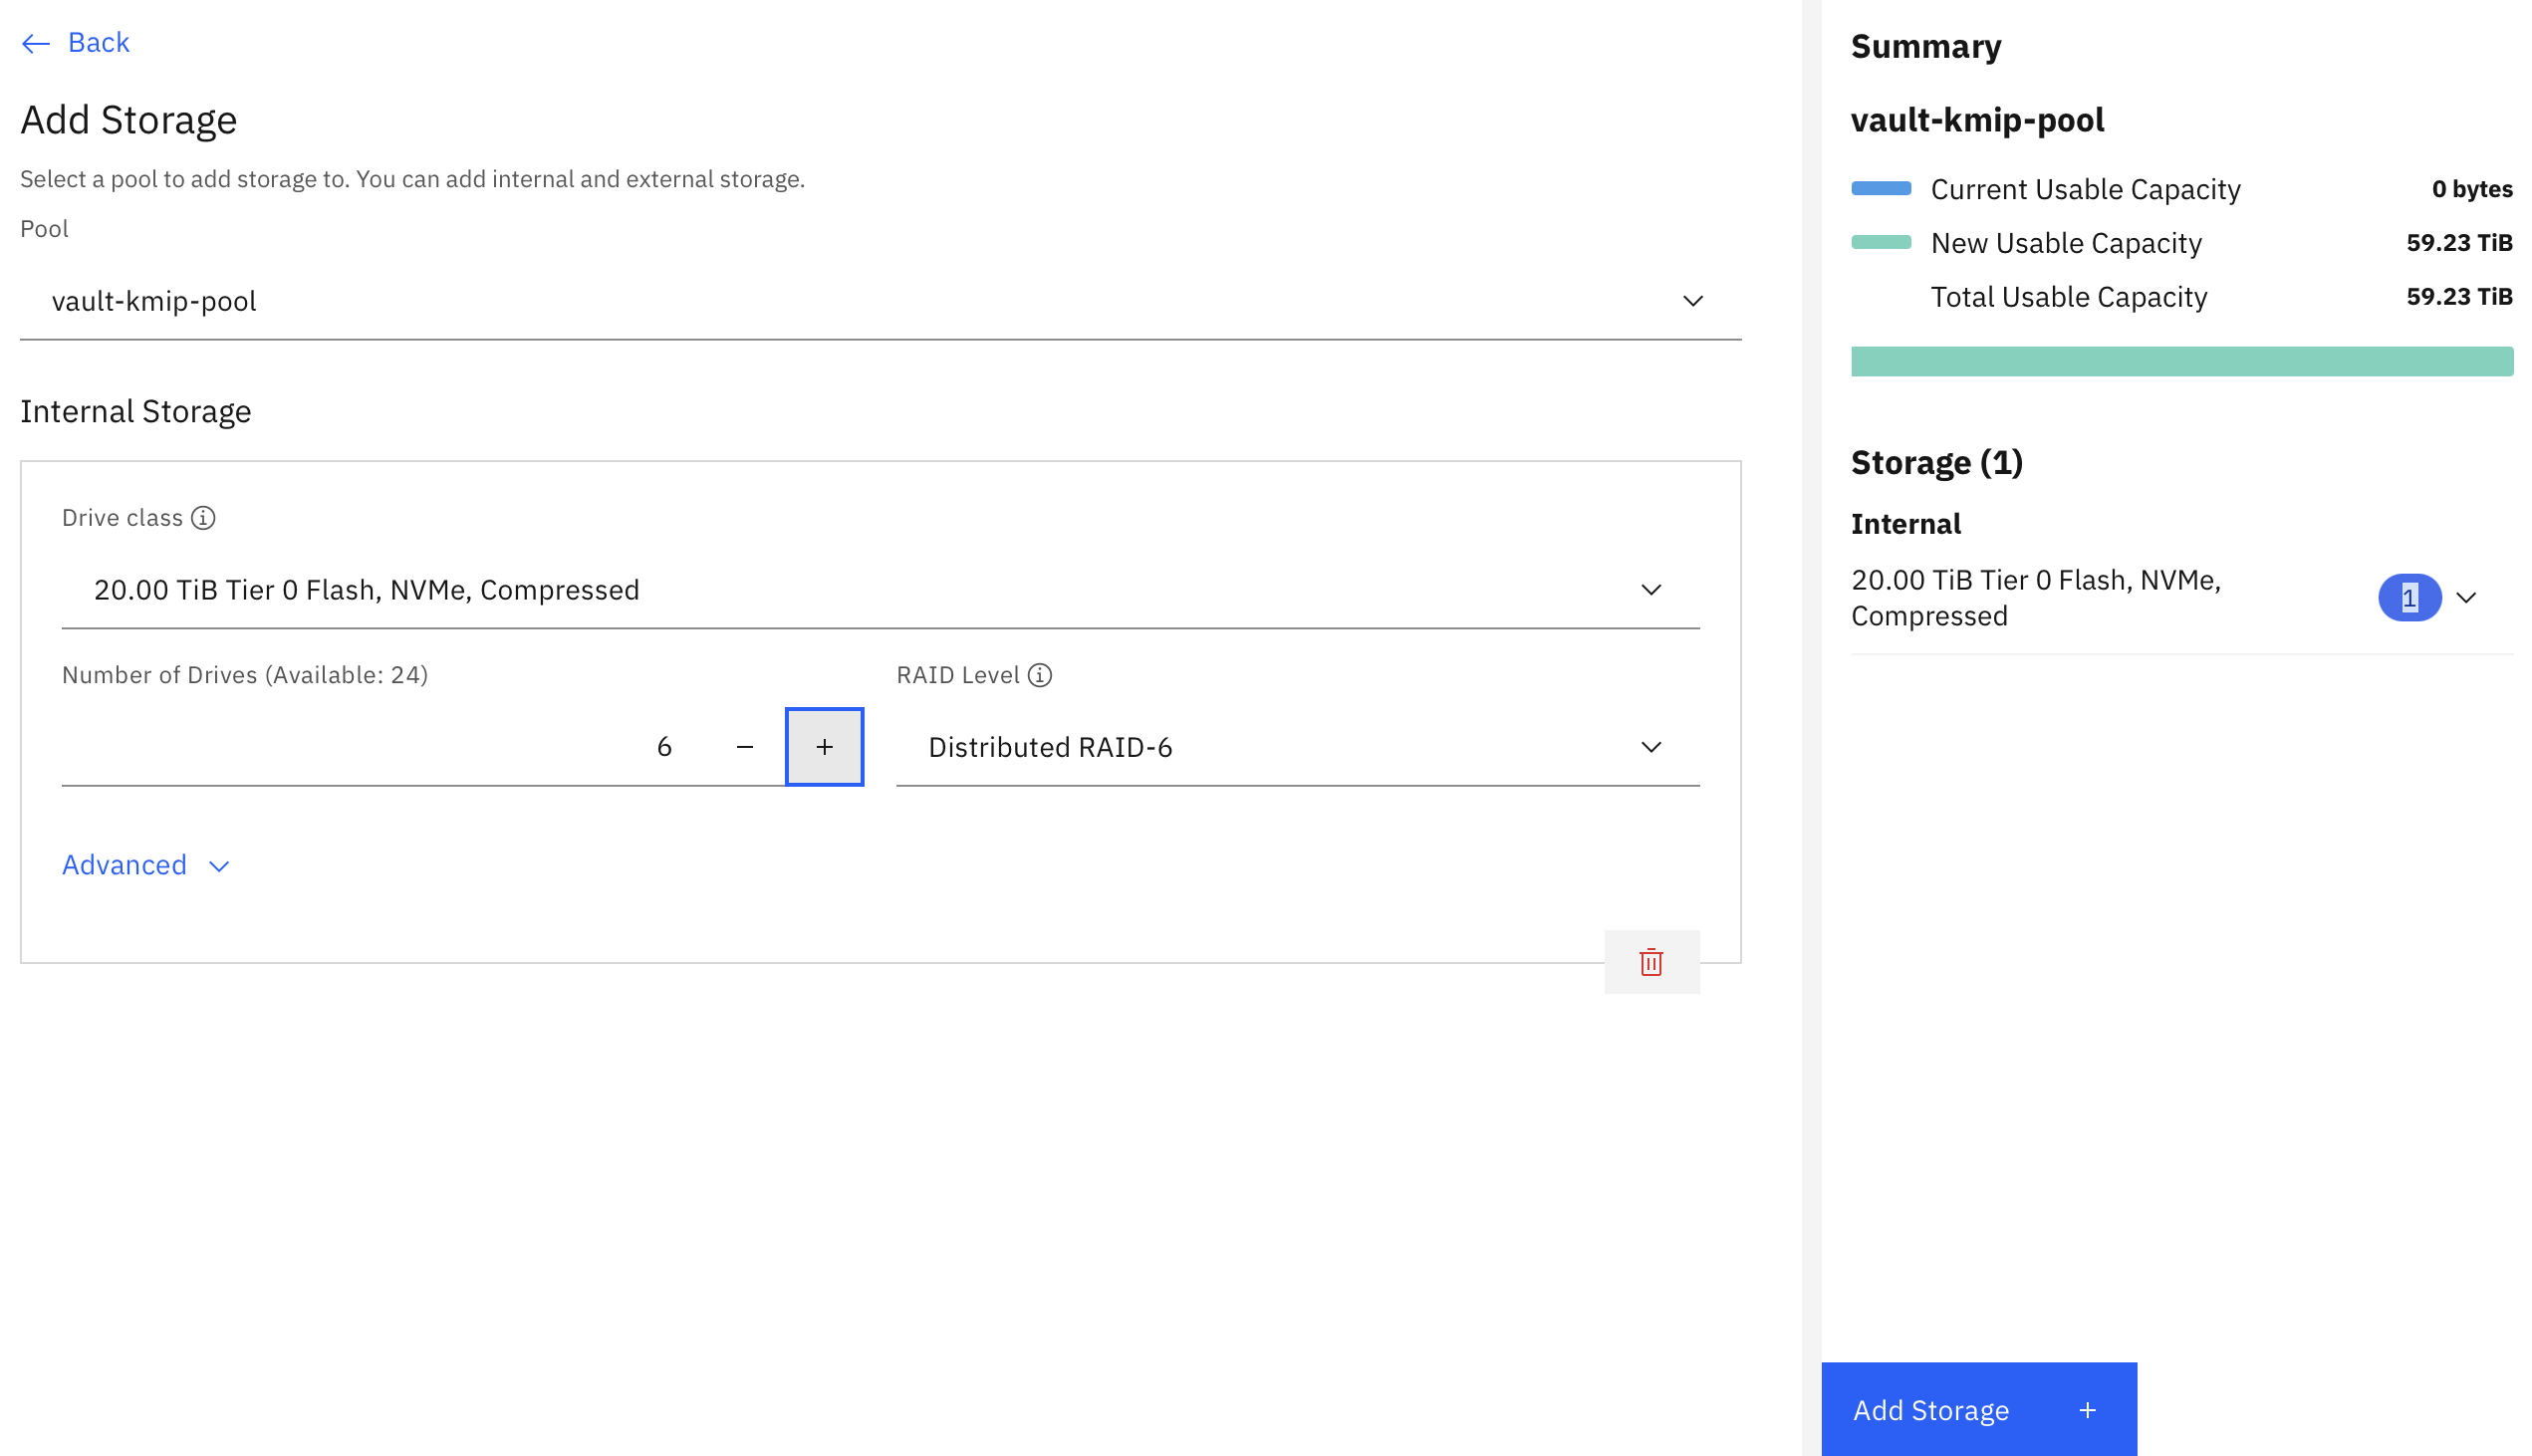
To add storage to the volume pool, click Pool Actions and select Add Storage. Provide the following details:
- Number of drives
- RAID level
- Total storage provisioned
When you have finished entering the details, click Add Storage.
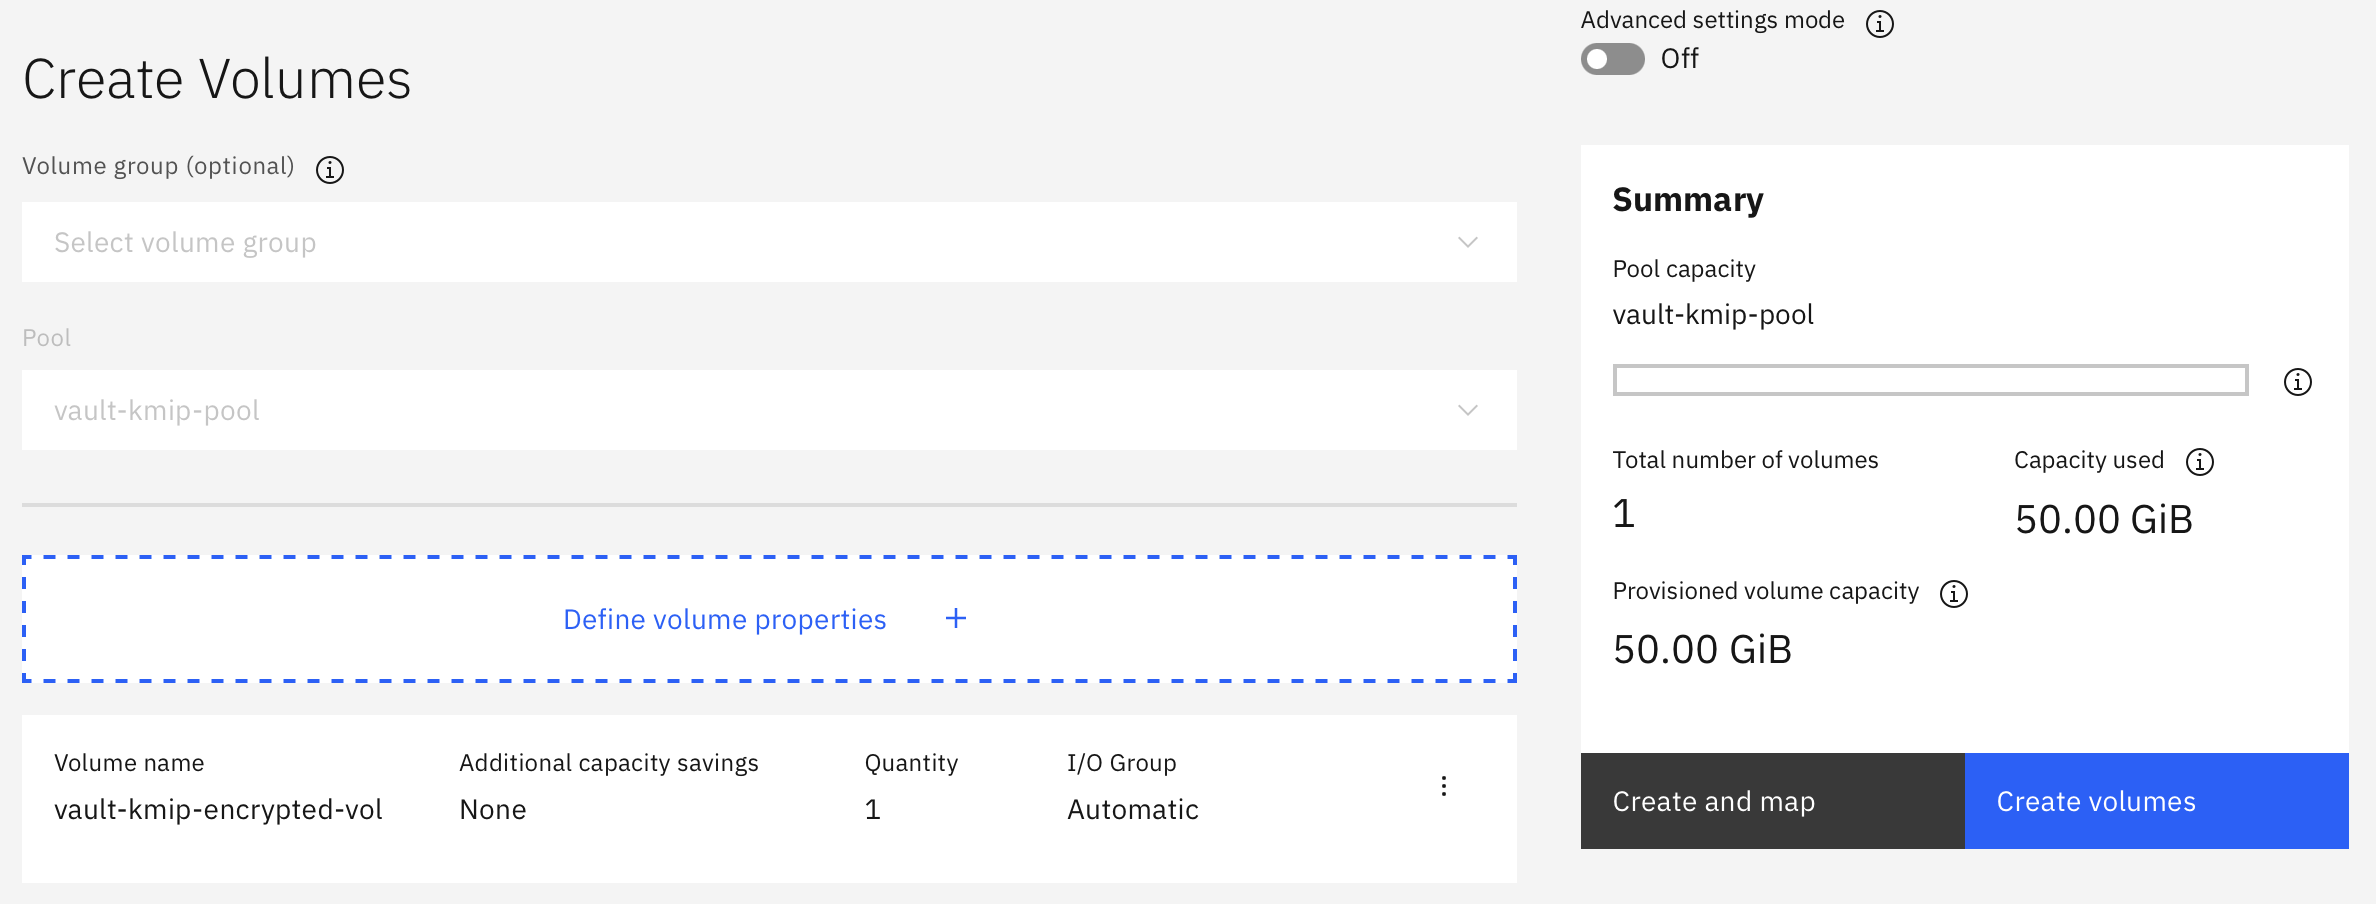
To create an encrypted volume in the encrypted volume pool, click Volumes > Create Volumes.
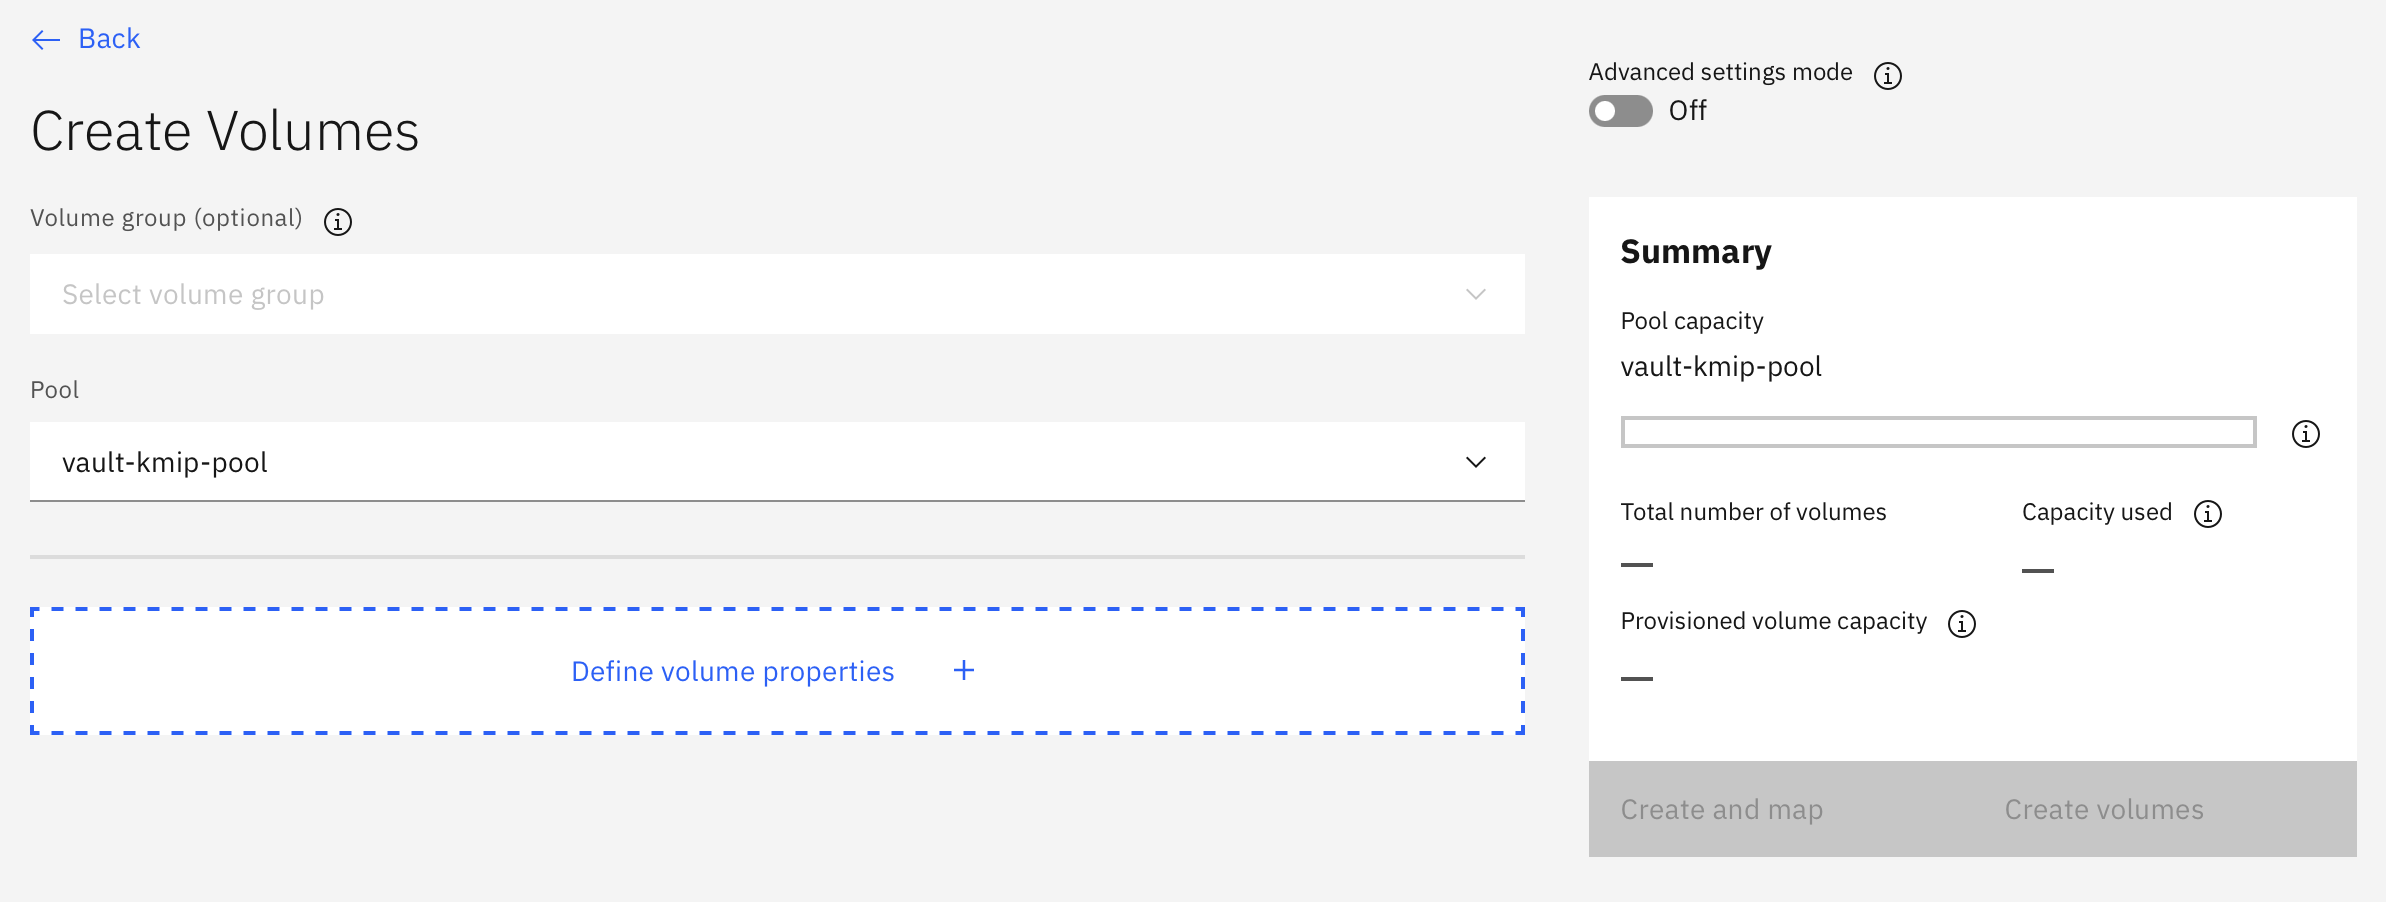
Click Define Volume Properties with a volume name, for example
vault-kmip-encrypted-vol
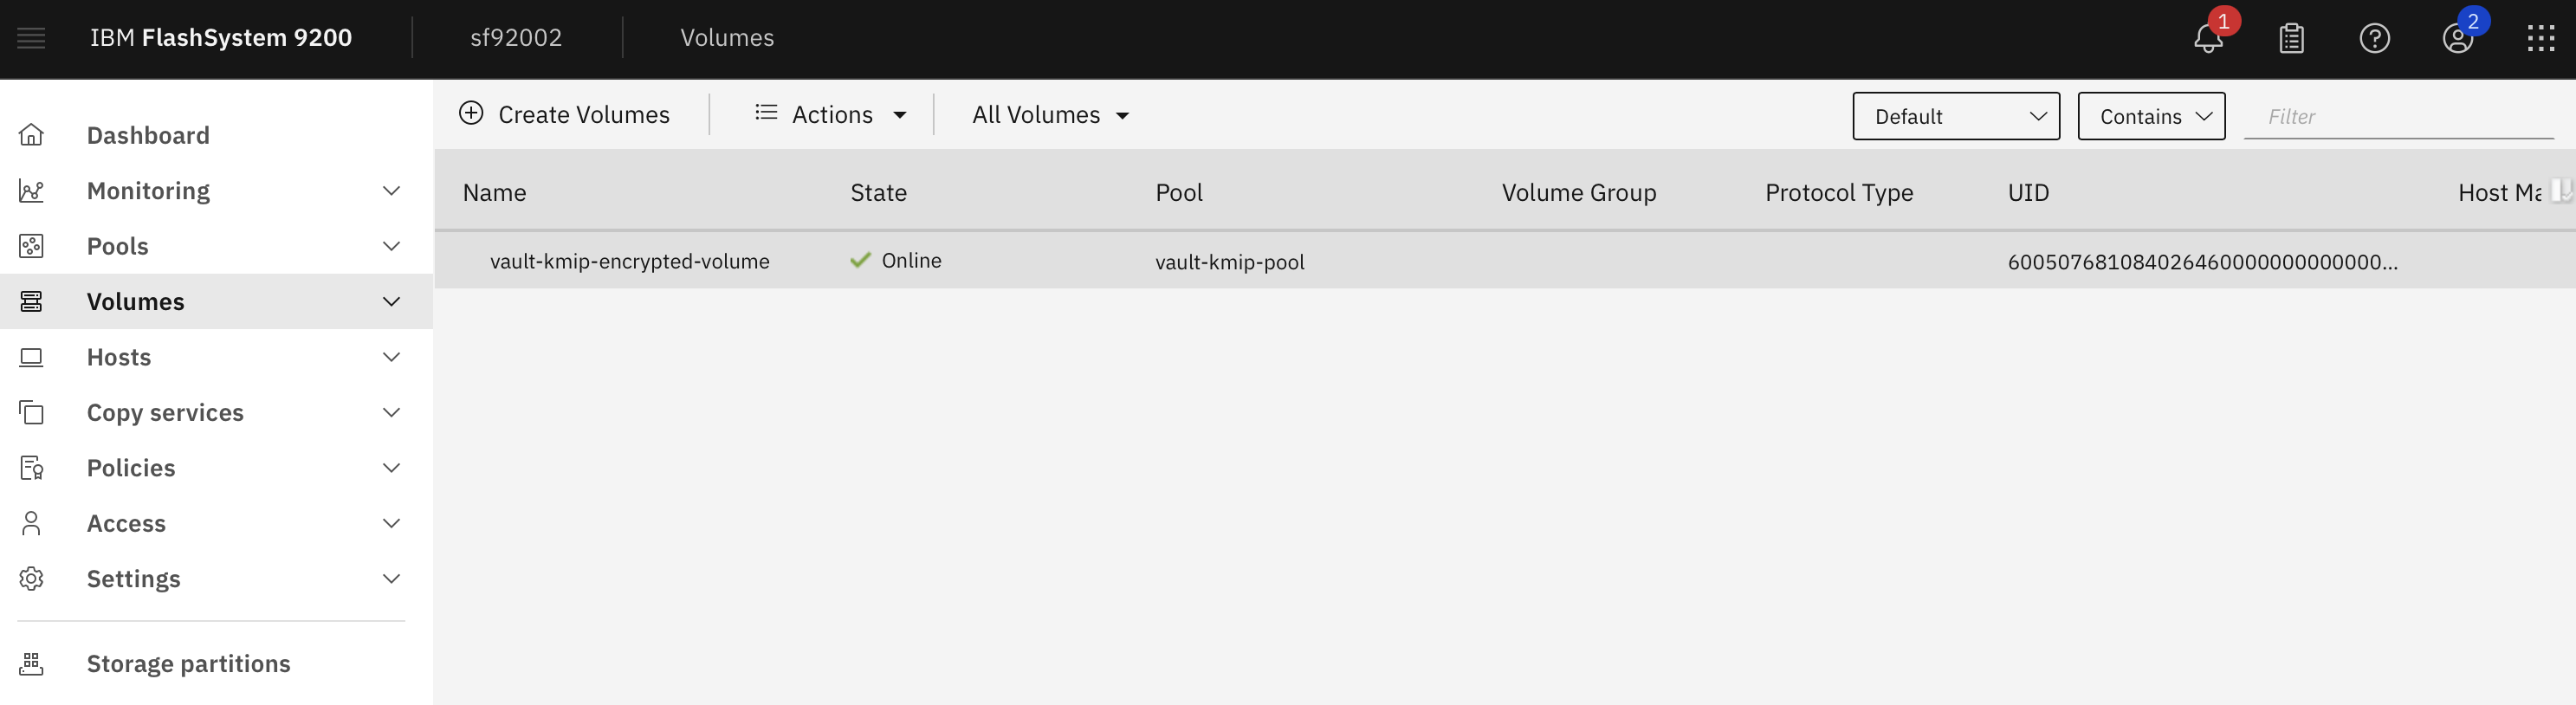
On the Create Volumes panel, click Create volumes.
The encrypted volume is now available for use:
Conclusion
In this tutorial, you have learned how to install IBM Vault and then enable the Key Management Interoperability Protocol plugin to boost Vault's data protection and secrets management capabilities.
Now that you have completed the process of creating encrypted volumes with KMIP on Vault, try creating some files on the encrypted volumes. Make sure the data in the volumes is encrypted. To further enhance the configuration, you can integrate the Vault installation with IBM Hardware Security Modules on LinuxONE.
For more information on IBM Vault, check out the following resources: